


Orion Models 1/72 F-16A/B/C/D Fuselage Reinforcement Plates First Look
By Michael Benolkin
| Date of Review | December 2005 | Manufacturer | Orion Models |
|---|---|---|---|
| Subject | F-16A/B/C/D Fuselage Reinforcement Plates | Scale | 1/72 |
| Kit Number | OMV72001 | Media | Vinyl |
| Pros | Adds fuselage details to update the Hasegawa and Revell kits | Cons | |
| Skill Level | Basic | MSRP (USD) | Out of Production |
First Look
 |
 |
When the F-16 first entered service, engineers worked very hard to preserve the aircraft's clean aerodynamics as the least disruption could result in a loss of aircraft control. With a fly-by-wire control system managing an unstable airframe, the software needed to correctly identify and respond to highly dynamic changes to airflow during routine as well as in high maneuverability flight.
In time, the Viper became more adaptable to changes in configuration and today we see Block 30s with Sniper or Litening pods, Block 40s with only one of two LANTIRN pods, and Block 50s with the HTS pod, all carried asymmetrically.
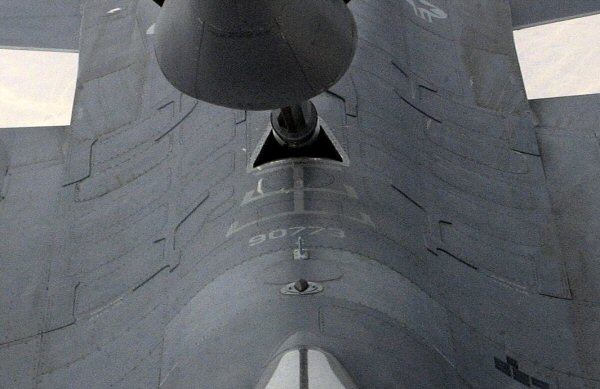
As the F-16 airframe accumulated flight time and duress under combat conditions, the aircraft required external reinforcement "scab" plates added to the airframe. These plates are subtle details, but can be very noticeable under the right conditions as this photo clearly reveals.
Hasegawa has released a wide range of Viper kits in 1/72 scale from the F-16A/B Block 15 through the F-16C/D Block 50/52. The Block 50/52 aircraft don't need the scab plates (for now) as they were strengthened internally while in production. The Block 40/42 airframe (F-16CG and F-16DG) receive the multitude of scab plates as shown in the photo to the right. The earlier Block 15 F-16A/B and Block 25/30/32 F-16C/D kits receive the stiffeners/scab plates located between the air refueling receiver and the front of the vertical stabilizer. Revell has released several of these versions as well and these scab plates will work for them too.
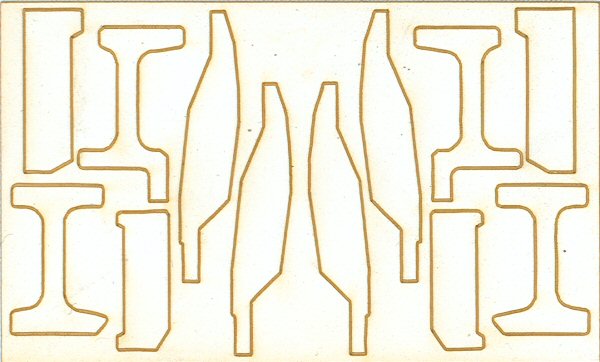
As these scab plates are vinyl, installation is merely peel and place. You will want to make sure the plastic is clean of any oils or residue to get the best adhesion on the surface and you definitely want these on the raw plastic BEFORE painting. If you are adding these after the fact, you still can avoid peel-off later by applying a coat or two of Future over the installed plates, then re-flatten the area to blend into the rest of the aircraft's hue.
This is a nicely done enhancement for the Revell kit! My sincere thanks to Orion Models for this review sample!