


Academy 1/24 Joe's Power Plus Service Station Build Review
By Michael Benolkin
| Date of Review | April 2014 | Manufacturer | Academy |
|---|---|---|---|
| Subject | Joe's Power Plus Service Station | Scale | 1/24 |
| Kit Number | 15122 | Primary Media | Styrene |
| Pros | Reissue of the classic service station | Cons | Nothing noted |
| Skill Level | Experienced | MSRP (USD) | $69.00 |
Build Review
If you'd like to take a look at the kit as it comes out of the box, check out the in-box review
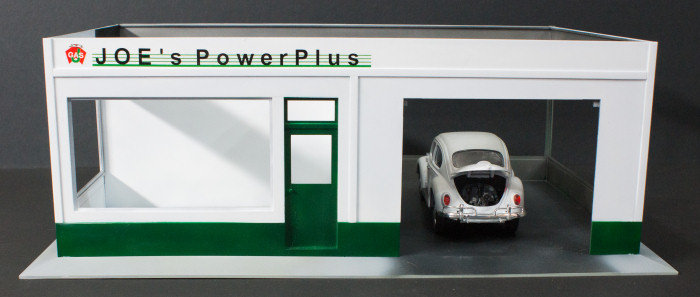
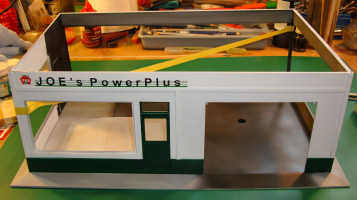
previously published here on Cybermodeler Online. The main building in the kit was designed as a simple display backdrop with open top, open side and open rear of the garage. This kit was originally designed for the die-cast collector market to put models into simple vignettes, but I'm not a die-cast collector, so I am going to have some fun with this project. The kit's design depicts a 1960s/70s era single-bay garage but this design is timeless in that you'll still find these buildings today in rural America. You can easily modernize the kit with some simple additions/modifications or leave the scene back in time as-designed.
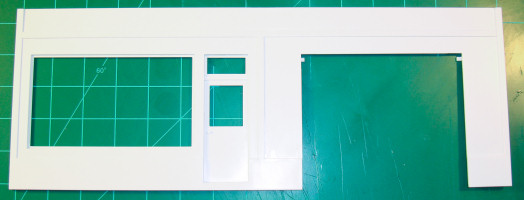
I started with the main building structure first. The display base measures 16.8 inches wide by 11.1 inches deep by .4 inches high. The area under this raised display base is perfect for running wires, but more on this later. There is a hole molded in one side of the base to hold the hydraulic car lift so that side is obviously the garage while the other side will have the office and restrooms.
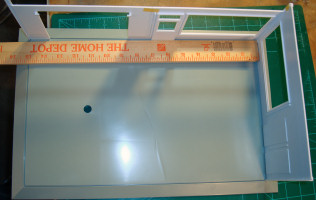
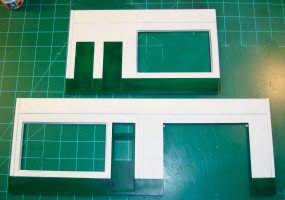
I began by removing the parts for the two enclosed wall sections from their sprues and cleaning them up. I also used a razor saw to carefully remove the two large tabs molded on the edges of the display base and cleaned up those areas as well. Using some tape, I dry fit the walls into the display base to get a clearer idea of the layout. The kit doesn't provide any interior walls to close off the office and restrooms, so I'm going to fabricate these from sheet styrene.
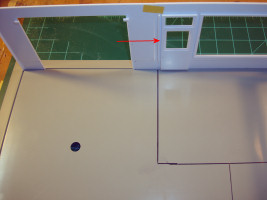
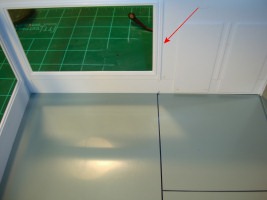
What is interesting is that there are tabs molded into the front and side of the building walls where there might have been walls in the original design (see the red arrows above) and decided to make use of those features.
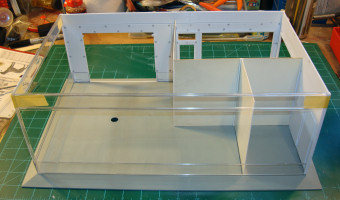
I used a drafting triagle to draw a line out from both wall tabs which will demark the office and then drew a perpendicular line to close off the bathrooms. Since I don't intend to detail the bathroom areas, I'm going to use that space for wire runs and support gear for the station lighting that will be going into this build. The resulting recessed area behind the bathrooms will serve as the open storage area typical of these small stations.
Before I can start scratchbuilding new interior and exterior walls for this station, I need to take care of the ejector pin marks in the kit walls that I don't want to be seen after assembly. I applied Mr.Surfacer 500 into each ejector pin mark, let it dry, and then applied a second layer over the top of the first to compensate for the filler putty shrinkage when drying. When this was all dried, I wet-sanded the walls smooth so they can all receive black primer inside and out. The black will help eliminate light leakage through the plastic when the finished model is illuminated. Before we prime the parts however, we still have some construction to complete.

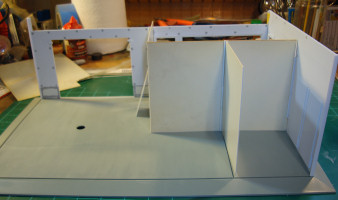
The room divider lines drawn on the base were readjusted (did you know that you can erase permanent marker lines with Isopropyl alcohol?) and then the job of scribing and carving out those divider lines was accomplished. I used a scribing tool from UMM which allowed me to create progressively deeper and wider grooves in the base to work like the perimeter grooves molded into the base. A simple file cleaned up the grooves.
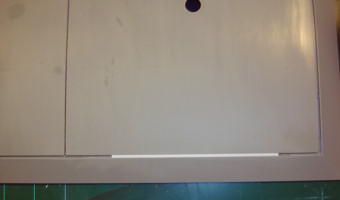
While I was focused on the base, I used some Evergreen styrene strips to fill in the groove that would be exposed with an open garage door. I measured the width of the opening with the walls in place and then installed the filler strip with the walls still in place to get correct position before removing the walls, cementing the strip permanently in place, and then wet-sanding the strip to blend it into the surface of the base.
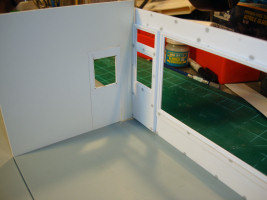
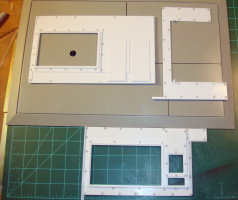
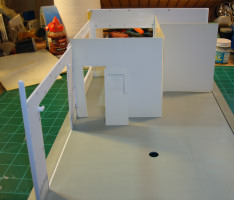
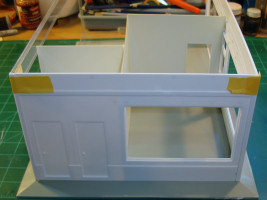
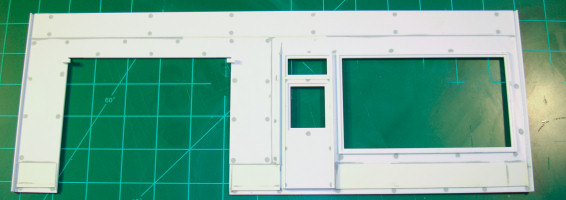
Using sheet styrene, I created the inner walls for the office. In these images, I've got the side wall that I've also cut out a door into the garage bay. I haven't decided yet if I'll pose the door open or closed, but it fits nicely either way. Notice under the front window that I've also installed strips of styrene into the recess molded under the window and in a few other wall sections to bring the inner wall flush with the surrounding wall surfaces.
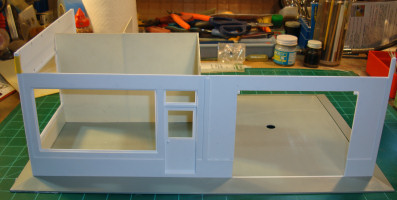
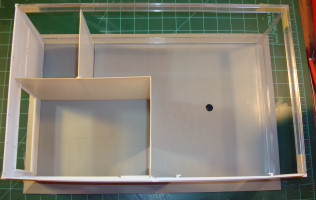
Here are four views of the enclosed office and the back wall of the restrooms. None of the walls are glued into place yet so minor adjustments can be made. Notice the light shining through the plastic of the restroom walls/doors in the lower right image? That is why we need to use the black primer so the plastic won't glow when the building is illuminated.
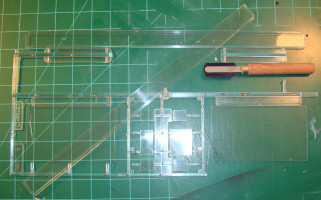
It is time to get all four walls and corners onto the base to see how this project needs to move forward. As I mentioned earlier, the rear and garage side walls are open with clear strips top and bottom to frame the structure. Removing those clear strips from their sprue trees was different. In order to get good injection flow into the molds and remove the sprues without ugly ejector pin marks in the clear parts, these clear strips are molded with longer connecting edges to the trees. Sprue cutters shouldn't be used as you'll risk damaging the parts. I used a simple razor saw from UMM to remove these parts cleanly and safely from the sprue trees.
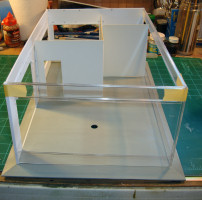
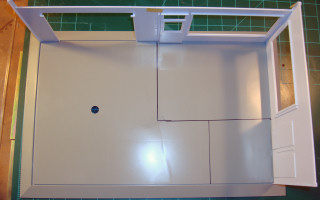
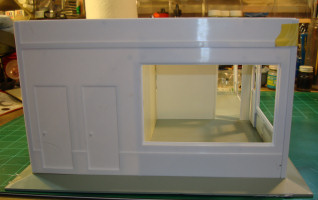
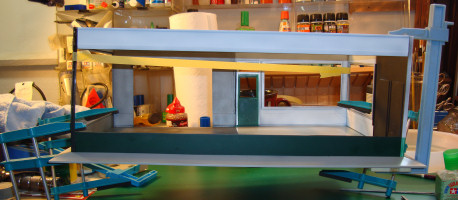
You can see the exterior of the station building now dry-fit in place. The interior walls fit inside the walls though I still need to finish enclosing the restroom. While I am going to paint the upper and lower clear strips on the back and side of the garage, I changed my mind about closing up that side wall. The only problem with this is that there is only a thin clear pillar in that rear corner that won't be very strong. I'll be adding another pillar there to reinforce that weak area so that the structure will be strong enough to be handled, especially with a removable roof with lighting installed.
Here is the front of the station with both halves glued together. The front needs to be buffed with fine grit sandpaper to give the acrylic paint a surface to grip. The backside has all of the ejector pin marks filled and the strip styrene in place, all ready for primer.

The base was given a primer coat of gray followed by a coat of white in the office area and dark gray in the garage bay. While the photo doesn't show it, there are a number of colors applied to the garage area to start the random color patterns in concrete garage floors and a light overspray of those same colors was applied to the white office floor to simulate the industrial floor tiles used in that era. The office and garage were given a coat of Future gloss acrylic to simulate the stuff I had to sweep the floor of the gas station I worked in as a teenager that absorbed oil and fluids (and covered up the remainder) with its dark semi-gloss finish. I used an artist's pencil to draw the tile patterns in the office floor to complete that look.
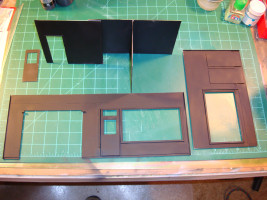
The interior walls were given a primer coat of flat black to block light from shining through the plastic.
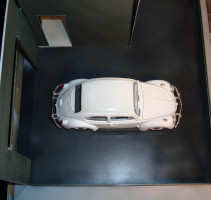
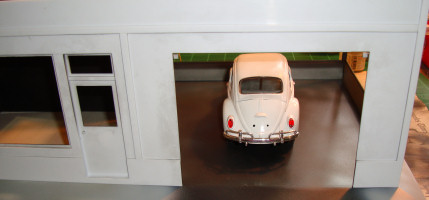
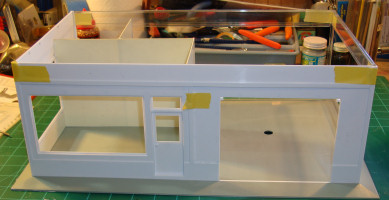
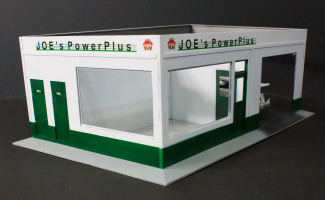
The office walls were painted white while the garage bay walls were painted metallic gray. Here I've dry-fitted the painted walls onto the painted base for one last test. Looks pretty good with the VW Beetle in the bay.
The exterior walls were painted white with the doors and the bottom of the building painted Tamiya Gloss Green since that closely matches the green in the Joe's PowerPlus artwork.
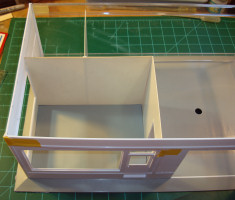
Here are the exterior walls glued into place on the display base. As I mentioed before, my base is slightly warped so I clamped everything down while the liquid cement dried and used some tape under tension to keep that lone pillar in the far corner mated solidly with the upper wall sections.

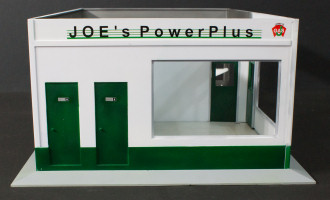
It took a little tweaking with clamps and liquid cement to get the exterior walls firmly into the display base and keep the model in alignment. The effort worked. With the structure solidly in place, I glued in the interior walls and that office area looks nice. Empty, but nice. I'll have to scratchbuild a counter and cash register but this is looking good so far. It is time to set this assembly aside and build the removable roof that will also hold the overhead lighting for this building. Stay tuned!
To be continued...
Thanks to MRC for this review sample.