


Accurate Miniatures 1/48 SB2C-4E Helldiver Build Review
By Michael Benolkin
| Date of Review | October 2010 Updated November 2017 |
Manufacturer | Accurate Miniatures |
|---|---|---|---|
| Subject | SB2C-4E Helldiver | Scale | 1/48 |
| Kit Number | 480406 | Primary Media | Styrene, Photo-Etch |
| Pros | Nice exterior and interior detailing, photo-etched details | Cons | See text |
| Skill Level | Intermediate | MSRP (USD) | Out of Production |
Build Review
To avoid repeating myself, click here for a look at the kit and a brief description of the aircraft.
The Accurate Miniatures' release of the SB2C-4E Helldiver is really a reissue of the ProModeler (Revell-Monogram) 1/48 SB2C-4 kit with a fret of photo-etch from Eduard to replace the brass from the Revell's Pro-Modeler release as well as a different set of decals. I intended to build this kit straight out of the box with no aftermarket items, as this was supposed to be a companion build to Accurate Miniatures' other release the SB2C-1C Helldiver. I'll get into the SB2C-1C build status at the end of this article, but first to work.
I originally started both builds back in early 2006, but both models aggravated me to the point of aborting the project and setting them into the limbo pile. A few years later, I was cleaning up the workshop and rediscovered these partial builds, and decided to resume the project. A few minutes with the SB2C-1C brought back the frustration from the first attempt, and it was set aside once again. I decided to focus on the SB2C-4E project, and the first step was to toss out the Accurate Miniatures instructions and use the instructions out of the Pro-Modeler (Revell-Monogram) kit I had in my stash. I'll recap the build from my notes, though the in-progress photos have gone away over time.
The interior sections of the entire model were painted with Model Master Zinc Chromate Green. Details were painted during the assembly process as needed to bring out the nice work done by the Revell-Monogram designers. Work of course starts in the cockpit area and the front cockpit was assembled according to instructions. The same is true with the gunner/radio operator's rear cockpit and there is a lot of detail in there. Note: The cockpit is assembled into the right fuselage half, so as you add new parts to the assembly, regularly check the fit of the left fuselage half to the right so you can make any adjustments to the parts while the glue is still setting. This one step will save you lots of anguish when it is time to glue the fuselage halves together and mine went together nicely.
Next comes the engine and the Eduard photo-etch provides an ignition harness though you won't see much of it between that tight cowling and the spinner. Nevertheless, it does add a little more depth to the simple engine face from the kit. Some detailed painting and washes bring out the cylinder head details and provide some depth to that part. The engine face mounts to the fuselage firewall and the exhaust stack fairings mount into the recesses at the 4 and 8 o'clock positions aft of the firewall. I mounted the exhaust stacks into the fairings at the end of the assembly process to simplify painting.
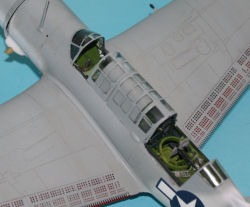
The weapons bay under the fuselage is very nicely done with lots of structural details and an ingenious way to mount the doors in the open position. The instructions indicate that you can do some surgery and close the doors, but I opted to leave them open. A pair of bombs is included to mount on the twin trapeze frames inside the weapons bay, but I opted to leave out the bombs.
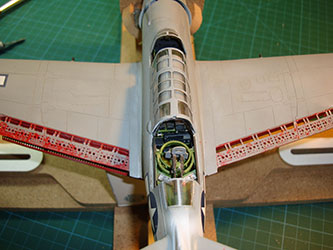
Next come the wings and here is where some work may be required. The perforated photo-etched dive brakes mount to some perforated plastic frames molded into the flap/dive brake wells. If you build the kit stock, the dive brakes/flaps will be closed. I see lots of builds with the brakes open, so I decided to drop the flaps on mine. This required the plastic frame on the lower wings to be carefully removed and the flap well cleaned up before moving on. If you look at the plastic flap structure, there are lots of recessed holes to mimic the dive brake holes, but those holes don't go all the way through the structures. Here is where some time was spent - I drilled out all of those holes so you can see daylight through the dive brakes/flaps.

Next, the 20mm gun barrels are installed into the outboard sections of the main wheel wells and the rocket launcher stubs mounted to the undersides of the wings. Before gluing the wing halves together, I opened the flashed-over holes for the weapons pylons that mount between the wheel wells and the rocket launcher stubs.
The flight controls are all molded integral with their respective surfaces and while I gave a passing thought to removing the elevators and mounting them down, these aircraft had control locks to keep them from flapping around in the winds that lash around the flight decks. Since my control stick was centered in the cockpit, I left the flight controls likewise centered/neutral.
One of the more annoying parts of this kit is the main landing gear. The Revell designers did a great job of replicating the look but they could have done much better with a solid strut mount. The combination of strut and downlock should have been sturdy, but the mounting points inside the wheel wells are awful. I compensated with a combination of glue to get the gear in position and aligned, then cyano to keep them there.
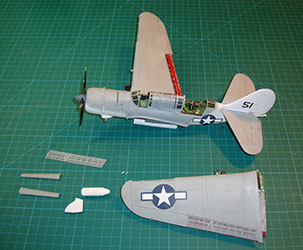
The stock Revell-Monogram kit provides the Yagi antennas of the standard ASB radar system, but the Accurate Miniatures markings are for the SB2C-4E which carried the AN/APS-4 radar pod. Thanks to Fotios Rouch for sending a spare set of Replicast APS-4 pods, now I have a properly configured sub hunter.
Another one of the weaknesses of the Revell-Monogram kit is the canopy frame detail. It is almost non-existent which makes masking these windows challenging at best. Thanks to some Eduard yellow tape masks made for the Revell-Monogram kit, I was able to mask and paint these canopy sections.
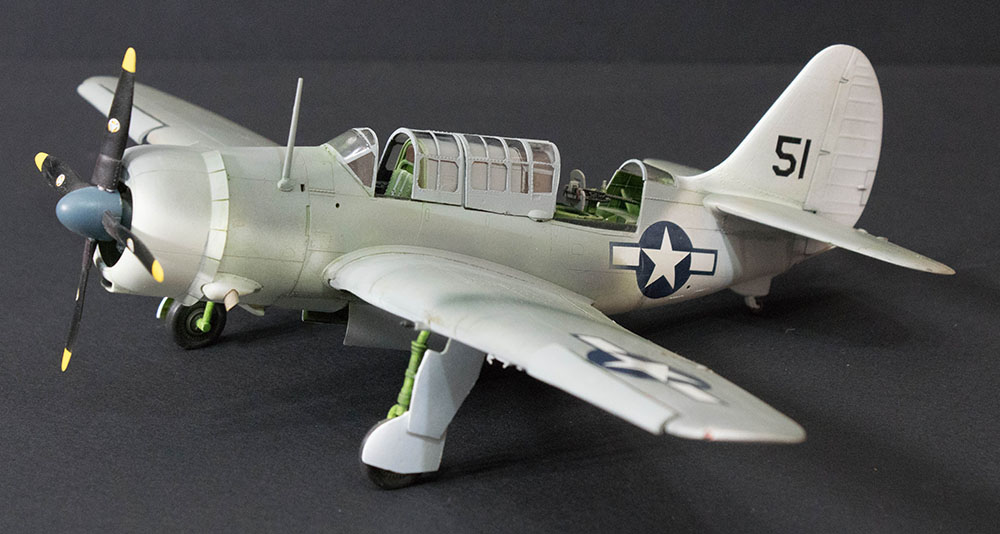
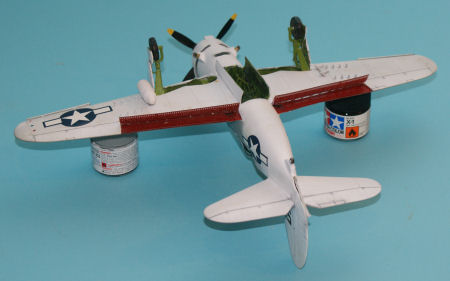
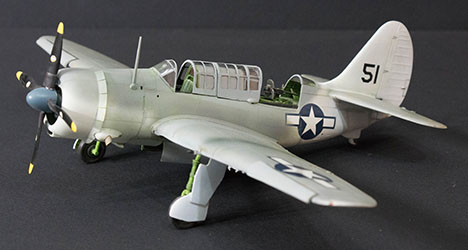
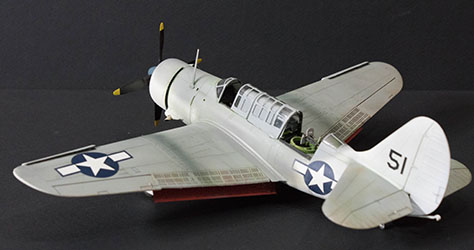
I wanted to replicate one of the Atlantic theater sub hunters with this build and US Navy carrier aircraft typically wore a Dark Gull Gray over White scheme to blend in with the dismal North Atlantic weather.
With the masks in place, the first coat of paint was Model Master NATO Black followed by a coat of Model Master Flat White (which was also used to prime the rest of the aircraft). This was topped off with a coat of Model Master Dark Gull Gray. The upper surfaces of the airframe were also treated to the Dark Gull Gray. Painting the Dark Gull Gray over the Flat White canopy frames allowed the canopies to match the color of the rest of the aircraft (and not appear darker).
The flap wells were painted Model Master Flat Red including the drilled-out holes. The photo-etched flaps and dive brake sections were likewise painted and installed on their respective plastic sections. The dropped flap sections were mated to their photo-etched counterparts and mounted into the flap wells with cyano.
The kit exhausts hollowed out more to scale appearance and were painted to mimic the standard rusted appearance.
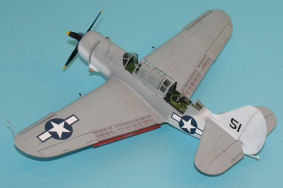
With the canopy sections still off the model, I painted the model with a gloss coat to provide a smooth surface for decals. One of the problems with using older decals is the fact that they become brittle over time, The Accurate Miniatures' national markings shattered in water as did several other markings from the sheet. I was able to use some national markings from my spares and added some tail numbers to finish off the basics.
The decals were cleaned up of any remaining adhesive that invariably pools up when they dry, then another gloss coat went over the top of the decals to blend them into the surface.
I used a diluted wash of Van Dyke Brown to bring out the panel lines all around the airframe and a similar wash of Lamp Black to bring out the fight control silhouettes and dirty up the wheel wells and weapons bay.
When everything was dry, I covered the model with a coat of Gunze Clear Flat which took the shine out of the model and the decals.
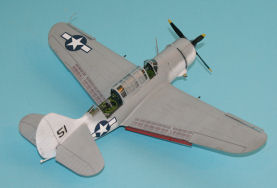
Now it was time to install the canopy sections, this was done using Elmer's white glue. While this was drying, I added the remaining small details like radio mast, pitot tube and tail hook, all of which would have been broken during the assembly and painting process.
Update
So here we are over a decade later, and I thought I'd clean the dust off the model and add some weathering. As I'm cleaning the model, I hear a troubling 'tink' followed by another, and then the wing fell off. The glue had become brittle over time, both the liquid cement and the cyano.
The first step was to get the model into the aircraft assembly jig and reset the wing. The upper wing joint was glued first and allowed to sit for an hour before the model was inverted in the jig and the lower wing joint also glued. After a similar wait time, the model was structurally sound again and now I needed to add the smaller parts that had come loose.

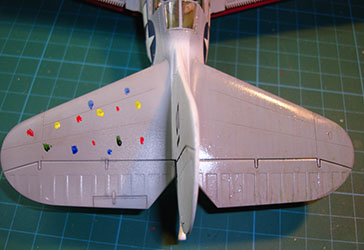
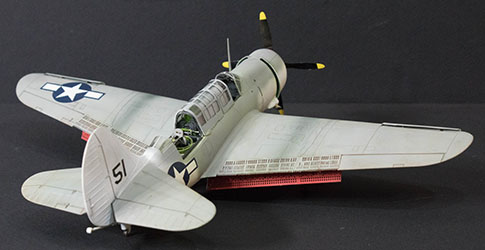
You may have seen the oil dot method of weathering and I've been wanting to try the technique, but I didn't have the courage to do that to a new-build project. What better canvas than a recent crash victim? I started off by applying a fresh clear-coat using Future on the model. When the Future had dried, I applied oil dots using the Oilbrushers from Ammo by Mig Jimenez. In the image below, both sides have had the dots applied, but the right side has been brushed with Odorless Mineral Spirits which put the dot colors into solution and they are brushed in parallel with the direction of flight. In this image, the right horizontal stabilizer is still wet, but the mineral spirits dry quickly and where there was a plain gray surface (with a fresh gloss coating), now there is subtle variations of the gray that replicates the look of lightly weathered/oxidized paint and the finish is now dead flat.
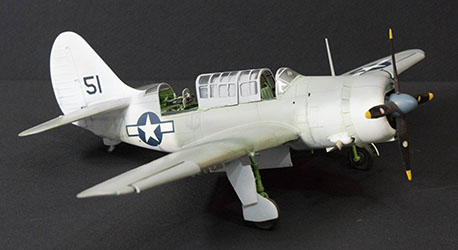
Once the great dot experiment was finished, and it worked well, I used gray panel line wash all over the airframe. Another nice feature of the aircraft jig is that I can work on the underside without breaking off antenna masts and other details.

Conclusions
This isn't a project for the novice. There are a few steps in here that will take some time and LOTS of patience. If you're using the Accurate Miniatures instructions, shred them and download the Revell instruction sheet. Too bad they didn't simply copy the Revell instructions verbatim. Despite the challenges, the results look good and there aren't any other options for a Helldiver in 1/48 scale to date.

As for the SB2C-1C kit, Accurate Miniatures provided the same parts as the SB2C-4 kit with the addition of a three-bladed propeller and spinner. The accompanying Eduard photo-etch set did delete the perforated holes but left the dog-toothed trailing edges which means you'll have to trim these too short or scratch-build new upper brake sections. There are also windows in the section between the pilot and rear gunner that aren't provided for in this kit, so some other scratchbuilding is required. After a few attempts to restart the SB2C-1C project, that project was terminated.
The Revell/Pro-Modeler 1/48 SB2C-4 kit is recommended for experienced modelers, the Accurate Miniatures SB2C-4E is recommended for experienced modelers who are not taking blood pressure medication. The A-M SB2C-1 is best left to those who have ample Scotch or controlled substances handy.