


AMP 1/48 OH-6A Loach Build Review
By Fotios Rouch
| Date of Review | May 2013 | Manufacturer | AMP |
|---|---|---|---|
| Subject | OH-6A Loach | Scale | 1/48 |
| Kit Number | 401 | Primary Media | Styrene, Photo-Etch |
| Pros | Superbly detailed kit of the Loach | Cons | See text |
| Skill Level | Experienced | MSRP (USD) | $30.00 |
The Build
For a look at this kit as it appears out of the box, check out our AMP 1/48 OH-6A Loach first look here.
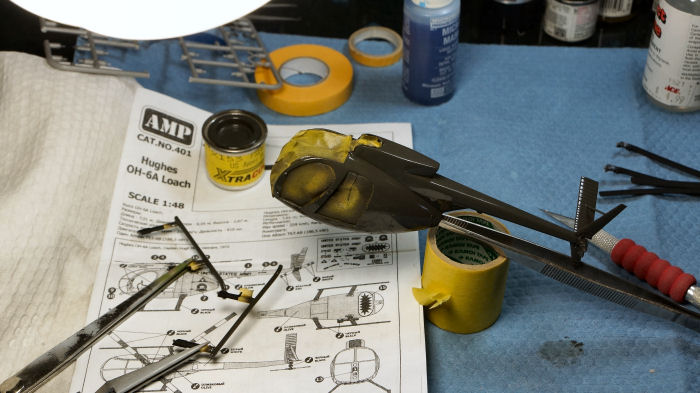
First thing out of the box I noticed that the fuselage parts in my example were dark gray and the rest of the sprues were lighter gray. I also noticed that the maker brand stamped in one of the sprues is Master44. A familiar logo for those that build AModel kits. Before I started construction I washed all the parts with 409 and let them air dry.
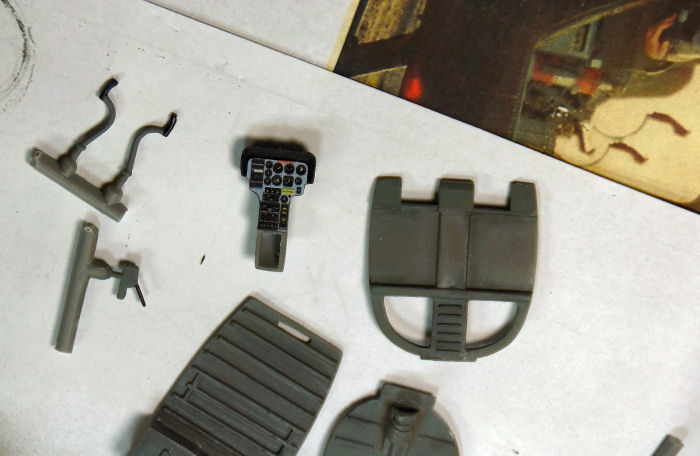
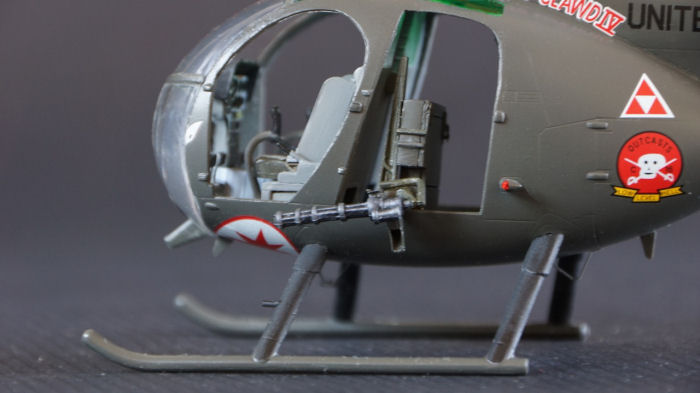
Then I cleaned up the clear parts, washed them and after they were dry I dipped a few times in Future. It sure makes a huge difference on all the parts but especially so for the front clear part that is going to be a window into all the hard cockpit work that is to follow. I followed more or less the instruction sequence and worked on painting the inside of the fuselage and the cockpit parts. The provided and pre-painted Eduard photoetch looks very good and is going to make a difference for the mostly open cockpit. Be careful as all of the parts will require cleanup and possibly touch up of the various sink marks. A good quality sprue cutter will also be very handy.

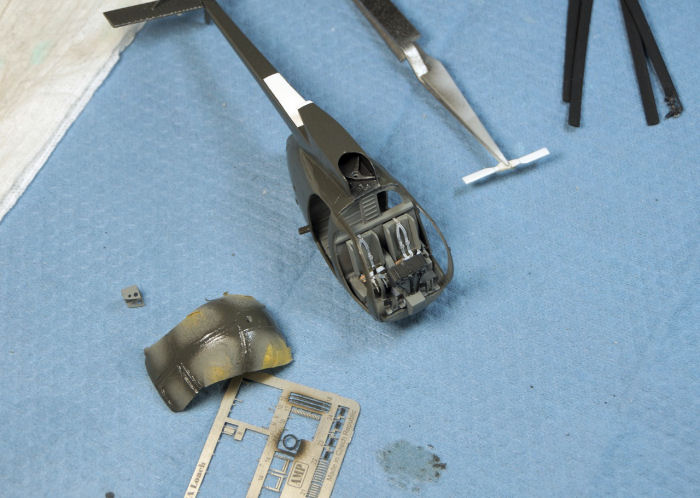
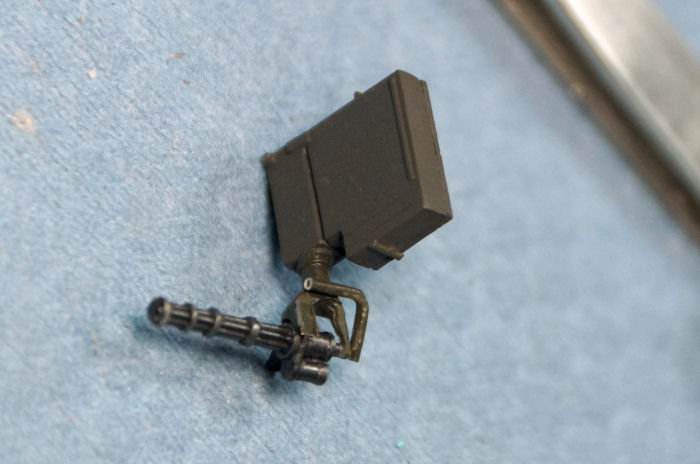
I enjoyed the color photo-etch instrument panel that has the dials sandwiched between the plastic surface and the colored instrument panel. Much better than using the kit's instrument panel decal. Use lots of photo references for painting the interior parts as the instructions do not get into much detail. For the Gatling gun I used two different Humbrol Metal Cote paints 27003 and 27004 and carefully polished the areas I wanted with a pointed Q-Tip.
I had some difficulty with the upper windows that did not want to fit at all. Careful sanding of the clear parts and the fuselage openings was required. After the top windows were secured in place I applied a drop of Future from the inside of the fuselage.

A lot of test fitting of the interior was required before any glue was applied. Even so, I needed to use a bunch of clamps to glue first the top portion of the fuselage. The bottom portion will be done next.

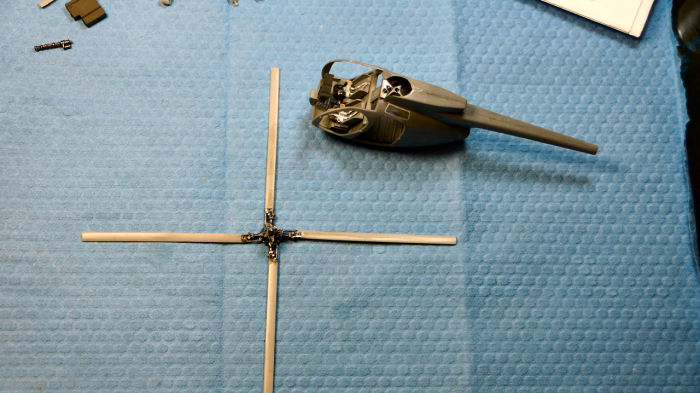
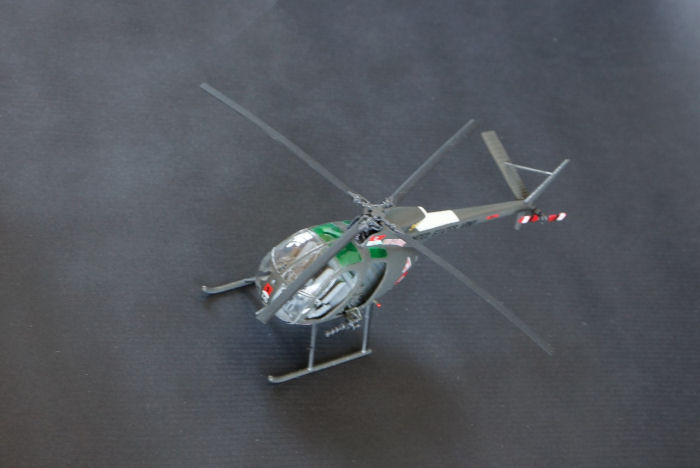
The main rotor was a bit of a disappointment. The parts do not fit well and the actuators do not reach the blades appropriately. Also there are locating holes in blade areas that no actuator can reach. Something is not quite right and I might have to go to Pima Air and Space and take some zoom photos of the suspended example.
A few things needed attention before masking and painting:
Firstly, I could not stand the look of the top windows. They did not fit well at all and they are sticking up and create a step. I decided to go to town on them and sand them down flush to the fuselage. I started with coarse sanding sticks and worked up to super fine polishing cloths. Much better.

The next step was to putty and fix all the joint imperfections. This was followed by an application of Mr Surfacer 500. Final sanding and polishing revealed no blemishes or undulations.
Careful masking was applied using Tamiya masking tape that was pre-cut with scissors to shape and applied from the inside of the model.

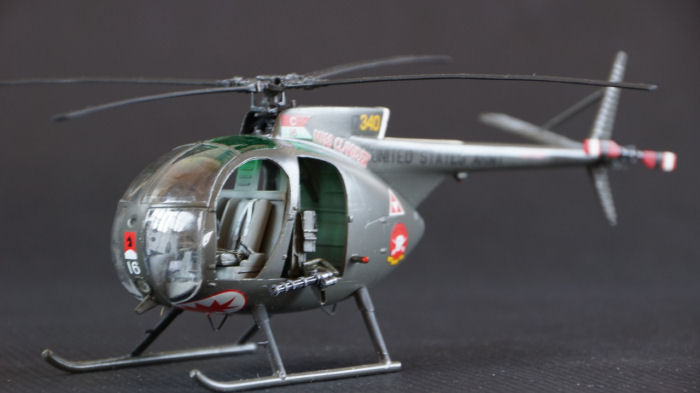
I used Xtracolor paint for the main color. This paint takes days to properly dry so I am leaving the model alone for a while.
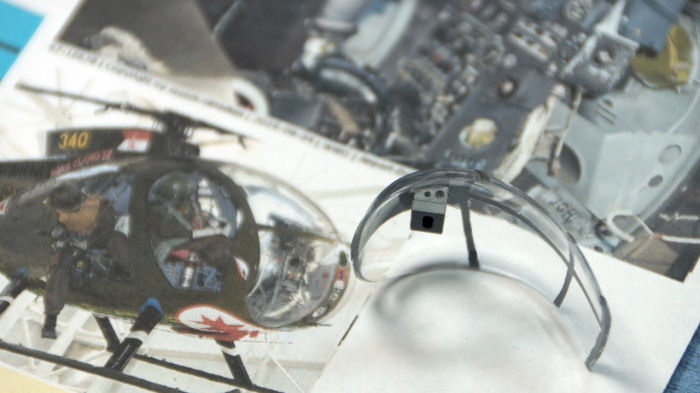
I think the hardest part with building this kit is the clear bubble glazing. Not only it does not fit well it also has to be used as a guide to mate the door frames to conform to it. Needless to say this process took the longest and it had to be done in small increments. Also it is my opinion that the canopy is a bit oversize and it will leave a small step on the bottom of the fuselage.
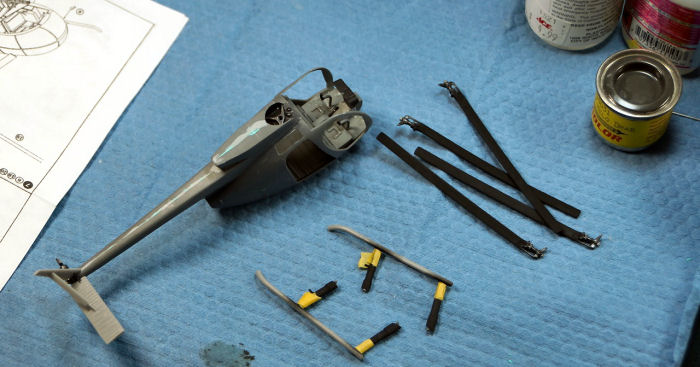
The Gatling gun assembly was fun and it looks great with all the added Eduard photo-etch parts.
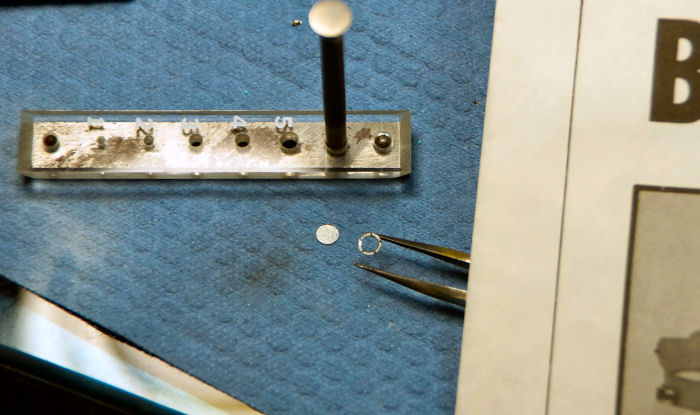
The front light is not covered with the kit contents. Eduard provides the round bezel for it though and with the help of a punch die set and some Bare Metal foil I made a suitable replacement.

Final assembly proceeded OK with the exception of the main rotor. I was not pleased with the execution of the top rotor mechanics and actuators. I used my references and made up something a little more convincing. I also tried to hand bend the rotor blades to give the impression of their weight.
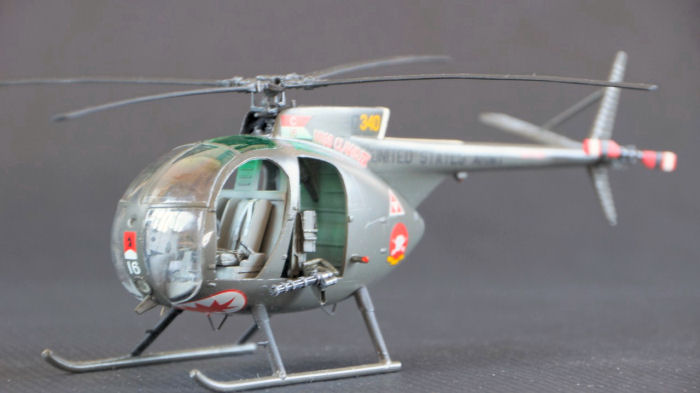
The decals went down fine on the glossy Xtracolor paint but gave me a scare. It looked like I was getting massive silvering. This was an illusion due to the fact that they are very flat. Once I applied semi-gloss over the whole airframe they acted just fine and blended really well.

For such a little model I spent way more time than calculated.
It looks OK in the end but it is really intended for more experienced modelers.
My sincere thanks to HobbyTerra for this review sample!