


Classic Airframes 1/48 Martin EB-57E Canberra Build Review
By Fotios Rouch
| Date of Review | April 2008 | ||
|---|---|---|---|
| Subject | Martin EB-57E Canberra | Scale | 1/48 |
| Kit Number | 4130 | Primary Media | Styrene, Resin, Photo-Etch |
| Pros | Nice detailing, especially with the resin castings | Cons | |
| Skill Level | Intermediate | MSRP (USD) | Out of Production |
Background
For an inbox review of the B-57B click here. Classic Airframes came out with their B-57B late last year. I was hoping that more and different versions would follow but this has not happened to this date.
Being a limited run kit it does not lend itself to major investments on the part of large after market companies. Lone Star Models to the rescue! Mike West went ahead and made a fairly comprehensive conversion for turning your B-57B to an EB-57E.
Construction
As always the processes begun by carefully cutting all the big parts from their sprues and washing them in warm water and 409 solution. The resin parts were washed separately and a soft toothbrush was used to remove any demolding agent from them.
The next thing was planning the building of the model. How far was I willing to take this and how much time was I going to invest in this conversion. As it usually happens with us modelers I decided to show the speed brakes open and the flaps down with the canopy up. And so the project begun.
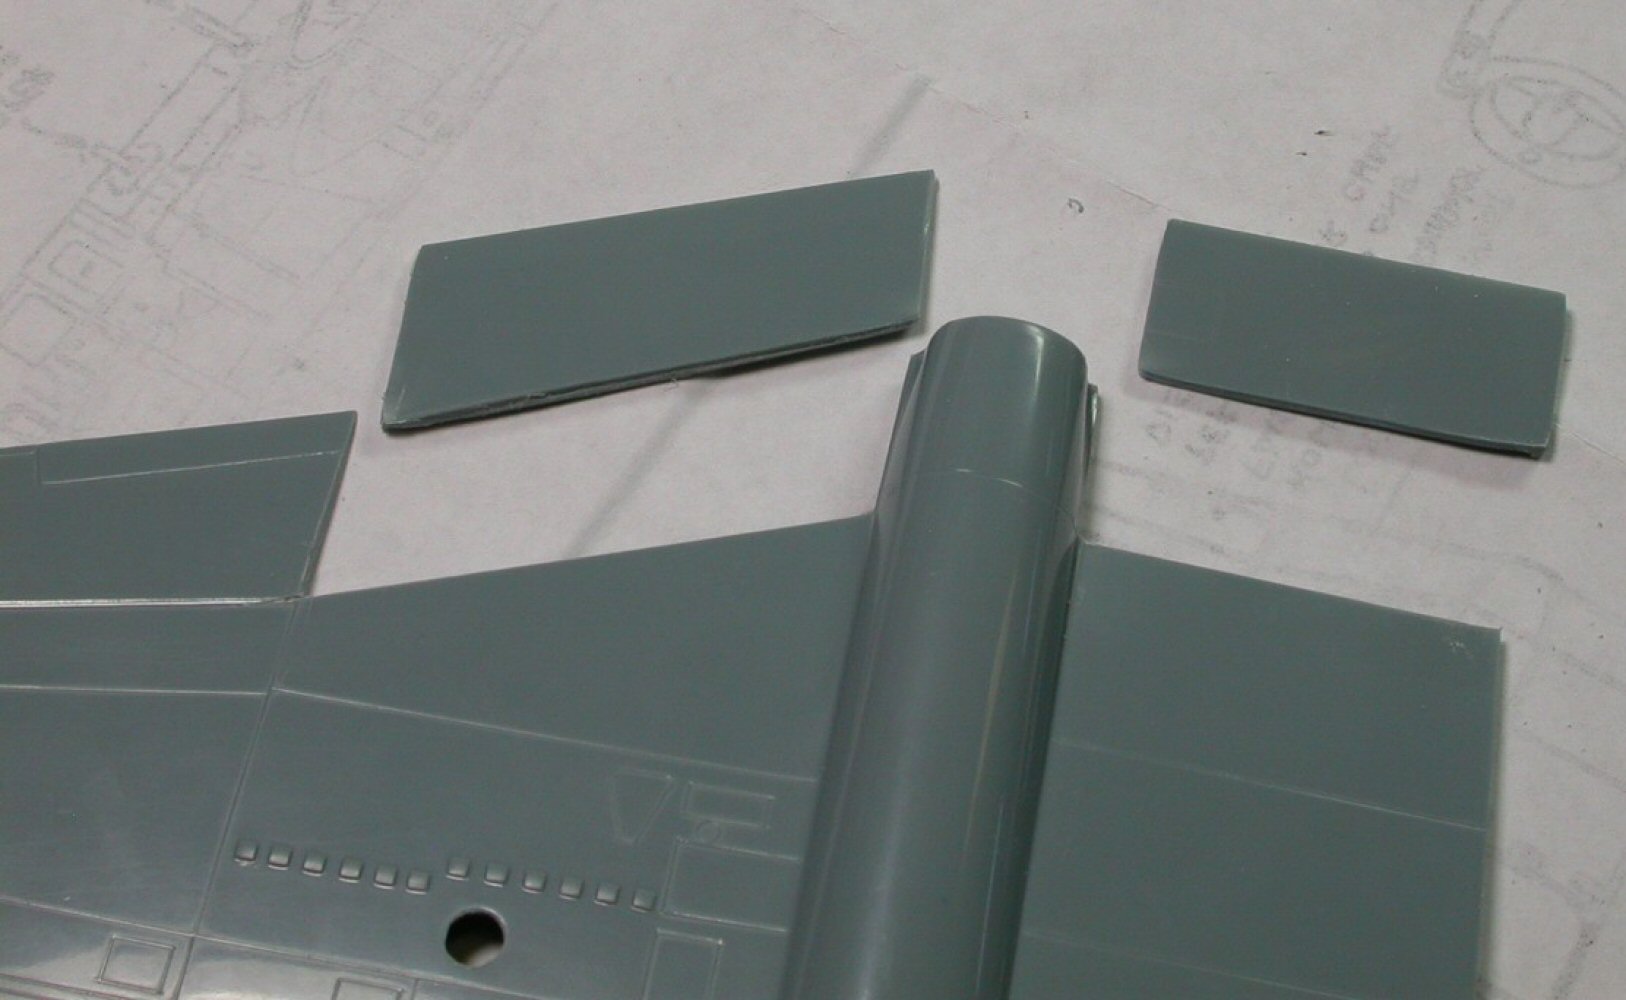
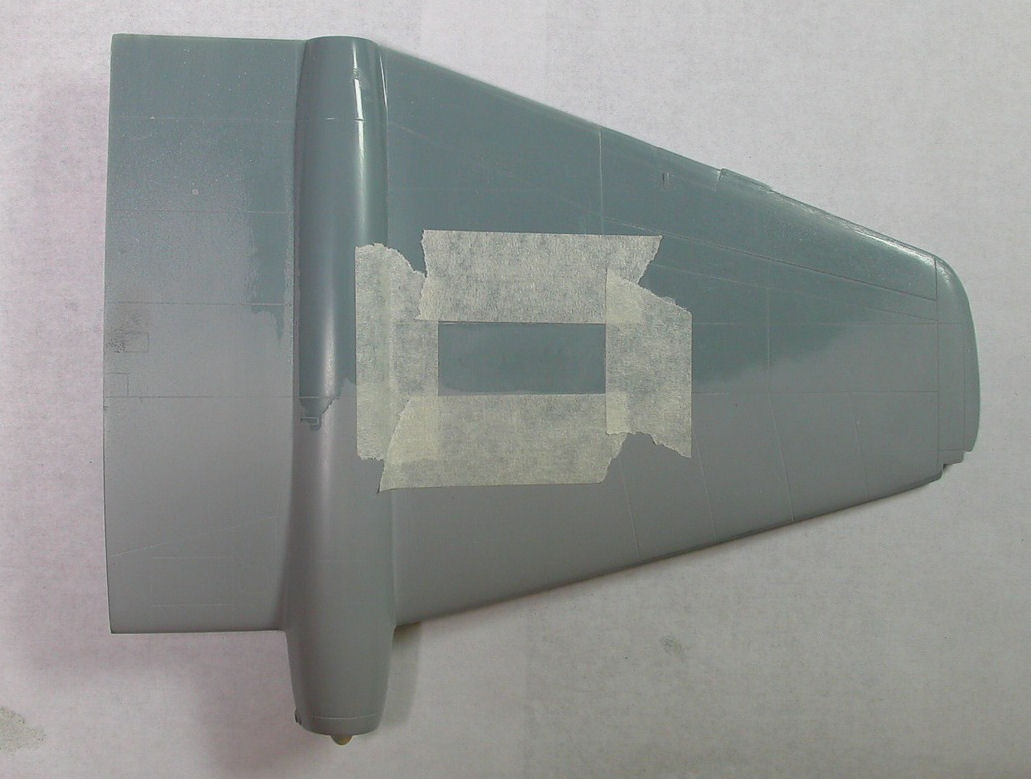
I used Dymo tape to outline the flaps and protect the surrounding plastic from a runaway razor blade. With slow passes first the flap grooves were deepened until the flaps were just about to fall off. The joints cleaned up easily since the razor saw makes very clean cuts. The Heritage Aviation photo-etch flaps will be used for this project. Although they were originally made for the Aeroclub Canberra they will be just fine for this project as well.

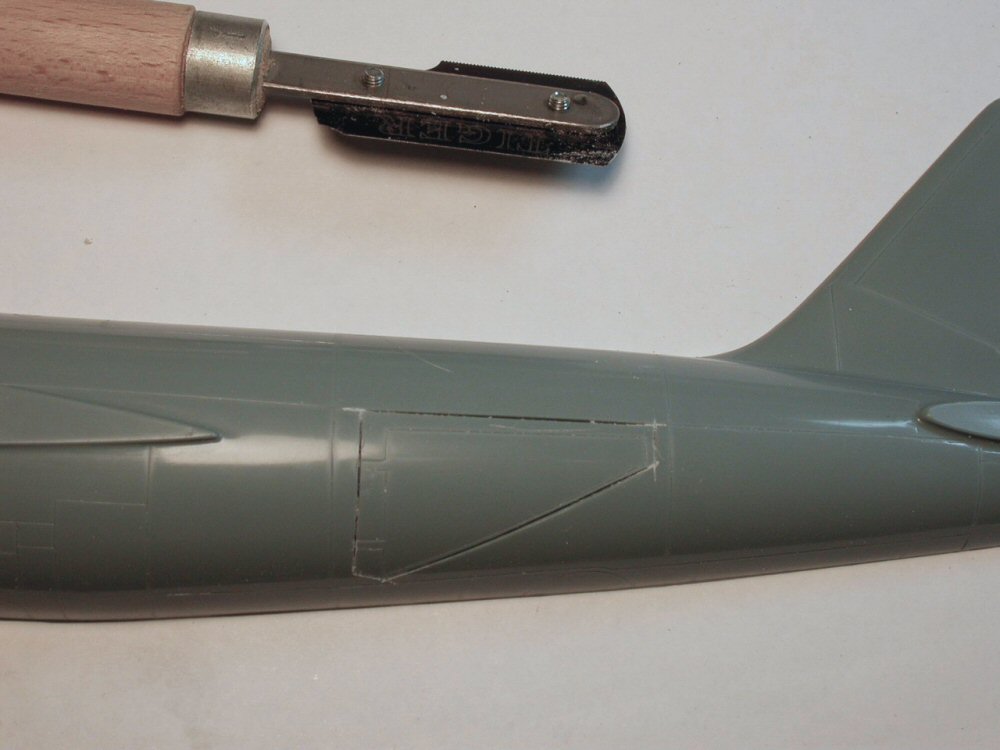
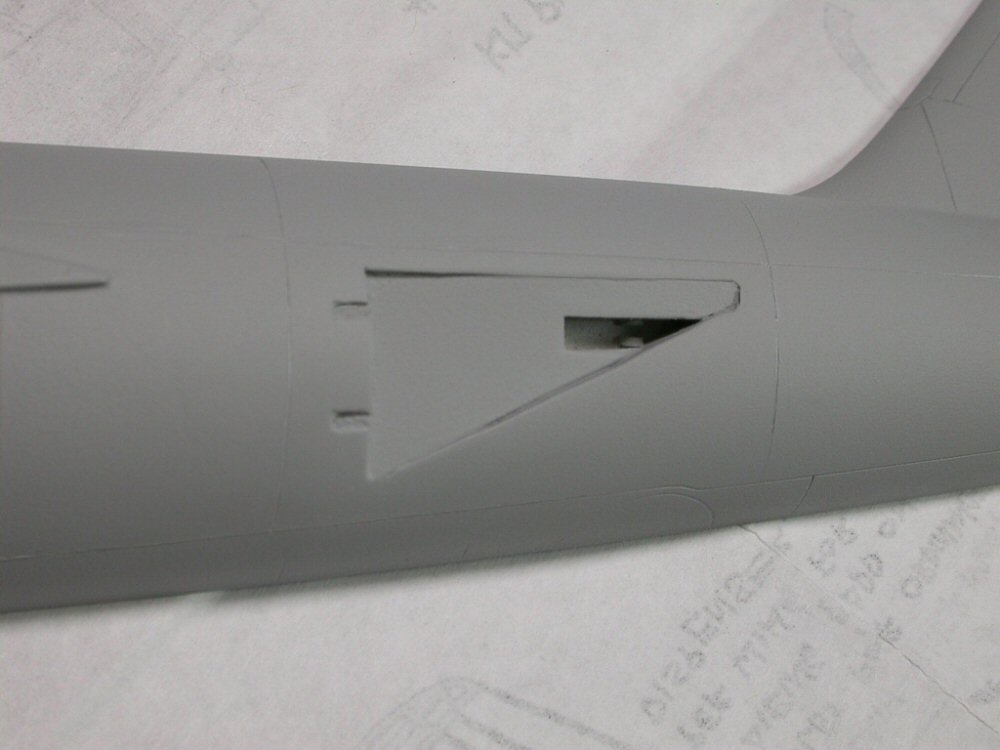
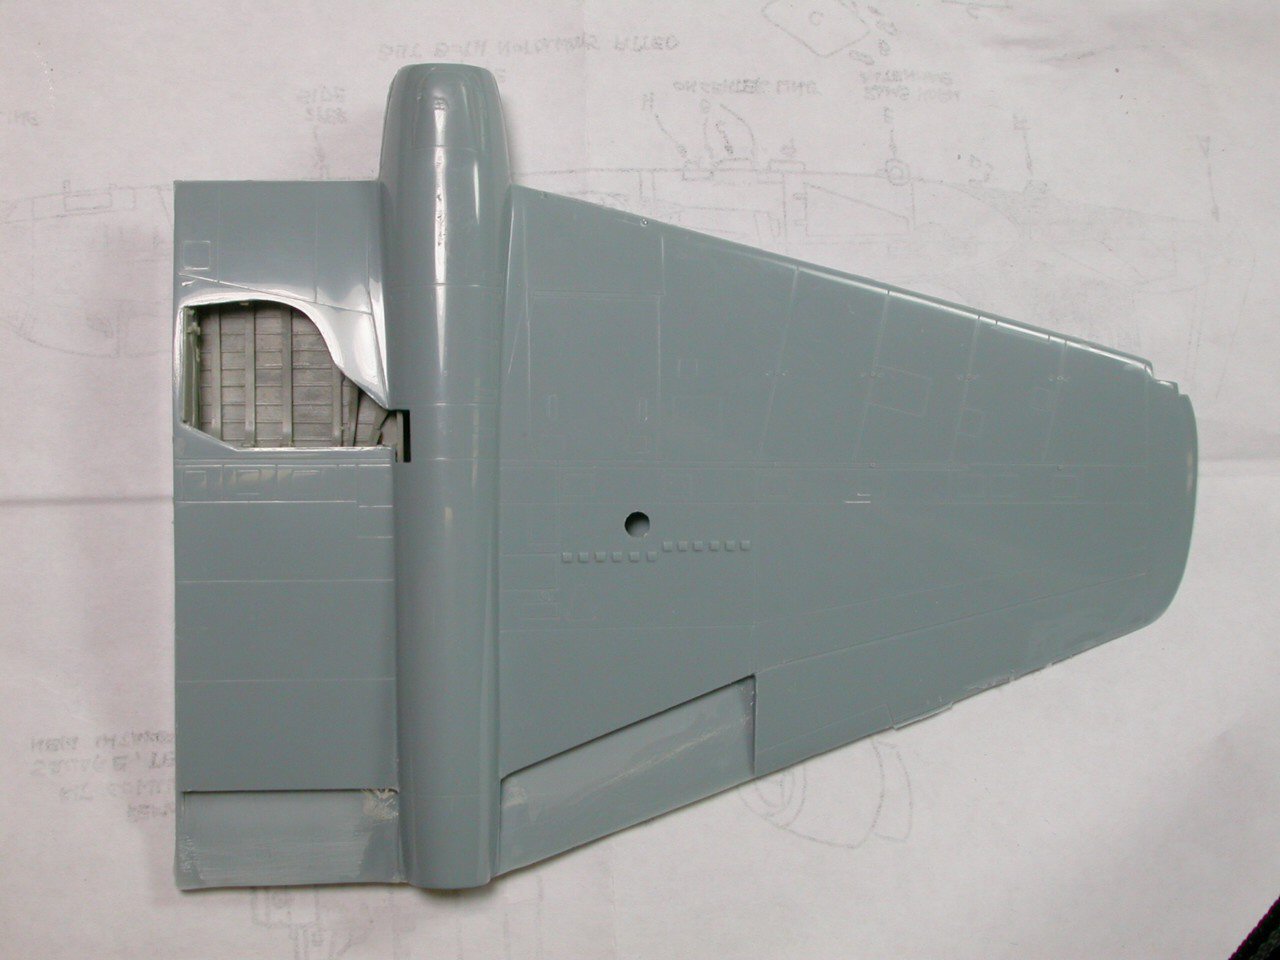
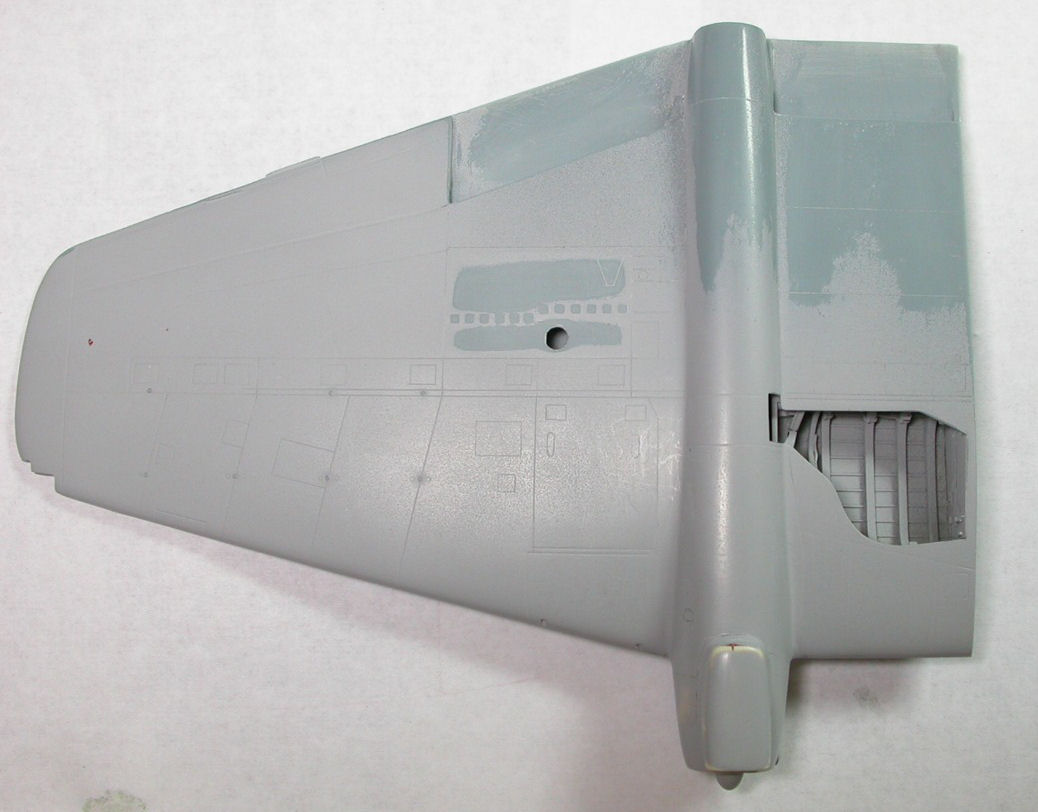
Next step was to cut out the speed brake area on the plastic fuselage and insert the resin speed brake wells. This has been the toughest part of the project so far. The conversion instructions do not have much info on the proper placement and it was tough to see where the cuts were supposed to be made. A template would have made things much easier. Since I started my conversion, Mike West updated his instructions and I believe new sets should have the improved instructions in them.
So I made my best guess and cut an area that looked to be about right for accepting the resin speed brakes.
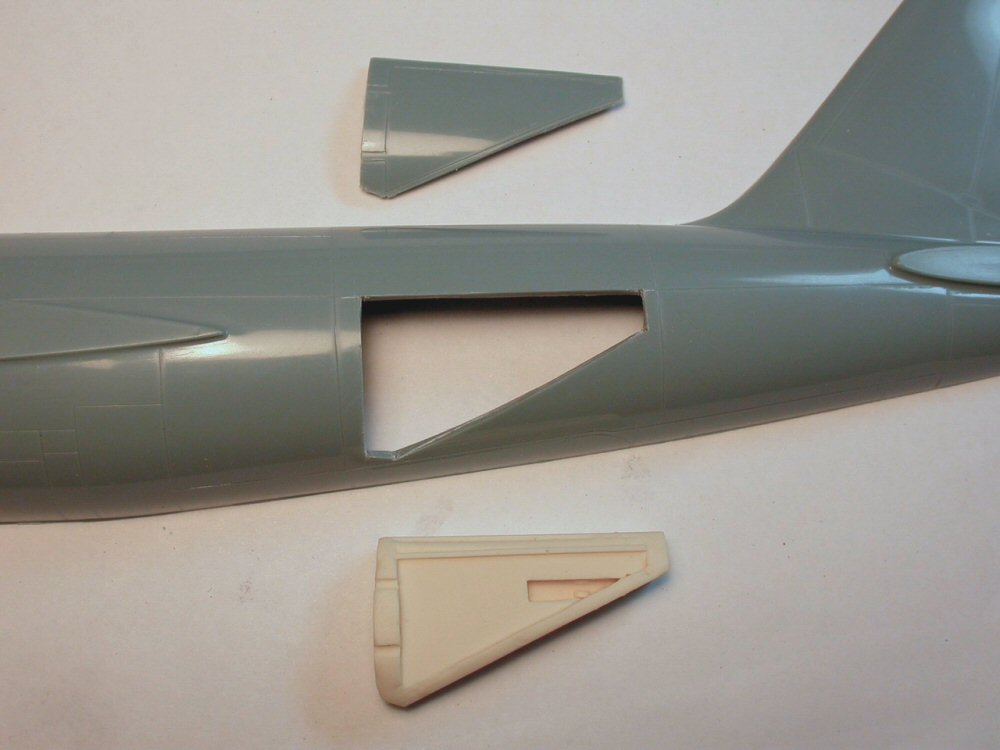
Test fitting showed that I would have to shim the opening here and there with styrene strips. I also found out that the resin speed brake wells would need some help to be made to conform to the fuselage inner curve. To help things, I sanded down the inside of the fuselage.
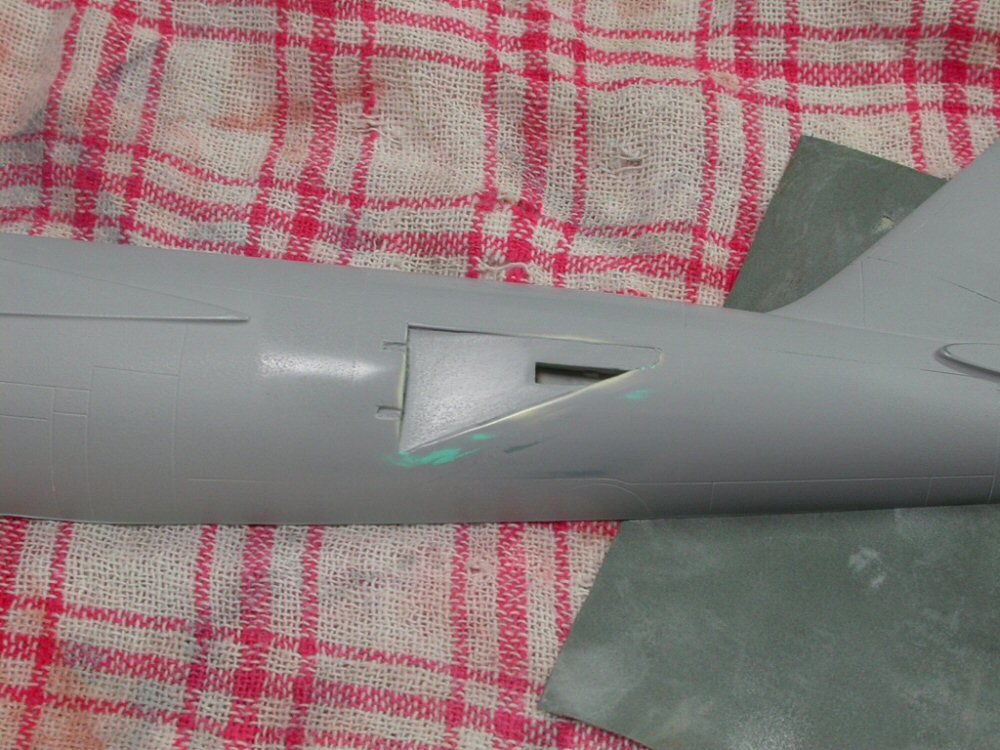
Lots of super glue was used and extra plastic strips were used on the inside to secure the speed brake well really well.
After the speed brake was in place I used automotive primer to spray the area and then masked it and I applied 3M Acryl Green to cover any surface imperfections. Once dry I sanded the area down with wet and dry polishing cloths of various grades.

One more primer coat was applied and it looked like the speed brake was finally integrated well into the plastic.
The problem was that a lot of the panel lines had disappeared in the process of sanding down the fuselage.
Again Dymo tape was used and the panel lines were restored with a scribing tool.
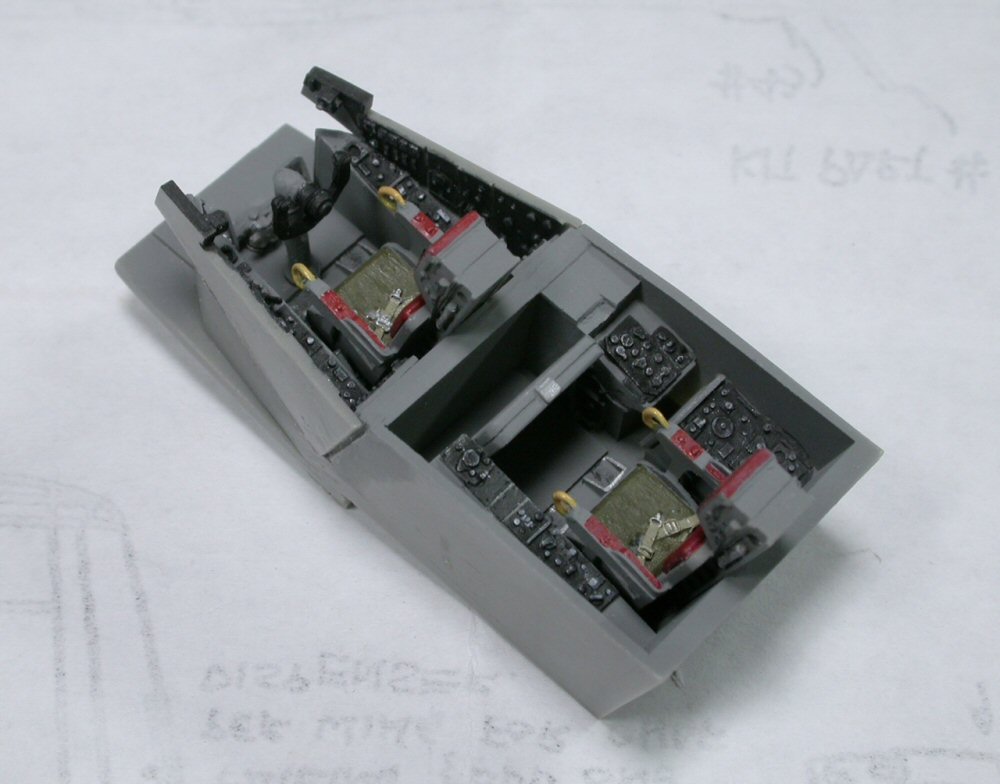
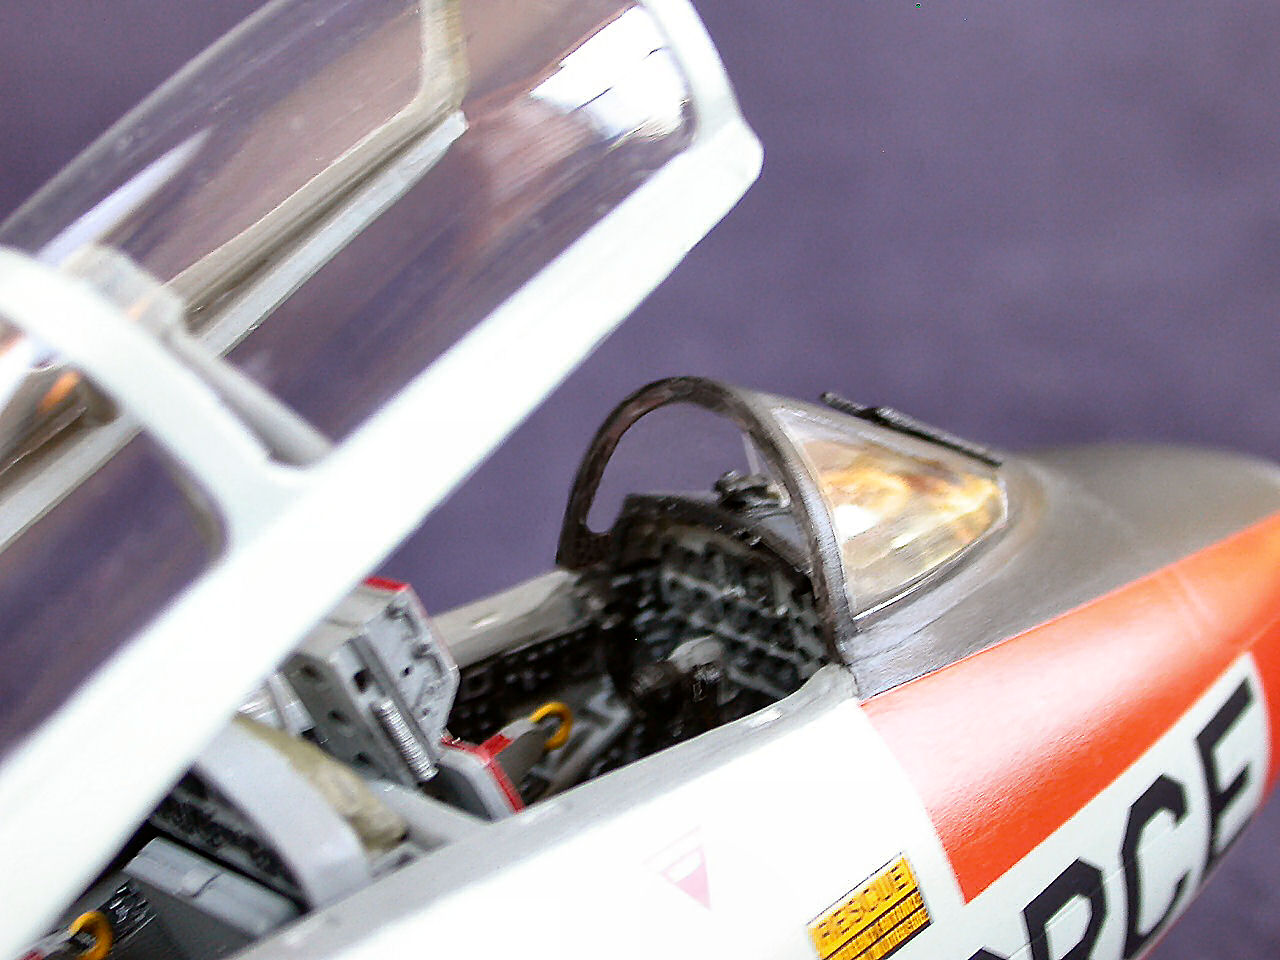
After the surgery was completed I turned my attention to the cockpit assembly.
For reference I used the Dash-1 manual images found here. https://www.cybermodeler.com/aircraft/b-57/b-57_pit.shtml
The interior was painted FS36231. Dry brushing brought out the nice detail on the resin parts.

The fuselage assembly took place next following the same procedure used in the previous two Classic Canberras I built I did. The forward fuselage portions were glued to their respective rear fuselage parts to ensure a very good joint front to rear. Once that was dry I glued the completed left and right sides together. To get the left to right fuselage joint to fit better, I lightly sanded the parts on a big sheet of sandpaper that I laid on a flat surface. The joint was good and little sanding would be needed later to make the seam disappear.
I elected not to install the cockpit and the front wheel well at this point. They can easily slide in later. Leaving these parts out for now allowed me to apply more liquid cement to the joints from the inside and ensure a sturdier assembly.
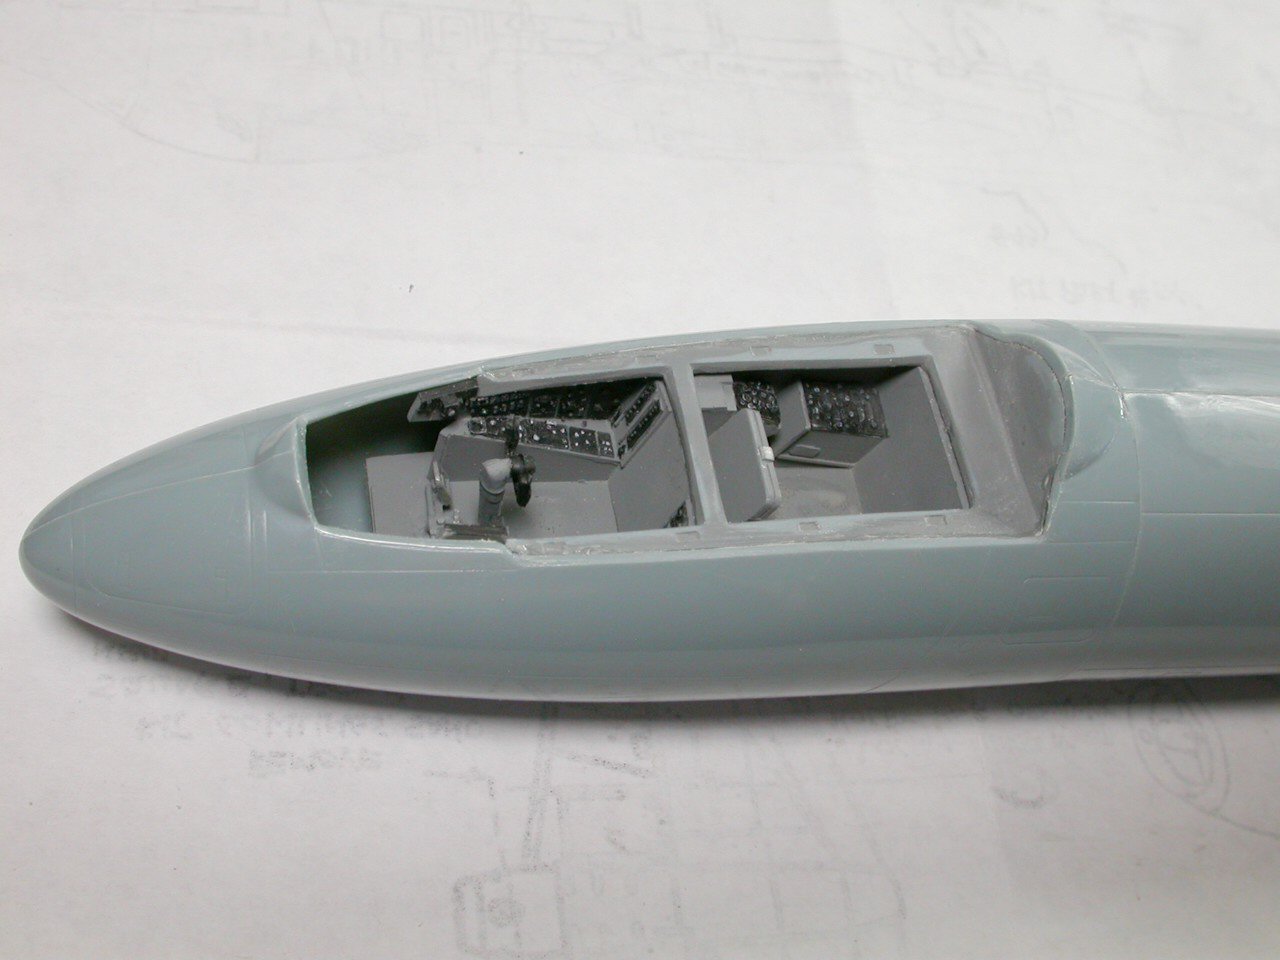
The front wheel well fits very well in its place and only little trimming was necessary on its top to allow the cockpit tub to fit comfortably in the fuselage cavity. A lot of lead weight will be needed to go to the front of the fuselage and just behind the cockpit to ensure that the model sits on all four wheels.
The cockpit canopy frame is supposed to fit perfectly flush with the fuselage so make sure that adjust it to fit with no visible seam.
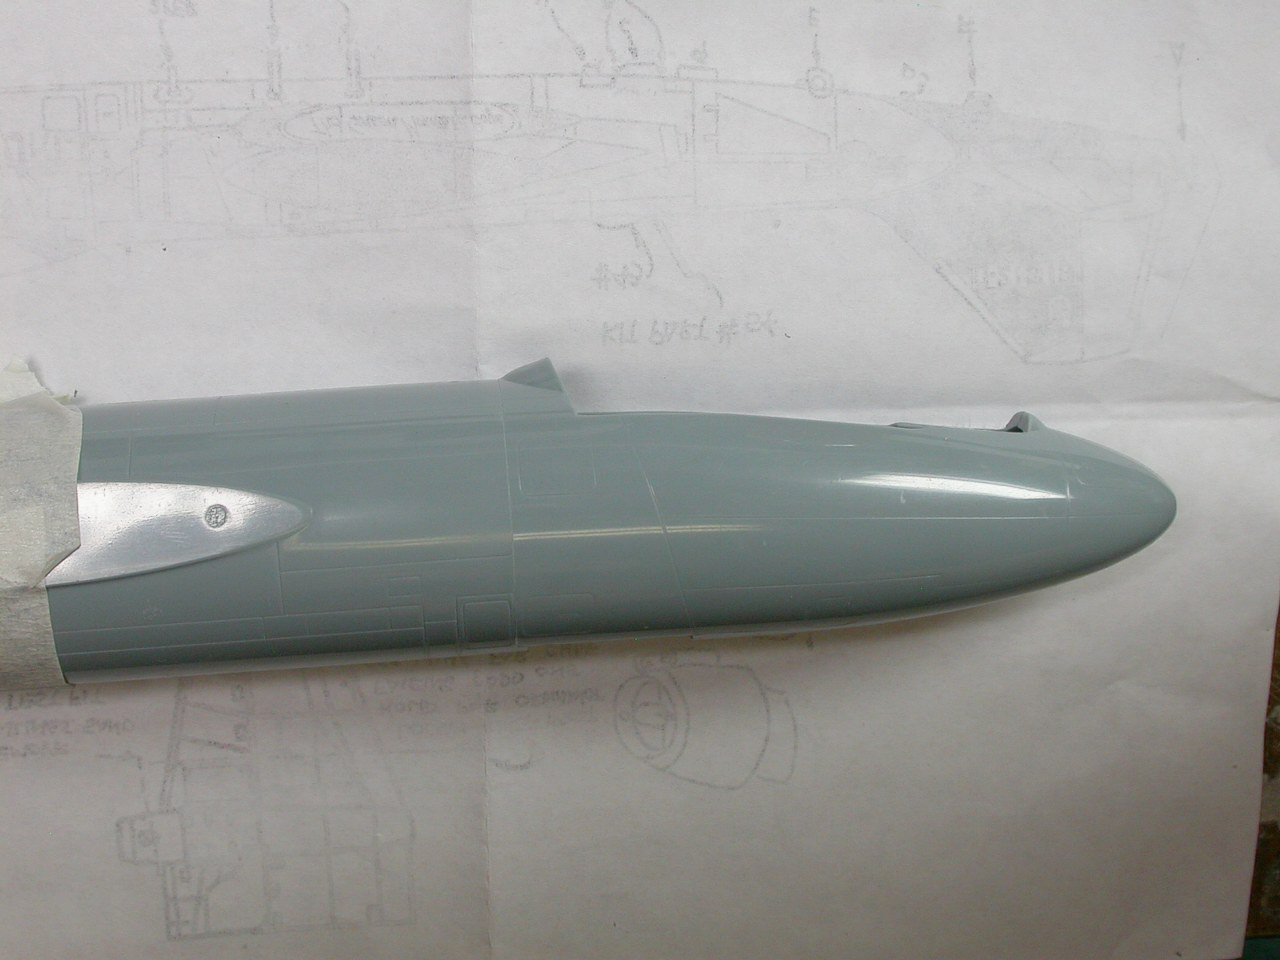
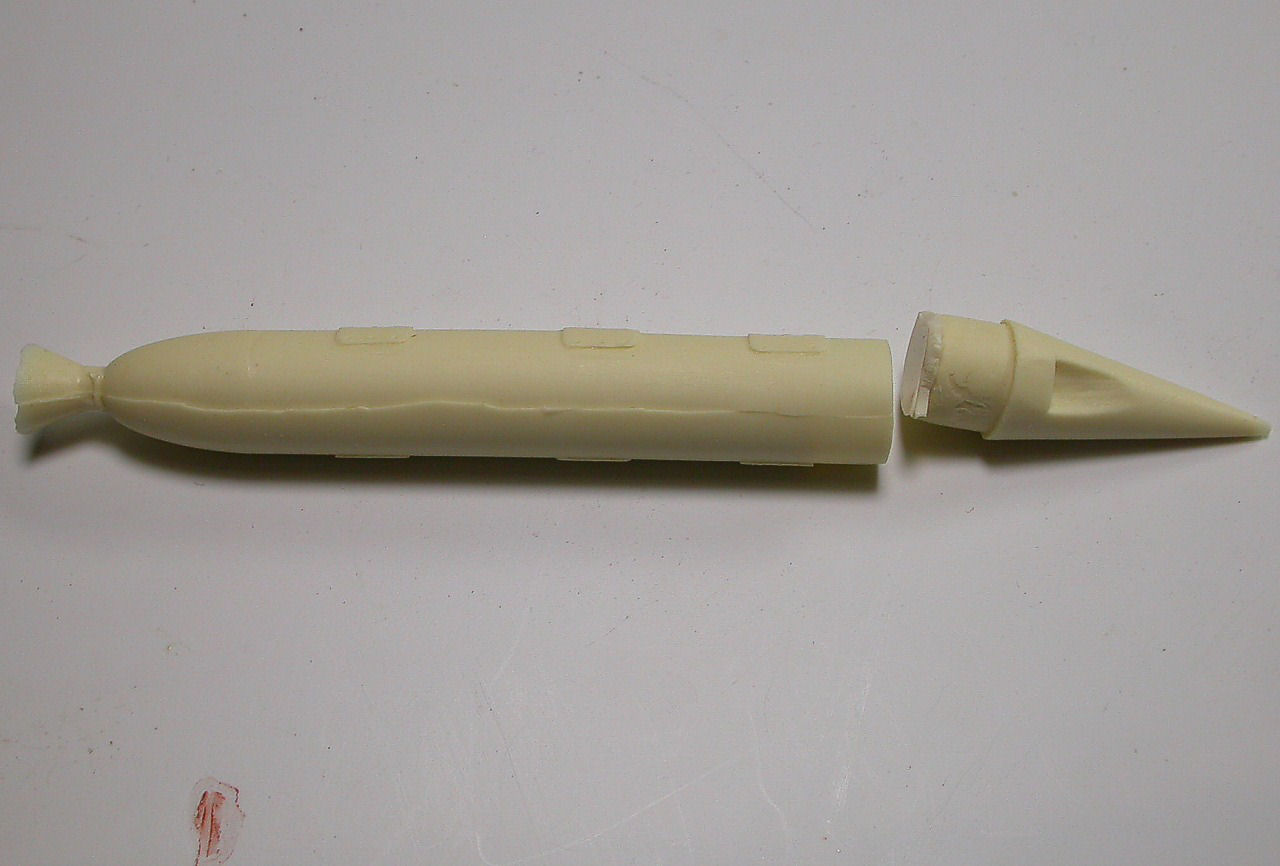
After the fuselage was done I focused my attention on the new resin intakes.
I like the look of the front oil cooler scoop as it captures the look of the real thing. I had to spend a little time deciding how to cut out exactly the existing plastic intake. The instructions do show with a dotted line where to cut on the bottom of the nacelle but you have to be careful how you drive your saw so you do not remove too much plastic.
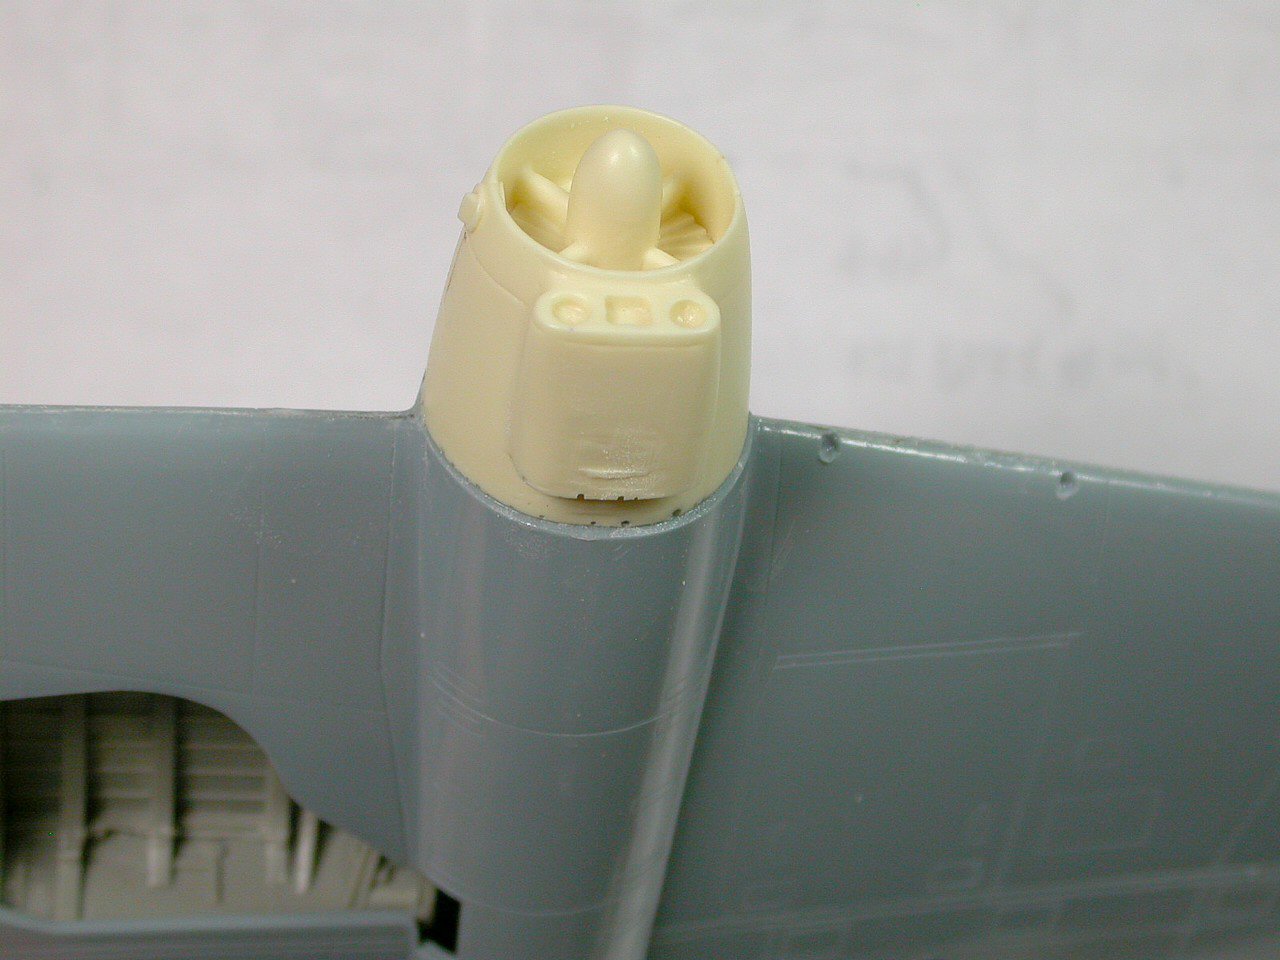
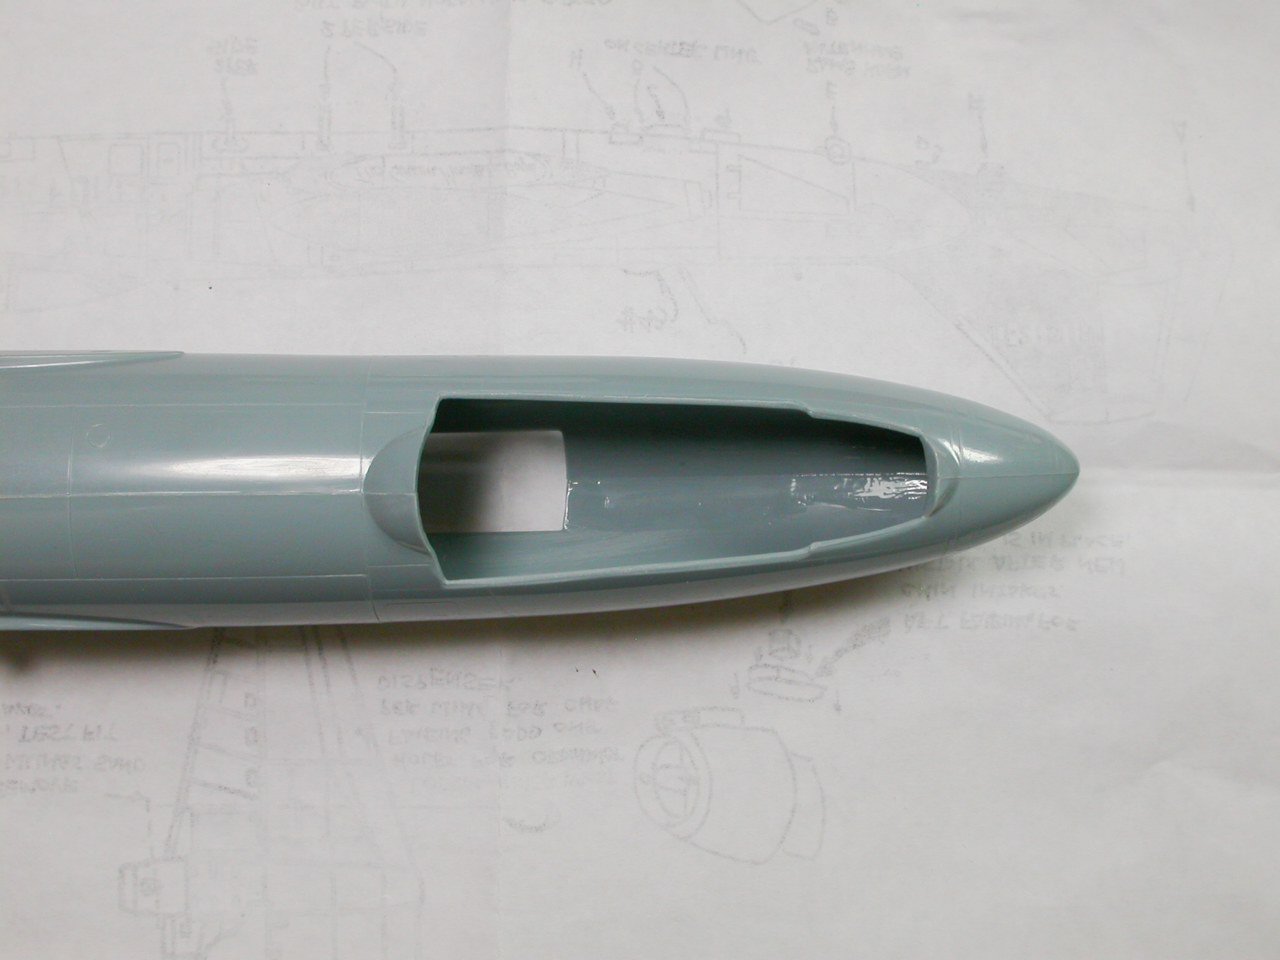
After the plastic nacelle was off I did a quick test fit of the intake.
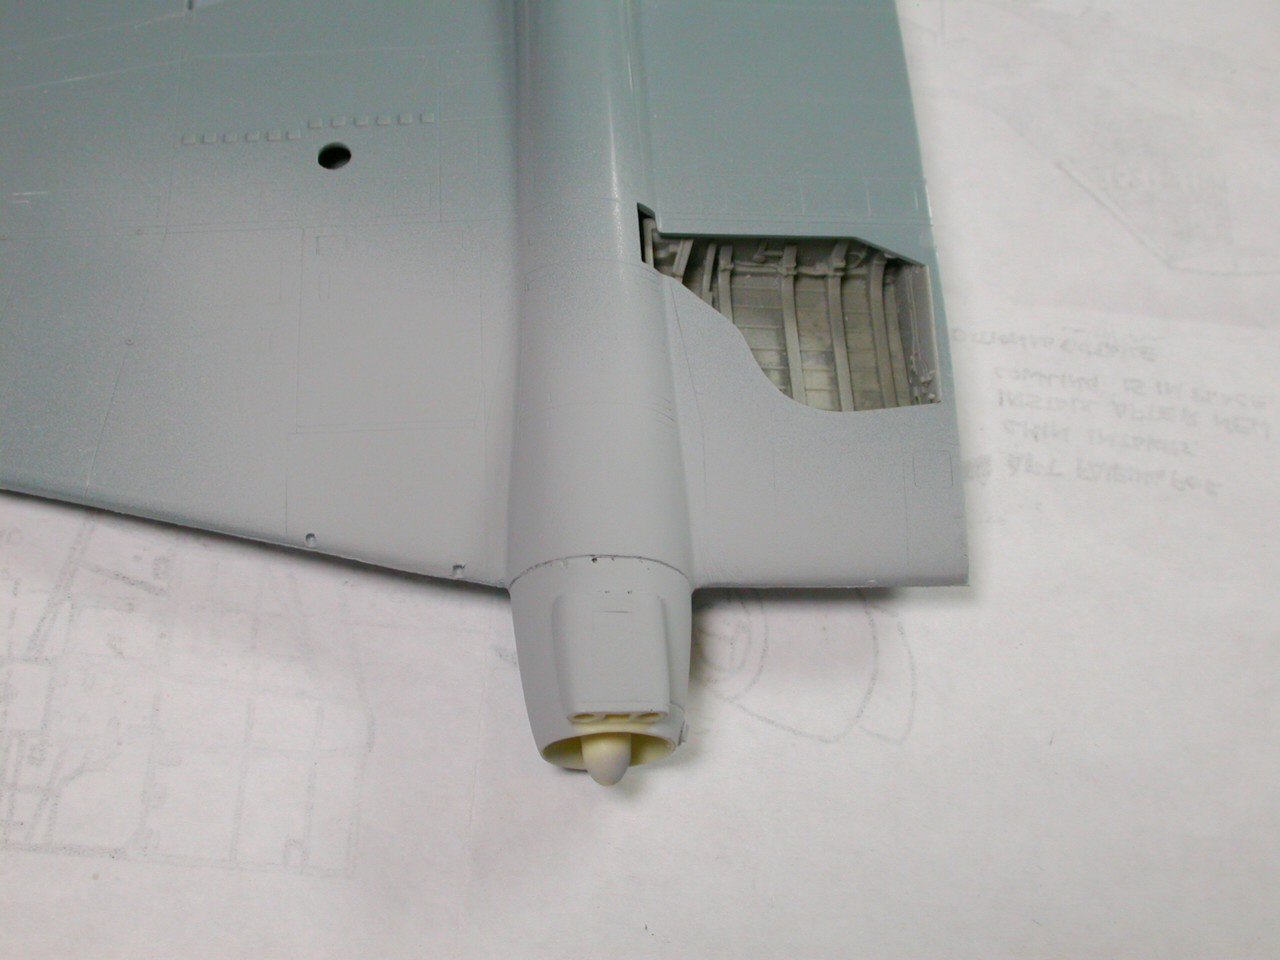
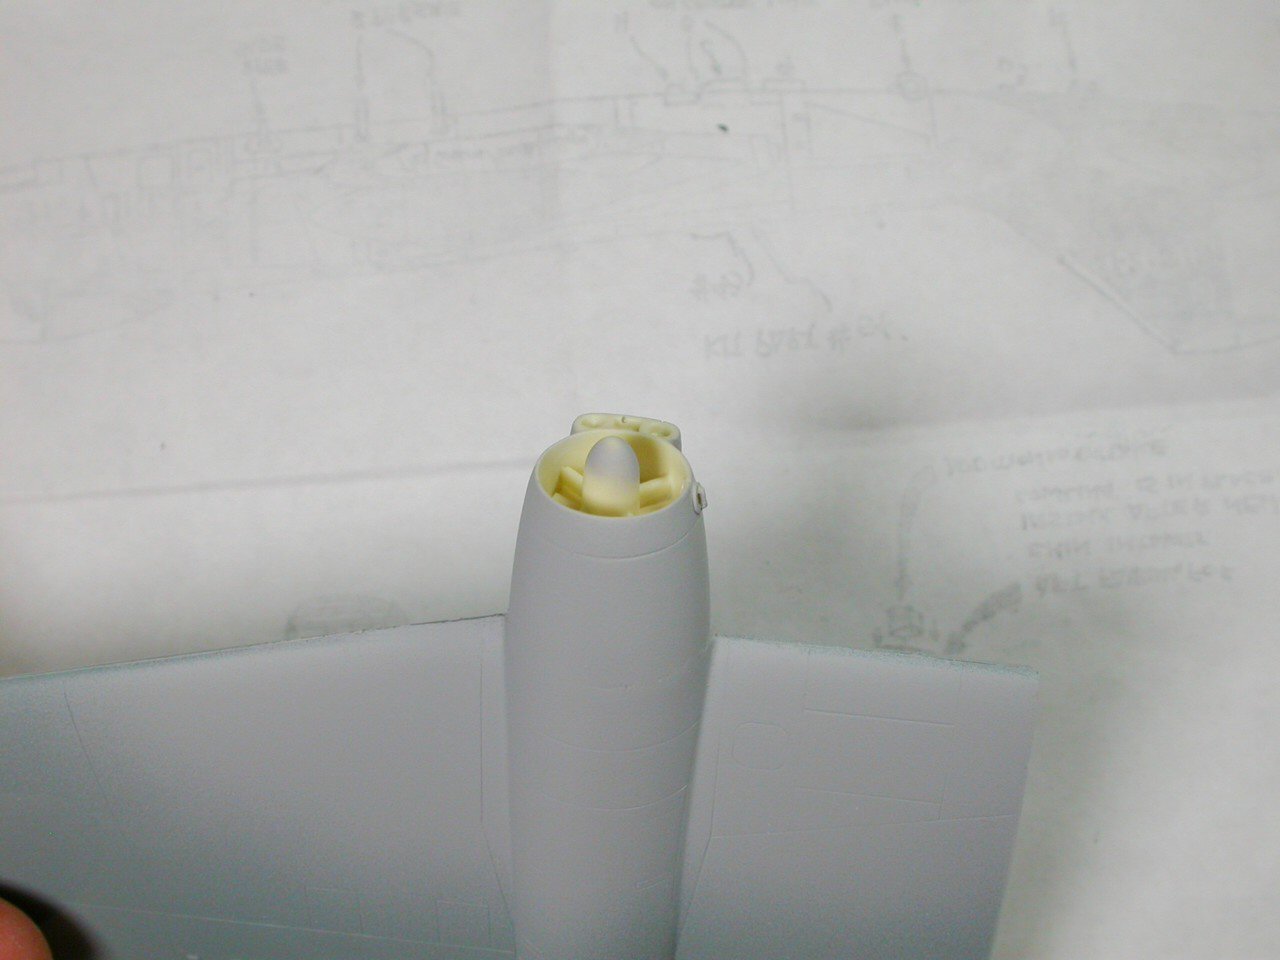
It fit OK but I believe that the resin might have shrunken a bit so a little step was left to deal with. I decided that I wanted the step to be on the bottom of the nacelle with the best fit being on top. Some sanding took place next and a coat of primer was applied to show me where I had to use putty to level things out.

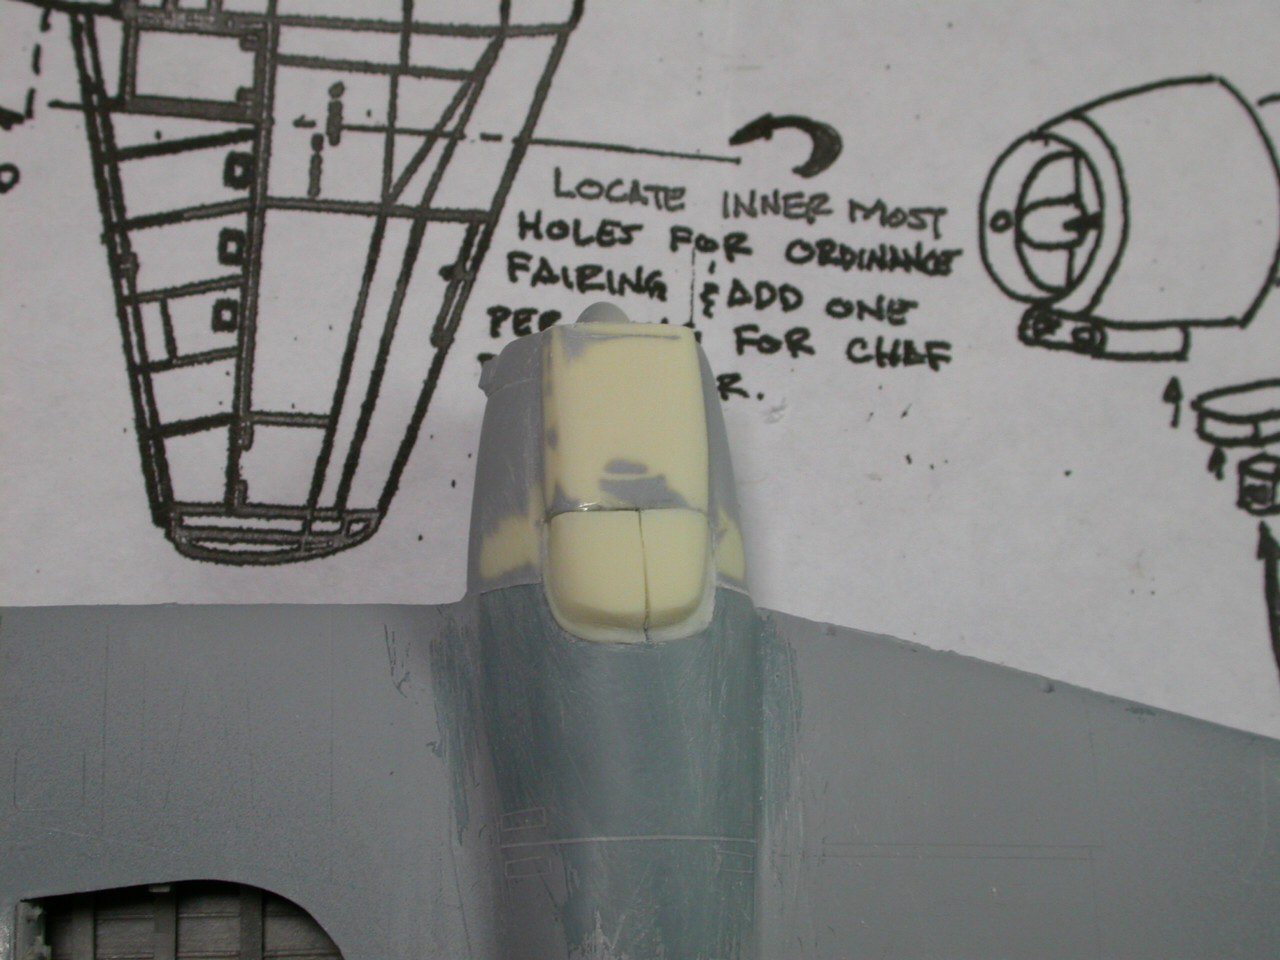
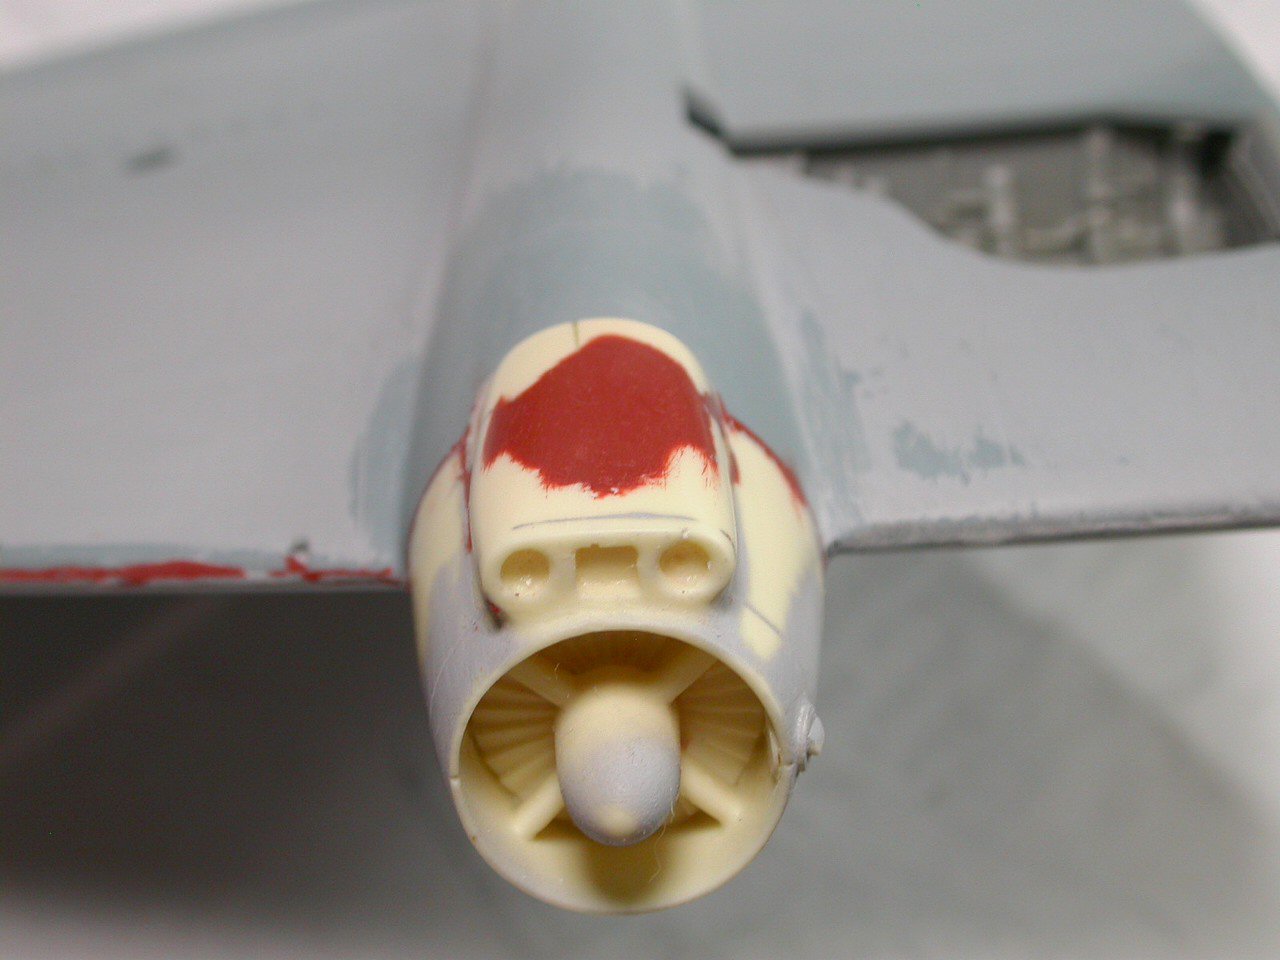
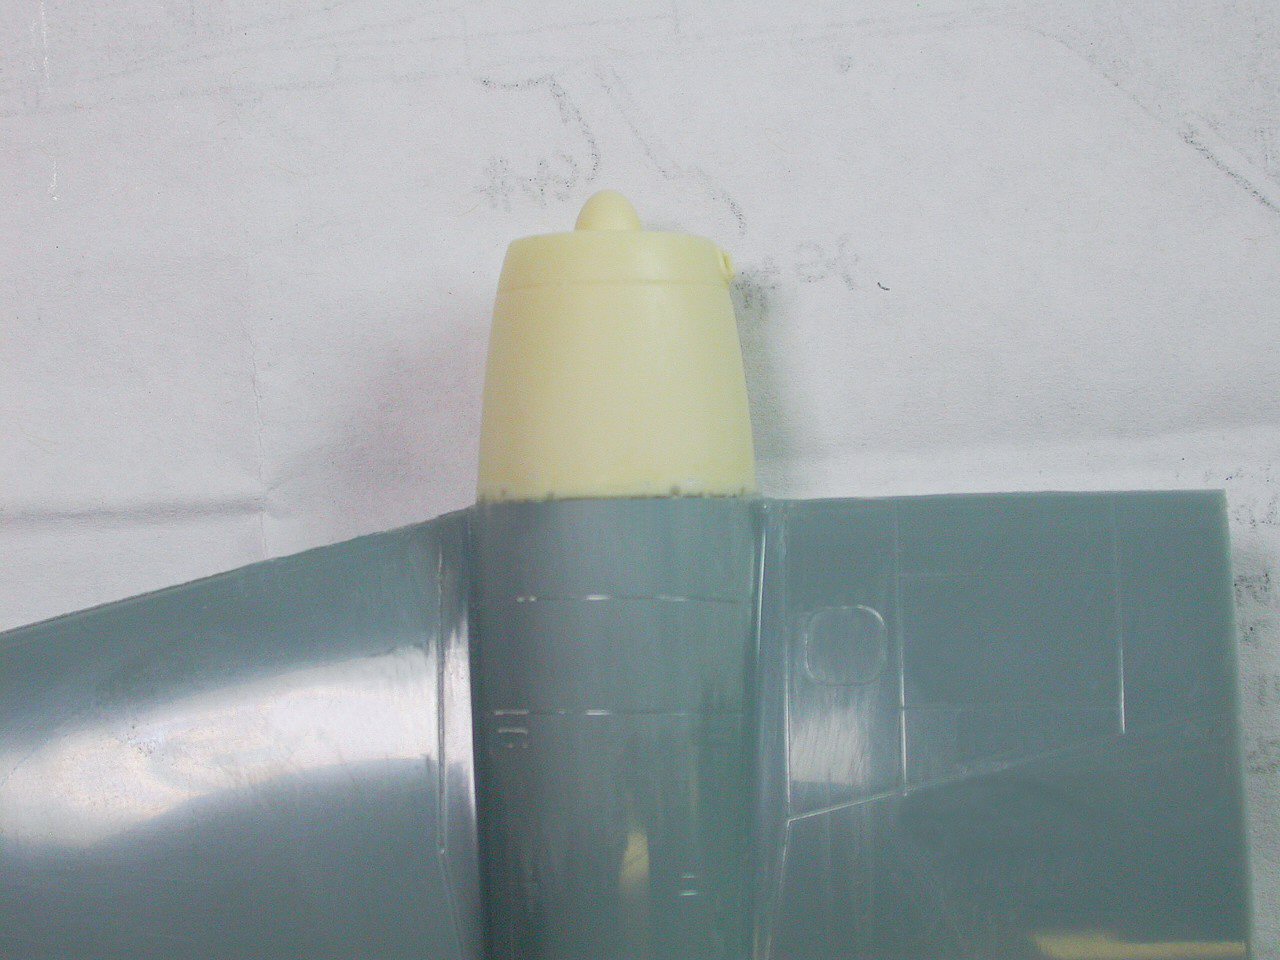
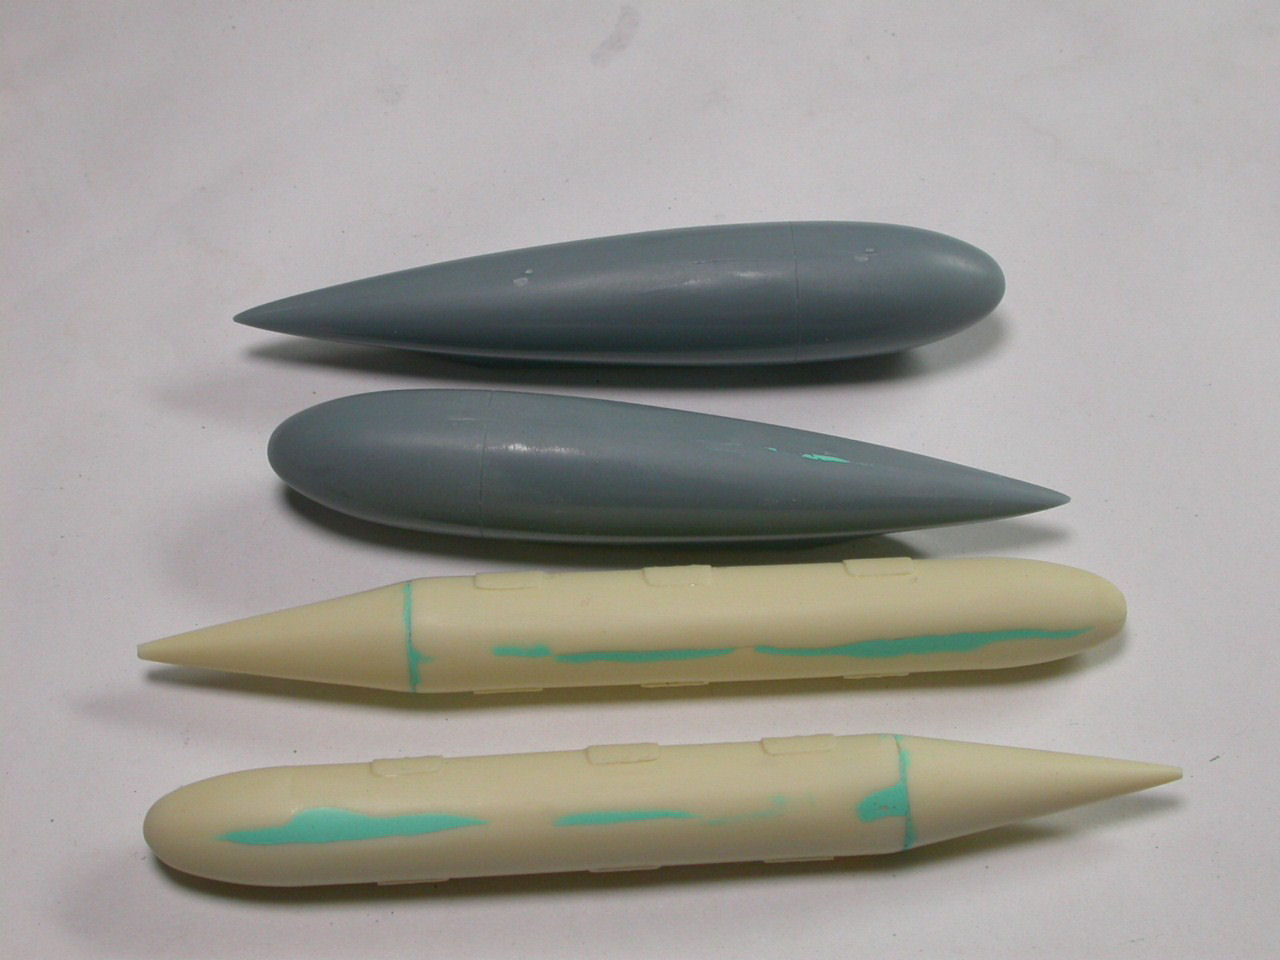
Next I tried to fit the resin fairing that integrates the scoop to the rear of the nacelle. In my case it appears that the fairing is a bit too wide so the only thing I could think of doing was to saw it length wise and remove a bit of resin, then glue it back together and thus adjust for the extra width.
I sanded the resin assembly a bit and then applied Acryl Red to smooth it out and shape it as per my pictures of the scoop. A coat of primer showed a few areas that I need to address before the scoop is completed. Scribing of the nacelle will be necessary. The B-57E had different nacelle panel lines from the standard Canberra an I will need to recreate them.

Well, the small business trip break turned to a long absence due to family illness back in Europe that required my presence there. Things turned out ok though so I am back and I am charging forward to finish this project.
I knew that the flaps would take a while to do due to their complexity so I decided to continue with that part of the project.
Research and many picture emails later clearly indicated that when the Canberra had the flaps and speed brakes out it also had the speed finger brakes deployed on the top and bottom of the wings.
The project was getting more complex as all the little fingers would have to be sanded down and then added later in their extended position.
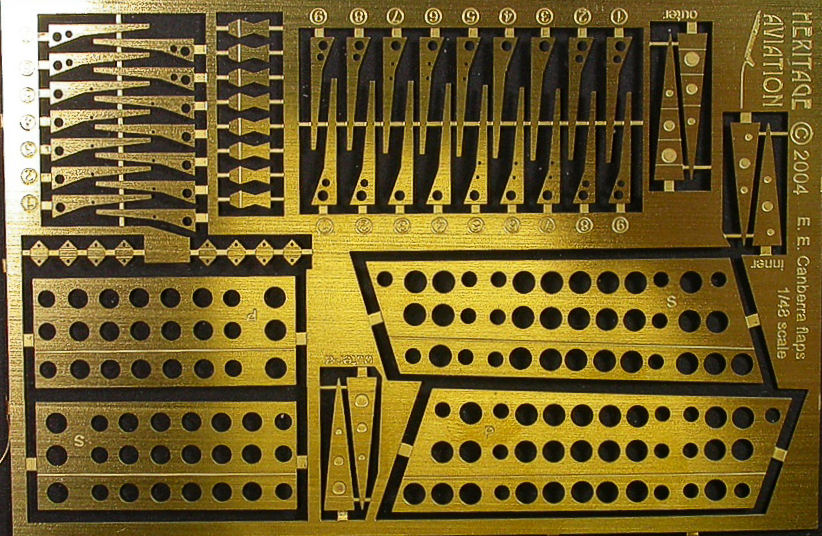
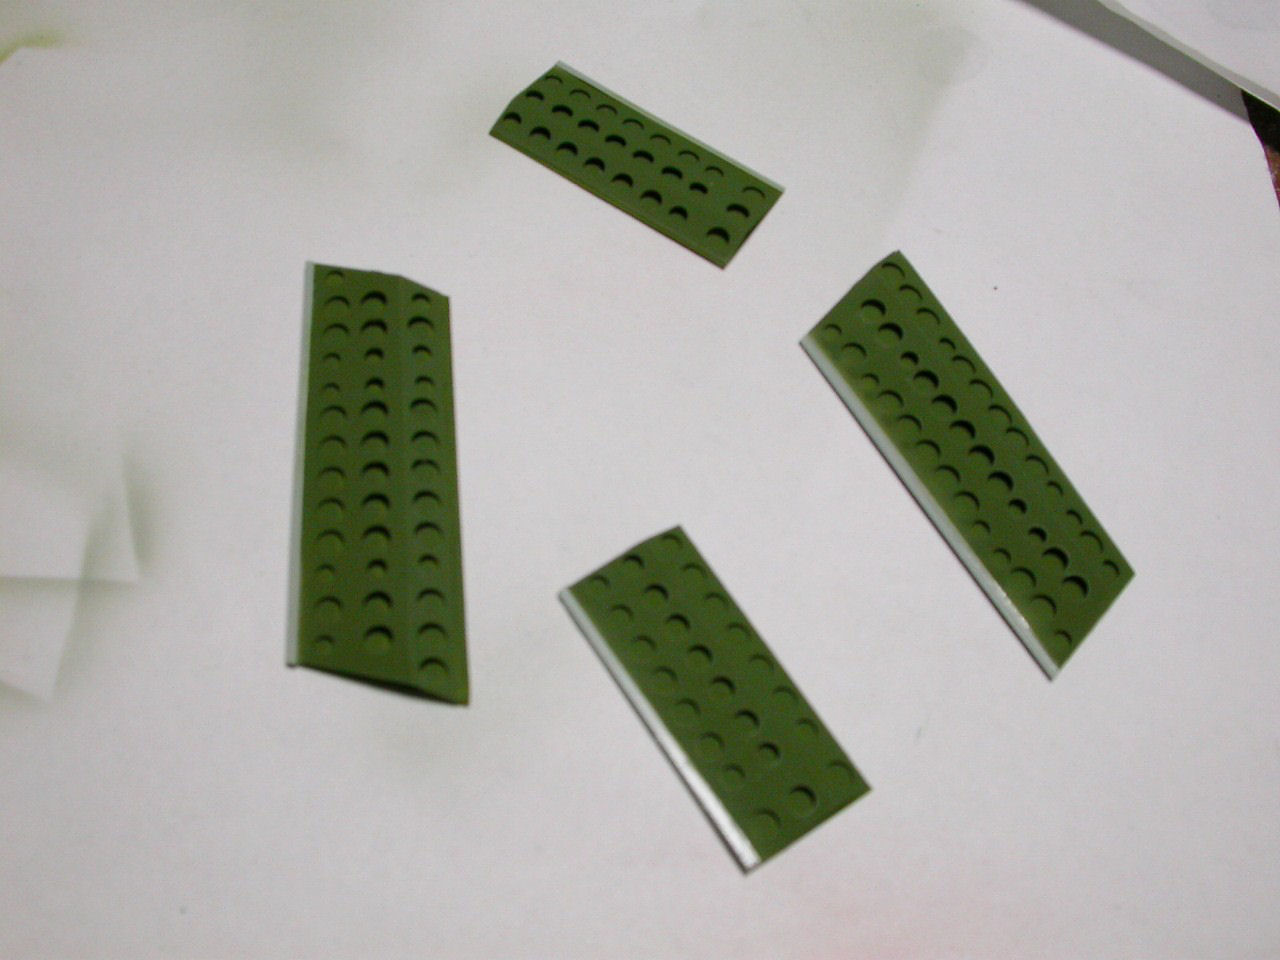
I used the photo-etch from Heritage Aviation in England. They were originally planned for the Aeroclub Canberra but they can work with some changes on the plastic model too.

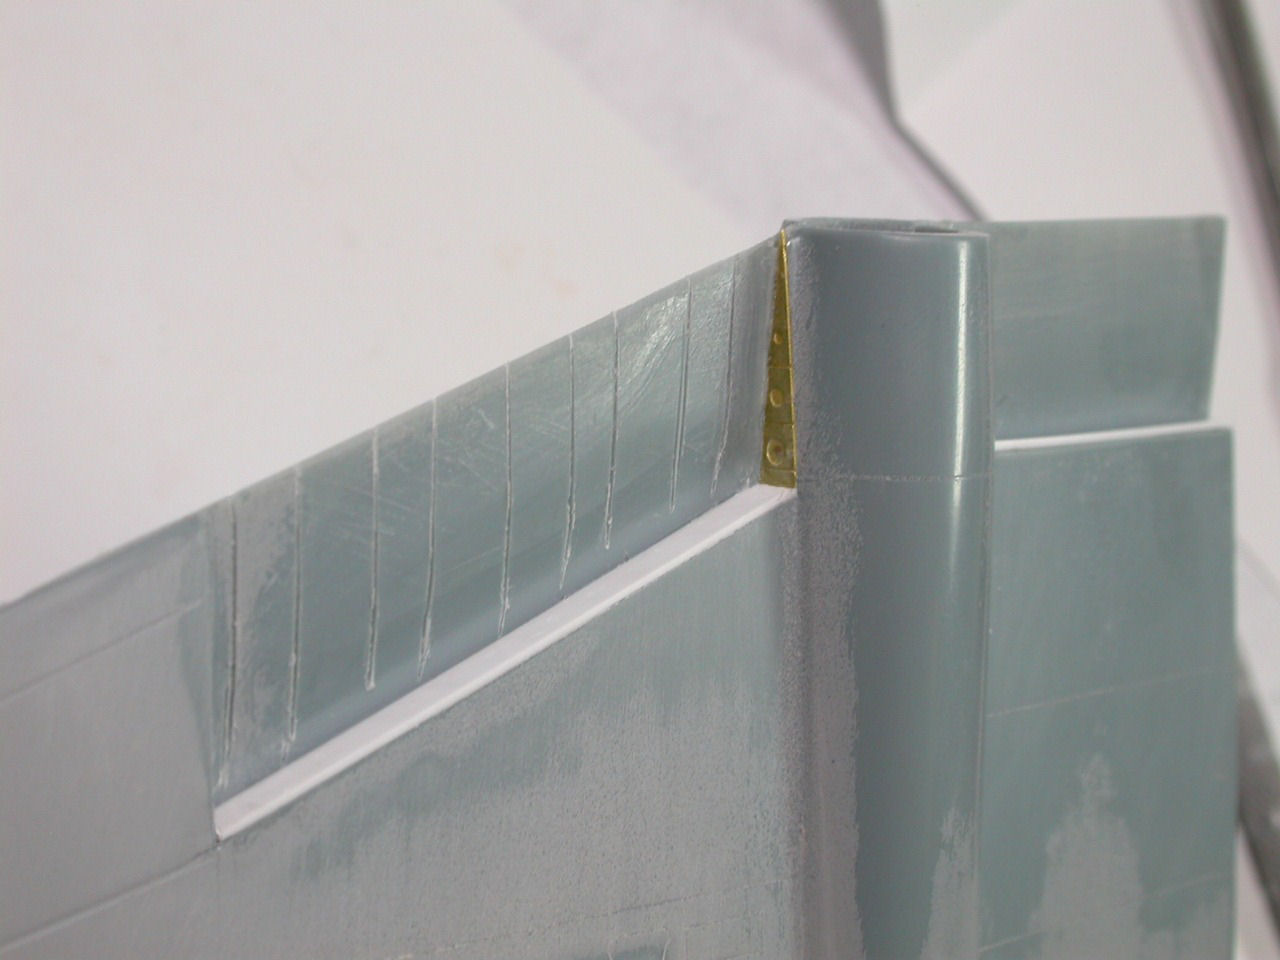
I started by cutting out the flaps on the lower wing and also removing the flap lip on the top of each wing. This lip is part of the flap and when the flap is retracted it integrates with the top of the wing. The lip was discarded and was going to be redone by a fresh piece of plastic strip.
I also thought that it would be easier to attach the photo-etch flap stringers if I would have scribed a little groove first on the plastic wing. The photo-etch parts need to be slightly sanded down or modified to fit the plastic Canberra. Some needed trimming on the back and some needed trimming on the bottom. I also had to insert a thin strip of plastic to blank out the back area of the flap nest which had a gaping hole after I cut of the flap portion. The groves I scribed on the plastic did help me to locate and secure the photo-etch parts but some stringers had to be rebuilt from styrene stock.
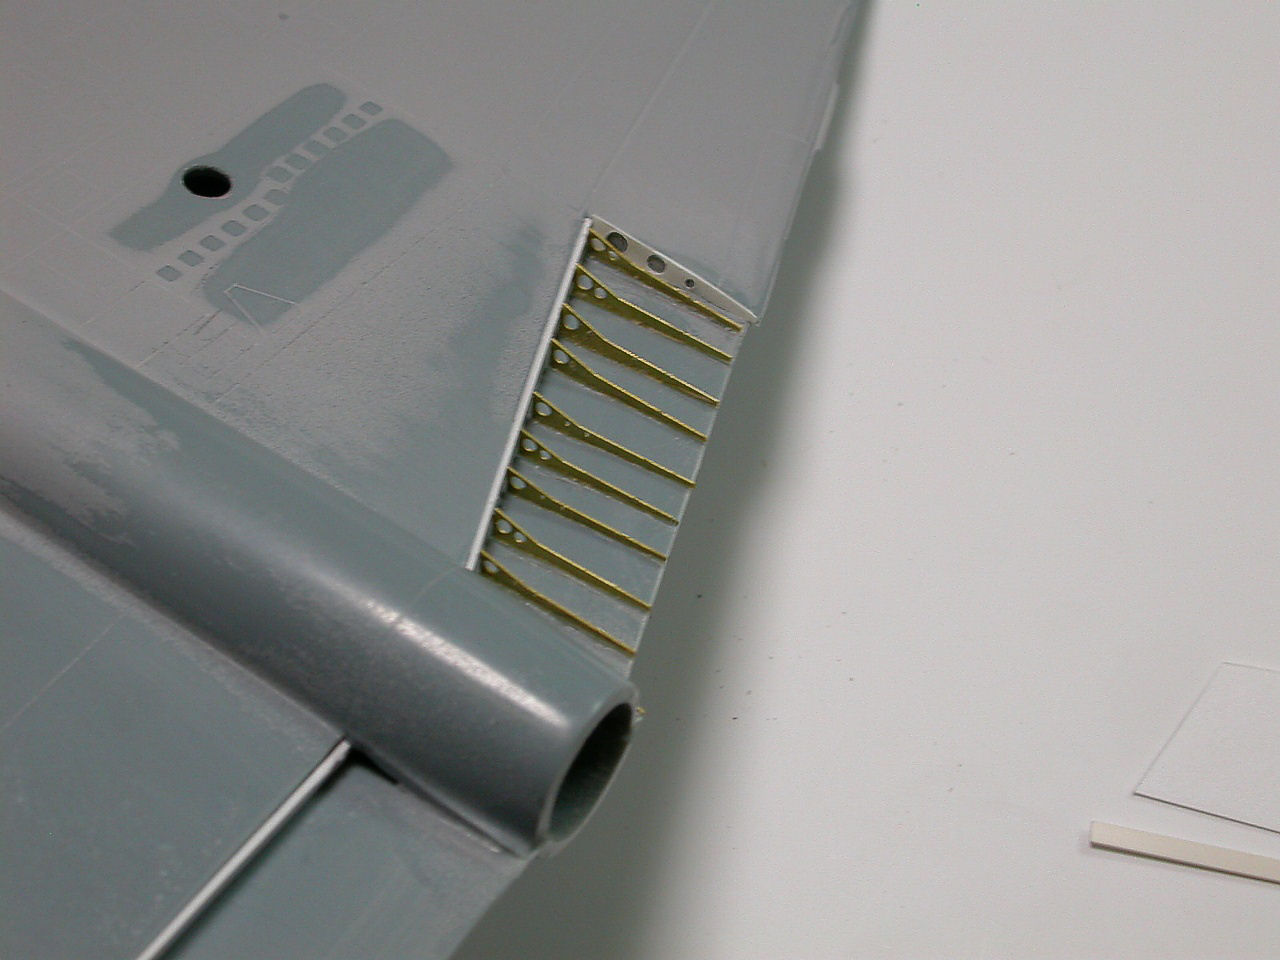
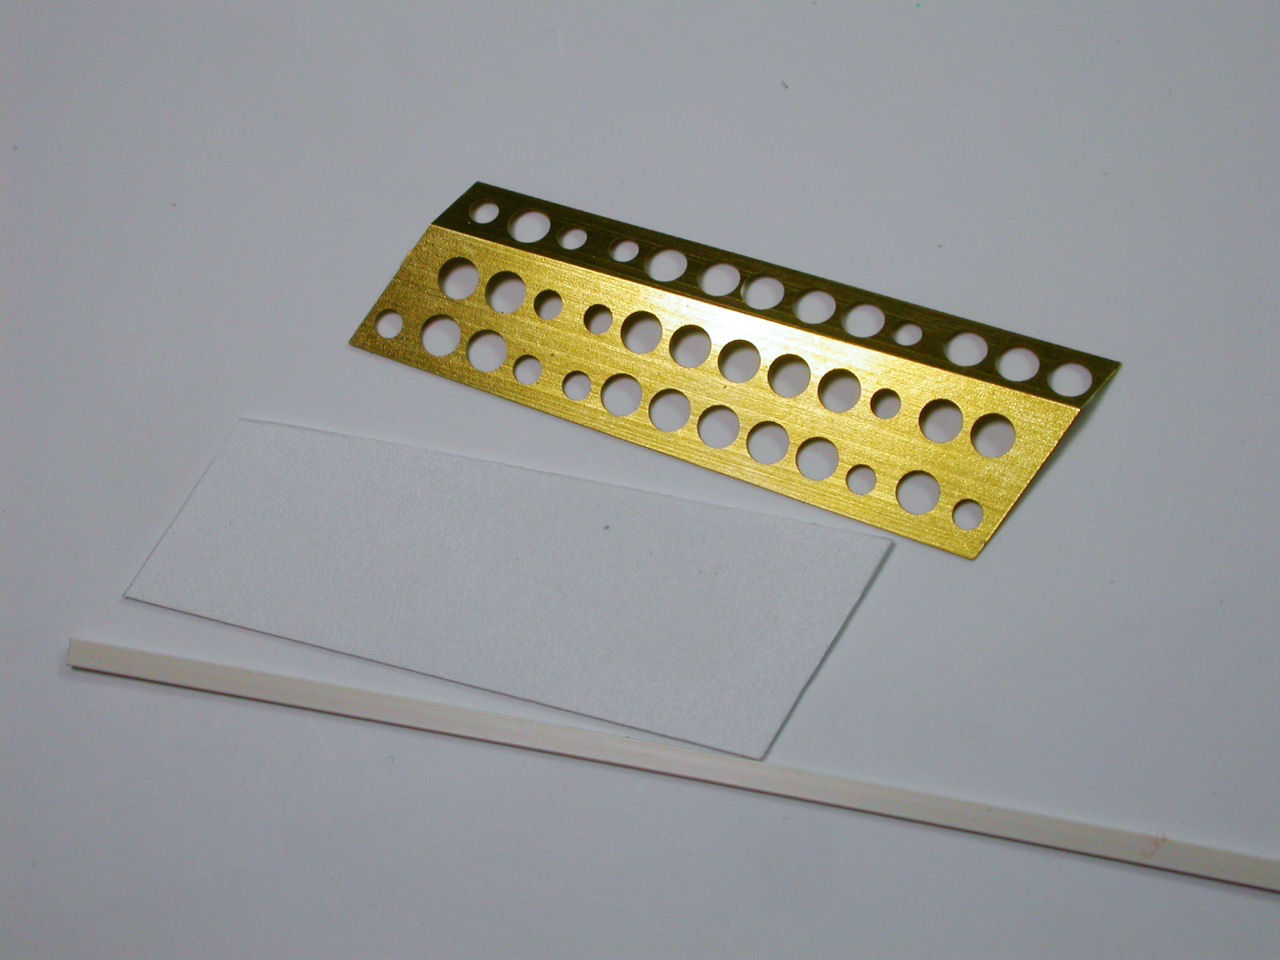
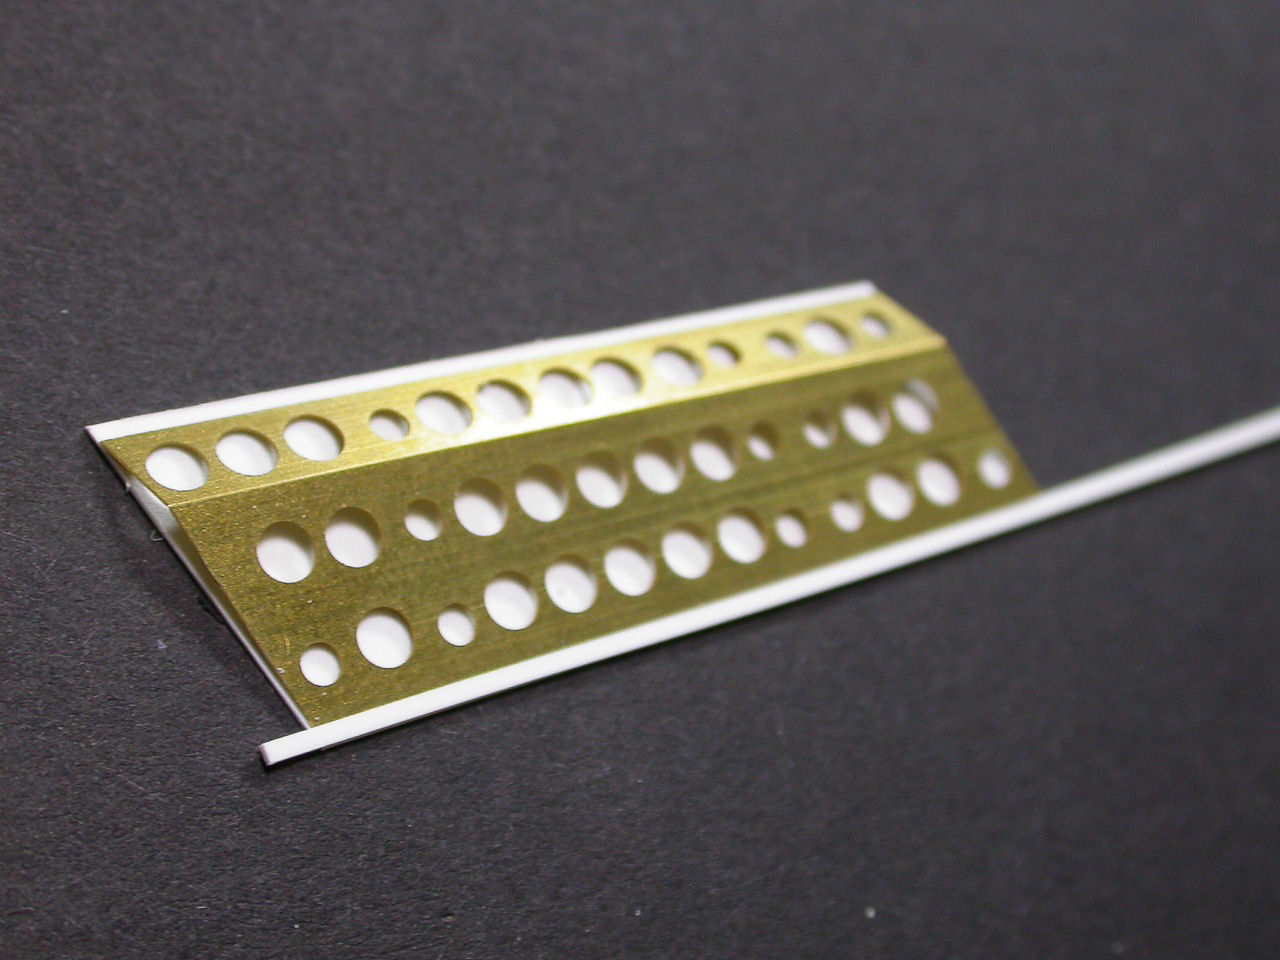
In the end I left off the outermost stringers since I was afraid that they would be knocked off as I would try to attach the wings to the fuselage. The inner most stringers came up short in length but once the flaps are in place it will not show that much. The photoetch flap inner structures were cut out of their fret and were bent by using the Mission Models bending fixture that generously provided to me by Cybermodeler Online.

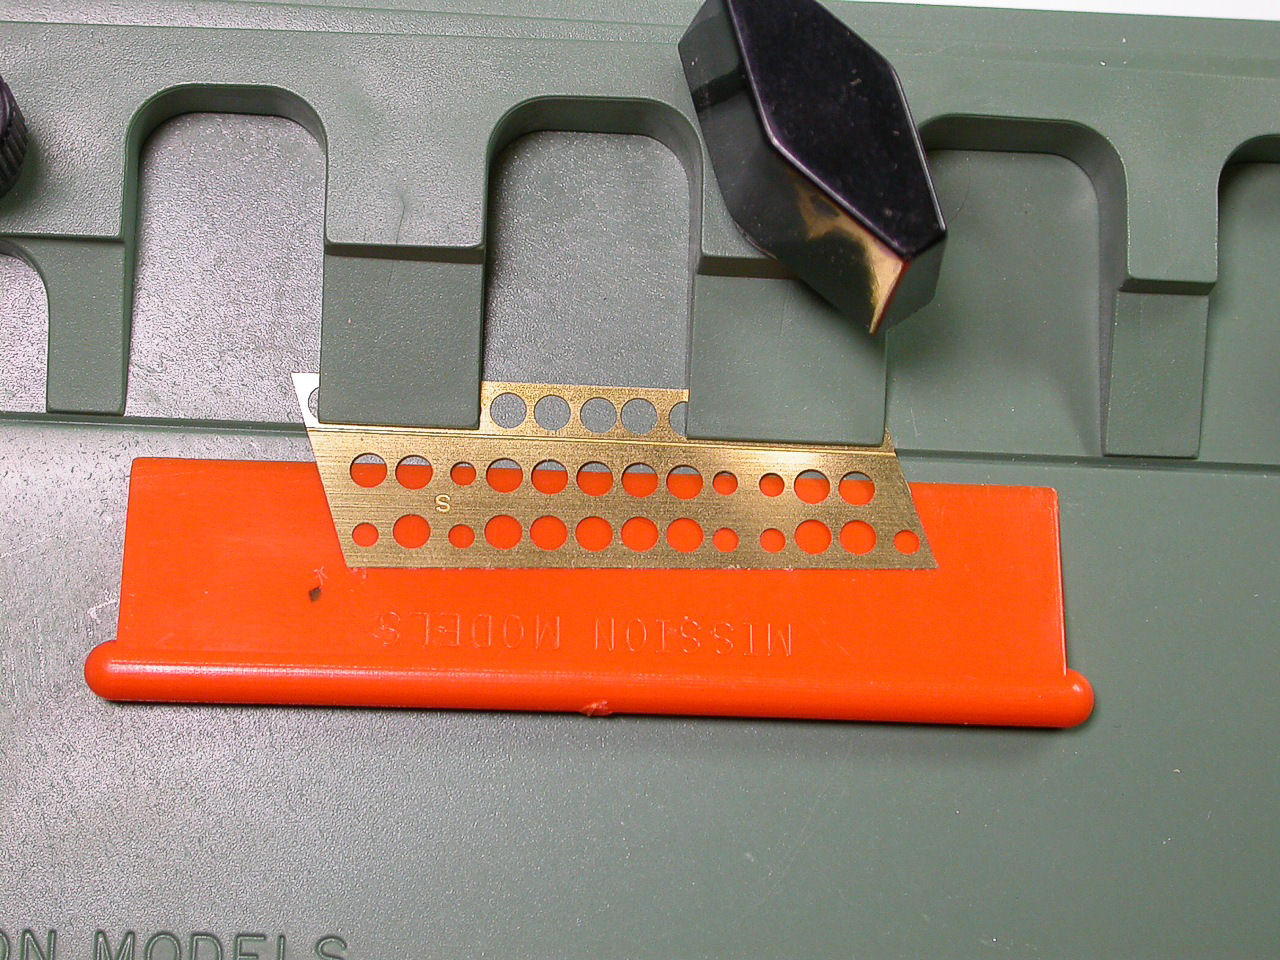
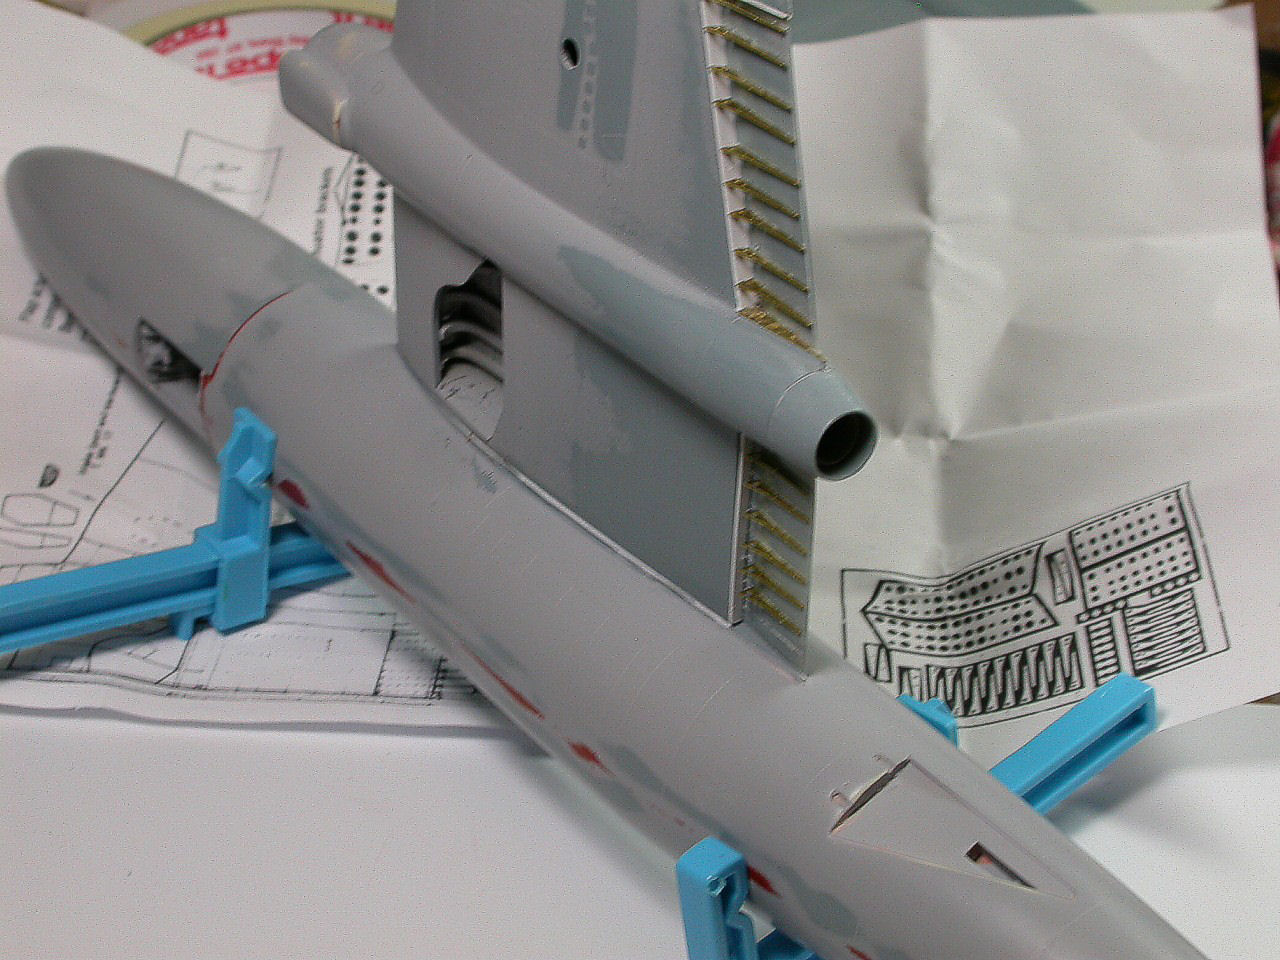
This tool makes dialing in ant angle into the photo-etch in a very fast and secure manner. The cutout on the plastic wing was used as a reference and a suitable piece of flat styrene stock was cut to represent the actual flap where the perforated structure would attach to. Once I glued the photo-etch to the newly created flap surface I used styrene strip to form the outer flap lip, glued it to place and trimmed it to size.
Painting the complete structure made it visually appealing and the flaps were set aside for much later. After the wings were done and the flap nests were completed, I started the process of attaching the wings. This is not easy and I always had to be careful with the Canberra family in making sure that the wings have the correct dihedral dialed in. So I decided to start with the port wing and go from there. The wing attached ok on the top joint with the fuselage but I needed to add styrene strip to fill in a gap on the bottom portion.
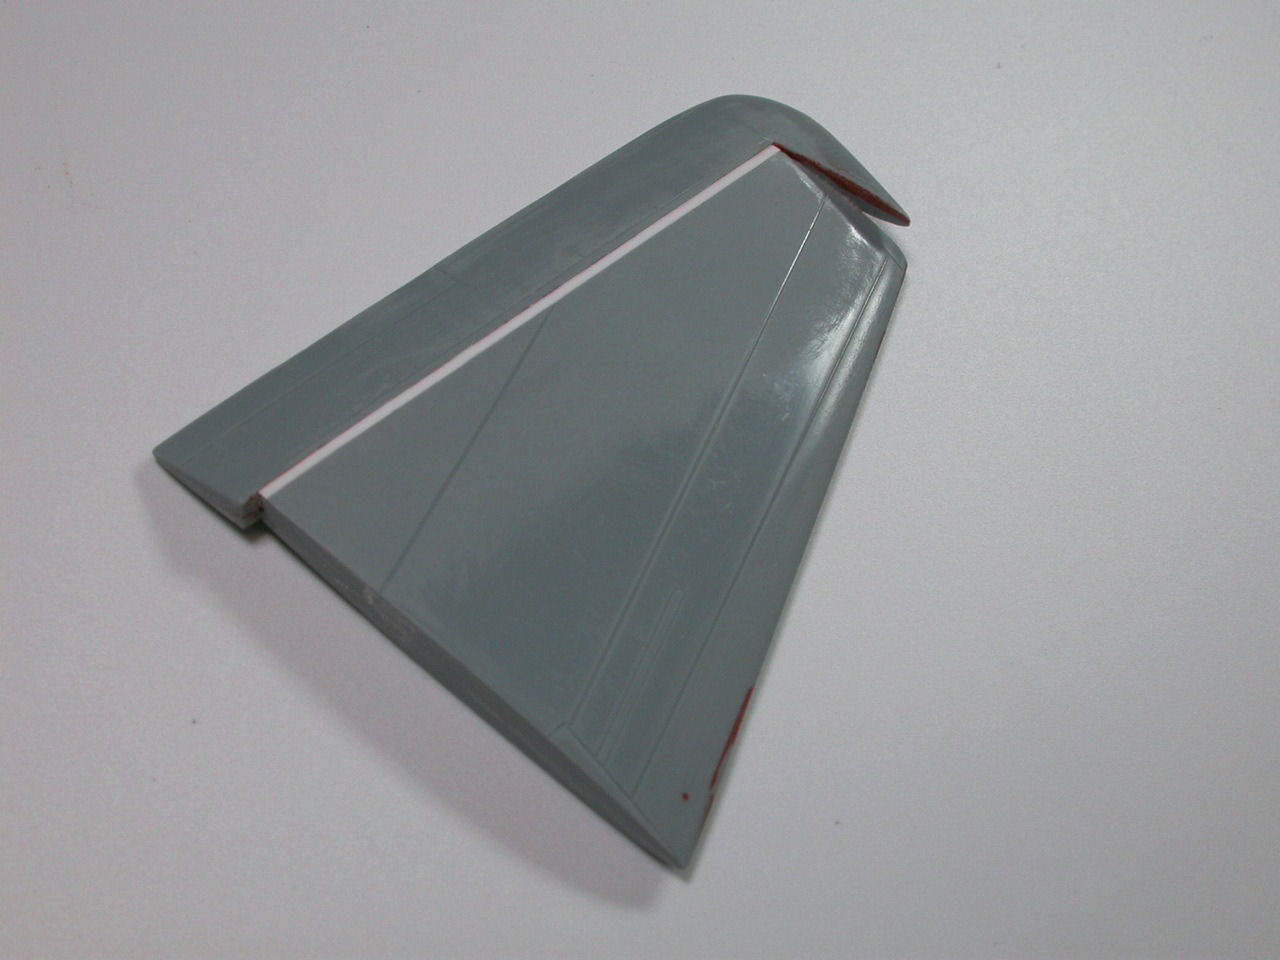
While the wing was setting I started work on cutting off the elevators and the rudder. I was really thinking that having the flaps down and the flying surfaces positioned differently would add visual appeal to the model. The elevators were cut off and styrene strip was added to close the gap left at the joint. After the wings had set and the flying surfaces were prepared and positioned in place I cleaned up the model and prepped it for one more coat of thin primer.
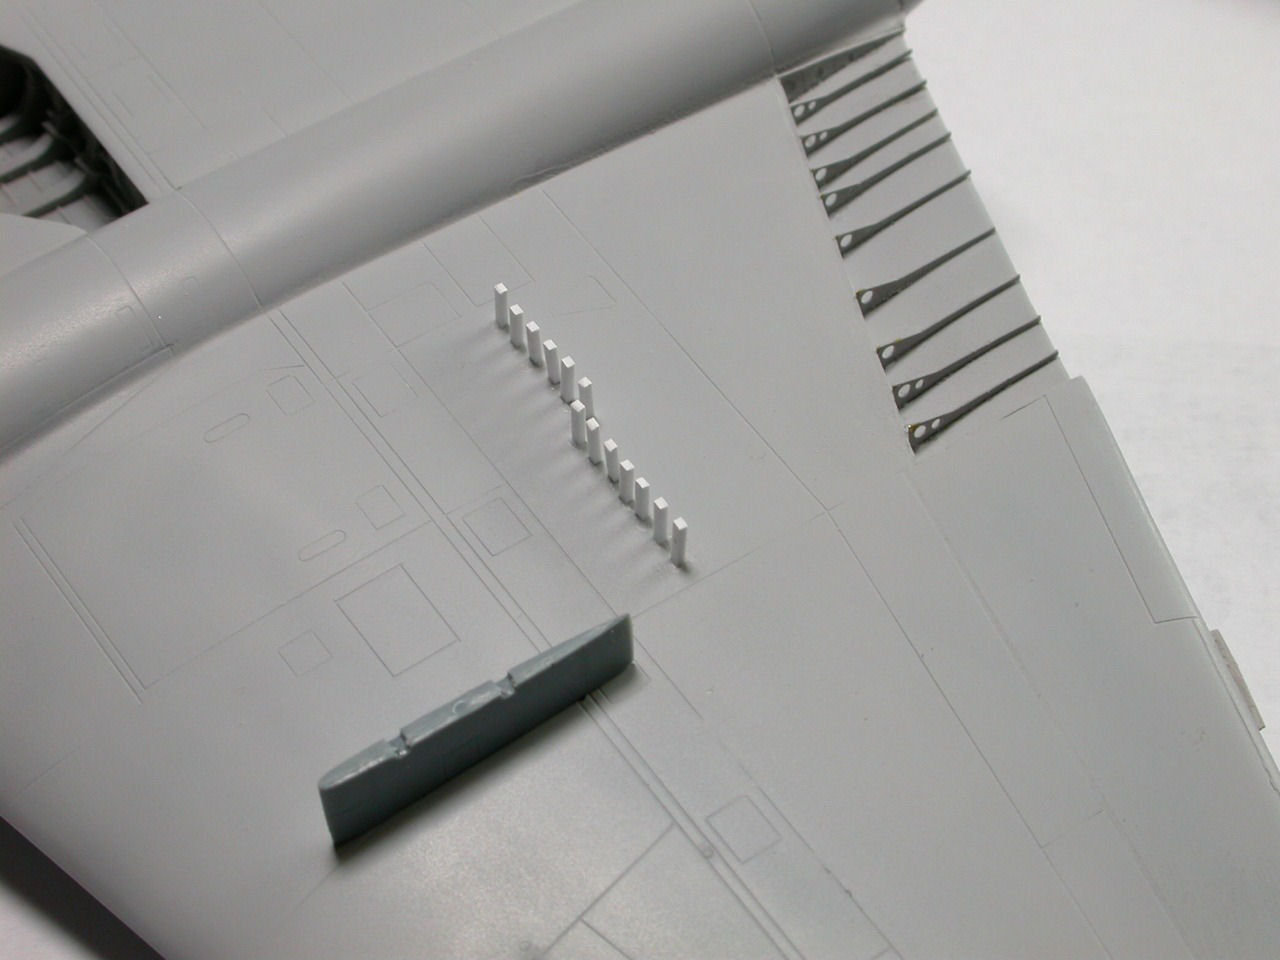
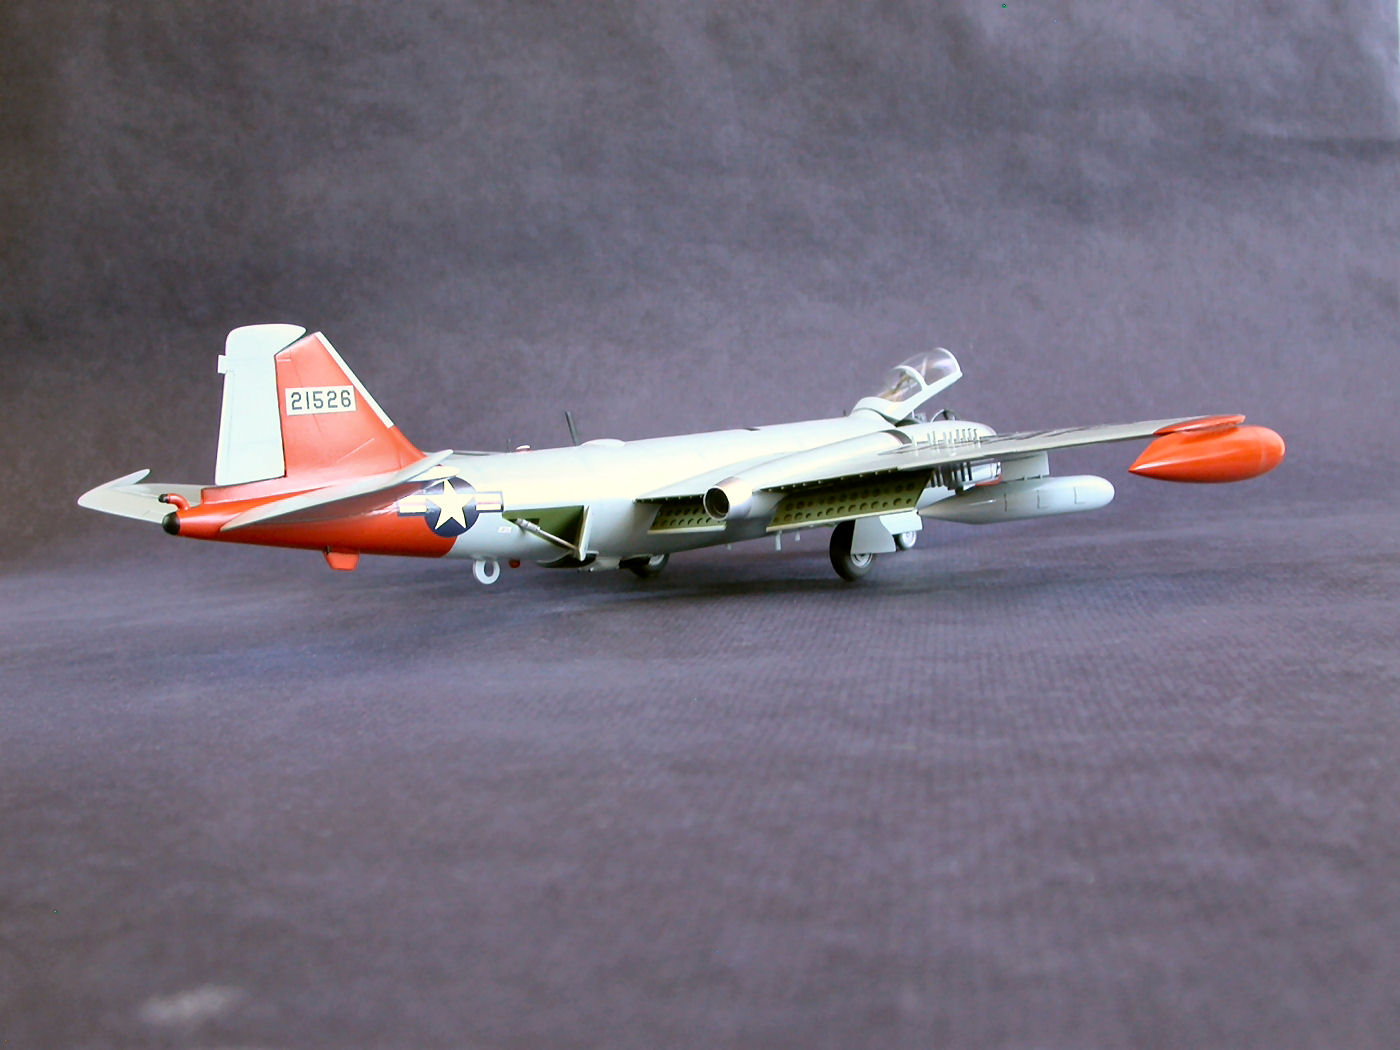
Once the primer was dry and lightly sanded I concentrated on cutting the brake fingers out of rectangular cross section styrene stock and went on the lengthy tack of gluing them all in place. Now the real life brake fingers do not look like that exactly since they have a little "hat" on top of the so they can disappear when they retract into the wing. I am not sure that I will replicate that yet in the end product.

The next task was to attach all the resin pieces that make the EB-57B what it is. Many ECM bumps and antennas all over the fuselage! I held off in attaching the little blade aerials until later since they will come unglued and disappear as the model gets painted and handled.

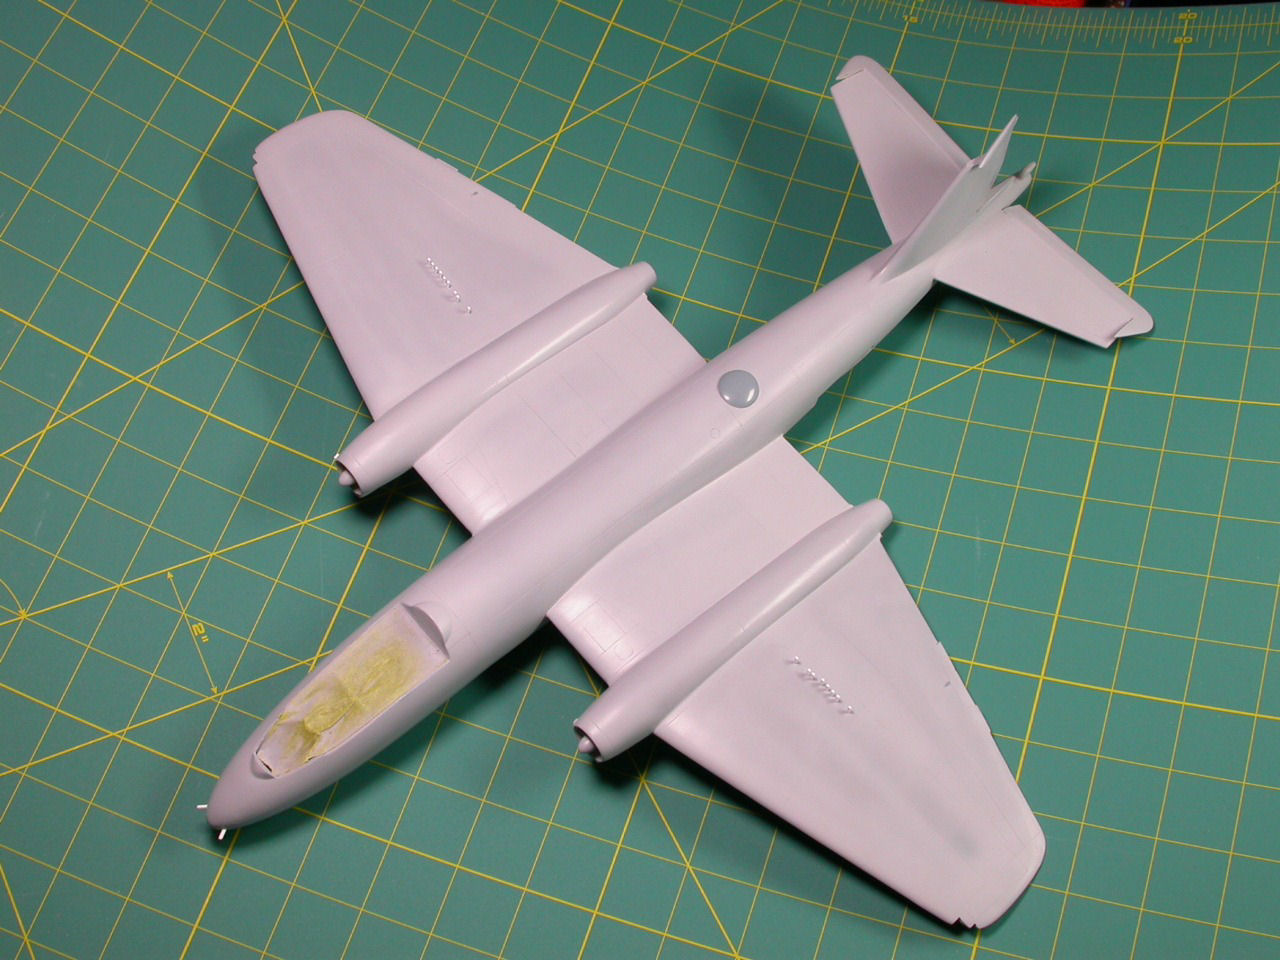
Another thing I had to work on was the resin pods that go under the wing of the EB variants. The resin was a little rough due to the mold design. The part was sanded and puttied and in the end it looked pretty decent. The wingtip tanks were easy to complete but something bothers me about their shape. I have seen the resin replacements but I am not happy there either. I stuck with the kit parts and I will study the problem later as I have two more Canberras to build down the road.
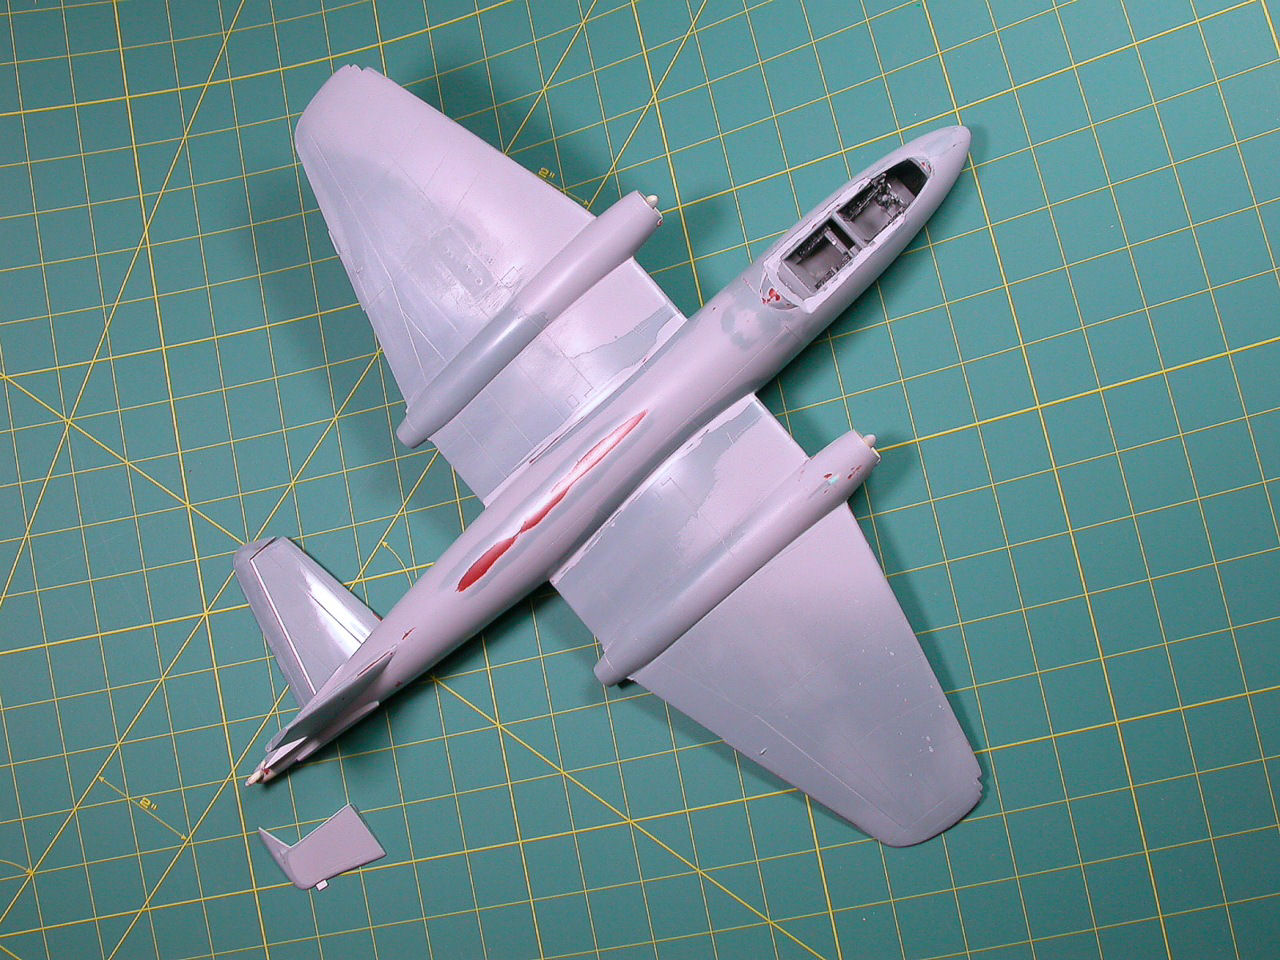
After all was done I felt that I really wanted to end 2007 with having done most of the painting!
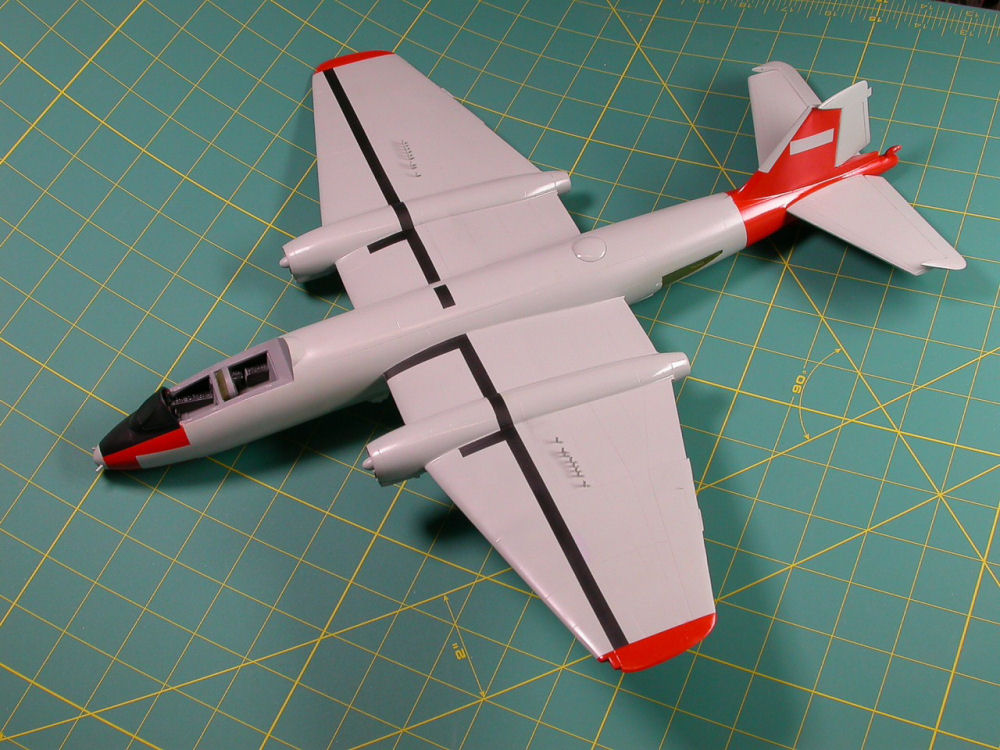
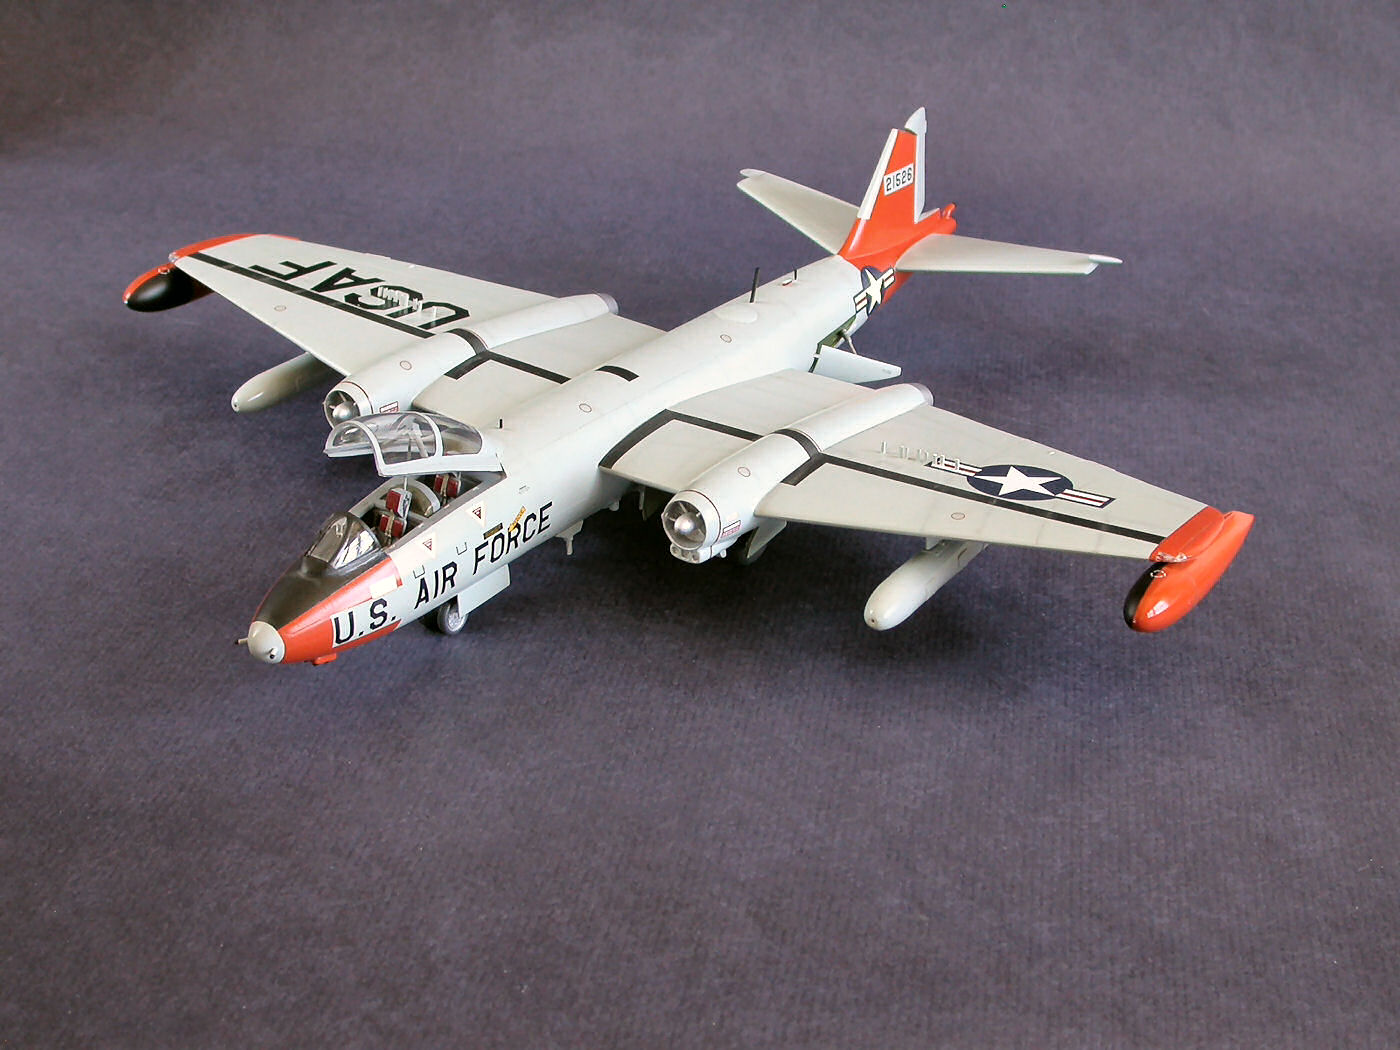
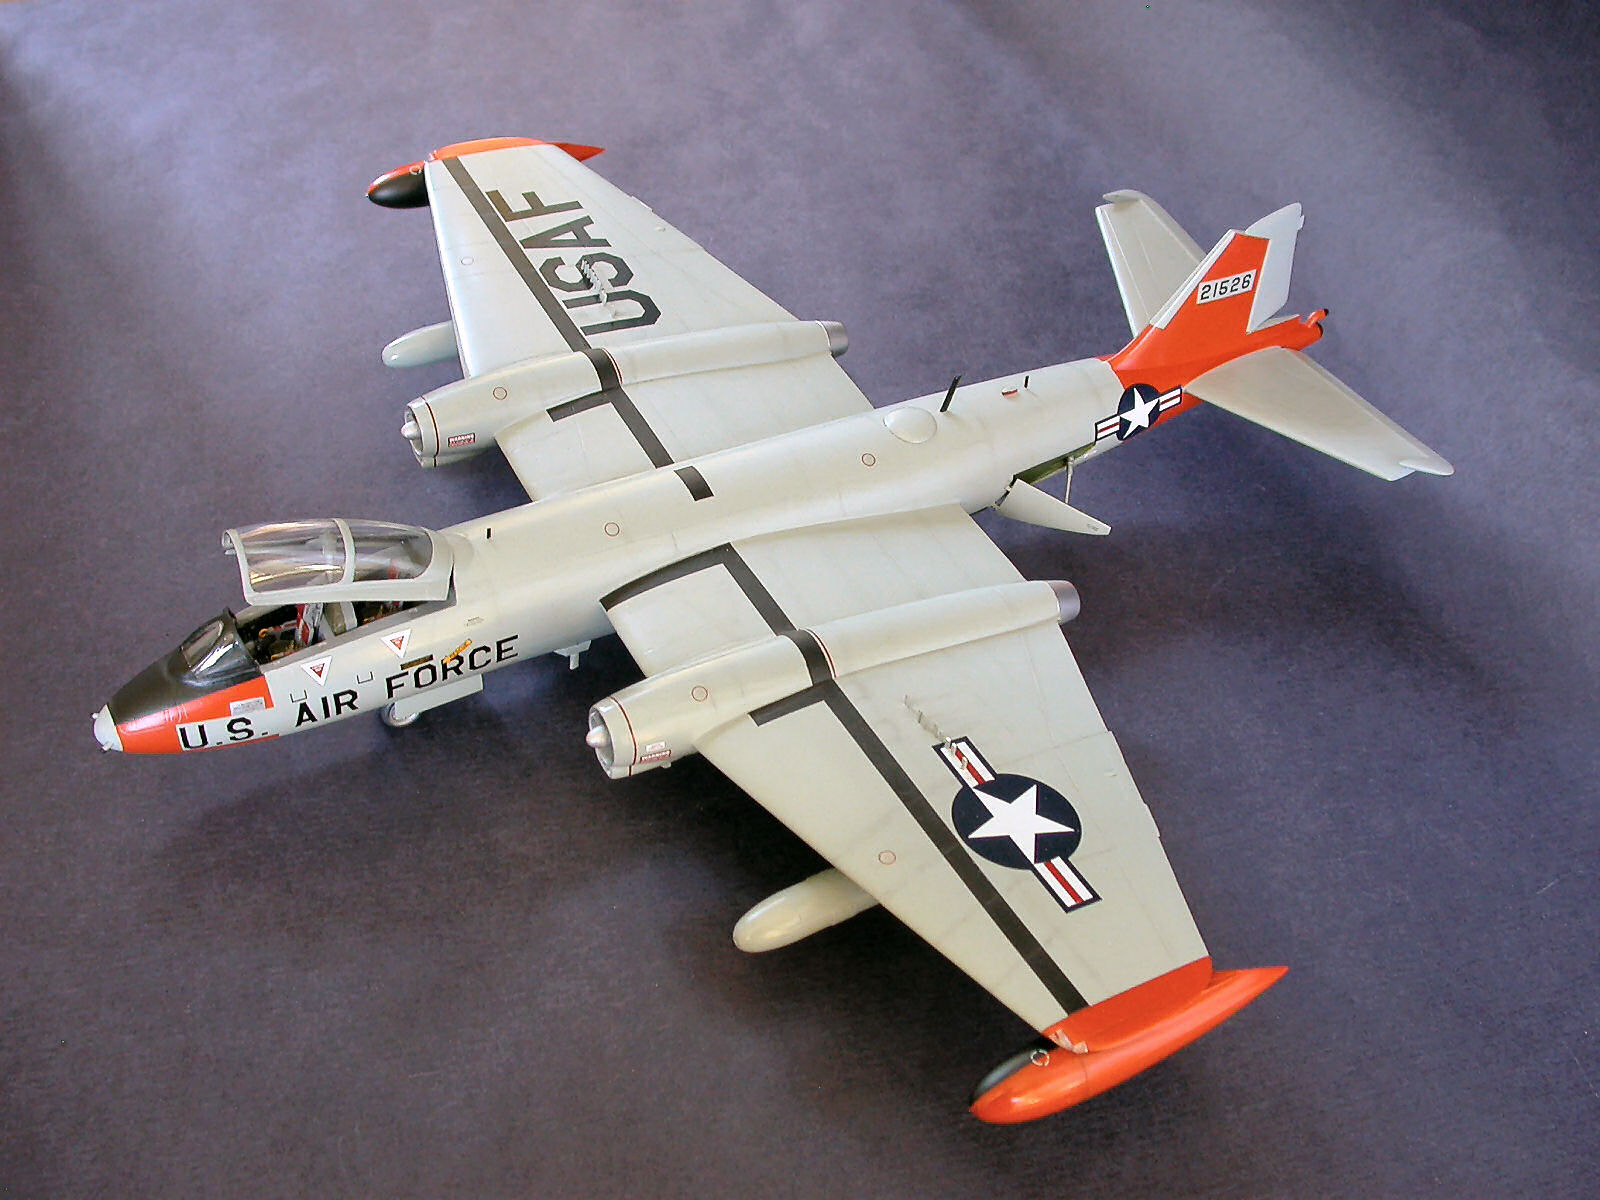
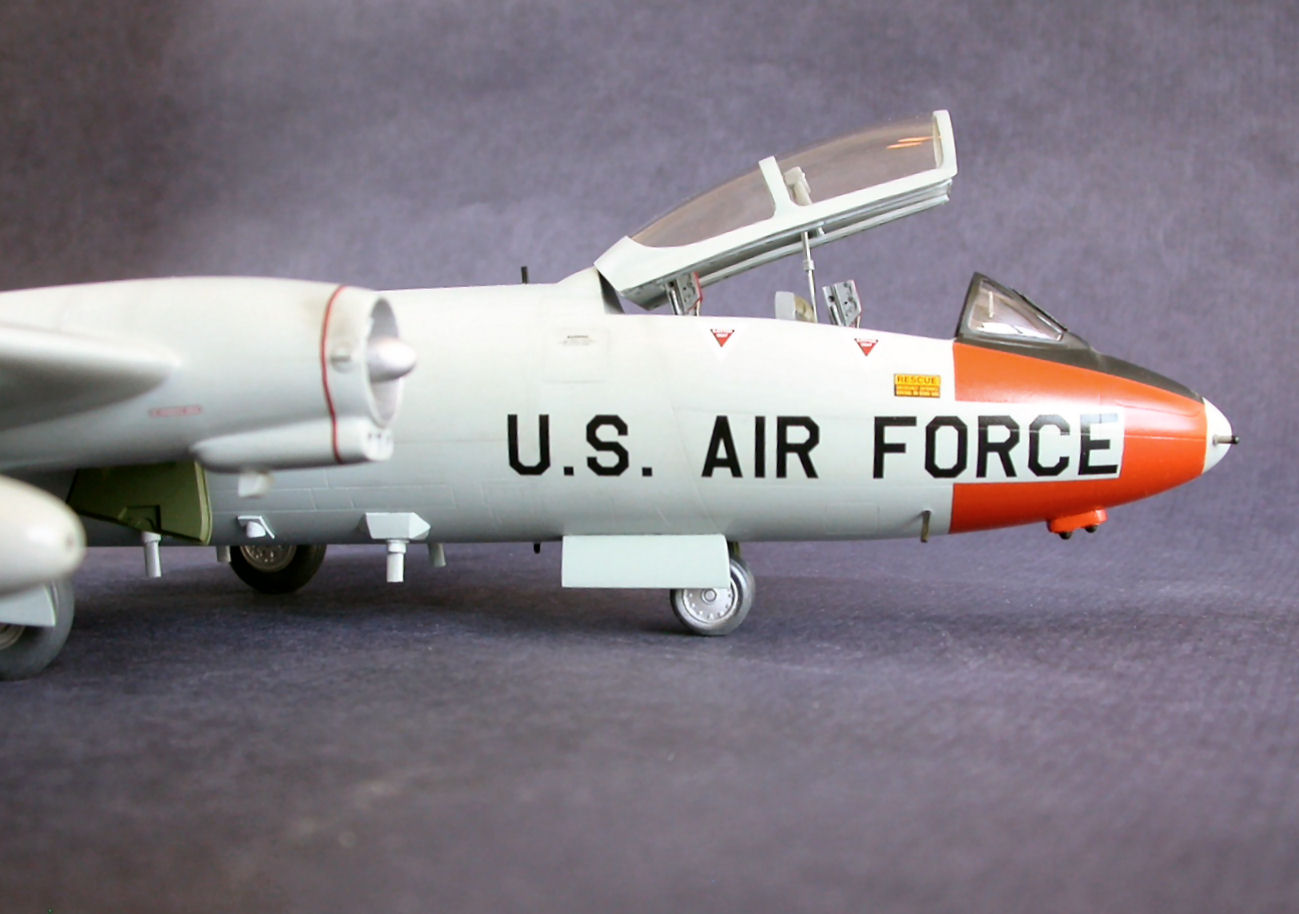
I used Testors Aircraft Gray FS16473 for the airframe and International Orange FS12197 for the wing tips, nose and fuel tanks.
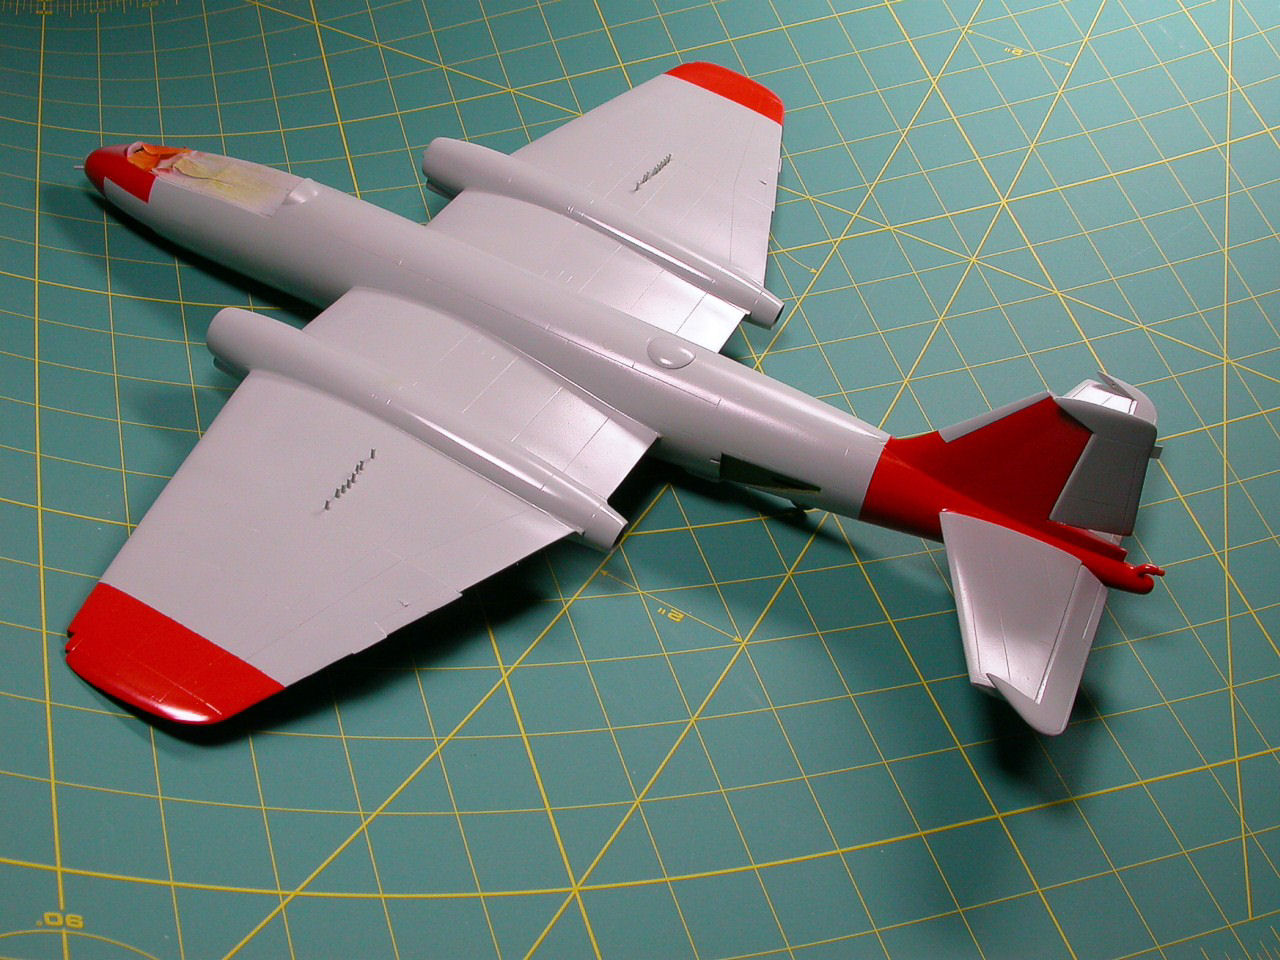
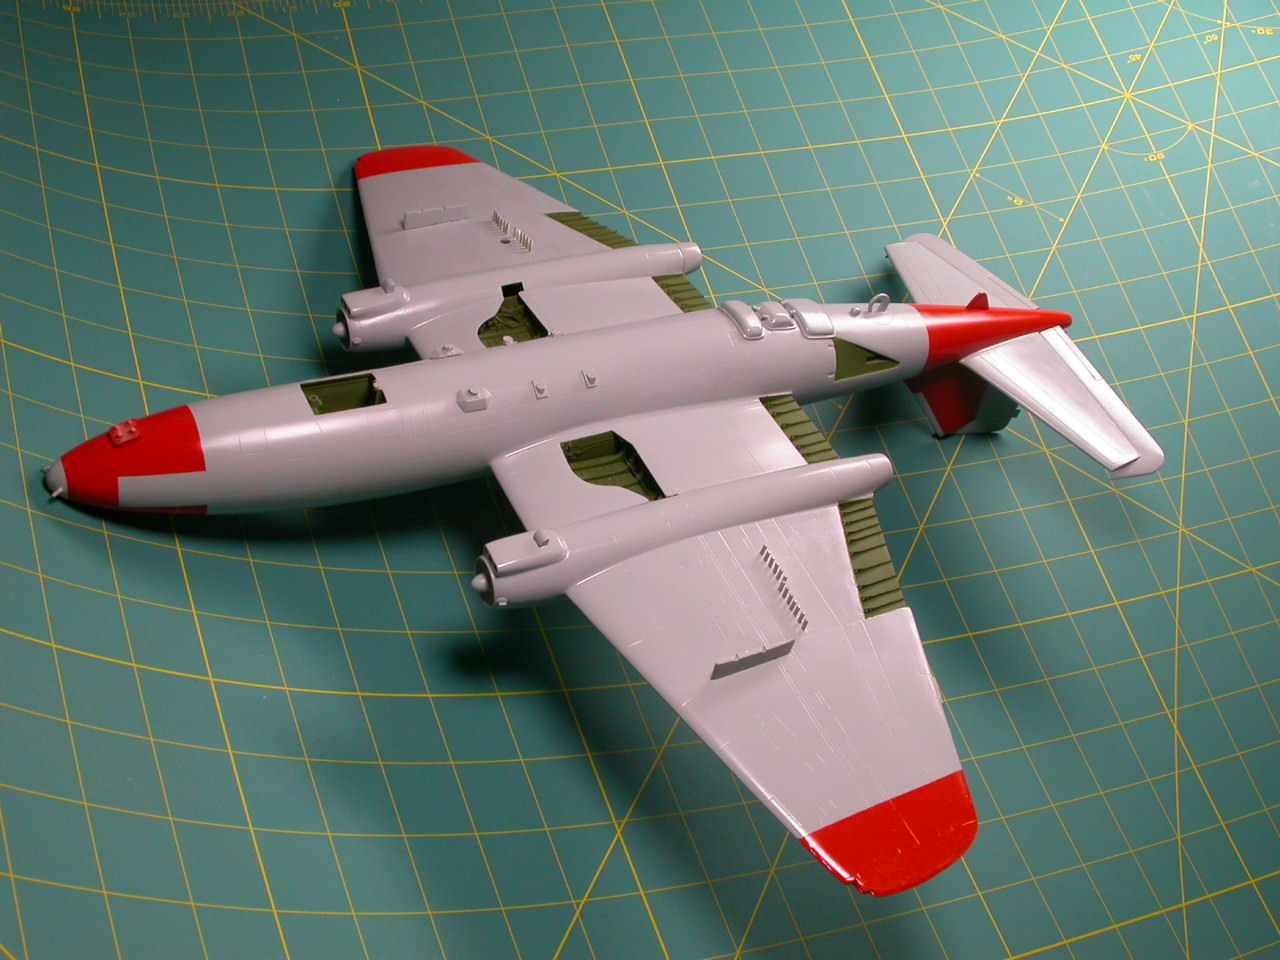
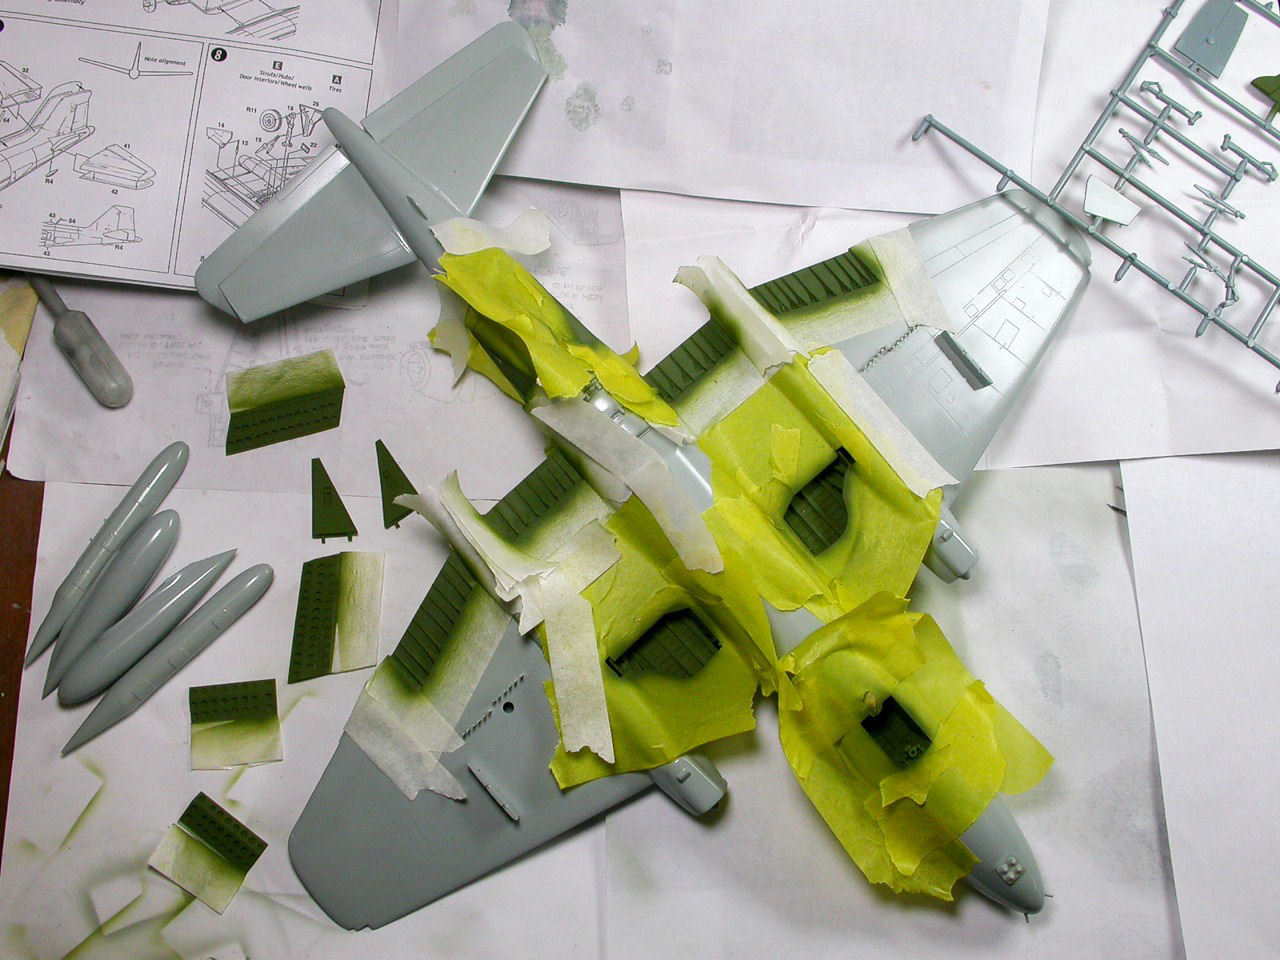
Once all was dry and the masking was removed I also sprayed a shade of interior green for the wheel wells, flaps and speed brakes. The gray Canberras look to have these areas in green and the natural metal ones look to have them in a zinc chromate yellow that is more yellow than green.
Well, the year is over and a new one begun but family activities kept me from finishing the painting on this bird before the end of 2007!
Next steps will see me applying the anti-glare black on the nose and the tanks. Also all the little antennas and landing gear will be attached next before we go on to decals and model weathering completion.
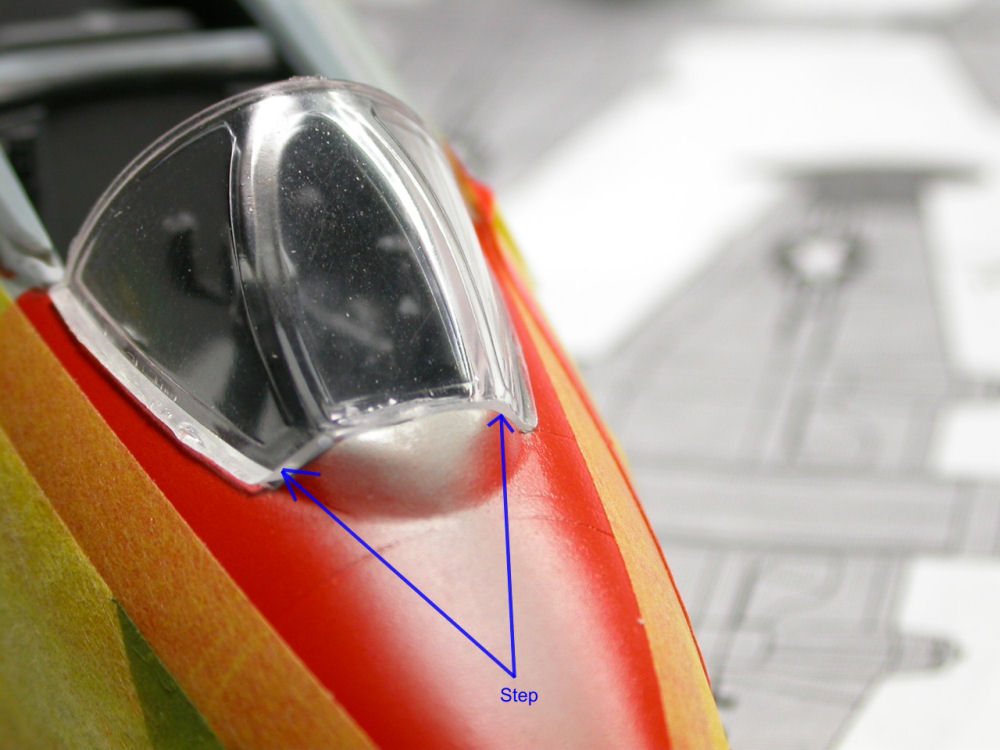
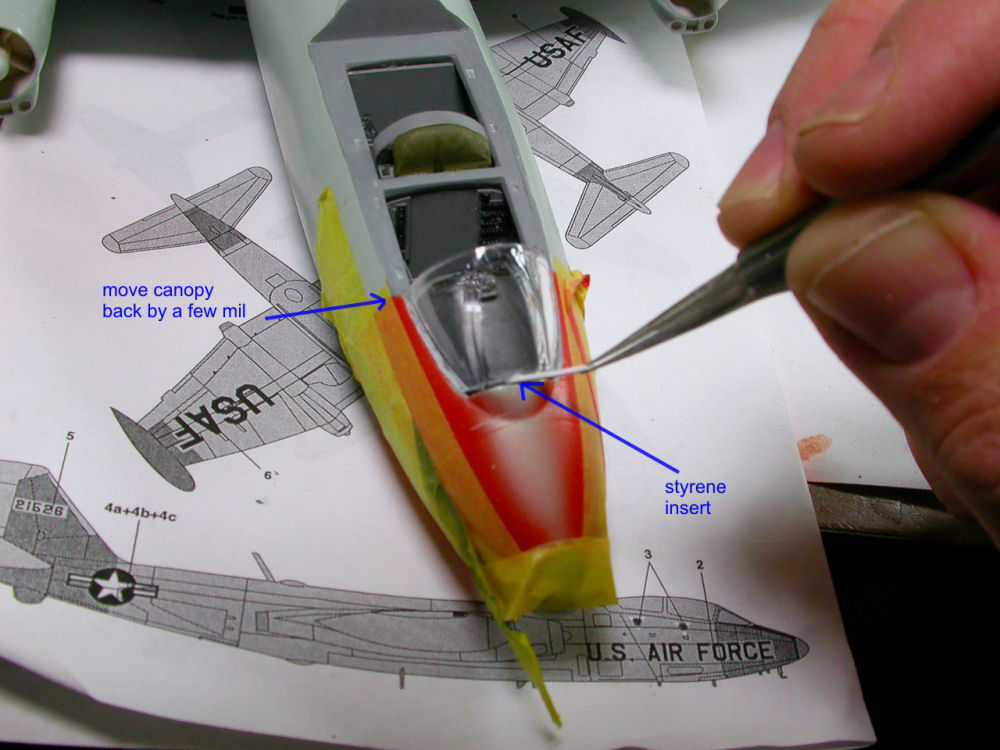
As I was masking the model and planning the black anti-glare application, I decided that it would be a good time to integrate the canopy windshield and paint it gray inside and the same black on the outside and achieve a more integrated look of the clear plastic to the fuselage. I am glad I did at that point and I wish I would have thought of that earlier before much painting had gone on. As you can see, if you were to attach the clear plastic where the plastic canopy fairing would have you to then you would end up with a sizable step on each side of the clear plastic.
At that point in the build I decided to move the canopy back by a mil or two. I inserted a thin strip of styrene that I had pre-cut to shape. I glued the Futured canopy to the fuselage with cyanoacrylate glue and then glued the filler strip in with a little styrene glue. By doing that I managed to eliminate the step and also noticed that if I were to put down the main canopy things would fit well. Maybe the canopy is supposed to be a bit further back and front fuselage canopy fairing is not big enough. In either case, the wise modeler might want to do a test fit early in the game and decide which way they would like to go and not wait like me to find out at the last minute!
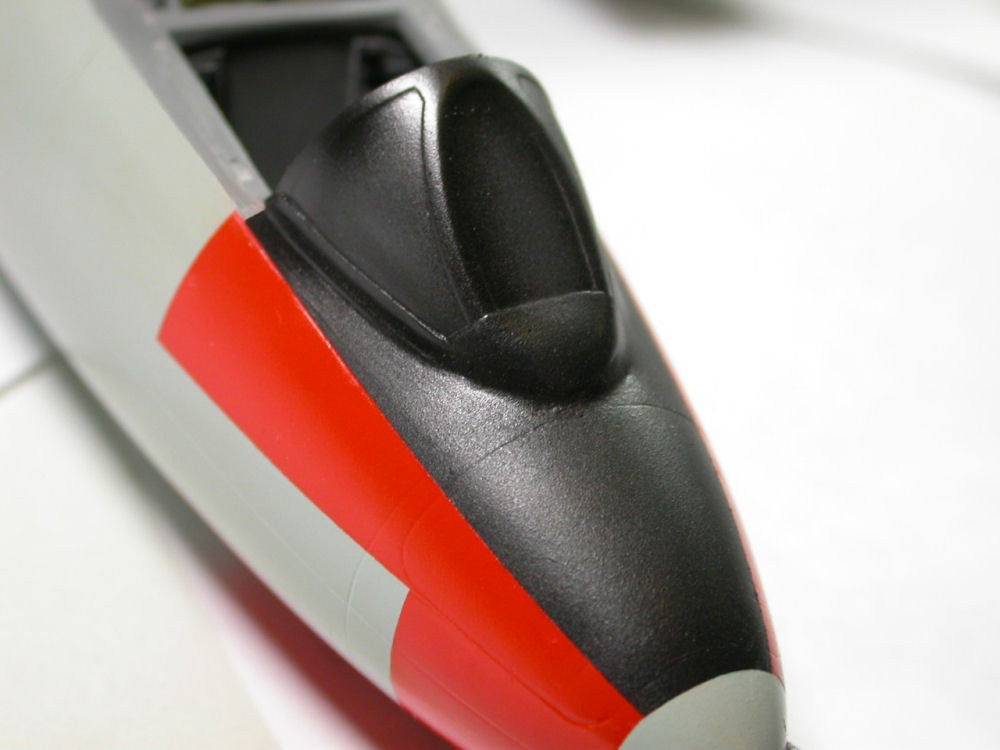
I also used a little 3M putty to smooth things out and once all was dry and sanded, I remasked the fuselage and the canopy windshield and airbrushed the black paint.
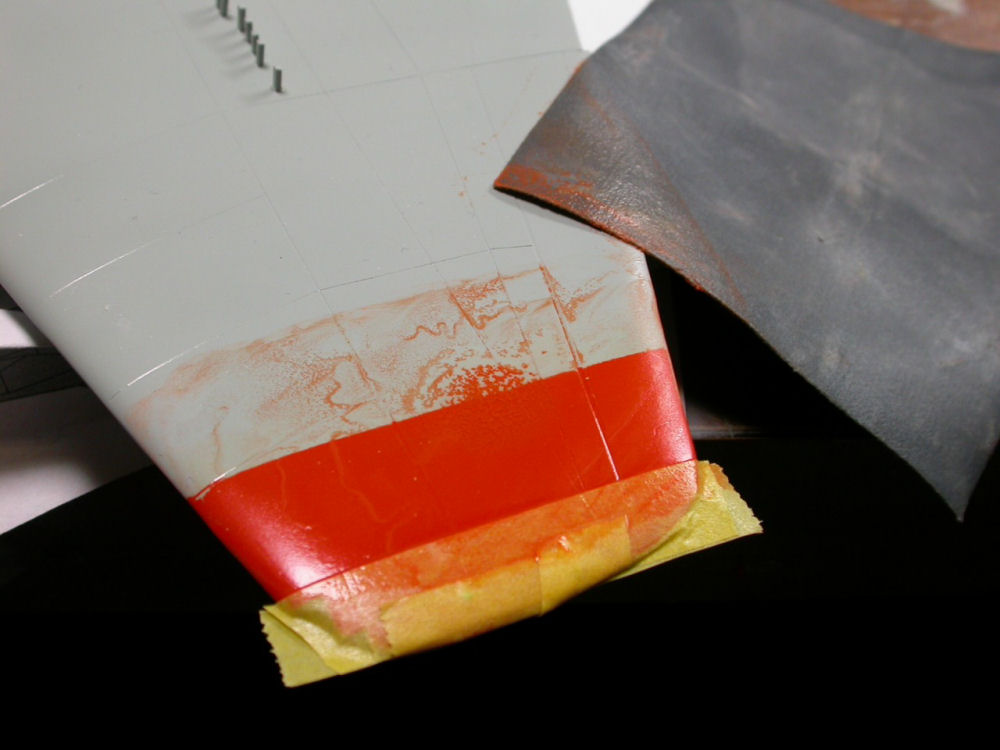
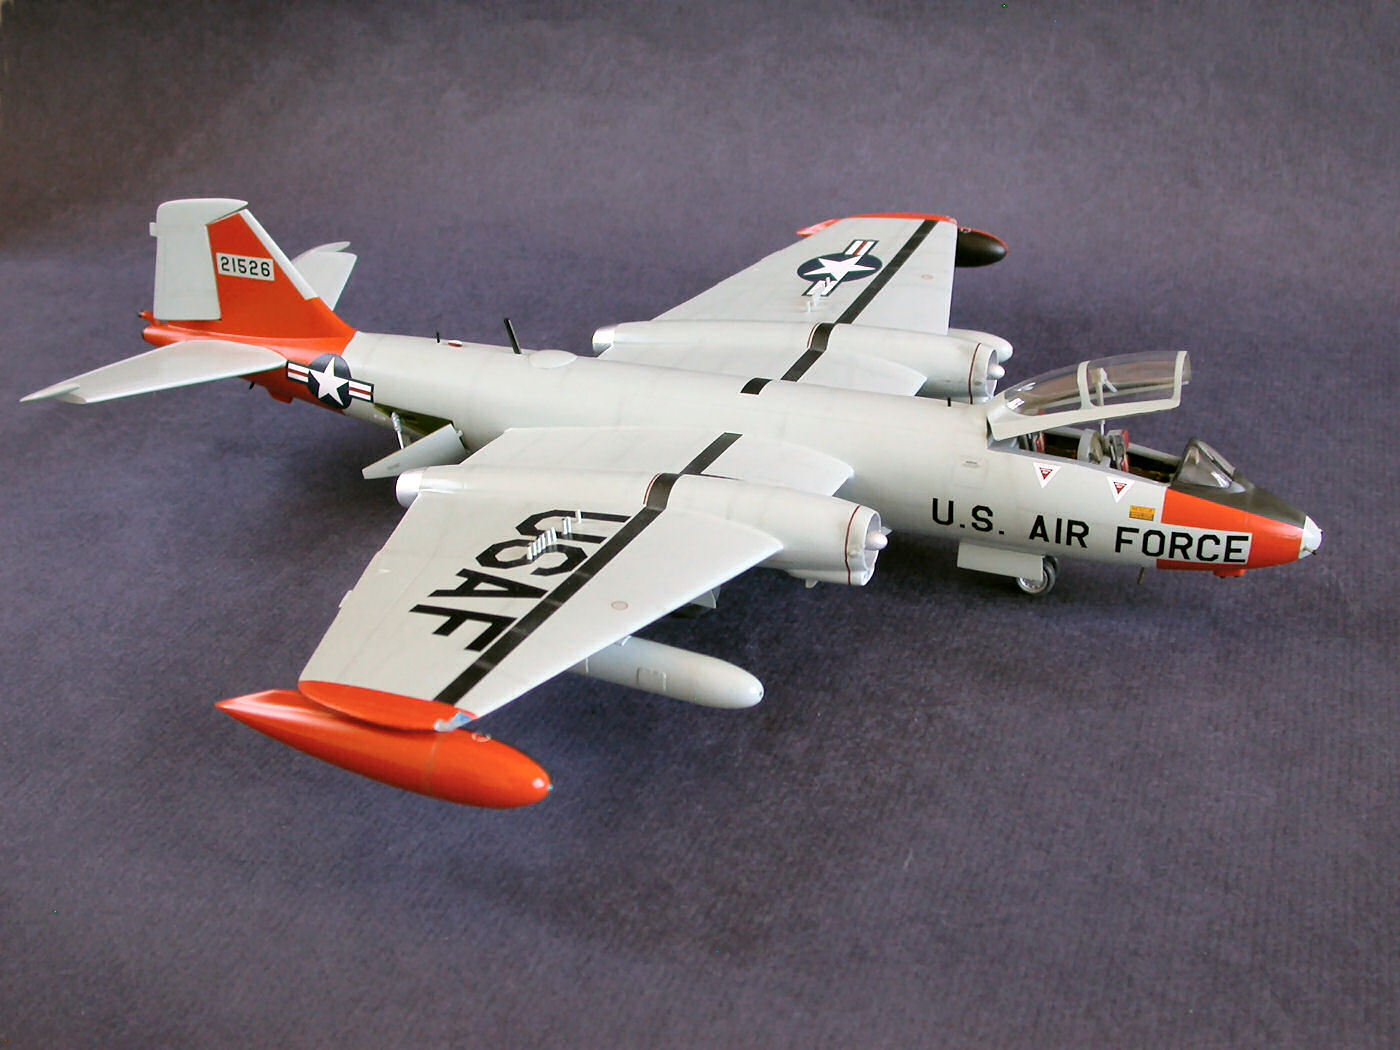
Things were progressing along slowly until I realized that the painting instructions for the international orange on the wings are not accurate for the decals provided for this specific aircraft. The kit instructions are in accordance to the tech order package but many EB-57s had a smaller orange area painted on the wingtips. So the fine polishing cloth came out and the painted area was smoothed out and was prepped to me masked again and repainted to match the photos. As time was going by I was getting the feeling that I was not as well prepared with enough photos of the specific aircraft. Another problem was that many EB-57s of the same era had different interpretations of the tech orders and had the orange and the walkways done differently.
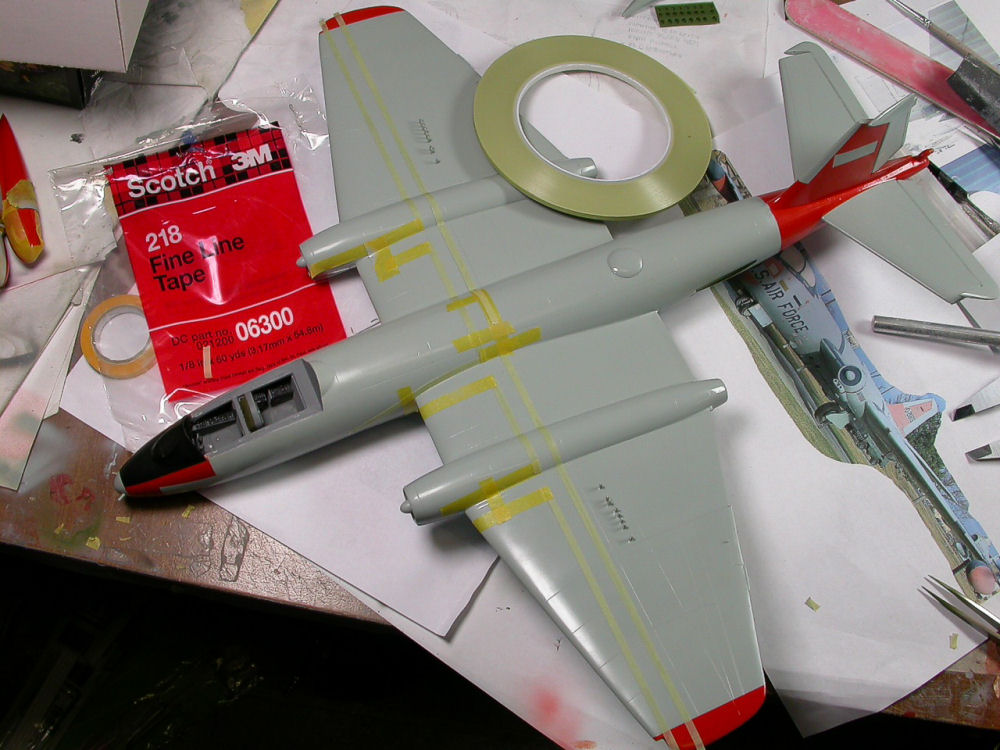
So out came the 3M masking stripe tape and with the help of the Boyd's tech orders the work continued in earnest.
The 3M masking tape is designed for automotive use and very flexible. Most importantly it comes at a very reasonable price for the 60 yards that you get!
One other thing to mask and paint was the area were the tail number goes. This area is specified to fit 12" numbers so it is very defined but I had to go with what the decal sizes were and mask accordingly.
All the masking tape was removed in the end to reveal the walkways as they applied to this specific EB-57B.
Things appeared to be coming along well and I was getting ready to move to the landing gear painting and assembly. Once the landing gear would be completed, I would be able to attach all the tinny antennas that would break other wise as the model rests on its belly.
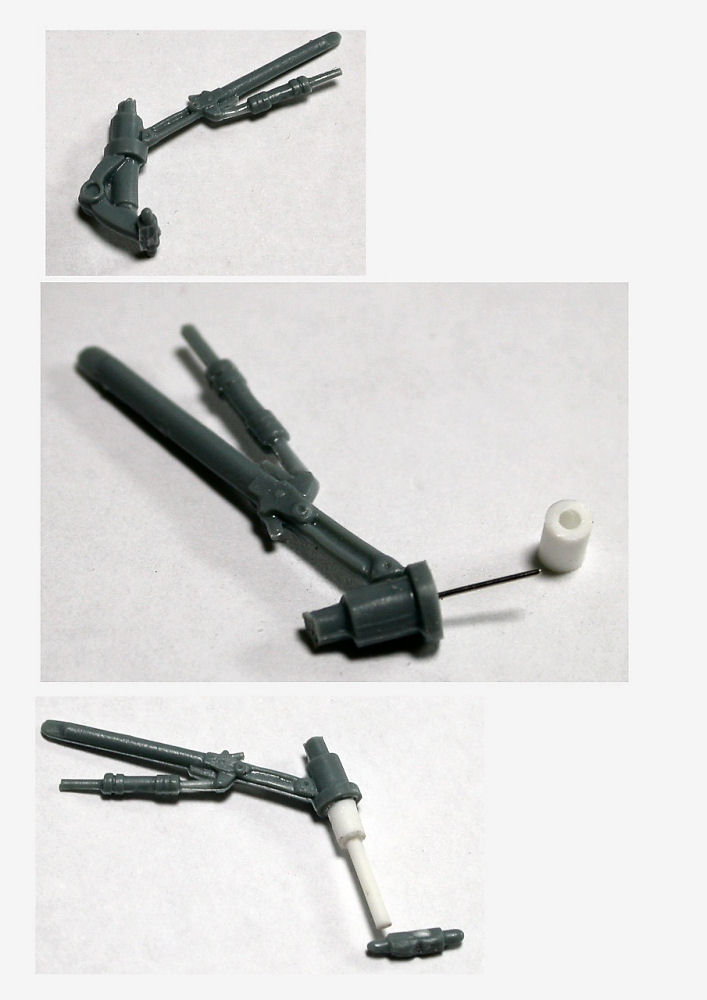
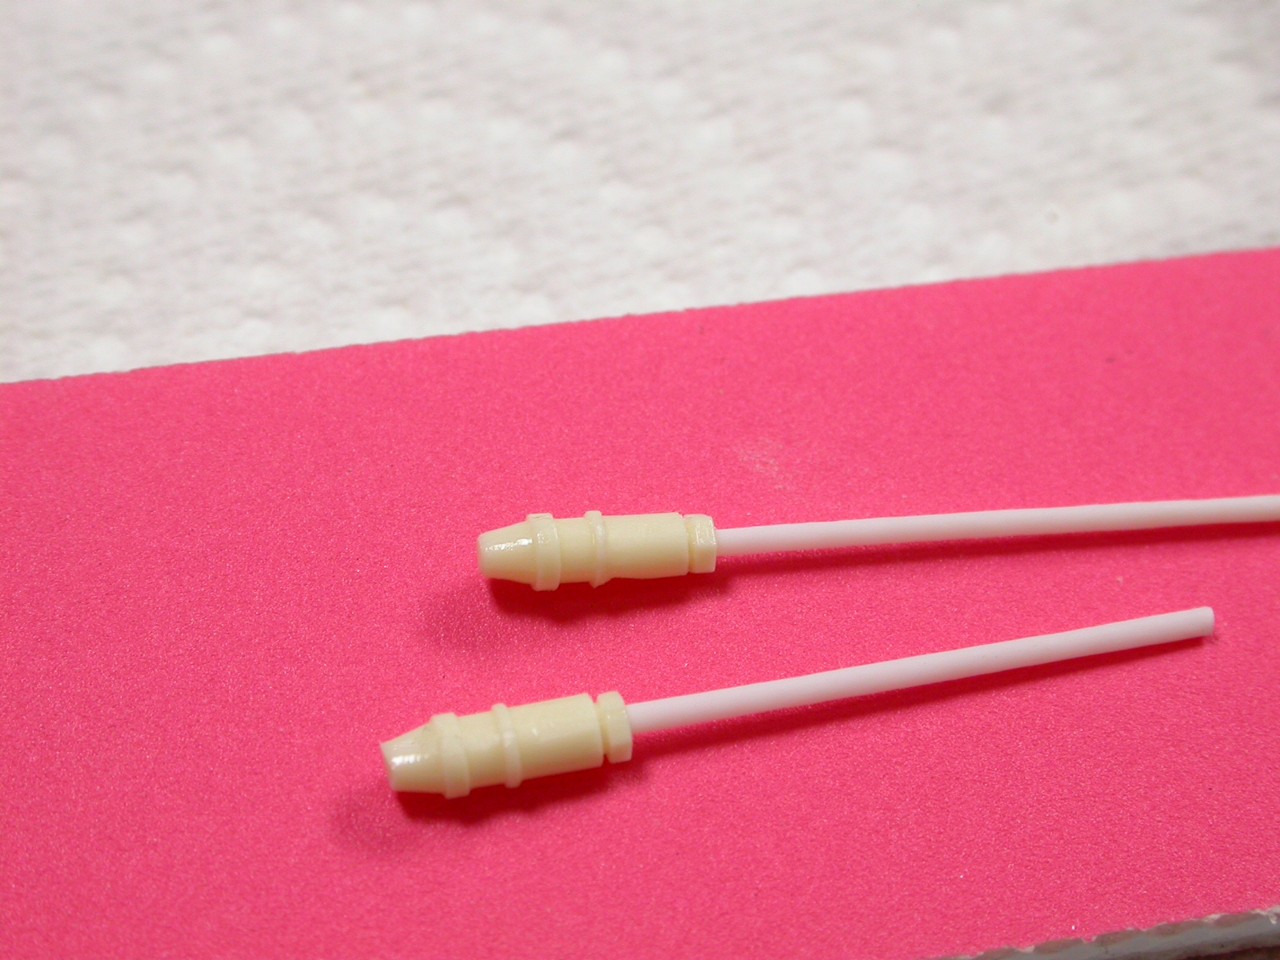
This is when I realized that the front landing gear provided in the kit is the same gear as in the previously designed British Canberras. The B-57 had a different front landing gear. I decided to scratch build the gear. I cut off all the gear portion that did not match the US version. Then I inserted a metal pin for strength and a piece of round styrene tube around it. Lastly I added a long piece of styrene rod that will be trimmed to size once I decide on the stance of the model. The B-57 sat low on its lose gear and I will need to trim the styrene nose gear rod to length taking into account the diameter of the wheel assembly.
Next, I would like to finish with the landing gear, attach antennas, and dress up the flaps with their actuating rods.
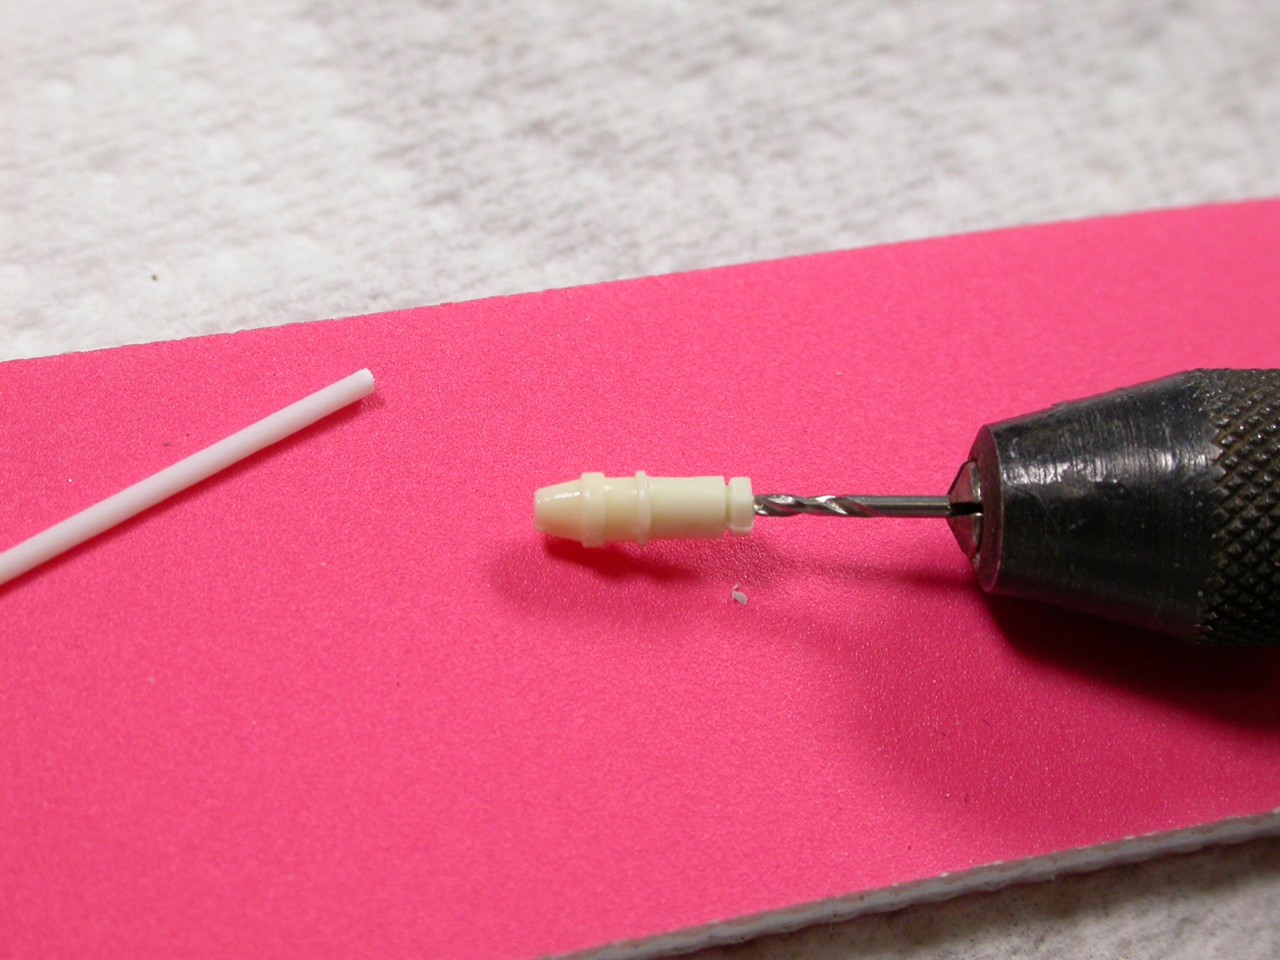
As always what I think is going to be a quick completion ends up holding back the project. For one thing there was no actuating rod for the canopy lift mechanism included in my kit. This item was scratch built using evergreen styrene rod pieces of different diameters that were inserted in a small section of hollow metal tube cut to size. The styrene rod pieces were not trimmed until it was time to attach the canopy. This way I could achieve the proper sit on the canopy and have it support itself between the rod and the fuselage.
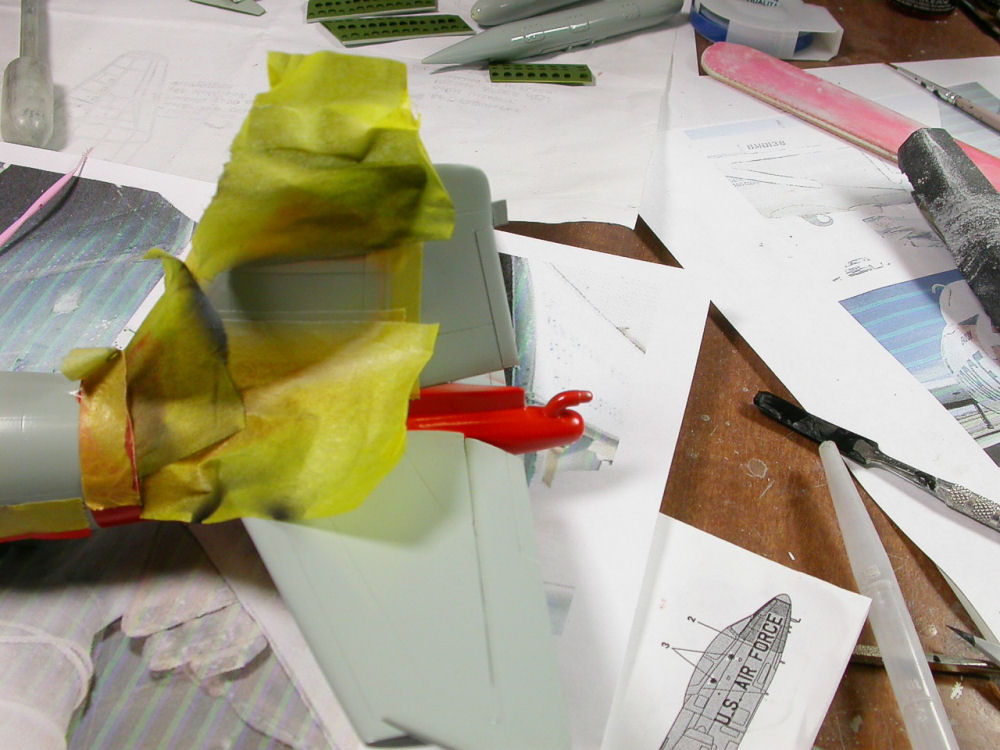
The resin actuating mechanisms for the speed brakes were drilled with a micro drill and styrene was inserted to simulate the hydraulic rod. The styrene rod was not trimmed until it was time to glue in the speed brakes.

The main landing gear went on next and when the glue was dry I rested the model on it and went on with trimming the front landing gear oleo strut until I would get the model to sit to my liking. The Canberra can be seen in various pictures with its front landing gear totally compressed until the front wheels practically disappear inside the wheel well. It can also be seen with the fuselage as almost parallel to the ground and in stages in between.
After assembly was completed it was time to do the decals. The decals went down really well and gave me no problems at all. The only area that needed a lot of care and careful application was the area where the USAF and the national insignia have the speed fingers sticking out through them. I puzzled over it and thought I would be able to perforate the decal and have the little pieces of plastic come through but it just would no work. I decided to carefully snap off the appropriate speed fingers and reattach them after the decals were dry.
The tops of the speed fingers were touched up with either black or white paint to represent the black of the USAF lettering or the white of the national insignia as in real life the insignia was sprayed on with the speed brakes retracted.

Very light weathering was applied since this was a well taken care of bird and because more often than not I like my jets clean!
I enjoyed this project as it brings my Canberra collection closer to completion. So far I have four Canberras completed and I hope to do four more but boy do they take up space in my display case!
Mike West's EB-57 conversion is recommended even more now that he has added more parts to it, remastered a few more and is including much better instructions as well.