


DML 1/72 M1A2 Abrams Build Review
By Loren A. Pike
| Date of Review | August 2005 | Manufacturer | DML |
|---|---|---|---|
| Subject | M1A2 Abrams | Scale | 1/72 |
| Kit Number | 7216 | Primary Media | Styrene |
| Pros | Accurate shape, nice detail in this scale | Cons | |
| Skill Level | Basic | MSRP (USD) | $9.95 |
Background
The M-1 Abrams is the end result of a long and stormy period of tank development during which the U.S. Army tried to find a replacement for the M60 series of main battle tanks. The M60 was the Army’s main battle tank throughout the 1960’s and 1970’s and although continually updated and improved, a replacement was long overdue.
In between the M-60 and the M-1, the MBT-70 attempted to bridge the technical gap between American and Soviet tank designs and give the US a decided superiority. The MBT-70 was a joint project of the U.S. Army and German Government. The MBT-70 used a number of experimental and untried systems which resulted in excessive cost overruns. Faced with these increasing costs, Congress cancelled the program during 1971.
The XM-1 program was initiated with Chrysler offering a turbine powered vehicle and GM producing a traditional diesel powered vehicle. The Department of Defense selected the turbine powered Chrysler vehicle over the Army’s objection. Common components with the German Leopard were developed – such as armament, power train, and tracks. Eventually, the only common component was the gun as the Germans did not like the turbine/automatic transmission of the XM-1 and the U.S. Army did not like the heavy tracks of the Leopard.
On 2/28/80, the first production M-1 was turned over to the Army at the Lima Tank Plant in Ohio. During the presentation ceremony, the tank was officially christened the “Abrams” in honor of General Creighton Abrams, by his widow. General Abrams had been a WWII tank commander and the commander of U.S. Forces in Viet Nam.
The Abrams has seen a number of engagements. Bosnia, Operation Desert Storm, Operation Iraqi Freedom, and Afghanistan to name a few. It is the “big stick” on the battle field today – and in the foreseeable future.
The Kit
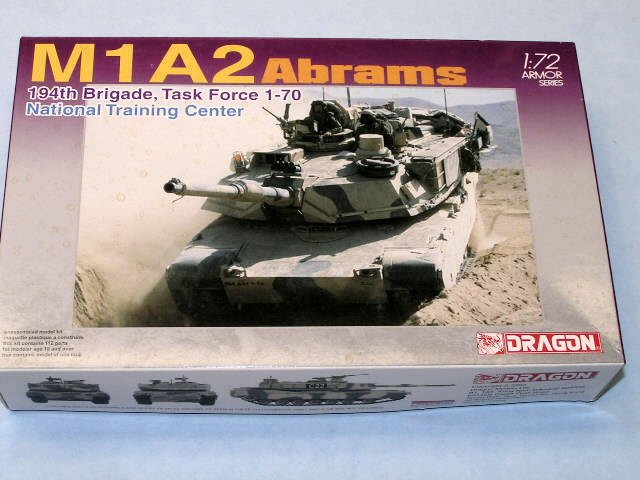
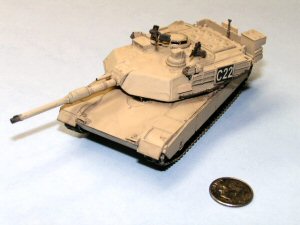
1:72nd M-1A2 Abrams of the 194 th Brigade, Task Force 1-70, National Training Center by Dragon. The kit was enveloped in several sealed plastic bags and located in a very sturdy top and bottom section box. These boxes are MUCH EASIER to use when you are constructing a kit and I wish ALL manufacturers would use them for their kits.
Dragon uses a colored exploded view for their directions which are very easy to follow. On the front page there is a parts diagram with the unused parts outlined in a light blue. I usually take off all the “extra” parts and put them in a separate zip-lock bag for future projects. NEVER throw out these extra parts as you can bet, down the road you will need a __________(fill in the blank)! I then proceed to the assembly sequence.
The main weak area of the tank is in the turret stowage basket area. The real vehicle has “bars and mesh” while the kit represents this as a solid area. This could be re-worked by the ambitious. I will simply cover it all up with the tanker’s “kit” and other stowage items so it won’t even be seen!
Assembly
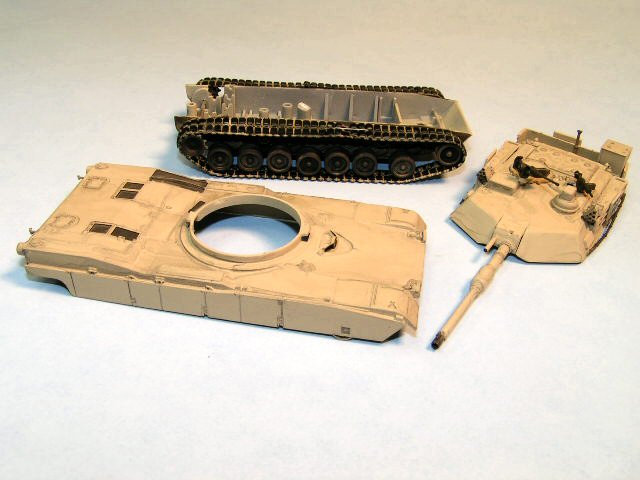
Step 1 is the basic running gear. Only surprise is that the solid metal axel for the rear drive sprocket. This is a hold-over from the die-cast kits that Dragon produces and also evidenced by the locating towers in the hull for screws which are not present in the kit. Step 2 is simply to open a couple of holes in the turret. Step 3 is to add a few items to the top of the chassis area. Steps 4, 5 & 6 have you starting and completing the turret. Step 7 is the machine guns on top of the turret and assembling the turret, top of the chassis and the bottom of the chassis. I kept theses three “sub-assemblies apart and went to the spray booth. Before Step 8, I assemble these three painted sub-assemblies and add the tracks which I’ve given a “wash” as described in the painting section below.
Painting
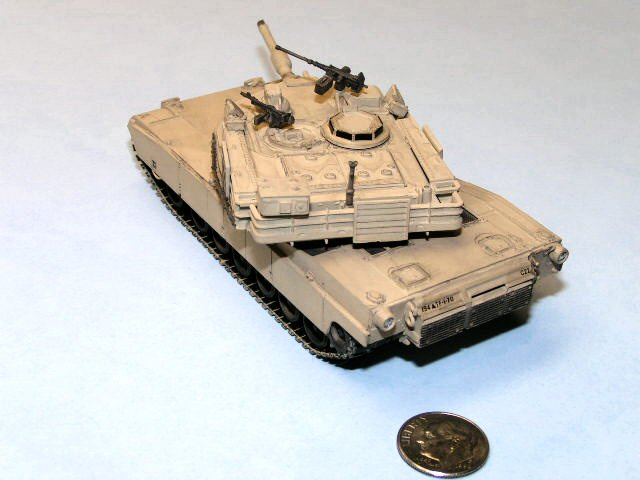
My practice is to nearly complete major sub-assemblies and then spray them the “base color”. In this case, the base color was Pactra M-28 (Israeli Yellow) FS 33238. I’m not sure IF I will spray on the “stripes” as call out in the directions, but that is an option others may want to do.
Detail painting of the vision blocks, the head lights, the tail lights, and the various tools and “add-ons” was completed and used what is called out in the directions. My standard practice for “amber” or “red” lamps is to first paint a silver (Testor’s in the small bottle) and then overcoat them with an acrylic amber or red. This makes the lamps “glow” a bit like a real turn signal or stop lamp.
The tracks were not given as much “rust” as I normally use as this tank is used in the desert. A wash of dirty brown/black/metallic was “flowed on” with brush with me trying to NOT touch the raised pad detail of the tread. The wheels were also “dirtied up” with some of this same mixture, but a very light coat.
I use a lot of “looks right to me” colors, so the COLOR POLICE would have a field day with my kits as I could not cite exact FS-type numbers!!!
Decals
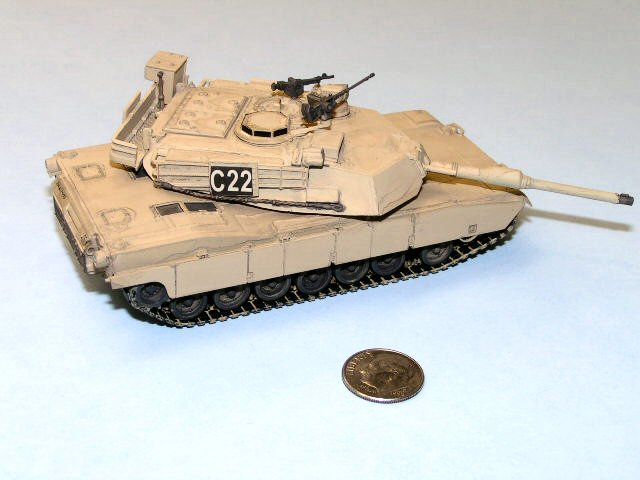
As per normal on armor, only a very limited number of decals for this kit. I usually “pool” some Future™, place the softened decal in that pool, then overcoat it with more Future™. There is very little, if any “silvering” on the decals. I then come back and overcoat the entire model (except the vision blocks) with a dull-coat that I have on hand. I’ve been using some Floquil, but others would work as well I’m sure.
Conclusions
This was a very enjoyable build. Since usually I “multi-task” when it comes to building kits and I have several that I’m actively working on, I can’t tell you how long it took me. I would say that except for the paint drying, this kit is easily a “week-ender” project. Try one of these small kits. I sure you’ll be “hooked” on them like I am!
References:
- Abrams: A History of the American Main Battle Tank by R. P. Hunnicutt
- M-1 Abrams in Action by Squadron/Signal Publications from which I quote several points in the History section above.