


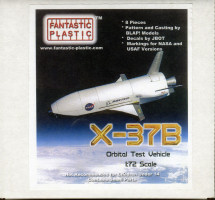
Fantastic Plastic 1/72 X-37B Space Plane Kit Build Review
By Chuck Holte
| Date of Review | February 2015 | Manufacturer | Fantastic Plastic |
|---|---|---|---|
| Subject | X-37B Space Plane | Scale | 1/72 |
| Kit Number | N/A | Primary Media | Resin |
| Pros | Dimensionally accurate, decals for 3 variations | Cons | Nothing noted |
| Skill Level | Intermediate | MSRP (USD) | Out of Production |
First Look
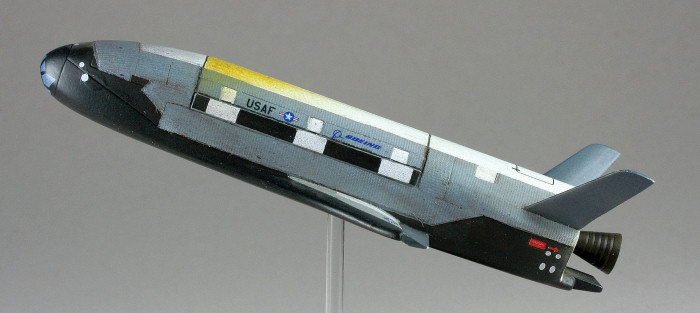
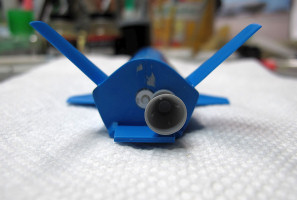
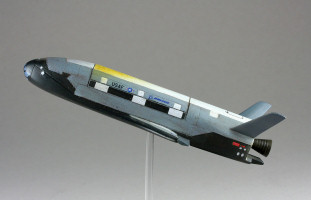
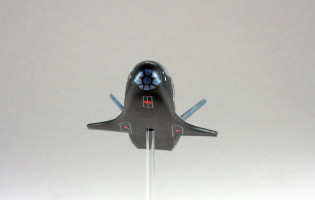
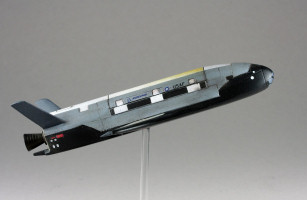
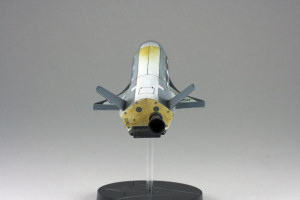
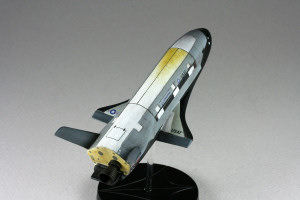
The X-37B Orbital Test Vehicle (OTV) is an experimental US Air Force program to demonstrate advanced technologies and procedures for a vertical launch, horizontal landing, reusable, multi-mission spacecraft. Based on a NASA design, two X-37Bs were built by the Boeing Phantom Works for the USAF. First launched aboard an Atlas V booster at Cape Canaveral Air Force Station, FL on 22 Apr 10, OTV-1 landed 224 days later at Vandenberg AFB, CA, on 3 Dec 10 after logging 91 million miles on orbit. The spacecraft modeled in this review is OTV-3; launched from the Cape on 11 Dec 12 and landing at Vandy on 17 Oct 14, after 675 days in space.
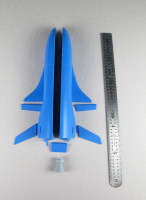
The Fantastic Plastic X-37B kit is simple and easy to build into a nice model of the actual spacecraft. The kits eight resin parts were patterned and smoothly cast by BLAP! Models. The excellent ALPS decal sheet was produced by JBOT Decals and covers at three versions of the X-37 at different points in time, including the NASA design. Three pages of instructions cover the simple construction and the more complex variations in the painting/decals/markings.
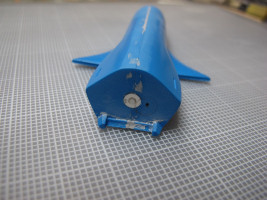
Since I wanted to model the most recent mission, OTV-3, I had to make several modifications to the basic kit. Most obvious, the exhaust had to be moved from the centerline to the starboard (right) side of the aft fuselage and the extended fuel dump molding was removed. I extended the upper mission bay outline nearly an inch forward of the existing engraved panel line. The model has no landing gear or provision for display, so I drilled a hole in the bottom of the fuselage to accept a piece of clear acrylic rod attached to a display stand from the spares pile.
I wanted to model the spacecraft as it appeared upon return from it's nearly two years in space, so it needed to look well used and even a bit ratty. Aside from the usual masking and painting drills, I wanted to show the upper thermal protection more realistically. I used photos of the last mission return on the internet look here for reference. Trying to capture the rough texture of the thermal blankets, I eyeballed and cut sections of 3M Durapore Surgical Tape (lifted from my Doctor's office) with a #11 X-Acto knife. Cutting the tape to fit was a bit tedious and I took a few shortcuts in actual panels along the way. After a coat of superglue and primer, I was satisfied with the look.
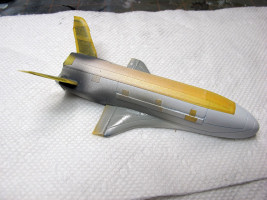
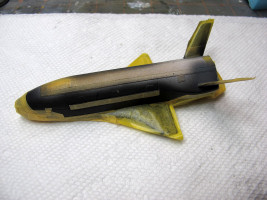
I had originally planned to lightly scribe the black thermal tile patterns on the model, but ran out of time and inspiration after doing the blankets. After painting, I brushed on a coat of Future for the decals. For OTV-3, I had to create a few simple markings for the tail and the nose that weren't on the JBOT sheet. Following the decals, a coat Floquil flat and some heavy weathering finished the model.
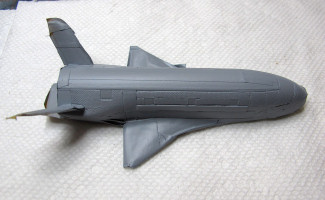
This was a simple build leading to a model of a fascinating spacecraft project. The few modifications I made to the original kit were easy as was the assembly. The finish was a bit more work, but only because I chose to make it so. I'm happy with the end result and now have another X-Plane on my display shelf.

Recommended for those interested in model spacecraft.