Hasegawa 1/32 Bf 109F-4 Build Review
By Michael Benolkin
| Date of Review | September 2021 | Manufacturer | Hasegawa |
|---|---|---|---|
| Subject | Bf 109F-4 | Scale | 1/32 |
| Kit Number | 08881 | Primary Media | Styrene |
| Pros | Easy build, nice details | Cons | See text |
| Skill Level | Experienced | MSRP (USD) | $72.95 |
Build Review
For a brief description of this aircraft and/or a look at this kit out of the box, look here.
So, after finishing up my last big project, I wanted something simple to essentially getting back to basics. Several folks wanted to see an F-4 build, and I do have several planned, but that gave me the idea for this build - an F-4, or more precisely, a Bf 109F-4/Trop. I've had this Hasegawa kit on the shelf far too long and I was curious how this would work with a Quinta Studio cockpit set, plus I didn't want to add a bunch of aftermarket stuff, just focus on the basics and see what could do to overcome some 'glitches' I've experienced in recent builds.
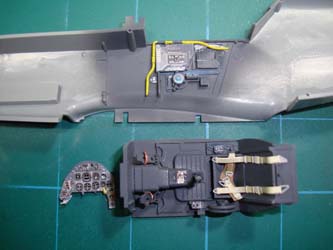
I assembled the cockpit area per the instructions and removed any molded-on surface detail on any part that would receive a Quinta Studio part. When the cockpit preparations were completed, I applied RLM 66. The closest detail set I could use for this build was Quinta's QD32029 Bf 109G-6 designed for the Revell kit. As usual, I cut the decal sheet into sections and put the next section to be used into the water. As each part loosened off the decal paper, I removed the part to dry onto a paper towel. I was pleasantly surprised how close the fit was on the Hasegawa kit and I applied each part to the kit's cockpit surfaces. After adding some detail painting in the cockpit, I was ready to assemble the fuselage.
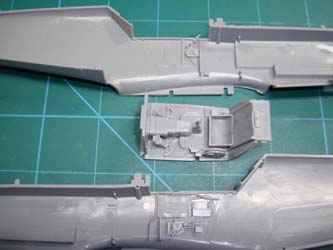
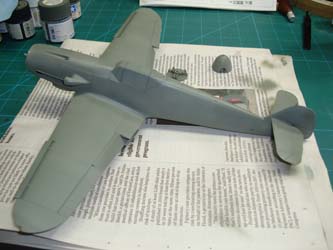
While this kit goes together rather quickly, the molding processes at the time left a trough along the seams of the fuselage, which is not a surprise as the solution was worked out long ago as well. I applied a bead of gap-filling cyano along those seams, then filed the surfaces flush and then buffed the scratches out.


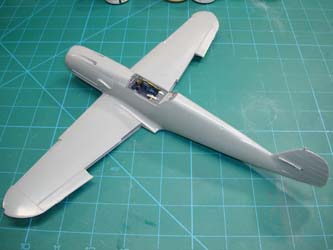
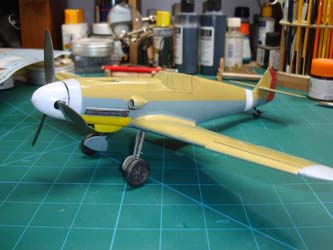
Here is the prepared fuselage with the wings dry-fitted. Before I apply the primer coat to the model, I wanted to mask off the windscreen and canopy which will also be used to protect the cockpit interior as I paint. The way that Hasegawa molded the cockpit clear parts, there isn't an easy way to mask off the frame, so I opted to cheat and ordered a set of Eduard canopy masks with a few other items, all of which arrived today.
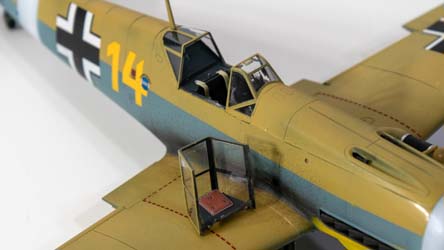
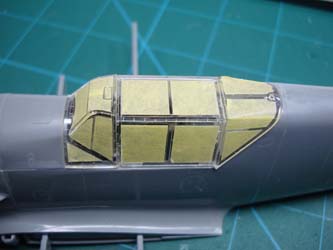
The Eduard canopy masks worked brilliantly, so the windscreen and rear transparency are glued into place while the hood is held closed with white glue so I can access the interior when painting is finished.
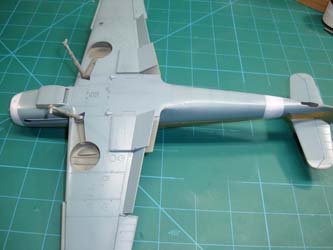
The wings were glued to the fuselage and the landing gear dry-fitted into place. At this stage, I wanted to address one obstacle that has plagued some of my previous builds - contaminants on the plastic. This paint scheme is going to involve lots of masking and there are few things that will derail a project faster than paint pull-up. This exercise is a bit of a confidence booster for me going forward. I used to use Plastic Prep from Testors to clean the plastic surfaces prior to painting, but that product has been discontinued. For this project, I went old school and wiped down the model with isopropyl alcohol using a blue paper shop towel. When it was clear, the first color I applied was RLM 66 on the cockpit clear parts to keep the exterior colors that come later from being visible on the interior frames.
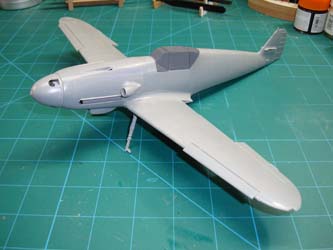
The first overall color is RLM 02, which is Tamiya RLM Gray acrylic thinned with lacquer thinner. This goes down smoothly, dries quickly and is tough as nails.
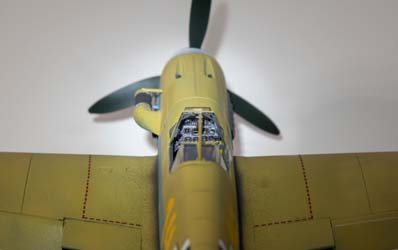
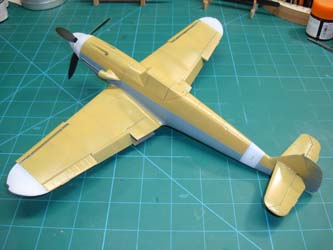
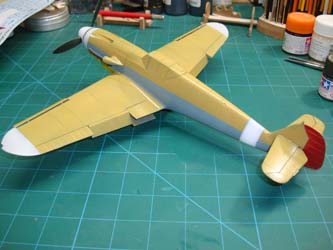
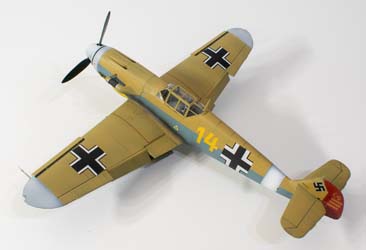
In the next session, I applied Tamiya Gloss White (also thinned with lacquer thinner) for the theater identification markings painted over NATO black pre-shading. While the instructions called for black propeller blades, I painted mine RLM 70. So here's where the real test begins. Using Tamiya kabuki yellow tape, I masked off the white areas as well as the wheel wells that are RLM 02.
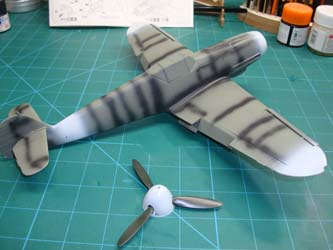
I found some Gunze Sangyo Aqueous paints online for RLM 65 and RLM 79. These colors go on glossy or semi-gloss, which makes decal applications easy without a clear coat applied first. I grabbed my Iwata single-action spray gun and applied the RLM 65 first, then set the model aside to dry for several hours.
This aircraft (in full scale) had a hard line between the RLM 79 and RLM 65, so I masked accordingly. The RLM 79 goes on glossy. Again, I set the model aside until the next day.
I removed all of the masking that was all over this model. Much to my pleasant surprise, there was no paint pull-up except one tiny spot on the while fuselage band. This was quickly touched up and then another small detail needed to be addressed - the Gunze RLM 79 and RLM 65 were applied in multiple layers, so there was a ridge of paint on the sides of the fuselage between the tan and blue mask line. I gently wet-sanded that ridge with a 3600 grit polishing pad, stopping frequently to see if the ridge had buffed out and to see if I had burned through any of the paint. After just a few minutes, the ridge had been buffed out without damaging the surrounding paint.
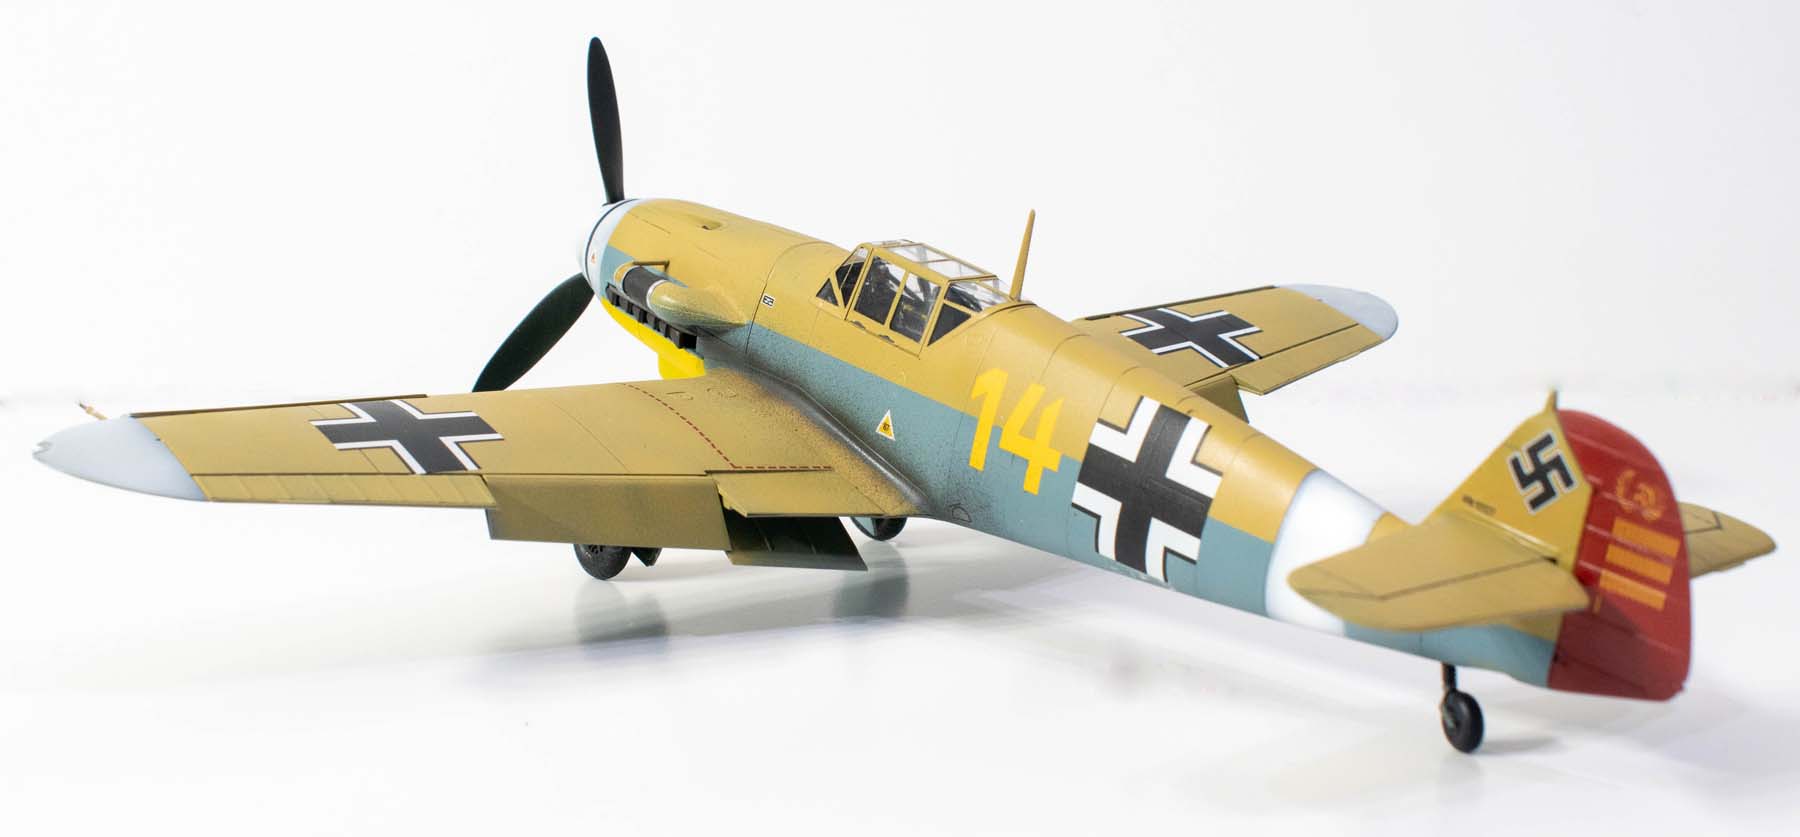
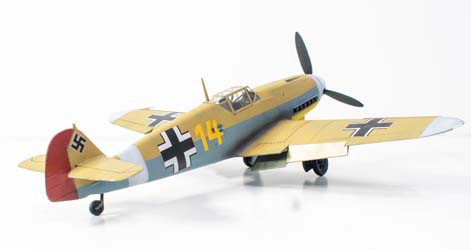
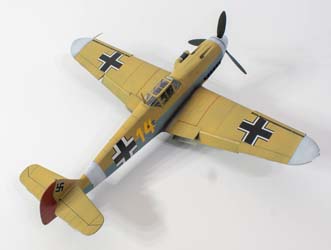
The final colors were the RLM 04 yellow chin and an odd red rudder. From what I gather, the red was dulled down a bit as not to be as visible at a distance. Hasegawa provided the dull red as a decal but I grabbed some Tamiya red and mixed in some tan to replicate that hue. These areas were masked and painted.
It was now time for decals, and here is where I faced a few new challenges. The model had been stored in a metal shed for a few years and while the kit's decals had survived the environment, the aftermarket decal set from EagleCals didn't fare as well, even inside the zip-locked bag from wherever I acquired them. I opted to use these as spares and used the kit's decals for this project. One problem was that the kit's decal sheet had been exposed to something on one small spot, under one of the wing's Balkenkreuz. That one spot was not responsive to the water soaking to remove and place that decal, instead it self-destructed. The EagleCal spare came in handy. All of the rest of the markings on this model came off the kit's decal sheet. The striped walkway lines did break apart during application, but some careful brushwork and an adult beverage allowed me to get everything aligned. I did apply a coat of decal setting solution after each decal was placed, followed by a careful application of softening solution when all the decals had dried. When the decals had all dried and any water spots removed. I applied my favorite Gunze Sangyo Clear Flat over the model. When that had dried, I removed the Eduard masks off the clear parts and declared the project finished.
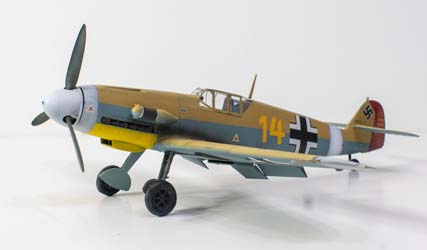
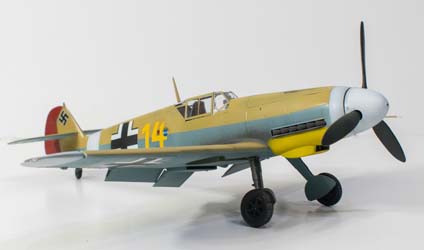
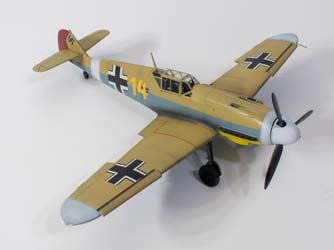
I like how the model turned out, it was never intended to be a showstopper, merely a trip back to basics to validate some of my techniques and simply have an easy project before embarking on my next more challenging build.
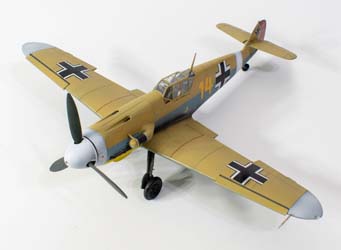

And here's one of the reasons this build happened - the look of that cockpit with the Quinta Studio set in there which makes the model look so much better without the lengthy effort.