


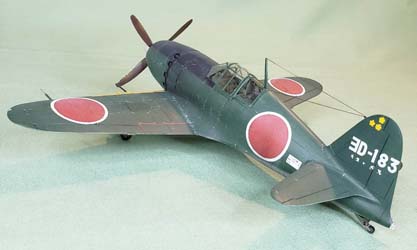
Hasegawa 1/48 J2M5 Type 33 Raiden Build Review
By Kelly Jamison
| Date of Review | January 2021 | Manufacturer | Hasegawa |
|---|---|---|---|
| Subject | J2M5 Type 33 Raiden | Scale | 1/48 |
| Kit Number | 09196 | Primary Media | Styrene |
| Pros | Easy build | Cons | See text |
| Skill Level | Basic | MSRP (USD) | $30.50 |
Build Review
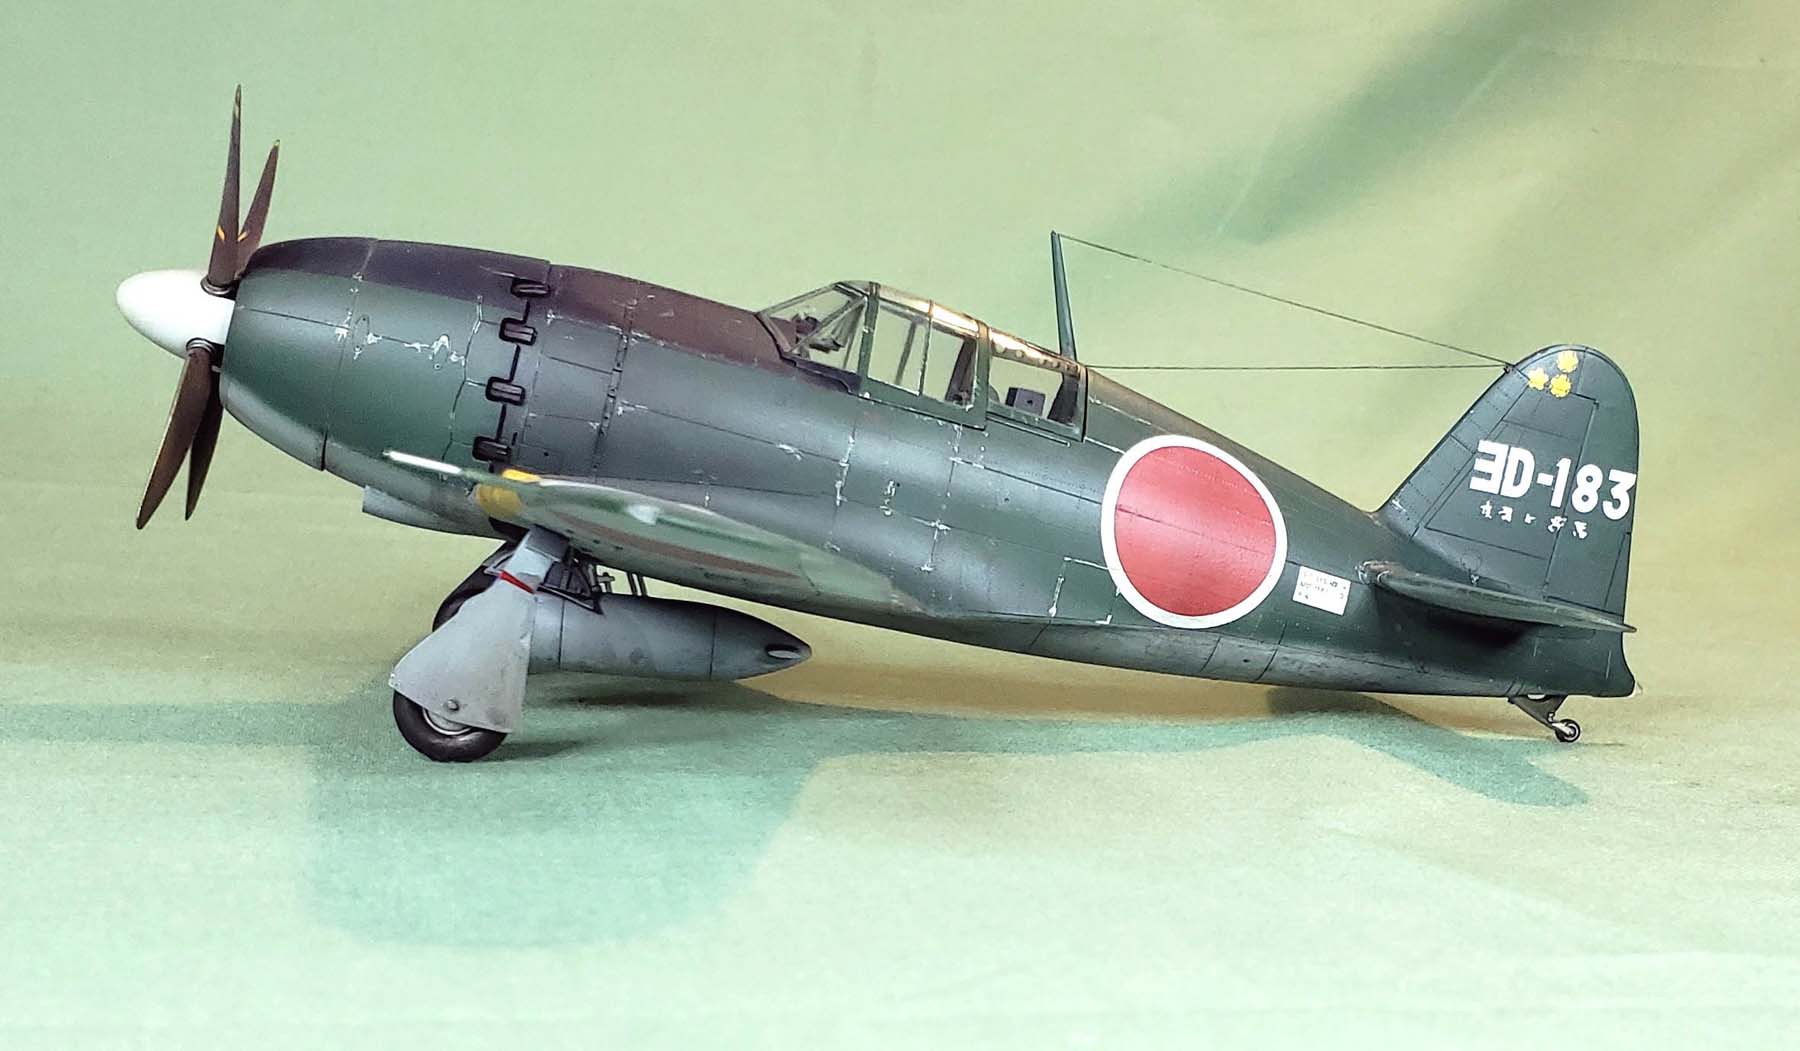
There has always been something about the Mitsubishi J2M Raiden (Allied codename: Jack) that has intrigued me. It is both a chubby and streamlined aircraft at the same time. It looks like a muscle-bound deadly fighter and a slick powerful Reno air racer with an identity crisis. Its debut on the battlefront was delayed by constant development setbacks and the technical issues with the turbochargers needed for its intended roll as a high-altitude interceptor. It had a semi-successful but short-lived career. There is a single surviving Raiden on display right now at the Planes of Fame in Chino California. Information about the Jack is limited but I will list some good books on the subject that will help you in your research if you wish to know more about the Raiden.
There are a few kits out there that are excellent in the big three scales, but we will focus on 1/48 for the scope of this article. The Otaki/Arii kit is one of the older offerings and was reboxed in 2018 under the MicroAce name, so it can still be found. Light on detail but overall a nice little kit and can be obtained for an extraordinarily little amount of money. The one of the other kit manufacturers is the Tamiya J2M3 and is one of their longest running aircraft kits in continual production, with the last boxing being in 2008. That specific kit had a maintenance crew and light jeep added making it the more desired and difficult find.
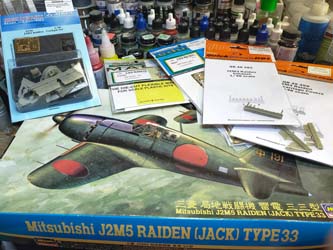
The kit I choose was the Hasegawa J2M5 Type 33, Kit #9196. First released in 1997. It is a modified version of the original J2M3 released the previous year. The only physical difference between the J2M3 and J2M5 is the cowling right in front of the windscreen. There are flat areas breaking up the smooth curved surfaces and the front windscreen is a bit different. I am sure there is a Raiden expert out there that can tell me of a different rivet pattern or panel line but to the average modeler, that is about it. Because of this, you can use many J2M3 parts for this kit with no problem at all.
As usual, I had to buy all the accessories for this little gem to spruce it up a bit. More on that later. Here is a list of what I added to the build:
- AeroMaster Empire Defenders Part 3 #48-286
- Aries J2M3 Raiden cockpit set #4538
- Eduard J2M3 Raiden Photoetch Details #48-201
- Eduard Masks 1/48 J2M Raiden EX095
- Teknics J2M3 Raiden Metal landing gear TK48044
- Quickboost J2M3 Raiden undercarriage covers #48-399
- Quickboost J2M3 Raiden Exhaust #48-383
My paint of choice throughout this build was the Mr. Hobby’s Mr. Color line of paints with Mr. Color Thinner #110. They airbrush very well but are temperamental to the paint/thinner ratio and they do smell strong if you are painting in a common area or have loved ones close that are sensitive to paints. A paint booth is highly recommended.
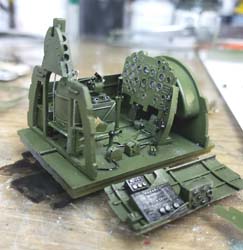
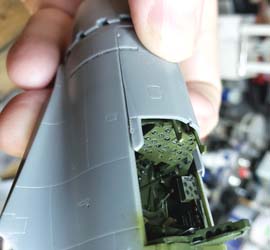
The Aries cockpit is nicely done in a high-quality grey resin casting. The entire cockpit got a coat of Mr. Color #126 Cockpit Color (Mitsubishi Green) including the slightly unusually painted instrument panel. Radios, knob ends, 77and throttle handles got painted Mr. Color #2 Black. I didn’t really have any problems building it up. The parts are much more refined than the kit parts and it looks great when you are finished. I honestly didn’t spend much time on it other than paint, wash and some light chipping and weathering. After doing the cockpit and looking at the kit cockpit still on the trees, I might have stuck with the original kit cockpit. Although an improvement over the kit cockpit, it wasn’t a quantum leap at all. Sticking with the kit cockpit might have been a better decision even more since I figured out late in the build that it would be a lot of work to pose the canopy open as I had planned. More on that later too.
It fit very well into the fuselage. I did cut out the locating lugs to help to position the cockpit better. Quickly the fuselage halves came together. I had to use rubber bands since all my clips were too small to fit around the barrel of a fuselage. I left out part J14, the radio, and sanded that flat deck area behind the headrest smooth, painted #126 Cockpit Green and then glued the radio in place along with some small wires that I fed down into the fuselage for added detail. I left off part G8, antenna, to keep from breaking off during sanding. The tail planes went on with no problem and did not need any putty.
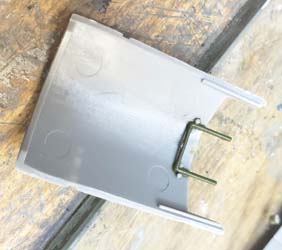
Now the part that makes a J3M5, the front upper cowl, part #B1. There is a Part #G15 that is used to mount the bullet proof glass to inside the cockpit area. When you try to place it on the fuselage, the mount interferes with the aftermarket cockpit instrument panel. I had to use some micro files to get the clearance needed. Once the little troughs were cleared out, the upper cowl fit right into place.
If you are doing a version that has the 60kg bombs, you need to drill out the mounting holes on the bottom wings at this time during construction. I glued the wing halves to the bottom wing section. Don’t forget part G2 that goes between the wheel wells. Ask me how I know… And as quick as that the fuselage was ready to go onto the wings. I held off on parts K2, machine guns, and G14, pitot tube to keep from breaking them off during sanding. If you are going to put the 30mm machine gun covers on, now is when you want to modify part K3 barrel covers and superglue them into place.
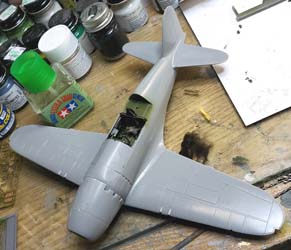
At this time, I deviated from Steps 6 and 7 which mainly deals with wing tip lights, landing gear, drop tank and bombs. All things that would need to be done after filling and sanding. Starting back up with Step 8, Nose Assembly. Parts F1, F2 and the inside of F3, nose cowl, got painted silver. Also place the vinyl sleeve plug into the fuselage but don’t glue it. Part F2 will hold it into place. It is used to set the prop shaft into and really helps when transporting your kit because you can take the prop off easily. The lower scoop Part E1 got glued into place and sanded to match the shape that extends into the bottom of the wing area.
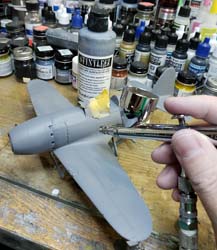
I held off on the exhaust stacks and prop along with canopy until after paint. I did paint the inside of the wing tip lights the standard colors: Left = red – Right = green, then superglued them into place, sanded smooth and polished clear. They got a bit of masking tape and the whole plane got sprayed with my favorite primer, Stynylrez. It can cover up a multitude of sins and make your final coat of paint look great! A little pre-shading with Mr. Color #33 Flat Black helped get the effect I wanted.


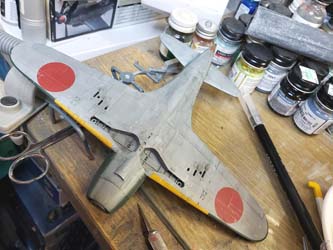
Then I used Mr. Color #58 Orange Yellow to paint the identification stripes on the leading edges. I was taken aback at the color in the jar verses the dried color on the wing. So, don’t judge the color in the jar with this paint. I had painted a yellow stripe around the fuselage thinking I would do a different color scheme but ended up not doing that version, so it got painted over.
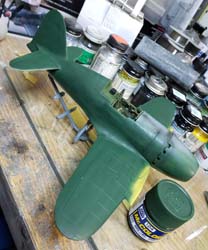

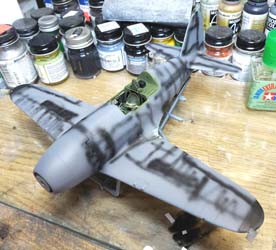
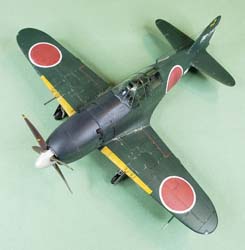
After the leading edge yellow dried, I masked it off and painted the bottom of the plane Mr. Color #35 IJN Grey. I found it easier to paint the bottom grey first and then the green second to get that tight demarcation line along the lower cowling and fuselage. While you got the airbrush loaded up, don’t forget the, external tank, tail wheel and landing gear covers (inner and outer). Now it is time to paint the top green color, Mr. Color #124 Dark Green. Note that the green goes around the leading edges of the wing and follows the same line as the yellow ID stripes. Getting that curved area masked off on the lower wing tips was a bit of a challenge but nothing a pair of scissors and an Opti-Visor can’t handle.
Now for the anti-glare panel. If you notice, it isn’t flat black but a very dark black blue. Mr. Color makes a #125 Cowling Color that matches this well. If you don’t have access to Mr. Color paints, just a few drops of dark blue will change the black hue just a tad to match that unique color. A quick masking and loaded up airbrush got the antiglare panel looking the part. A quick coat of Future Acrylic gave a nice gloss coat for decals to adhere to.
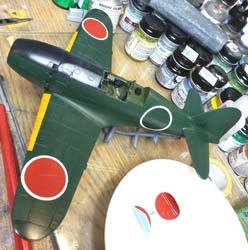
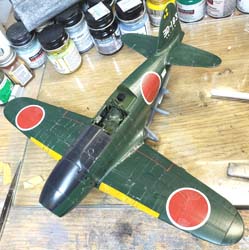
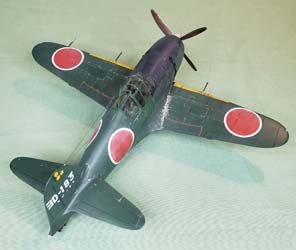
I used AeroMaster Decals Empire Defenders Part 3 #48-286, aircraft #5, that AeroMaster misidentified as a J2M3 but was really a J2M5 of 302 NAG, 1st Squadron Early 1945 base at Atsugi Air Base Kanagawa. Right off the bat, I didn’t like the way AeroMaster did their Hinomaru’s. They started with a white ring that you put down first and let dry then the red circle. The doubled thickness of the two decals made it difficult to get into all the panel lines on the wing and fuselage. If you tried to cut the center out of the white rings, the decal would be very fragile but it an option. On hindsight, I should have painted them on using circle masks. The bottom of the wing decals didn’t react well to Mr. Marker decal emulsifier. I used a combination of Solva-Set and Micro Set/Micro Sol. It took many sessions to get them finally to lay down. You can still see crinkle marks in the decals, but I used that to my advantage and weathered them up to look more like natural wear and tear. But this reenforced my thoughts that I should have painted them on with masks. Some white pastel chalk ground to a fine dust gives the Hinomarus a more faded look.
I used a Pentel Gel Silver pen to get the chipping marks and I also used many different washes to get the bottom oil stained. The way I do my weathering is in many layers and during many different sessions. If you try to do it all at once, it can come off too strong. Take your time and you will begin to enjoy the process. I always stop slightly before I think I should. That seems to help me from not overdoing it. Everything got a coat of ModelMaster’s Flat Clear to seal in the decals.
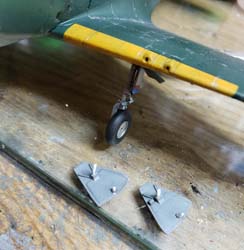
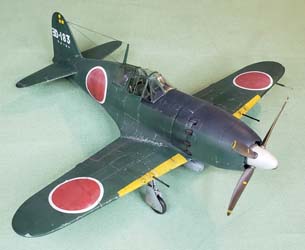
The wheel wells and inner covers of the landing gear along with the landing gear got a coat of #35 Mitsubishi Light Grey. The main gear covers really didn’t fit the Teknics metal gear so small studs had to be made to help attach them to the gear. Back to the Teknics metal landing gear. They were great! Looks super, easy to work with, fit with stock wing sockets but the tail wheel was soft on detail. I thought the kit tail wheel looked better, so I went with that.
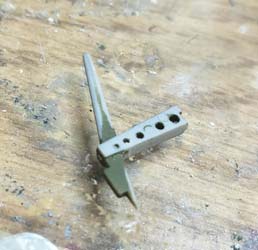

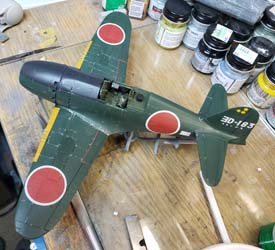
After a short break, I went back to the modeling table and started putting on the pointy things. The first problem that popped out at me was the push pin indent marks on the antenna structure after I had already painted it. I sanded the areas flat, painted it interior green again and painted the antenna exterior green. It got mounted to the headrest and fuselage with no problem. Much better. I painted the Quickboost exhaust stubs Mr. Color #28 Steel and weathered them up a bit to look the part. I found using white glue gave me the time to work the exhaust stubs as to adjust them into place perfectly. I painted the propeller blade tips yellow first and masked off the warning stripes then the prop got a coat of Mr. Color #131 Propeller Color. It is a brown primer that really gives most Japanese planes a unique look. The prop boss got painted silver by hand. The spinner got a coat of ModelMasters Acryl White and weathered just a bit with a thinned smoke wash I make by using 2/3 Future Floor Polish, 1/3 distilled water and an exceedingly small drop of dish washing soap along with a few dabs of black and brown acrylic paint. Go extremely easy on the black/brown until you get the depth of smokiness you want. It is easy to overdo it.
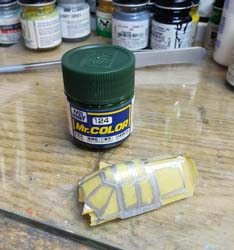

Time for the canopy. I used Eduard EX095 masks on the kit one piece canopy. Eduard gives you both J2M3 and J2M5 masks making them a decent value if you plan on doing a different version like I plan on doing soon. I don’t know if you use them, but they are worth every penny to me in time and effort saved. Once I got the masks laid down, I used a silver sharpie marker to “paint” the unmasked areas. I went ahead and masked off the inside of the canopy with one big piece of painters tape to keep any overspray from getting on the clean inner glass and then a coat of #124 Dark Green (Mitsubishi) and ModelMasters Clear Flat to finish off the canopy.
Now the problem; there is a built-up rail area that the main canopy corners ride on for opening and closing that is not molded to the fuselage like it should be. I was left with the choice of modeling the rails on a 99.9% finished model and cutting the fragile canopy apart and then having the problem of the back windows which would be incomplete because the frame is molded into the main canopy. Or I could order a Rob Taurus #48060 vac formed canopy from Hannants for around $5USD but shipping to the States is just silly for a canopy. Squadron makes a J2M3 canopy, #9587 for about $8 + $5 for shipping in the US, but it is for the Tamiya kit. Since I just needed the main canopy part, it can be adapted for the Hasegawa kit, but it is not worth it to me. I decided to temp install the canopy without glue until I could make a final decision. You can still see the cockpit detail through the large canopy so I might stick with what I got and call this build complete.
I found this kit to be a quick build and easy too. The aftermarket stuff was fun but necessary? Some pieces are must have. Some are nice additions, and some are overkill and not necessary at all. I believe one of the unnecessary pieces of aftermarket was the cockpit. I could have saved that money (around $22USD) for something else like better decals. The quirks of this kit are small and nothing beyond the skills of an average modeler. All in all, a great addition of a unique aircraft to my collection and well worth the effort.

Book References:
- Navy Interceptor "Raiden", Famous Airplanes of the World #61 by Yoji Watanabe ISBN-13: 978-4893190581. Excellent reference but it is in Japanese.
- J2M3 Raiden by Hideyuki Shigeta Zoukei-Mura Concept Note. Vol 6 ISBN-13: 9784903596174. Written in both English and Japanese but hard to get.
- Mitsubishi J2M Raiden Jack by Robert Pęczkowski Mushroom Model Publications Yellow Series #6110 ISBN-13: 978-83-916327-7-2
- Mitsubishi J2M Raiden by Mariusz Kubryn Scale Plans #40 Mushroom Model Publications ISBN-13:, 978-83-65281-69-2