


Hasegawa 1/35 Shchelkunchik Ma.K. (Nutcracker PKH.103) Build Review
By Michael Benolkin
| Date of Review | October 2017 | Manufacturer | Hasegawa |
|---|---|---|---|
| Subject | Shchelkunchik Ma.K. (Nutcracker PKH.103) | Scale | 1/35 |
| Kit Number | 64111 | Primary Media | Styrene |
| Pros | Unique subject | Cons | Nothing noted |
| Skill Level | Basic (out of the box) | MSRP (USD) | $94.99 (plus everything else added to the list) |
Build Review
For a brief description of the Maschinen Krieger (Ma.K.) universe and a look at the basic Nutcracker kit out of the box, look here.
When I first saw this kit, I thought it would be a simple build straight out of the box. Had I built it straight out of the box, indeed it would have been simple, but this project turned out to be a classic case of 'scope creep', as we say in the engineering world. Instead of having the discipline of building it straight out of the box, I began to have ideas about different aspects of the project. First, I wanted to test some new camouflage masks from Japan to see how they work, and more importantly, how they work with acrylics. Then I started looking at that lame turret with a funky antenna sticking out of the front. While there have been no cartoons/anime or mangas published about this universe (though a movie has been announced sometime in the future), I found some brief CGI animations on YouTube produced by Ma.K.'s creator/artist Kow Yokoyama and one of these videos had the Nutcracker (Nutrocker) in 'action'.
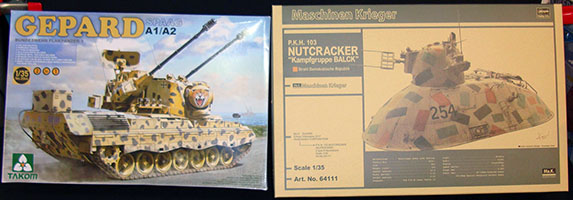
Initially, I thought about putting a T-34/76 turret on this hull as the silhouette would be rather menacing, but I happened to have a Takom 1/35 Flakpanzer Gepard kit handy and wouldn't you know it, the turret race fit the Hasegawa hull almost perfectly (no modifications required). So now it was time to reimagine the Gepard turret. This cycle continued for several weeks while I started the basic assembly and ran the paint mask trial. So what did I end up with?
- Hasegawa 1/35 P.K.H.103 kit
- Takom 1/35 Flakpanzer Gepard kit
- 1/35 OH-58D FLIR system out my spares
- Italeri 1/35 40mm aluminum gun barrels
- Live Resin 1/35 SAG turret
- Live Resin 1/35 SAG shield
- Live Resin 1/35 Spec Ops Gunner figure
- Miniart 1/35 DShK machine gun
- Polar Lights large dome display stand
- HiQ Yellow-Tape Cloud Camouflage Paint Masks
- Begemot Soviet Air Defense decals
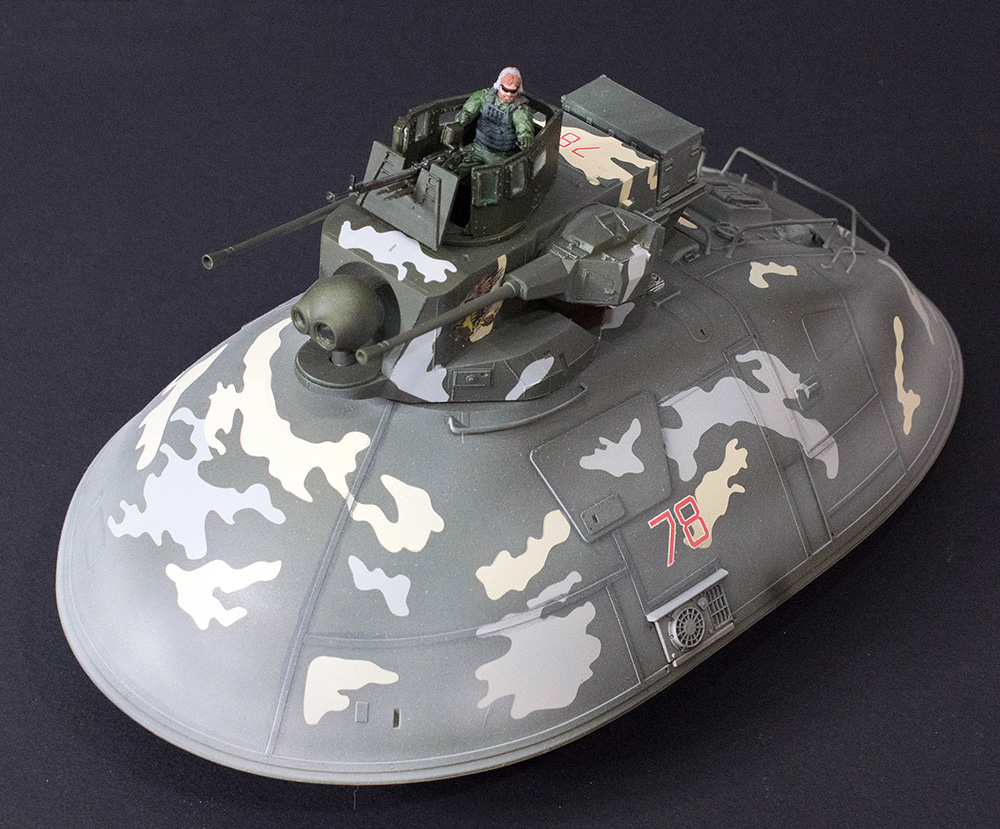
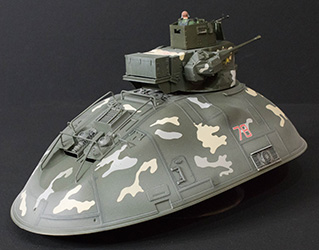
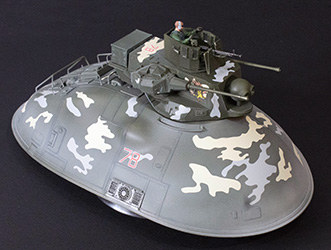
Yes, this is a classic case of scope creep. Nevertheless, this conglomeration transformed the Nutrocker into a futuristic assault hover tank that is fielded by the New Moscow Brigade to push back the forces of the Germanic Strahl Democratic Republic.


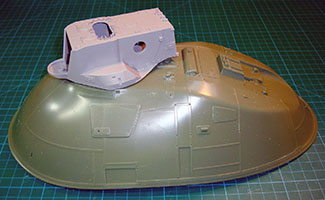
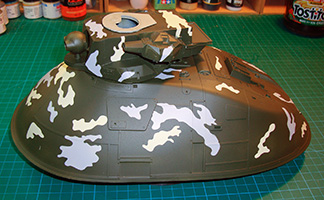
Construction started with the hull and the fit of the kit is good. The bottom plate that mounts to the hull shroud requires a bit of work to get the alignment pins into place, but once they go into place, I glue the plate into place. The insert that mounts to the center of the bottom plate was modified to allow the steel rod from the Round 2 base to pass through and into the epoxy mount I created in the hull shroud, just behind the turret race. The resulting stand provides a nice display option to keep the hull off the ground (shelf).

I applied a base coat of primer gray, then applied some of the cloud pattern masks to the hull. Next I applied a coat of desert sand, and after that had dried, I added more cloud masks. The final coat was 4B0 Russian Green, and when it had dried, I removed the masks. The masks are from a company whose name is in kanji but produces sets of cloud masks that are dye-cut from kabuki yellow tape material and as with other such tapes/masks, there was no problem removing the masks nor any pull-up of the paint underneath. Now that I have some confidence in these masks, I will be using them more aggressively on future projects.
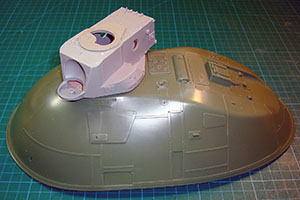
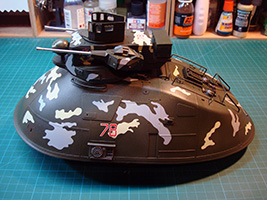
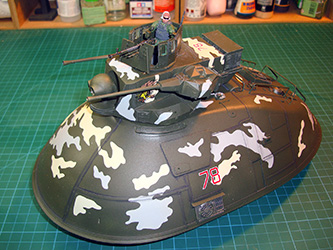
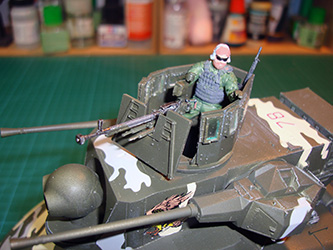
While I was painting the hull, I started the modifications to the Gepard turret. While I opted to retain the side-mounted guns, I removed all of the details from the top of the turret as well as the housing on the rear of the turret for the acquisition radar. In place of the top hatch and details, I will replace it with an armored gun shield/turret. The rear of the turret was boxed off and a mount was fabricated from Evergreen to mount the ammo box that also was raided out of the Takom kit. The tracking radar that goes into the front of the turret was replaced by a FLIR ball out of an OH-58D Kiowa Warrior project that fit the mount and recess nicely. With the details worked out and assembled, I painted and masked the turret in the same way as the hull.
While the Gepard has distinctive muzzle brakes, I wanted something different and the flash guards on the 40mm BOFORS barrels from Italeri were just what I was looking for. With some slight modifications to the gun mounts, the barrels were installed.

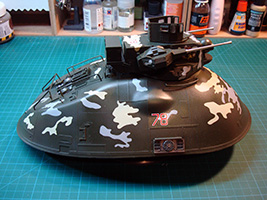
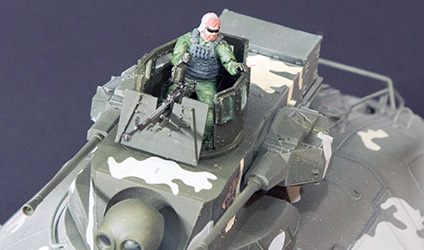
I'm sure you've heard of Live Resin and their amazing line of 1/35 resin details. I've acquired a few of their products for various projects, but none of those projects have made it to the bench to date, so this was going to be a new experience. First the SAG shield/turret - this was designed for the HUMVEE or M-ATV, so I had modified the top of the turret to accommodate the HUMVEE turret race. Removing the casting blocks from the shield/turret was much easier than I anticipated and much to my surprise, they had engineered locating pins and dimples in their parts making the shield very quick and easy to assemble using cyano. The completed assembly was washed and painted with 4B0.
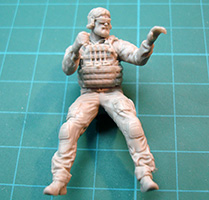
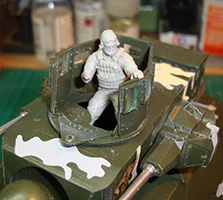
Another Live Resin product used here is the Special Ops gunner as this figure doesn't have a helmet but a full head of hair and beard. An interesting counterpoint to the Ma.K. figures on the market. The figure also has some amazing details and it too was easy to remove from the casting blocks, clean up, and assemble.

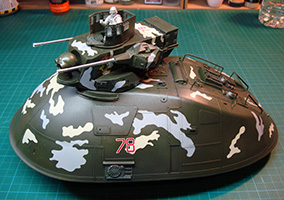
With the hull and turret painted and clear coated, I applied some distinctive hull numbers and eagle artwork to the vehicle. When those decals had dried, they were given another clear coat before starting the weathering process.
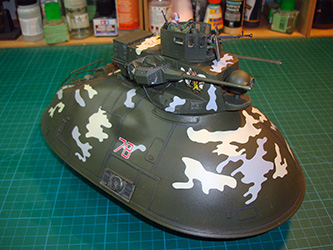
The hull and turret were treated to some gray panel line wash you bring out the molded-in structural frames before receiving a flat coat. My weapon of choice for flat coats is Gunze Aqueuos Clear Flat straight out of the bottle - works every time.
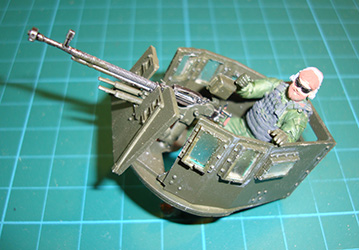
Between sessions with the hull and turret, I also finished up the gunner's turret, machine gun, and figure. This is the first figure I've done this century and won't be my last. This Live Resin figure is outstanding. The Live Resin SAG turret and gun shield are also well-engineered and are relatively easy to assemble, I have a few issues with them. First, Live Resin sells their conversions a-la-carte, so you must read the fine print as to what is included in each set rather than what you see in the image. The turret kit does not include the gun shield, and in my case, neither set had the gun pintle nor shield mount. Those were fabricated from scratch. While assembly is somewhat straightforward, none of the Live Resin kits I've seen so far include instructions though many are available on their website.

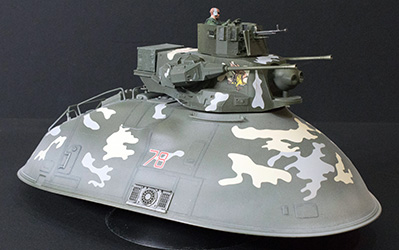
While I didn't want to go too far with weathering this beast, I didn't want to leave it clean either. I used an enamel-based Dust wash to dust-up the hull and turret, heavier towards the bottom (it is a hover tank, right?) and that provided a used look without being battle-weary (which is always an option later).


The pose of the Live Resin figure is ideal as I'll be building one of the Hasegawa 1/35 armor suits to pose along side this hover tank for a nice vignette.
I am happy with this combination of kits/parts to convert the Hasegawa Nutcracker kit into a Russian-themed Shchelkunchik (which is Russian for Nutcracker) hover tank. With projects like this one, you're only limited by your imagination and who knows, I may do another one with my original vision - a T-34/76 turret.
My sincere thanks to Hasegawa USAfor this review sample!