


Horizon Models 1/72 Mercury-Atlas Kit Build Review
By Michael Benolkin
| Date of Review | January 2016 | Manufacturer | Horizon Models |
|---|---|---|---|
| Subject | Mercury-Atlas | Scale | 1/72 |
| Kit Number | 2002 | Primary Media | Styrene, Photo-Etch |
| Pros | Impressive kit engineering | Cons | Nothing noted |
| Skill Level | Experienced | MSRP (USD) | $53.95 |
Build Review
For a brief history of this launch vehicle and/or a look at this kit out of the box, look here.
When Horizon Models released their Mercury spacecraft kit a few months ago, I had planned on building that kit but events had other plans. With the release of this new Mercury-Atlas kit, I could do both kits at once. As I mention in the first-look, one of the four sprue trees in the kit is right out of that first release of the Mercury spacecraft, the remaining three trees provide the Atlas D launch vehicle plus some unused parts for an upcoming Atlas ICBM kit. The kit is relatively simple to build though you should treat this kit as a limited edition model that needs a little extra care with fitting.
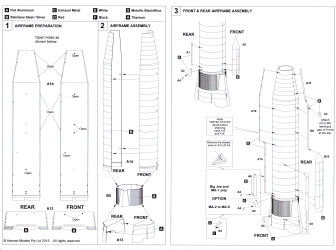
The instructions show the flashed-over holes that must be opened in the first stage (parts A13) and the second stage halves (parts A14). There is no standard hole size used here so I used a pin vice with a small bit to open the airframe holes and an X-Acto blade to slightly notch open the holes shown on one side of the second stage. I dry-fitted the parts together and glued the A13 halves and A14 halves together using Tamiya Extra-Thin Cement. Once the glue had dried, I used the pin vice to open the notches on the side of the second stage, used some Mr.Surfacer 500 to clean up some imperfections on the seams, then sanded and buffed the first and second stages to a polished finish.
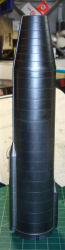
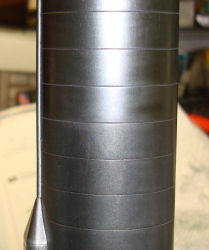
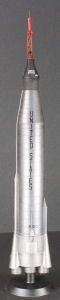
In addition to trying out this Horizon kit, I also wanted to try out the new Metalizer finishes from AK Interactive (odorless enamel) and Ammo by Mig Jimenez (acrylic). The second stage was painted with the AK Interactive Xtreme Metal Black Base as a primer coat but I wasn't happy with the results. Rather than a gloss black finish, the Black Base dried as a flat finish with a texture which was buffed out with a 3200 grit wet-sanding pad to a glossy finish. Next time I'll use Tamiya X1 Gloss Black. Over the black I applied AK Interactive's Xtreme Metal Polished Aluminum and once again I ended up with a slightly textured surface. This time the texturing worked to my advantage as I used a chrome buffing powder and not only did I get a great surface, I also recreated the banding seen in the machined Atlas airframe (before the second stage frosts over). The images below show the airbrushed Polished Aluminum unbuffed on the lower half of the airframe and buffed on the upper half.
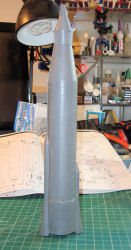
The first stage was painted Vallejo Primer Gray which was buffed out with a 3200 grit wet-sanding pad, then gloss-coated with Future and buffed again. Over this I applied AK Interactive's Xtreme Metal Dark Aluminum and then applied a Steel buffing power. While not that clear in the photos, the difference in metallic colors are evident and look like the photos of the Atlas D. The first and second stages were glued together along with the appropriate lower fairing for Atlas 130D.
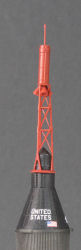
The Mercury spacecraft adaptor was painted Flat Black and the 'fins' that run around its circumference were dry-brushed Gunship Gray. The spacecraft itself goes together flawlessly and it was also painted Flat Black followed by a coat of Future. I did leave the retro pack off the heat shield since this was never going to be seen once the spacecraft was permanently mounted to the stack. Over the glossy black finish I applied a new color from Ammo by Mig Jimenez - Crystal Black Blue. This is a glossy color that isn't dark enough to replicate the blue-black of the Mercury or Gemini spacecraft, but over glossy black this stuff is perfect. Unlike some other acrylics however, you'll need to put a protective coat of Future over the Crystal Blue Black as it comes right back off with decal setting solution.

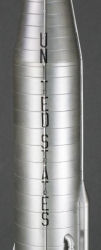
Study the kit instructions before starting this model because you'll find some useful tips for building this kit. One of those important tips is to apply the 'United States' before installing the external plumbing A15/A16. Before you can apply the decals however, you must adjust the hole sizes to match the pins molded on A15/A16. I had pre-painted all of the external plumbing, so I carefully removed A15/A16 taking care not to remove the pins as they are needed to mount the plumbing. Starting from the top, test fit each hole and adjust the pin or hole accordingly. Once all of the pins fit their corresponding holes, dry-fit the parts onto the second stage airframe. On my example, I had a few pins that got in the way of a snug fit, so I removed those pins leaving only two on each part.
With those adjustments made, I applied the 'United States' to the airframe and used some decal setting solution though I don't think it was necessary. When these decals had set, I carefully opened the holes covered by the decals for A15/A16 and installed the plumbing. Now you have a vertical silver bar running through your decal. The decal sheet provides what appear to be odd overlays for the plumbing which work great once they are applied and the 'United States' is clear again.
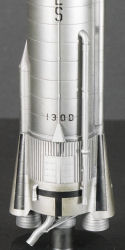
If there is one subassembly that will test your skills, that would be the escape tower. I opened the holes in the mounting collar with a pin vice to get the three tower segments mounted and glued to each other. The escape rocket unit mounts atop the tower with the three tiny rocket bells and the supersonic spike mounted atop the tank. You'll have to be very careful removing those tiny bells and the spike off the parts tree but you can see it is doable. I did spend some time with a file working the inside of the mounting collar to open it enough to fit over the nose of the Mercury Spacecraft. File a little - test a little. I shot this subassembly Vallejo Red and set it aside to dry.
With all of the subassemblies painted, decaled, and ready, I came to a point modelers always face with bare metal subjects - clear coat or not? The AK Interactive metal coat was as robust as its lacquer-based competitor - no fingerprints or other problems. On the other hand, I hate leaving exposed decals, so I thought I'd see what would happen to everything with a clear coat. Using Future again, I shot the entire model, applied the remaining decals, and shot the model again. The edges of the decal film what were slightly visible on the metal surfaces disappeared and the decal shine blended into the background. On the other hand, the bare metal finish was also dulled a bit by the Future. For my purposes, I'm happy with the results and you can still see the differences in color between the first and second stage metallics.
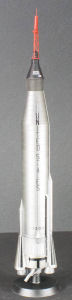
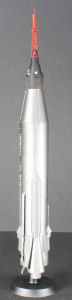

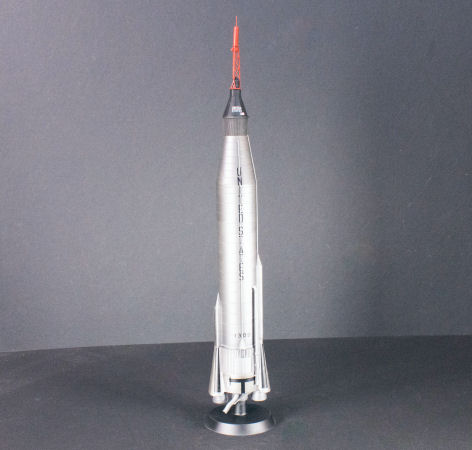
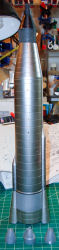
Here is the finished model. The escape tower is not glued to the spacecraft so it did move around slightly in these photos. You can also see the nice display stand included in the kit which I painted flat black and then a coat of Future. The stand fits into the second stage (center) engine bell and the model is ready to join the other spacecraft on my shelf.
This was a relatively straightforward model to build as long as you test-fit each part before committing to glue. That little extra effort will make the whole process go smoothly. While I could have spent a little more time painting more details and adding more of the airframe stenciling, I am pleased with the results which represent Colonel Gordon Cooper's first ride into space.
This kit is available from CultTVman Hobbyshop
or directly from the manufacturer.
My sincere thanks to Horizon Models for this review sample!