


Italeri 1/72 M20 Armored Utility Car Build Review
By Edward St. Denis
| Date of Review | April 2007 | Manufacturer | Italeri |
|---|---|---|---|
| Subject | M20 Armored Utility Car | Scale | 1/72 |
| Kit Number | 7038 | Primary Media | Styrene |
| Pros | Interior and exterior | Cons | |
| Skill Level | Basic | MSRP (USD) | $15.00 |
Build Review
Until recently there was no M20 armored utility car available in 1/72nd scale. Now Italeri has given us a great little model of this important armored vehicle. Based on their previous M8 armored car release, the model uses parts sprues from the M8. An additional parts sprue with parts specific to the M20 is included in the kit. Unfortunately the fenders in the M8 kit are not included in the M20 kit. I know that many M20 crews (and M8 crews) removed the fenders but having the parts would have been nice. The kit parts are well detailed but are sometimes very fragile. A great deal of stowage is included, including extras from the M8 kit. Optional wargamer’s wheels are available in the kit.
The Kit
You can see an in-box review of the kit here.
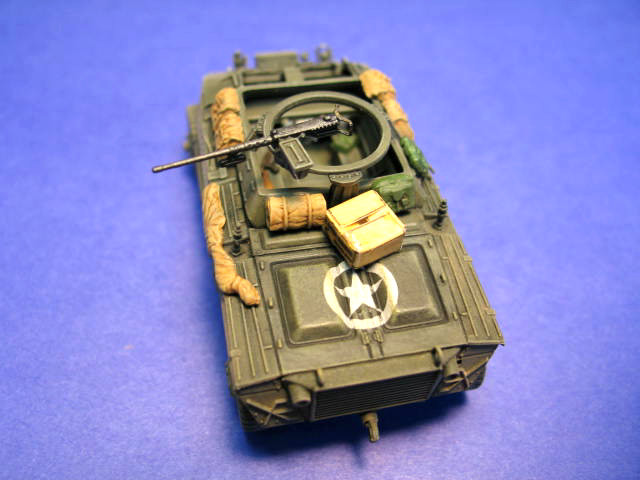
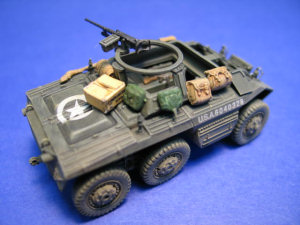
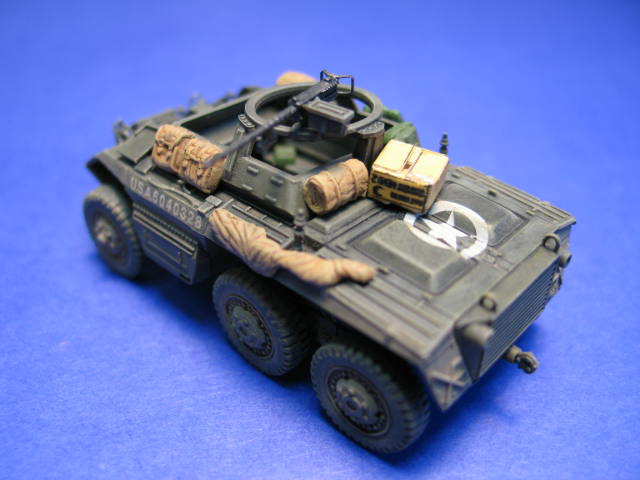
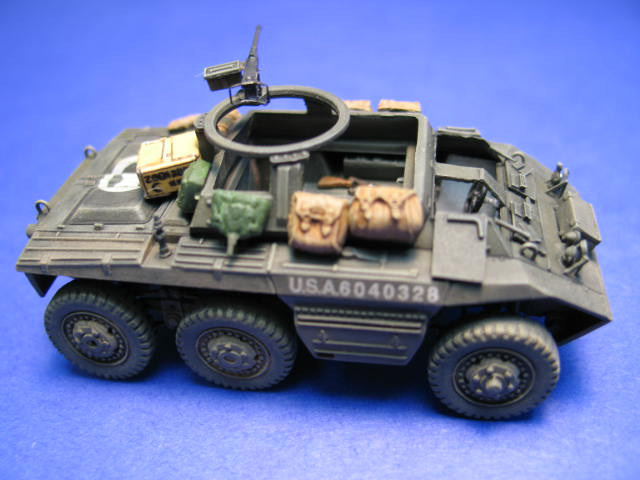
The construction is straight forward but I chose to improve specific parts of the kit. One big weakness of the kit is the undersized wheels. Two companies, Extratech and Caliber 72 make replacement wheels. I chose to use the Extratech wheels. Assembly steps 1, 2, 3, 4, and 5 went quickly. I chose to use the optional stowage bins 3B and 4B in step 5. Note that the bins should be placed up high on the center aspect of part 2A. I modified parts 42A by hollowing out the headlights and removing the light guards. After the headlights were glued in place, I added light guards from left over brass PE fret material and Evergreen strip. The lift rings behind the headlights were replaced with brass beading wire. In step 7 I modified part 1B by removing the driver and co-driver’s hatches with a hot knife. New hatches were built with sheet styrene and Evergreen rod and strip. The rest of step 7 was completed as planned. The kit 50 caliber machine gun had pistol grip handles added from an Extratech PE set for the Revell M4A1 Sherman. Lift rings were added to the rear of the M20 from brass beading wire. Construction was now complete.

Due to the open interior, the kit was painted in stages. First the driver and co-driver’s compartment was painted white and weathered. Then the rest of the interior was painted olive drab and weathered. Finally, after gluing the upper and lower hulls together, the exterior was painted olive drab. After weathering, the wheels were added. For some reason Italeri chose to include a three part Allied star for the engine deck. I replaced it with a Superscale star. I first applied Future wax to areas to be decaled. I used Solvaset decal setting solution to help the decal snuggle down over the engine deck detail. The other decals were applied without Solvaset. Once everything was dry, the model was sealed with Dullcote. Finally the lower aspect of the M20 was dusted with pastels.
The Italeri kit builds up into a great replica of the original. With additional detailing work and the replacement of the undersized wheels, the kit can be transformed into a contest winner. Both the M8 and M20 are welcome additions to the 1/72nd scale armor currently offered. Wheeled armored fighting vehicles have been sadly neglected by the major manufacturers. Italeri has sought to fill the gap with the Sd Kfz 231 (6 rad), Sd Kfz 232 (6 rad), Sd Kfz 234/2, Sd Kfz 234/3, AB 41, AS 43, M8 and M20. Other companies like ACE, UM, RPM and Roden have also been trying to fill the gap. However, Italeri would have been wise to include the additional sprue from the M8 kit with the fenders. After all they have already spent the money to produce the mold. In addition, the undersized wheels need to be replaced with more accurate scale replicas.
My thanks to Testors for the review sample.
References:
- AFV G2, Volume 5, Number 2
- Hunnicutt R. P. Armored Car A History of American Wheeled Combat Vehicles. Novato, CA: Presidio Press, 2002
- Mesko, Jim. U.S. Armored Cars in action. Carrollton, Texas: Squadron/Signal Publications, Inc., 1998
- Zaloga, Steven. M8 Greyhound Light Armored Car 1941-91. London: Osprey Publishing Company, 2002