


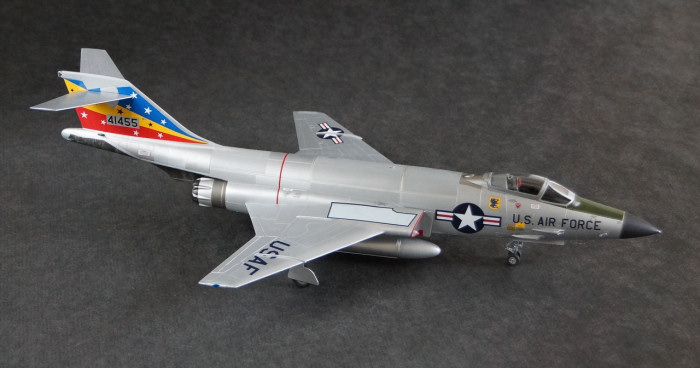
Kitty Hawk Models 1/48 F-101A Voodoo Kit Build Review
By Fotios Rouch
| Date of Review | July 2014 | Manufacturer | Kitty Hawk Models |
|---|---|---|---|
| Subject | F-101A-30-MC Voodoo | Scale | 1/48 |
| Kit Number | 80115 | Primary Media | Styrene, Photo-Etch |
| Pros | First injection-molded kit of this subject | Cons | See text. |
| Skill Level | Experienced | MSRP (USD) | $54.95 |
Build Review
For a brief background on this subject and a look at this kit out of the box, look here.
The F-101 single seat Voodoo and all its reconnaissance variants have been very high in all of the 50's-60's jet guys lists. The hope was that a mainstream company would do them like Hasegawa or maybe Gods willing Tamiya would do them but alas Kitty Hawk was first. The kit comes in a soft and grainy/unpolished plastic that takes the much needed sanding very nicely. The original kit research was limited and was augmented by input from online forums, but there was some corrections left out.
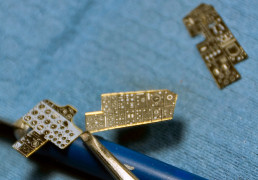
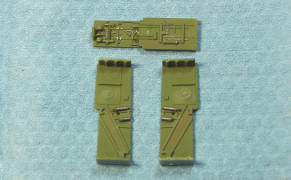
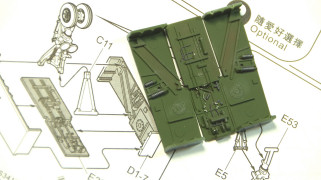
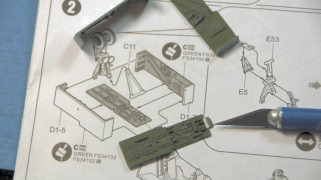
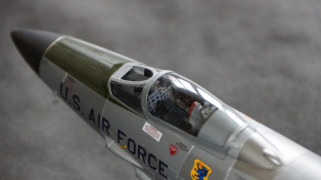
I stared this model by collecting research and images from forums, magazines and Cybermodeler Online. Construction started from the cockpit. I made a few copies from parts from the Black Box resin set for the F-101B variant to get the parts that were needed for this model. My copies were not perfect but were very good for augmenting this kit. Since nobody has made any resin interior for an early Voodoo, I used some of the kit parts and photo-etch. The decals provided sink in nicely to the photo-etch parts. Not perfect but it is adequate.
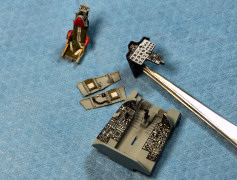
The resin side panels fit well after sanding off the detail of the plastic kit. I cannot figure out where the radar scope goes. The images provided by Cybermodeler's publisher show it on the starboard side and inside of the panel. The Kittyhawk plans show it on top of the port side of the panel. I have no images supporting that. Looking forward to any input.

The next job was to integrate the F-101A-30-MC gun panel to the front fuselage plugs. Take your time on that as they are fidgety and it will make a big difference later as you try to polish them and integrate them to a natural finish model.
The front wheel well was worked on next. Good surface detail aids to highlighting and all looks good until time for assembly. The front bottom tab will not allow integration. I cut mine off and it all went together well.
Before mating the front fuselage parts together I chose to integrate the top forward refueling doors shut. This was an unnecessary complication and mostly a gimmick so it had to be dealt with. The refueling doors fit OK but you need to take your time.
Once all looked like it would fit, I joined the forward fuselage together and secured it for setting. I used spacers where necessary to ensure proper fit with the other assemblies.

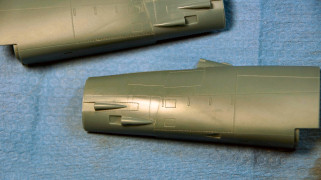
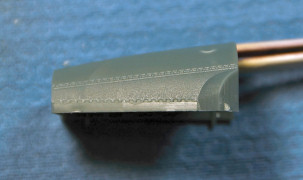
The next job was to remove the ridiculous slime lights. Slime lights on this early variant?! Anyway, they are easy to remove, re-scribe the covered panel lines and rivets and polish off.
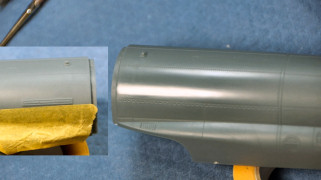
The next biggie was to attach the front fuselage plug to the top fuselage plug. It went OK but it is obvious that the designer did not match the radius of the two mating bodies. Some sanding/polishing and maybe filling will be required.
A trip to the Pima Air and Space Museum was required before the next stage to see what other things will need fixing.
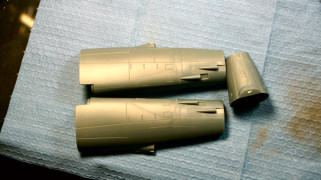
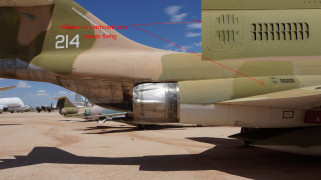
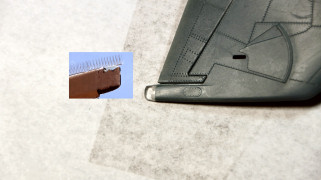
The fuselage side vents are another artifact of Kitty Hawk 'research' in which they copied the Monogram kit despite all the objections and advice received from different online forums. You clearly see from the images provided here that the port side vents are OK, although not perfect in outline but the starboard side vents are just a copy of the port side which is wrong. Why Kitty Hawk did not look at images and chose to copy the Monogram kit is for someone else to figure out. The first step was to fill all the erroneous vent marks and then re-scribe new ones based on the images from the Pima Air and Space Museum. Note that all F-101 variants are the same in this aspect (Monogram got this wrong too).

The next step was to put together the intake trunks along with the bottom forward fuselage panel. Well, no luck - nothing fit. Being of the feeble mind that it could all be made to work without putty, I tried a bunch of different ways to make it work. In the end I added one more spacer so the bottom panel could meet the fuselage in an acceptable way. The intake trunks were filed and grooved to make room for the joining parts.
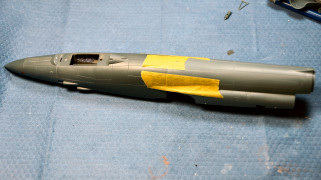
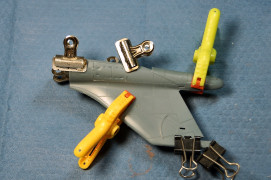
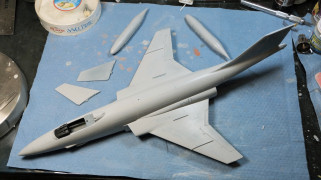
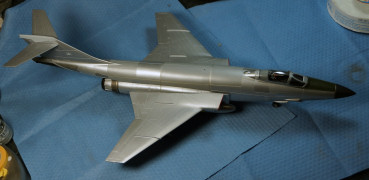
Here are the main assemblies ready for priming. I have a feeling that more putty will be needed at least in the various sink marked areas if not more. The best part is that a great number of the Voodoos were deployed in Europe. The ones deployed in England were not pure NMF and were actually Coroguard protected.

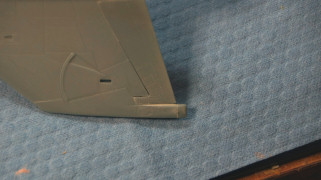
Other fixable nitpicks along the way were the silly tail cap. Firstly, there was no reason to make it a separate part and why then should it be so oversized? Easily fixed with sanding but it makes a point.
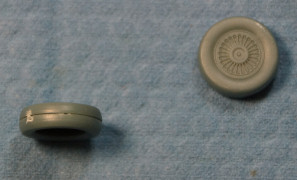
Next silliness are the main landing gear wheels. Fixable again but you get the point.
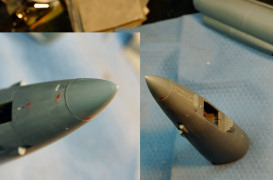
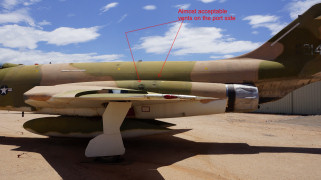
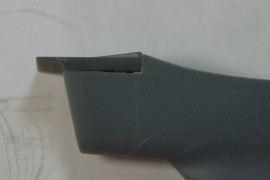
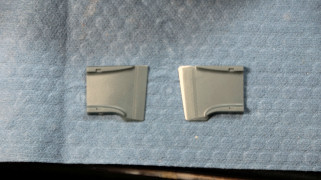
Next I moved on the to the intake splitters. This is another subject that Kitty Hawk ignored to research and decided to just copy instead the Monogram kit, despite useful input form the forums. So, what we have are ill fitting F-101B splitter plates. The Pima RF-101 Voodoo was photographed so I could make sense of the intakes. I used the images and used the Corel "trace" mode to outline the shapes. I scaled them to 1/48th scale and I will use them for my attempt to recreate the aircraft intake splitters.
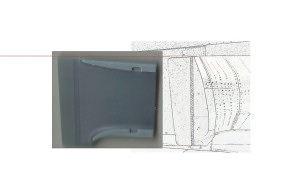

What puzzles me is that when I put the plastic splitter part next to the traced image, I have trouble matching the horizontal reference lines to the vertical splitter lines. I will have to add plastic. It looks like my design will be forced to be wrong and an adaptation of the plastic to make something that looks like an F-101A-30-MC splitter plate.
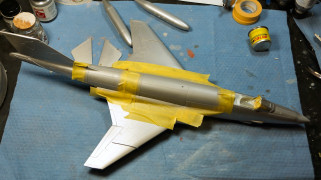
Prior to priming I decided to fill more sink marks on the fuselage. I attacked the ones on each side of the cockpit caused by the interior cockpit molded in detail. More sink marks were filler towards the rear fuselage caused by the inner structural reinforcement.
The fuselage was dusted and treated with Polly S Plastic Prep.
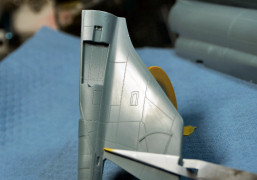
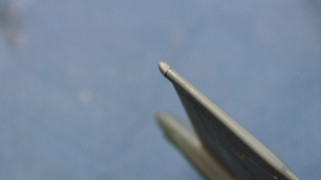
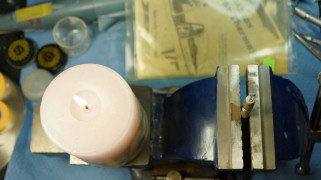
I had almost forgotten to work on the tail "fin cap" which was actually meant to be a clear cover for two tail lights. I sanded down the plastic cap to shape and then carefully cut it off using a sharp serrated razor. I thought it would be easier to thermaform a clear cap using the solid plastic cap as a master.
I still had Squadron stock which has yellowed after many years of storage but it still would look good for such a small part. The set up included a candle, a vise and a small drill where I had screwed the solid plastic cap on. A tiny bit of lubricant went on the cap to prevent the clear part from sticking on it. Thermaforming worked well but I was not happy with how the part look. For one thing it was a tiny bit oversize and it would have never attached securely. Instead I decided to use a piece of clear sprue and sand it to shape. Prior to attaching it to the tail, I drilled two small holes on the solid clear plastic to represent the two lights under the cover.
I then worked on the splitter plates. They seem to match my photos on the outline. At least it looks like someone made some effort to make them look like an A/C configuration.
Last step for this weekend was to use Mr Surfacer 500 to see how it all looks. Light wet cloth sanding will follow next to see where the other imperfections are (like the huge and long sink marks across the wing leading edges) and then a final coat of Mr Surfacer 1000 or 1200 will follow.
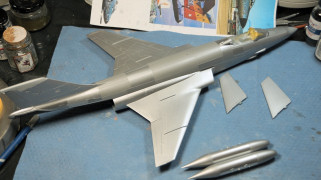
Work on the Voodoo continued with laying down Mr Surfacer 500 to get things started. The plastic is not smooth because the molds were not polished. Mr Surfacer filled in the plastic irregularities for the most part but another coat was needed and then after that another coat of 1000 Mr. Surfacer was applied and polished as well.
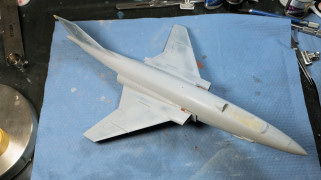
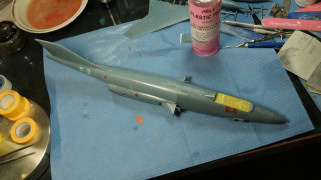
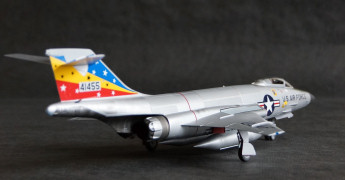
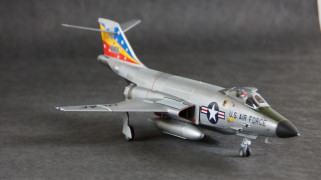
This is going to be a European deployed Voodoo so I used Floquil Old Silver for the base model surface. I also used Coroguard for the top fuselage surfaces. Some Alclad II shades were also used as per the various color photos on the web. The tail tip was painted light gray.

The antiglare panel was painted green.
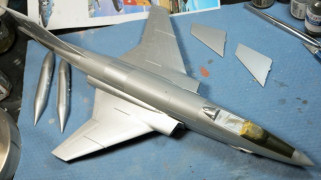
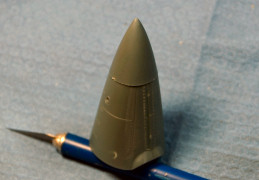
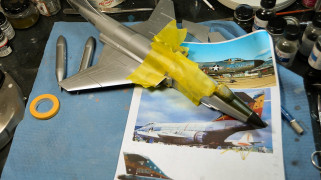
Work on the Voodoo continued with masking and painting the intake lips. Careful masking was necessary both because the pattern is a bit complex at the splitter plate and because I did not want to over-spray the rest of the model. Also the nosecone was painted black and after it was dry I masked again and painted a slim ring of different and a bit goldish hue between the fuselage and the nose-cone as per photos of the era for the UK deployed Voodoos.

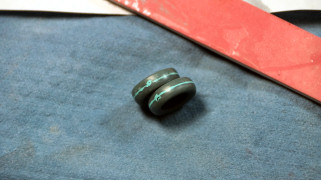
I also decided at this stage to fix the main landing gear tires. I again used 3M Acryl Blue for the huge groove left behind after assembly and they came out fine. I painted them tire black and waited for them to dry completely before shooting the silver wheel hubs.
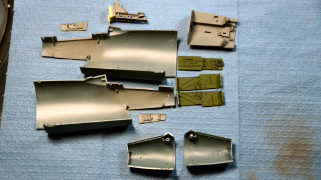
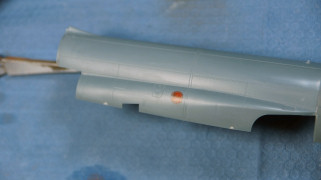
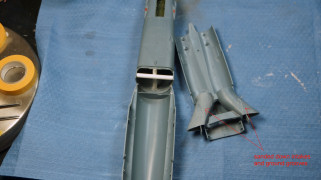
Next stop was the exhaust cans. I was not satisfied with the kit cans after seeing pictures of built Voodoos but I still threw one exhaust together with the kit parts just to see if I was still not happy. They can be made to work but I was not happy with the numerous seams and the fit of the panels. I dug out my C&H conversion and the Koster conversion set and chose the C&H set as a substitute. The Kitty Hawk parts went in the C&H set for possible future use.
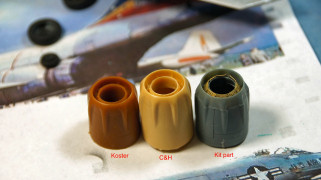
I used Alclad II paints again and pictures to paint the exhausts. I will work on them a bit more to enhance their look with some SNJ powder. Next stop will be to put on the landing gear and the clear parts.

The build continued with minor issues here and there. One thing I noticed with all the Kitty Hawk builds is that part removal from sprues is better done with a micro razor saw. Sprue cutters do not work well with the parts as they will be stressed and break. Another problem is that the sprue gates go into the parts that they support. For example, the front landing gear doors have sprues that intrude into the flat part surfaces. Even after carefully razoring out the doors, the modeler still has to cut the remaining sprue from the part.


The landing gear instructions are not very clear with actuator part placement and I had to use my museum photos to be sure.

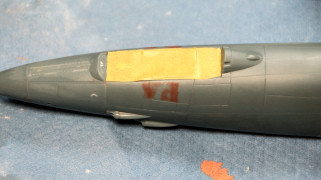
After the landing gear was installed and the model was standing on it, I finished off some small details and masked the canopy for the interior gray and exterior metal finish.
Very small things remain to be attached now. Next big thing is for the Caracal decals to arrive!
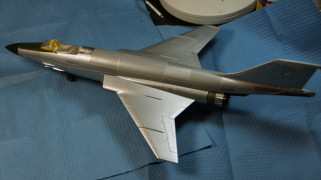
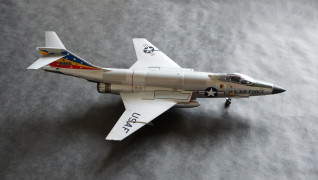
So this build is finally done. Although I am mostly happy with the end result, I feel that it could have been achieved with less pain and suffering. I find the upcoming RF-101 versions even more exciting, but I feel a bit apprehensive about diving into another such build. Maybe the kits will be better fine-tuned by then. As a general note to the Kitty Hawk model builders out there: remember to use razor saws and be careful as the tinny fiddly bits will break.


My sincere thanks to Kitty Hawk Models for this review sample!