Moebius Models 1/25 1954 Hudson Hornet Special Build Review
By Ken Kitchen, Front Range Auto Modelers (FRAM)
| Date of Review | December 2015 | Manufacturer | Moebius Models |
|---|---|---|---|
| Subject | 1954 Hudson Hornet Special | Scale | 1/25 |
| Kit Number | 1214 | Primary Media | Styrene |
| Pros | Extensive details, excellent fit of all parts | Cons | Slightly vague instructions |
| Skill Level | Moderate Experience | MSRP (USD) | $29.95 |
The Build
For a look at this kit as it appears in the box, look here.
As I stated in my earlier out of the box review of this kit I always try and do a Google search to see what I can find for background info. And as usual I wasn’t letdown; there is an incredible amount of information about these fascinating cars available on the internet. In this case I not only found out a great deal about Hudson’s I also found the inspiration I needed for this build.
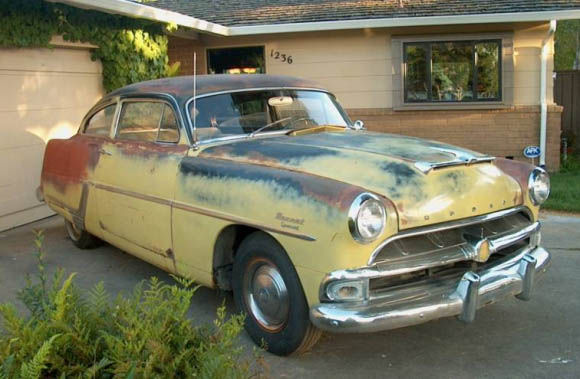
Here’s a quote from the “Bring a Trailer” website describing this car: “This 1954 Hudson Hornet Special Brougham has survived with all original paint and interior. It was last running about a year ago and the seller claims he has every registration document back to 1955 as well as the original sales contract from Trinidad Hudson dated June 15th, 1953. Even better, the seller has time slips from the now extinct Fremont Drag Strip where the car made some 19 second passes back in the day.” The site also included a few pictures of this car which gave me enough inspiration to accomplish this build.
As with most auto models if you follow the instructions they have you start with the engine assembly, but I tend to use the instruction more as a how-to guide for the subassemblies but not necessarily the build order. I like to start with the body partly because for me it’s the soul of the kit. Plus face it if you really mess up the paint job and decide to move onto another project you haven’t wasted time on the rest of the kit.
So as is my custom I started prepping the body for paint. The Hornet body has some mold lines that are barely visible along the tops of the fenders, as well as one along the front of the hood which need to be dealt with. Beyond that though prepping for paint was very simple.
I washed the body with soap and water to remove any residual mold release and hit it with a light coat of Tamiya fine white primer. This primer does a good job of sealing the plastic and filling fine scratches that are left from the seam removal. It’s also light enough to reveal any other imperfections I may have missed.
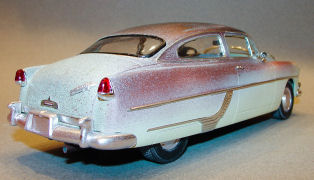
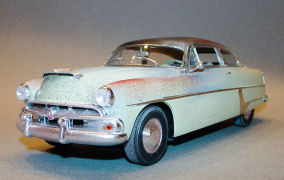
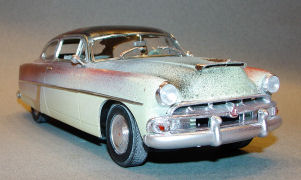
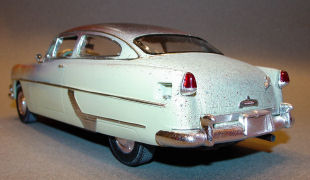
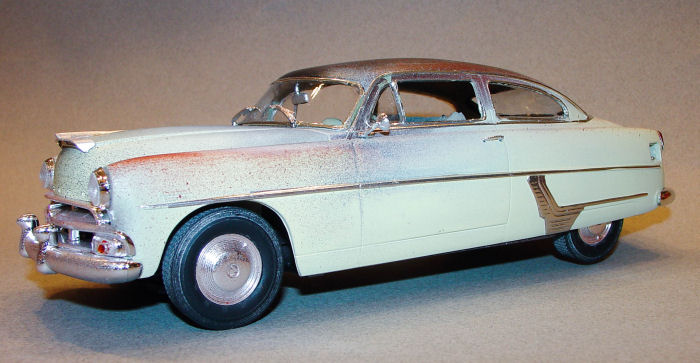
For 1954 Hudson offered the Hornet Club Coupe in 14 different colors, and 22 different two-tone color combinations available for 1954. Fortunately for me for this build I didn’t have to wade through all these options. Instead as the description of the car I was modeling stated: “The car came from the factory in yellow with a black roof, but now has a few extra shades of primer and surface rust.” While I was trying to replicate a factory stock color scheme 60 years of “life” freed me up quite a bit on the colors. I used a mix of Krylon Meringue (light yellow), and Ruddy Brown (red oxide primer), and Tamiya Semi-Gloss black to replicate this survivor’s paint.
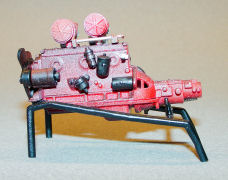
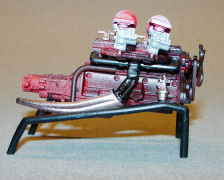
Again since I’m replicating a specific car I did my best to represent what it looks like now not what it looked like when new. I painted the basic block Tamiya Italian Red which is a very bright red. The various bits & pieces were paint in Tamiya Semi-Gloss Black and Krylon Silver. I then dusted the pieces with various colors to try and replicate the look of 60 years of wear and tear. After that I assembled the engine per the instructions.
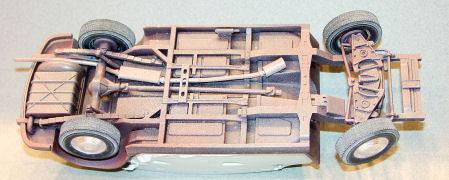
The chassis assembly came next, most of the parts I painted semi-gloss black the only thing I didn’t paint black is the exhaust which I painted Krylon Silver. Once the paint was dry I assembled the chassis mostly per the instructions. One area I deviated was to leave the spindles loose so that I could have pose able steering. Once the chassis assembly was complete I dusted it with Krylon Ruddy Brown, and Tamiya Light Sand to show 60 years of wear and tear.
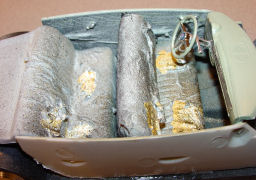
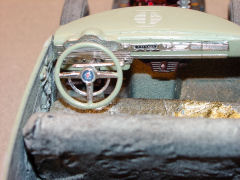
The interior is the next assembly to tackle. It was also the most difficult part of this build as I tried to replicate the very worn appearance of the prototype’s seats which had some significant holes and tears in the fabric with large portions of the foam underneath showing through. The way I did this was to soak some tissue in a 50/50 mix of white glue and water and laid it down on the seats and door panels. Once the tissue started to set up but before it was completely dry I tore the it in the appropriate places. After everything was dry I used a mix of thick white & yellow craft paints to replicate the foam.
At this point the engine and transmission assembly are mated to the chassis and frame assembly. The radiator and hoses are next then the firewall and final body assembly.
After putting body & chassis assembly together I installed all the lights, wipers, hood trim, door handles bumpers and side view mirrors. Test fit everything first, as I found I needed to open up a few locating holes that had become too tight from paint application. The body fit is very good, but take care as you’ll need to spread the body a little in a couple places to clear the floor boards. There are a couple of solid glue points on the front and rear of the chassis that lock the body down tight.
This was a relatively quick and simple build with minimal drama as the kit is engineered quite well. The fit and finish is exactly what I’ve become accustomed to from Moebius.
My sincere thanks to Moebius Models for this review sample!


