


Moebius Models 1/25 1965 Plymouth Belvedere Kit Build Review
By Jeff Conrad, Front Range Auto Modelers (FRAM)
| Date of Review | September 2016 | Manufacturer | Moebius Models |
|---|---|---|---|
| Subject | 1965 Plymouth Belvedere | Scale | 1/25 |
| Kit Number | 1218 | Primary Media | Styrene |
| Pros | Subject, fit, detail is very good | Cons | Door panel engraving, rear glass fit |
| Skill Level | Moderate Experience | MSRP (USD) | $32.49 |
Build Review
When I completed my first look of this kit I felt this kit would be an enjoyable build and result in a great replica for my Mopar collection. It wasn’t long before I pushed it to the front of the “queue” and got started.
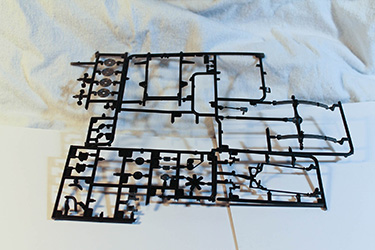
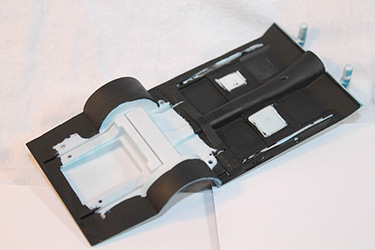
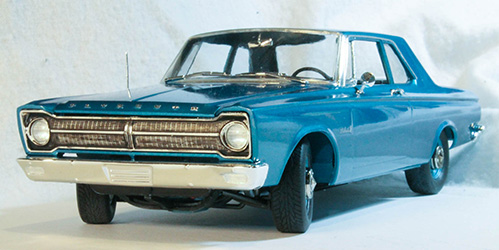
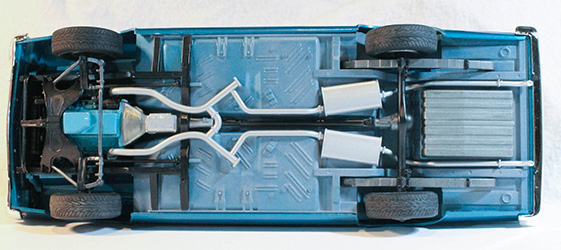
Typical with most automotive models the instructions have you start with the engine assembly, and in this case we have a decision to make – either the Max Wedge motor or the Commando 426 motor. The only real difference between the two is on the top end – the Max Wedge is equipped with a dual four-barrel carb cross-ram intake while the Commando has a single 4-barrel carb – the version I chose. After gluing up the block halves, heads, intake manifold and front cover I set the assembly aside and began to prep the rest of the model for paint. After gathering like colored parts I began to prep them for paint. I like to keep parts on the sprues as long as is practical to aid in handling. The body is always an important focal point, so I set to work removing mold lines and imperfections. A scant 10 minutes later I was done with the body – no kidding, it is that well molded. Moebius has done an amazing job with the tooling on this kit. One issue I found was with the door gap engraving – it is very faint, and a few coats of paint will make it nearly invisible. Likewise for the fender scripts, but there the kits decals should solve the problem. I advise builders to run the back of an #11 blade (or the scribing tool of your choice) in the door panel trenches to deepen them a tad before painting. Bucking the trend with the instructions, I attached the front and rear body bulkheads to the body now (rather than in step 5) so painting not only goes easier but the color will match between body panels.
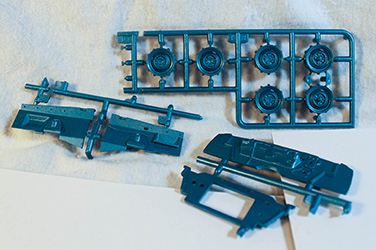
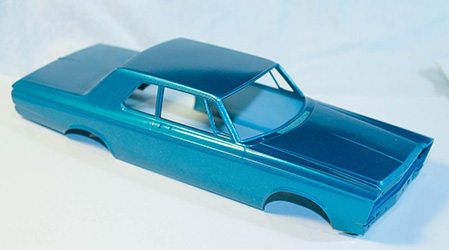
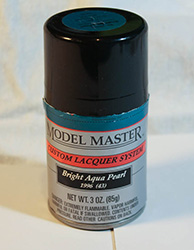
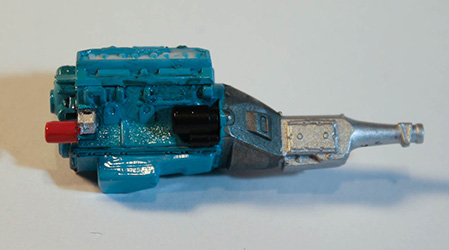
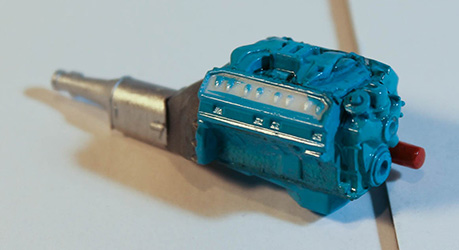
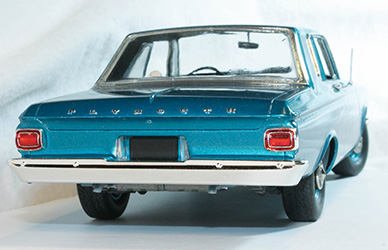
For the body color I chose to use Model Master #28115, Bright Aqua Pearl from the Custom Lacquer System. This color is a close match to Medium Turquoise Poly from the factory for 1965. In addition to the body, the firewall, inner fender panels, radiator support and stock steel wheels receive this color. From the factory the interior was available in Blue, Turquoise, Red, Gold or Black. I chose to go with black, so all the seats, side panels, dashboard, and steering wheel were sprayed with Tamiya TS-29 Semi-gloss black, while the interior floor was brush painted flat black. The majority of the chassis components (suspension, K-member, front sub frame) as well the fan, pulleys, belts and hoses also received some TS-29. The engine color was a little more challenging, as no model paint is available to replicate the Mopar turquoise that adorned all big block and racing big blocks (except the Max Wedges) from 1962-1971. I started with Model Master #2765 Turquoise, which is a little too light, and added a few drops of Model Master #2730 Chrysler Engine Blue and a small drop of Testors #1171 Green. Once I got a color I was happy with I airbrushed the engine block, heads, intake manifold and front cover. After a few days of curing I washed the entire assembly with thinned Tamiya Smoke (X-19) to bring out the details. One thing to be aware of, the exhaust headers have positive locating tabs, but it can be tricky getting them to mate to the corresponding detents in the heads, so be cautious here. Once done, the motor and front sub frame are mated together and set aside.


The interior builds up off the floor board, with the front and rear seats going in first, followed by the left and right sides. Take care here and make sure the side panels seat fully down into the slots on the rear seat to allow the body to seat down properly. Once the sides are solidly attached the dashboard and searing wheel locate to slots on the side panels. The tabs are sizeable, so I trimmed them back until the dash slid into place tightly with a solid click. Basic black was used on the interior in keeping with my budget street race.
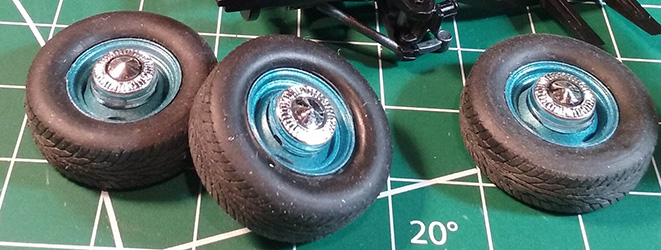
Wheels and tires are next, and these went together very well with no problems at all. The tires have great tread detail and are molded in a soft vinyl that has a great texture and color. They represent modern radial tires – good for my build but they are too wide and rounded to represent period bias ply tire of the 60s. Look to other sources (AMT parts packs for example) if you are building a period replica or show room stock replica.
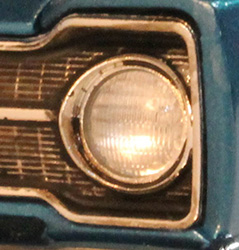
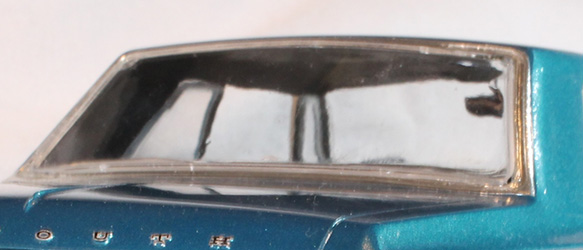
The headlight assembly is an interesting approach to the problem – instead of the typical molded bucket that a clear lens attaches to Moebius has a three piece assembly that really looks good when completed. The grill has an open hole for the head light, and the clear lens is sandwiched between the grill and the rear bucket, which glues to the back of the grill. One issue: the instructions say to use part #145A (clear) for the Left headlight assembly – I found the engraved lines simulating the lens on this part were better suited for the right side assembly, so I swapped 145A and 145B. All the window “glass” notched in and was easy to attach except one – the rear window. The instructions tell you to install the front and rear glass from the outside (the other windows install from the inside.) After the side glass was installed I jumped ahead in the instructions and mounted the body to the chassis. I find trying to fit the body after the front and rear glass are installed too often leads to problems – glass popping out, getting glue on clear parts, too much handling, etc. The front windshield fit very well – no gaps or issues. Not so with the rear though, as it appeared to be about 1mm to large in diameter all the way around. I spend the better part of an hour trying to find the “secret” to installing this glass, but there was no apparent trick – the rear window would simply just “sit” on top of the outer window molding which was already foiled. I don’t really think Moebius intended that, as the window would stand out from the opening about 1mm, looking quite silly to be honest. So, the only thing I could think to do was carefully remove about a millimeter from three edges (bottom and two sides) and then bevel the top edge. This gave me a positive attachment surface at the top and allowed the other three sides to sit flush with the trim while also providing some small measure of contact for the glue to adhere to them. After another hour of filing, test fitting, filing, test fitting, etc. it finally fit well enough to look “natural”. However the glass was no longer clear, so next I had to polish the scratches out with my three way polishing stick from Squadron. A few minutes with that and it was just about perfect, so I treated the piece to a dunk in Future to sharpen the shine. 24 hours later the rear glass was installed. Hopefully this was a fluke, but if I build another 65 Belvedere (likely) and the rear window doesn’t fit I will simply replace it with some clear styrene – the shape is easy to duplicate and it would take far less time that trying to fix the kit piece.
Front and rear bumpers, parking lights, door handles and windshield wipers were all that was left to install and the build was complete. When it comes to fender scripts and brand lettering I usually apply bare metal foil to simulate the chrome on these pieces, but this time I used the kit decals. For the hood and trunk “Plymouth” lettering the decals come as one long piece, but to avoid any silvering from the clear carrier film I cut each letter apart and applied them separately. It sounds like more work, but it actually went quite fast, getting both the trunk and hood done in about 15 minutes. I prepped the body with Microscale industries’ Micro Set then I dipped the decal (about 3-4 letters worth) into warm water for about 10 seconds, then let it sit for about a minute to allow the decal to soften. Using a small #2 pointed brush I slid the letter from the paper onto the raised letter on the model. I didn’t sand the letters flat earlier because I wanted a raised appearance for the lettering, and the letters were the same size and font at the ones on the model. Roughly fifteen minutes after applying all the letters I followed up with a dab of Microscale Industries Micro Sol to insure the letters were snuggled down onto the model, and then left to dry overnight. I am impressed with how convincing the decals look. A quick clean up (to remove finger prints) and an application of “The Treatment” model wax and my sleeper street racer was ready for some Saturday night cruising!


Moebius has created another great kit of a neat subject that until now has been long ignored. This subject is truly a “blank canvas” that lends itself to so many subjects – drag racing, stock car racing, customs, and of course factory stock versions – how about a slant six under the hood like the one from the Lindberg 64 Belvedere! With the exception of the rear glass and light door frame engraving – both easy to fix - this was a straight forward build, just like all the other Moebius kits I’ve built. Highly recommended!
Thanks go to Moebius Models for the review sample.