


Polar Lights 1/12 Robby the Robot Kit Build Review
By Steve Causey
| Date of Review | January 2014 | Manufacturer | Polar Lights |
|---|---|---|---|
| Subject | Robby the Robot | Scale | 1/12 |
| Kit Number | 0893 | Primary Media | Styrene |
| Pros | Beloved subject, modified/ improved parts, movie poster backdrop | Cons | Some fit problems due to age of moldings |
| Skill Level | Experienced | MSRP (USD) | $41.99 |
Build Review
For a look at this kit in the box, look here.
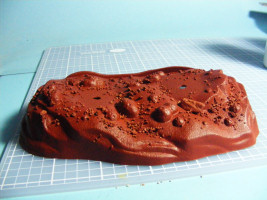
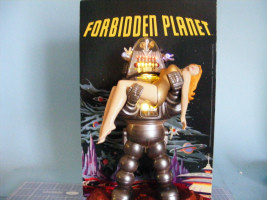
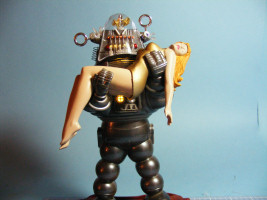
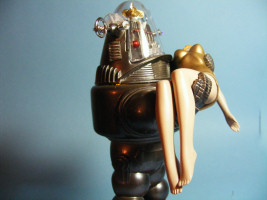
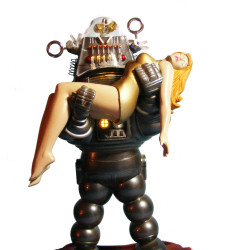
Robby the Robot is a true Icon of the Science Fiction Universe. Polar Lights has done a nice job of adding a few new changes to this vintage kit. The most obvious addition to the kit is the figure of Altaira, but the kit also features new legs and arms for the robot, a new base and a pasteboard backdrop that is a reproduction of one of the dramatic lobby posters.
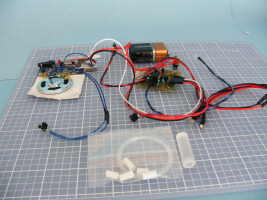
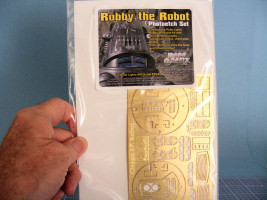
For this build I added a sound and light kit from Starling Technologies and a photo-etch set from Paragrafix. The instructions are clearly done with eight easy to follow steps.
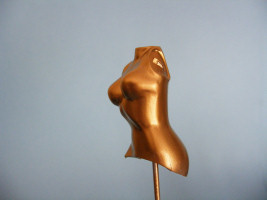
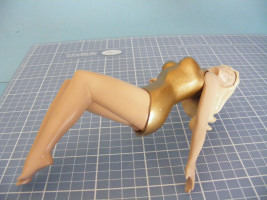
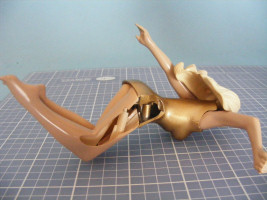
This is my fourth Polar lights Robby build so there were no surprises. I started the build with The Altaira figure which goes together well and I only used a little Mr. Surfacer on the seams. I painted her with a combination of Tamiya gold, and some craft spray glitter.
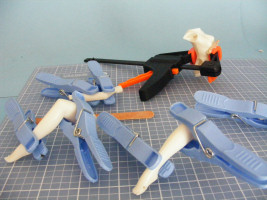

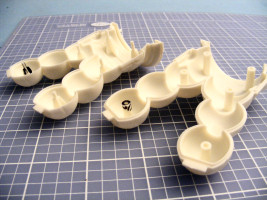
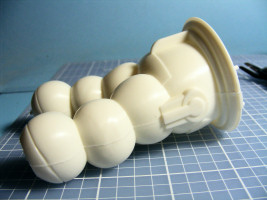
The robot's legs and feet are new for this kit featuring a different pose, and a better fit along the seams than the old legs, the new feet have invisible seams and this helps speed the project up too. I used very little filler, choosing to dress the seams with primer and sanding. The kit is easy to add lights to, only a few modification being needed to install the light kit. (The light kit comes with an illustrated PDF instruction document that fully explains the installation process.) The sound and light kit is plug n play with no soldering required.
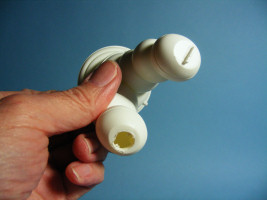
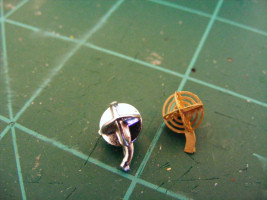
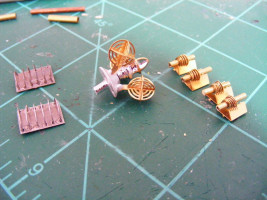
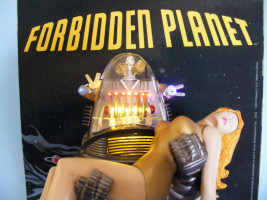
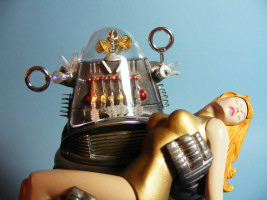
The majority of the electronics are hidden under the base and only three LEDs and eight fiber optic strands go inside the robot's body. I needed to drill holes in the base for three switches, and a hole where the robot's foot will stand to pass the fiber optic strands and the wires for the LEDs. Once the robot body was painted, I cut away a locator pin inside the leg and drilled a hole in the foot to pass the wires into the leg. The two lighted circles on the chest (analyzer disks alpha and beta; kit part #34 & 35) are drilled out. Alpha has a dedicated LED and beta has 4 alternately blinking fiber optic strands.


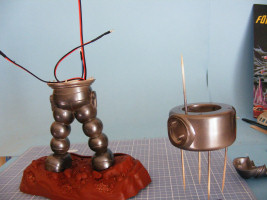
The next two LEDs light the head and face. I drilled out seven upper and six lower holes in part #13 using a micro drill bit in a pin vise. Then I put a short length of fiber optic strand in each hole and gathered the fibers up and made sockets for the two LEDs using plastic tubing. Finally, the last 4 fiber optic strands light the weapon neutralizers and each side of the robot's head. This requires drilling out the kit parts # 5 and the 4 clear parts #s 6,7,8&9.
After all the fiber optics and LEDs were mounted in the robot, I ran the fiber optic strands down into the base and connected them to the proper LEDs on the circuit board.
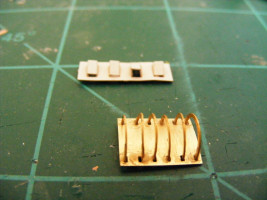
In my opinion, another must have is the excellent photo-etch set; the photo etched gyros on top of Robby's head alone are worth the cost of the photo etch set. The photo etch set requires patience, but you will be rewarded with an amazing replica.
The rest of the build goes smoothly and the assembled figures lock together when completed. The base makes for a sturdy platform to display the finished kit, and the movie poster backdrop is the icing on the cake. The Altaira figure is molded so painting is fairly easy, even beginners should be able to produce pleasing results.
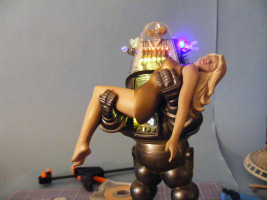

If you didn't fix the seams or add lighting you could have a finished model in a few days, this build took about two weeks. Even if you have one of the old Robbys in your collection, this new version will be a great addition to your shelf. Polar Lights did a great job of sprucing up this venerable veteran.
I highly recommend it!
My sincere thanks to Round 2 Models for this review sample!