


Polar Lights 1/1000 Romulan Bird-of-Prey Kit Build Review
By Michael Benolkin
| Date of Review | May 2015 | Manufacturer | Polar Lights |
|---|---|---|---|
| Subject | Romulan Bird-of-Prey | Scale | 1/1000 |
| Kit Number | 0934 | Primary Media | Styrene |
| Pros | Simple construction, fast build | Cons | Nothing noted |
| Skill Level | Basic | MSRP (USD) | $22.95 |
Build Review
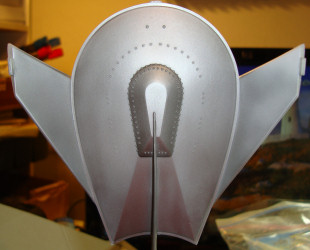
For a look at this kit straight out of the box, look here. When I wrote that first look, I said this would be a quick build and indeed it was. Step One - build model. I assembled the model according to Step One in the instructions though I took the time to use Tamiya Extra Thin Liquid Cement and clamp the various halves together to dry - the wings, then the wings and main hull. I left the engine nacelles separate until the end. After the glue had dried, there were just a few spots on the underside wing/hull joins that needed a spot of filler. I used Gunze Sangyo's Mr. Surfacer 500 and when it had dried, I used a progressive series of sanding blocks down to 4000 grit to prepare the surface for paint. Before I started, I rubbed the subassemblies down with Isopropyl alcohol to clean off any contaminants on the surface of the plastic that would interfere with paint adhesion.
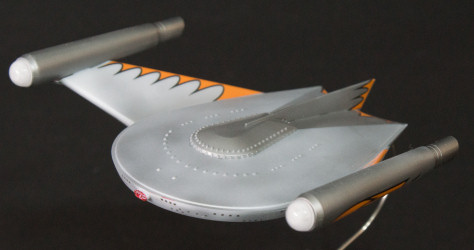
When I saw in the instructions that the Bird of Prey was finished in various shades of bare metal, I decided to test the new AK Interactive Xtreme Metal
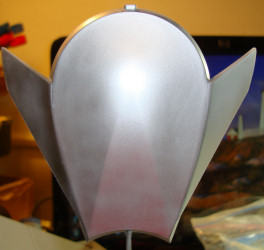
colors that had arrived about the same time as this kit. The first coat was the Aluminum shade which covered nicely. These AK metal shades are enamel-based and are quick-drying. According to the demonstration video (which is in the review link above), you can mask for the next color as soon as you clean your airbrush from the first shade. I did just that using Tamiya yellow masking tape, I masked off the bridge dome and rear area and then painted with the Dark Aluminum shade. As soon as I cleaned the airbrush again, I pulled up the masking tape and had none of the Aluminum paint pull up. Nice! Be careful though, the metalizer is easily scratched, so watch your fingernails while handling the model at this stage.
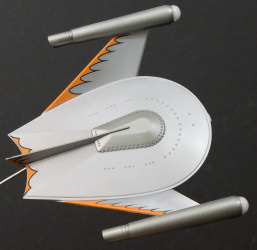
The engine nacelles were also painted with the Aluminum shade, but according to the instructions, the rear sections of the nacelles should be chrome. That was a good excuse to try the corresponding AK Interactive colors. I masked off the aluminum area and sprayed the Black Base color (quick-drying gloss black) on the nacelle rears. When I had cleaned the airbrush, sure enough the black was dry. I loaded up the Chrome and oversprayed the black. This process works great. Again I removed the masking tape from the nacelles and again, no problems.
The two scratches that I had inadvertently put on the hull were sprayed with the Aluminum again and the scratches disappeared with no trace. Before I scratched again, I applied a clear coat of Future on the hull and the non-chrome sections of the nacelles. I let this dry for about an hour. I tried to scratch the finish and the Future protects models as well as it does floors.
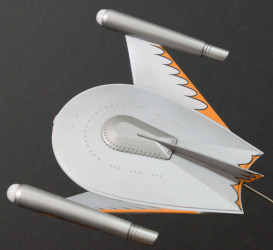
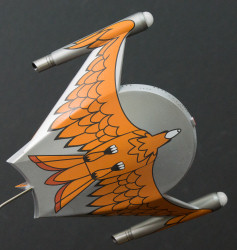
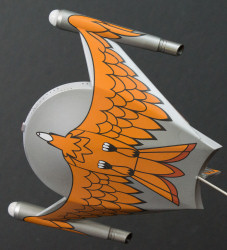
Now comes the moment of truth, the bird of prey decals. I dropped the bird's body decal into the warm water and brushed water onto the underside of the hull. This ensured that I could maneuver the decal into position before the decal glue set. Next, I followed the instructions' recommendation to cut off the outer wing sections of the wing decals and apply these later. I applied each wing in the same manner and they worked nicely.
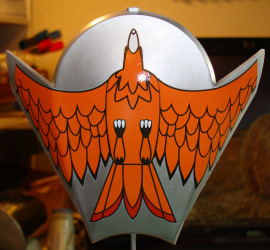
It was time to glue the nacelles onto the wings and apply the remaining decals. When all of the decals were dry, I airbrushed a coat of Gunze Aqueous Clear Flat over the model except over the chrome-painted nacelle areas. This knocked down the brightness of the orange bird a bit as well as the reflection. The last step was to paint the insides of the clear domes white and add them to the fronts of the nacelles. You can see in various screen grabs that the active engines are sort of green in the original production and I think they went red in the reworked episode, but I assume that they'd be opaque white when the engines were off.
This was a fun project and a nice opportunity to see if the model builds as nicely as it looks. Yes it does. It was also a nice opportunity to try out the AK Interactive Xtreme Metalizers and I'm quite pleased with the results.
You're going to need one of these kits in your collection!
My sincere thanks to Round 2 Models for this review sample!