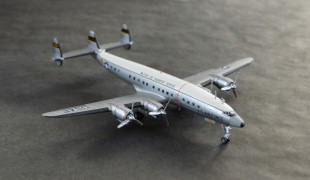
Revell 1/144 C-121C Constellation Kit Build Review
By Fotios Rouch
| Date of Review | August 2015 | Manufacturer | Monogram |
|---|---|---|---|
| Subject | C-121C Constellation | Scale | 1/144 |
| Kit Number | 4269 | Primary Media | Styrene |
| Skill Level | Experienced | MSRP (USD) | Out of Production |
Photo Feature
This is the re-release of the Lockheed Constellation L-1049G by Revell which is better than the older Revell release and with a lot more detail than the Academy kit. I decided to build it as a C-121C. This meant that some panel lines had to be deleted, some windows and doors removed and some new panel lines and cargo doors would have to be re-scribed.
The assembly of the kit is very straight forward. It even includes a nice cockpit with three seats and instrument panel. Notable since the view to the cockpit on the Connie is very limited. Minicraft should take a note of that when they offer no cockpit at all on their C-130 for example.
I used 3M automotive putty to cover unneeded panel lines, doors and windows. The rest of the windows were covered with liquid mask and whole model was sprayed with Mr Surfacer.
Mistakes were uncovered and were worked on and then a final primer coat was applied prior to starting the painting process.
The next step with the Connie build was spraying the white top coat. It took many fine coat applications until an orange peel and even gloss white coat was realized. It was left for days to dry, although in the Arizona heat this might be overkill.
Next the white top was masked in preparation for the Floquil Bright Silver coat. This is when I got perplexed. Looking at the photos of the real plane, it looks like the dark blue cheat line starts at the top of the cockpit window and proceeds to go exactly on top of the main cabin windows before it gently loops up and over the fuselage. Looking at the model and the images I realized that something is a bit off. I masked the model the best way I could and sprayed the silver color.
Painting continued with masking and spraying the various metal shades. I chose Alclad II dark aluminum, stainless steel and white aluminum for various accents. The cowlings on the Connie pictures look brighter than the rest of the airframe and there are stainless steel looking plates behind where the exhausts are. On this C-121C the radome is gray with a black tip. The antiglare black in front of the windscreen is restrained and small.
I decided to paint the black/yellow bands on the Connie's tails. One reason is that the specific aircraft I am doing, does not have "Atlantic Division" on the tails. Just "Atlantic". The only way to do this is to paint my own bands. Not an easy proposition in 1/144ths scale. I masked the yellow paint first and then I added the black paint which a mix of gloss and mat black. While I was doing the yellow paint I masked and sprayed the propeller tips. I removed the masking and now I can start applying decals.
Once the painting effort was completed, I unmasked the windows and cleaned up the model in preparation for the decal application. I used most of the decals included in the kit plus some form the spares box. I cut the "Division" out of the "Atlantic Division" portion of the tail decals and applied the "Atlantic" over the black stripe on the outer tail fins. I used the provided decals for the extra windows but they do not look very good and I am not sure what else I could have done. I left the model clean with no weathering.
Overall a nice kit (with the exception on the location of the main cabin windows).


