


Revell 1/72 F-16C Block 52 Fighting Falcon Kit Build Review
By Chuck Holte
| Date of Review | October 2013 | Manufacturer | Revell Germany |
|---|---|---|---|
| Subject | F-16C Fighting Falcon | Scale | 1/72 |
| Kit Number | 4669 | Primary Media | Styrene |
| Pros | Good fit, excellent decals | Cons | None noted |
| Skill Level | Experienced, due to decals | MSRP (USD) | $19.99 |
Background
The Lockheed Martin (originally General Dynamics) F-16A began series production in the mid-'70s as a light-weight, low-cost air superiority fighter. The "Fighting Falcon," or "Viper," as aircrews call it, has evolved into an all-weather multi-role fighter providing a superb air-to-air and air-to-ground capability for the US Air Force and 25 other nations. Over 4500 aircraft have rolled out the factory hangar doors and the production line is still open.
The Build
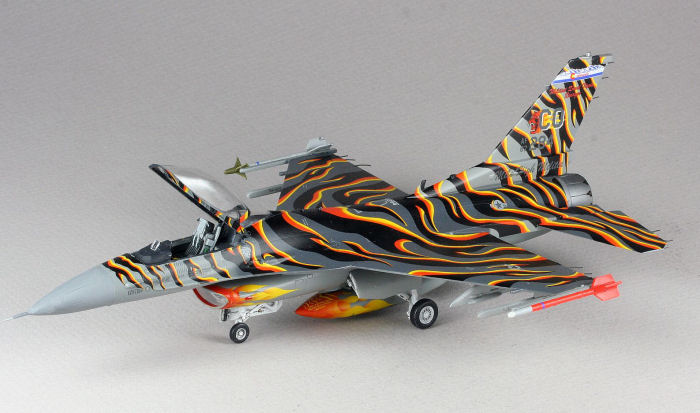
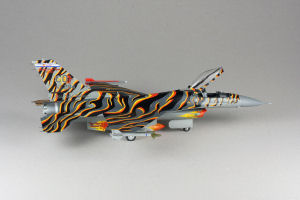
This is one in a series of Revell Germany releases of their excellent 1/72 scale F-16 with markings for unique, eye-catching multi-national color schemes. This kit provides colorful markings for a Colorado Air National Guard F-16C, 87-0284, from the 140th Fighter Squadron, Buckley AFB, a participant in the Tiger Meet of the Americas event, Cold Lake AB, Canada in 2003.
The kit is packaged in the familiar Revell Germany end-opening blue box with the Tiger Viper on the cover. Opening the box, one will find over 150 parts on five sprue frames; however, many of these parts can be immediately consigned to the bench stock spares inventory. Unneeded parts, such as different vertical tail configurations, engine tail cone and inlet options, a host of optional weapons, sensors and pylons, are intended for other versions of the F-16C in different offerings. The 15 page, 8X12 inch, multilingual instruction booklet does a good job of identifying the correct parts configuration for this particular Viper and provides options for a "standard" F-16C.
Following the instructions, the kit goes together well. Cockpit detail is more than adequate with raised detail on side panels and a decals for the instrument panel. The ACES II seat looks good, though I added some detail in painting it. I used a little filler to on the un-needed pylon holes in the wing and to blend the nose radome to the forward fuselage.
I washed the model with dish detergent and, when dry, primed everything but the clear canopy with Tamiya rattle-can Surface Primer (Gray). I then airbrushed the gear wells and inner door surfaces with Model Master Gloss White enamel and, when dry, masked the wells with their respective doors, using a small bit of yellow Handi Tak on the inside to keep them closed. After a few exterior touch-ups, I followed the kit painting instructions for the two color Viper scheme using MM FS 38270 Neutral Gray for the bottom, forward fuselage and vertical tail. MM FS 38118 Gunship Gray was used for the aft fuselage, wings and elevators.


Once the enamel had dried for several days, I airbrushed the entire model with two wet coats of Future, allowing a day to dry between coats. Future provides a glossy, non-silvering base coat for the extensive decals to follow.
The decals make this kit stand out from most everything else in my display case. Comparing the decal sheet to actual Tiger Meet photos, its all there. The decal sheet even captured "zaps" on the inside of the nose gear door including a bumper sticker that said "I Love Explosives" with a red heart replacing the word "love." Actual decal placement was not intuitive and I spent some time deciding how to apply such a complex scheme and which decals had to connect to make the whole scheme flow. I decided to start with the largest decal on top center of the fuselage that included markings for the Air Refueling Receptacle (ARR), reasoning that the decal had to match the engraved lines for the actual ARR. Once that was in place, I started piecing in all the other tiger stripes using the instructions, online photos and the box art to keep me honest.
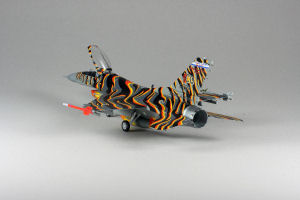

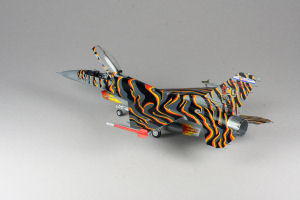
The decals were designed by Syhart Decal and printed in Italy, I suspect by Cartograf, judging from the quality, color and fit. Very strong decals with virtually no visible carrier film, and yet they settled into the panel lines and corners like paint. After all the stickers were down tight, I airbrushed another wet coat of Future to seal everything and provide a uniform base. I let this all dry for two days before airbrushing a final coating of Polly S Flat to take away the "toy" shine. Following the decaling and painting, I added the landing gear, doors, weapons and canopy.
Conclusion


Excellent F-16 kit; in my humble opinion, one of the best in this scale. If you like decaling, this is your baby! All in all, it was a very enjoyable build and certainly an eye-catcher when placed on the table with standard gray schemes. Recommended for experienced builders due to the complex decals.