


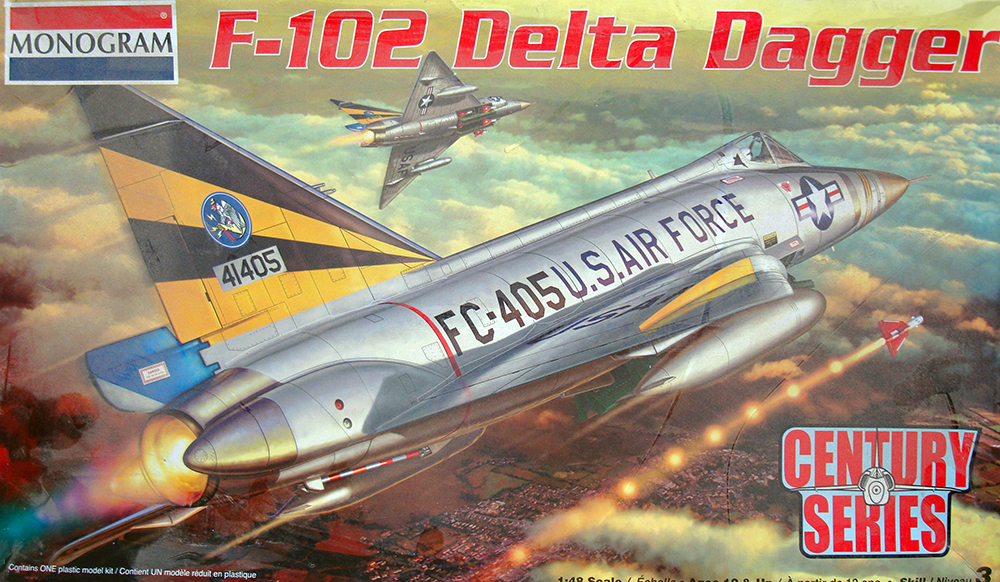
Monogram 1/48 F-102A Delta Dagger Kit Build Review
By Michael Benolkin
| Date of Review | September 2019 | Manufacturer | Monogram |
|---|---|---|---|
| Subject | F-102A Delta Dagger | Scale | 1/48 |
| Kit Number | 5518 | Primary Media | Styrene |
| Pros | Best kit of F-102A in 1/48 scale | Cons | See text |
| Skill Level | Intermediate | MSRP (USD) | $34.95 |
Build Review
When Convair won the contract to develop the F-102A in the late 1940s, they had already learned significant lessons from their efforts with their XF-92. The XF-92 looked a scaled-up German Lippisch P.13a interceptor designed by Dr. Alexander Lippisch. This was no coincidence as Convair (Consolidated-Vultee at the time) was not only given the captured engineering data from that program collected by Operation Paperclip, they also had the designer himself, now relocated to the U.S., on staff. By the time the XF-92 had reached Muroc Airbase (now Edwards AFB), Chuck Yeager had broken the sound barrier in the Bell X-1. Unlike the rocket-powered X-1, the XF-92 was powered by the Allison J33 which had insufficient power for the airframe. Even so, Chuck Yeager managed to break the sound barrier with the XF-92 in an aggressive dive, but the U.S. Air Force was ready to move on to a new design.
The F-102A was powered by the Pratt and Whitney J57 and equipped with a basic fire control system (FCS) that employed a mix of infrared and radar guided missiles that made up the Falcon family. There was no gun on the aircraft. The prototype YF-102 first flew in 1953, but its performance was underwhelming as it couldn't break Mach 1 in level flight. The design was revised using the newly discovered 'area rule' and in late 1954, the YF-102 reached Mach 1.22. The F-102A entered service as an interim interceptor as the U.S. Air Force was waiting on a more powerful engine and their full-function MA-1 FCS to be completed, both of which would equip the F-102B (later redesignated as the F-106A). In the middle of its production run, the F-102A received a new wing with a new profile in the outboard sections and this new design was designated as CASE XX. When a significant change is made to the aircraft's design on the production line, this usually triggers a new production block to mark that change, but the CASE XX wing was introduced in the middle of production block 75. Aside from looking at the outer wing itself, the only way to determine which aircraft had the original CASE X wing versus the updated CASE XX wing was the aircraft's serial number. F-102A 53-1790 through 56-1316 were CASE X, while 56-1317 through 57-0909 were CASE XX. The CASE XX wing allowed for Mach 1 flight at 50,000 feet, improved combat ceiling, as well as improved low-speed performance.
The F-102A was designed as an interceptor for use by Air Defense Command and as such, the F-102A did not have self-sealing fuel tanks as you'd see in a tactical fighter. In the mid-1960s, the Air Force found itself in a conventional air war over Vietnam using combat aircraft designed for nuclear deliveries. In those early days of Rolling Thunder, the F-100 Super Sabre was tasked with providing MiG protection (MIGCAP) for strike aircraft heading into North Vietnam. While the F-100 was an effective day fighter, it did not have a radar, so it could not find MiGs hiding in the clouds. The F-102 was sent over to provide airbase defense from enemy airstrikes (that never came) and in the MIGCAP role. The F-102's AIM-4 Falcons were not effective as they were not designed for maneuvering aerial combat. Nevertheless, the F-102 could be vectored to nearby MiGs using ground-controlled intercept (GCI) where its radar could detect the targets and sometimes drive them way from the strike flights. Sometimes that didn't work out as at least one F-102 was shot down by a MiG-21.
The F-102 would eventually be sent home to continue service in Air Defense Command until the F-106 Delta Darts were available in sufficient numbers, some were provided to Greece and Turkey, and most of the aircraft would be converted to PQM-102 target drones. As the F-102s were being phased out of service, the afterburner nozzles were repurposed to upgrade the remaining F-100 Super Sabre fleet. Like the F-102, the F-100 was powered by the J57, but unlike the F-102, the F-100's afterburner nozzle was problematic. The F-102's nozzle provided greater safety and reliability when fitted to the F-100.
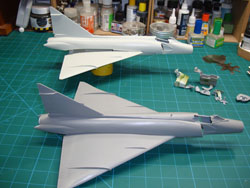
With the recent release of several nice F-102 decal sheets, I had the urge to build the Monogram 1/48 F-102A. At first blush, the kit is relatively easy to build and this should be a quick project. Sounds great, right? In the engineering world, there is a term called "scope creep" that happens when engineers and/or customers want more out of the same effort than originally planned. As I was looking through the three F-102 kits in my stash, I had the CASE X kit in a Monogram box, a CASE XX in a Hasegawa box, and another CASE XX in an Encore (Squadron) box. The Hasegawa boxing of the Monogram kit also had sufficient room inside for the C&H Aero TF-102A conversion. While that was tempting, that is just too much scope creep this time around and that project was saved for another day.
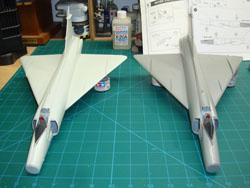
Assembly of this kit is rather interesting. With the fuselage, you build up the afterburner chamber, install it into the rear fuselage, and glue the fuselage halves together. The cockpit goes in later. With the wings, add the two main wheel well inserts, then glue the wing halves together. This is quite handy as I can take care of the gaps under the wings where the halves come together, fill, prime, fix as needed, reprime, and move on. The fuselage halves will have a similar gap in the vertical stab that will need to be filled, etc., and a lot of work can be done before adding the cockpit and mating the wings to the fuselage. Since I'm building two F-102As, the CASE X example will have the cockpit and weapons bay open along with drooping trailing edge control surfaces. The CASE XX example will have a pilot in the cockpit, canopy closed, control surfaces neutral, and weapons bay closed, depicting the aircraft ready to taxi. The CASE X example will get one of the colorful interceptor schemes while the CASE XX will be a Vietnam camouflaged interceptor assigned to Clark AB and forward deployed to several sites around Vietnam and Thailand.

Looking over the remaining two kits, the Monogram boxing looked sharp and ready to build. The plastic in the Encore box looked like the molds hadn't been cared for prior to use and there is lots of mold flash. The first step was to remove the wings and fuselage halves from the parts trees using a fine razor saw to avoid leaving scars where the trees were attached.
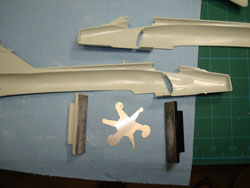
In both kits, there are the most unique ejector pin marks around the model and some of those were going to be in my way, so I started off using my R-V6 scraper. Once the plastic surface was clear of the marks, I sanded the affected surfaces smooth. Next came the Sujiburido files which plane a surface smooth and these knocked off the remnants of the sprue tree stubs.
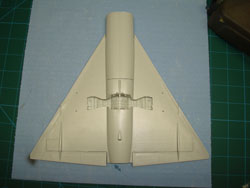
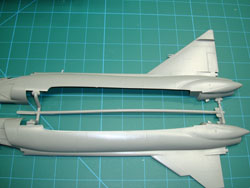
Here is the wing halves glued together and clamped to get the lower wing insert up against the leading edge as much as possible. Once the glue had dried, I began the process of applying cyano to the seams that should be invisible. I also glued the fuselage halves together and began test-fitting the wing and fuselage assemblies. There will be some gap filling required here too.
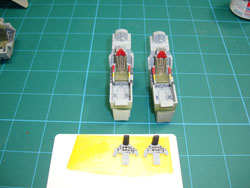
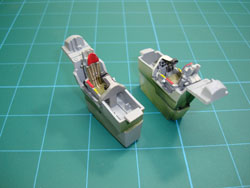
After some pre-painting, the cockpit tub is glued to the nosewheel well. The ejection seat is assembled and the process of detail painting the seat and instrument panel begins. The results are not bad and ready to be inserted into the fuselage.
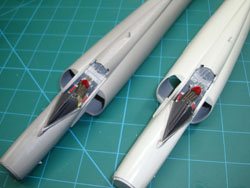
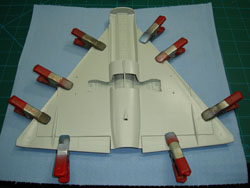
The cockpit is glued into place inside the nose and now the wing can be glued to the fuselage. Once the glue had dried, it was time to apply the gap-filling cyano where needed.
Stay tuned!