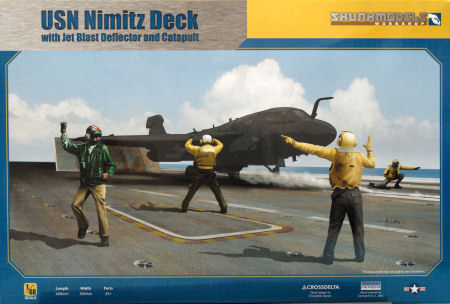
Skunkmodels 1/48 USS Nimitz Flight Deck Build Review
By Michael Benolkin
| Date of Review | November 2011 | Manufacturer | Skunkmodels Workshop |
|---|---|---|---|
| Subject | USS Nimitz Flight Deck | Scale | 1/48 |
| Kit Number | 48020 | Primary Media | Styrene, Photo-Etch |
| Pros | First larger display base NOT made from card stock | Cons | See text |
| Skill Level | Basic | MSRP (USD) | $39.99 |
Background
A few weeks ago, Lucky Model sent us three display bases from Skunkmodels Workshop for review. One was a modular unit that had three card stock flight decks that could be interchanged depending on what you wanted to park upon it ( look here). One was an impressive display base replicating the port side bow catapult from the USS Nimitz ( look here). The third display base was modular like the first one, but instead of card stock flight decks, this one had wood and photo-etch to replicate the deck of a World War II aircraft carrier like the Essex-class ( look here). Since the card stock flight deck was finished in the first review, I wanted to take a closer look at these other two flight decks as these are something completely new.
If you look at the parts images in the initial review, Skunkmodels made the deck in sections to make it easier to mold and to package. What comes out of the box however looks like a puzzle and you're left with two options here - leave it in sections or glue the beast together. I opted for the latter. I glued the deck together into two major assemblies, the deck around the Jet Blast Deflectors (JBD) and the larger deck area around the catapult. I used Tamiya Extra Thin Cement for this job and the two major sections came together rather quickly. When I held either section up to the light however, there was far too much light coming through those seams. I gave a passing thought to cyano but given that this deck may flex when moved, cyano is too brittle to hold together. This was definitely a job for liquid cement.
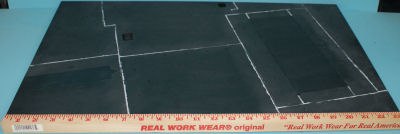
I reapplied liquid cement into one seam section at a time and then used some hefty clamps to mash the sections together. This took a several days and some patience, but when I held the two sections up to the light again, the seams were strong and solid. I glued the two major assemblies together and now I have one huge flight deck plate. The deck measures out at 23.5" by 14.25".
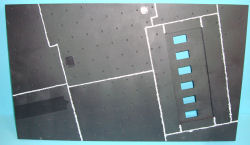
With the deck together and solid, I used Mr. Surfacer 500 around the surface seams. This image below illustrates nicely how this puzzle comes together:
The deck surface is molded with a slight texture that I didn't want, so I took the base to the kitchen sink and wet sanded the Mr. Surfacer as well as the deck surface. Even after sanding, you can see how much Mr. Surfacer remains to fill in the seams, but now we're closer to painting. I assembled the six sections of JBDs together and dry-fit them into the JBD well in the deck as you can see here. You can indeed build this deck with the JBDs down with no problem, but mine will be up soon.
Next, I'll paint the back of the JBDs, the JBD wells, and the insides of the deck hatches off-white. I'm sure these were white for the first few cycles but you can see in the images on the US Navy's website lots of good reference images for the JBD wells that range from greasy black to grimy white depending on when the last de-greasing session had been performed. These photos also show other colors and details that are found in there as well as with the deck hatches. Once the wells are painted and detailed, the JBDs can go back into the deck while the overall deck is painted, decaled, and weathered before final configuration.
Stay tuned!
My sincere thanks to Lucky Model for this review sample!


