


SMK 1/87 KrAZ-257 Build Review
By John Kelley
| Date of Review | July 2011 | Manufacturer | SMK |
|---|---|---|---|
| Subject | KrAZ-257 | Scale | 1/87 |
| Kit Number | 87003 | Primary Media | Styrene |
| Pros | Good detail; good fit; easy build | Cons | Flash on the cab |
| Skill Level | Basic | MSRP (USD) | $15.65 |
Background
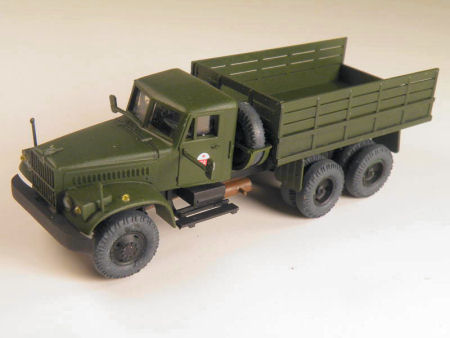
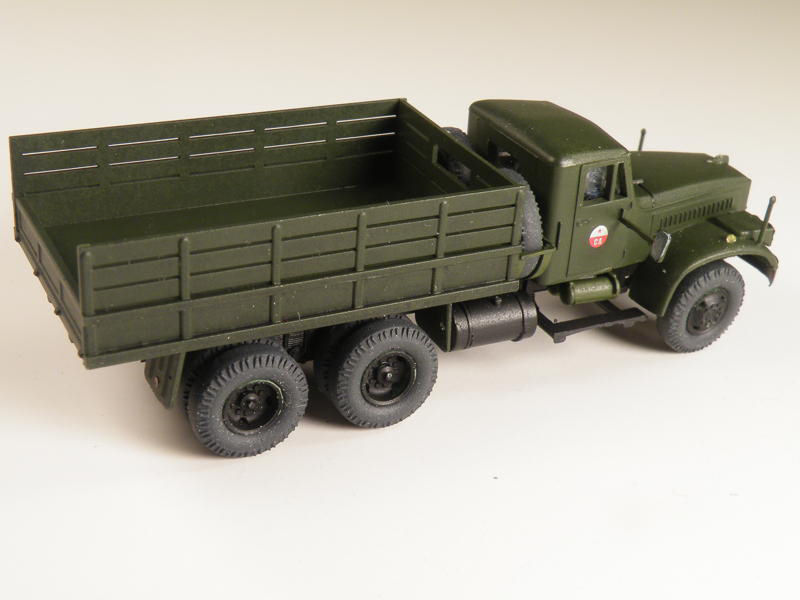
The KrAZ-257 was a post war cargo truck built in the Ukraine. It was originally developed from the KrAZ-219 truck and was used in both civilian and military service. Several thousand examples of this truck have been produced and exported throughout Asia and Africa; many are still in use today.
The Kit
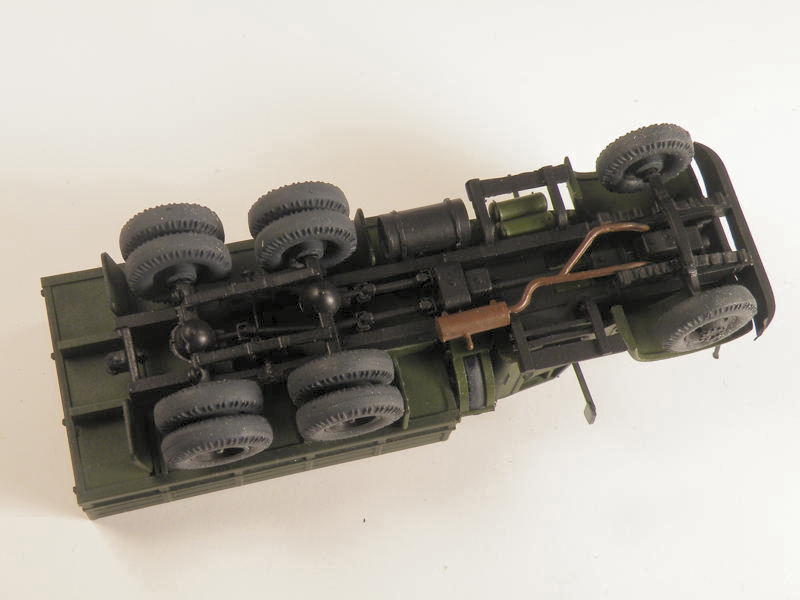
SMK has produced a model of the KrAZ-257 in 1/87 scale. The 25 part kit is molded in green, white, black and rust colored plastic. The model has a one piece chassis with engine and springs molded into the chassis. Only 7 pieces are attached to the frame and they are the front and rear axles, muffler, drive shafts, fuel tank and tool box.
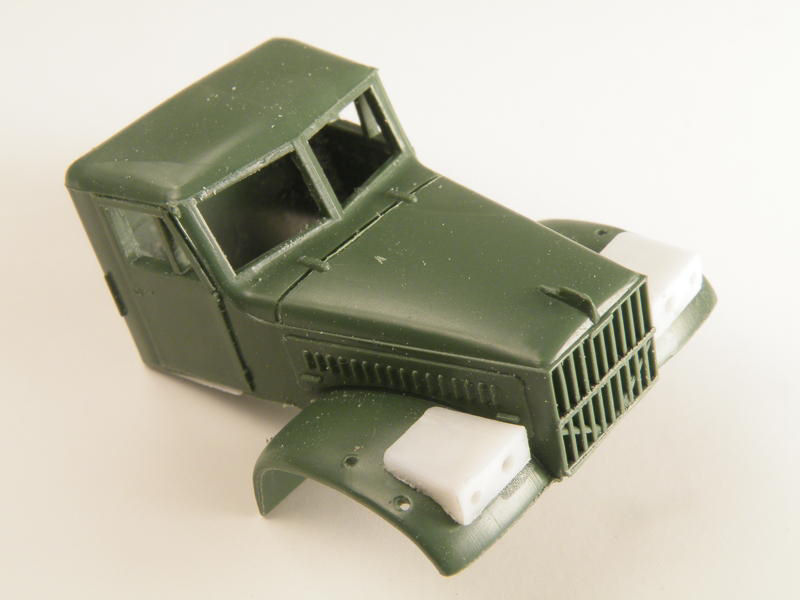
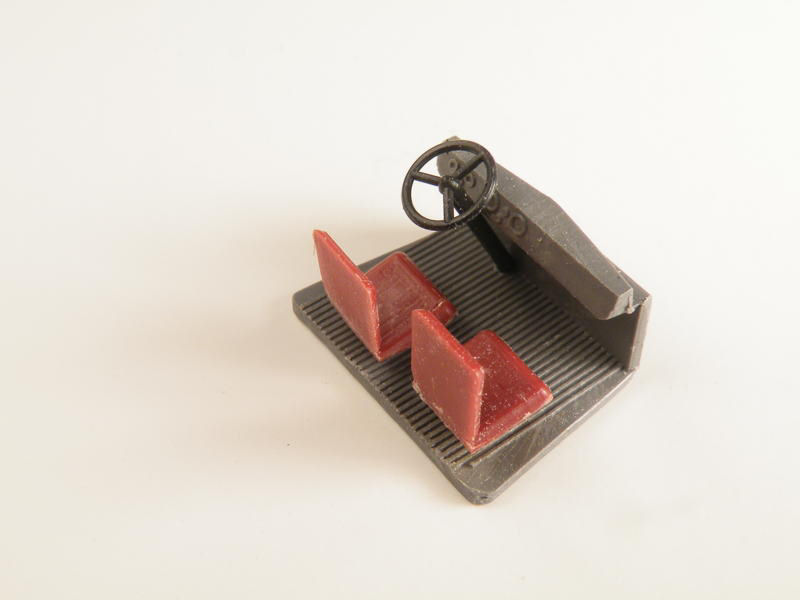
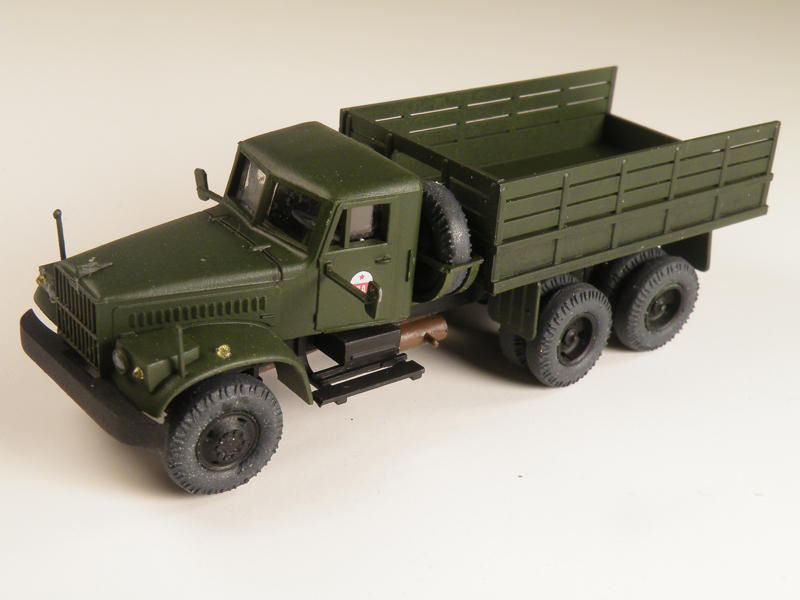
The interior consists of a molded in dashboard and a separately molded steering column and seats. However, there is no gear shift and pedals. This may not be a problem as little is seen inside. There is a sprue of amber turn signals and, fortunately, SMK give you several in case you lose one or two. The spare tire rack is a one piece molding as well as a clear plastic windshield with side windows are provided, but surprisingly, no rear window. There is only one part that had a molding error and that was one of the front wheel hubs which was not completely molded on one side. I was still able to still use it in the spare wheel rack. I just made sure that the error was covered by the rack.
The tires have nice side wall detail but no tread, and the 8 wheel hubs are all molded separately. This makes for very easy painting of the wheels and tires. While mold flash was present on a few of the kit parts the heaviest was found on the cab and seats. There was a large piece on the cab bottom and around the rear window opening. I found it easiest to remove the flash on the cab bottom using a razor saw. A large sprue gate was on the bottom of the cab as well and this too was carefully removed using a file. Not careful enough, though, because I had to add some sheet plastic to the bottom of the cab to correct my mistake. The consistency of the plastic varied. Some pieces were soft while others were brittle and hard to remove the flash.
Assembly
As with all truck model kits, I started off with the chassis. I trimmed some minor mold flash on the chassis and then began to install the rear axle assembly Part 10. There is a sprue gate in the middle of the assembly. Do not cut this off flush with the springs. There are two pins that are molded into the spring and the sprue gate and these need to be left to locate onto the chassis. I left about 2mm of the pin on each side of the springs and filed them down until they were just long enough to fit into the holes and not bow out the springs. The assembly has to be carefully slid into place, however the springs are strong enough to be carefully pulled out enough to engage the pins into the location holes. After this was done, I added the drive train Part 9, front axle and tow hook.
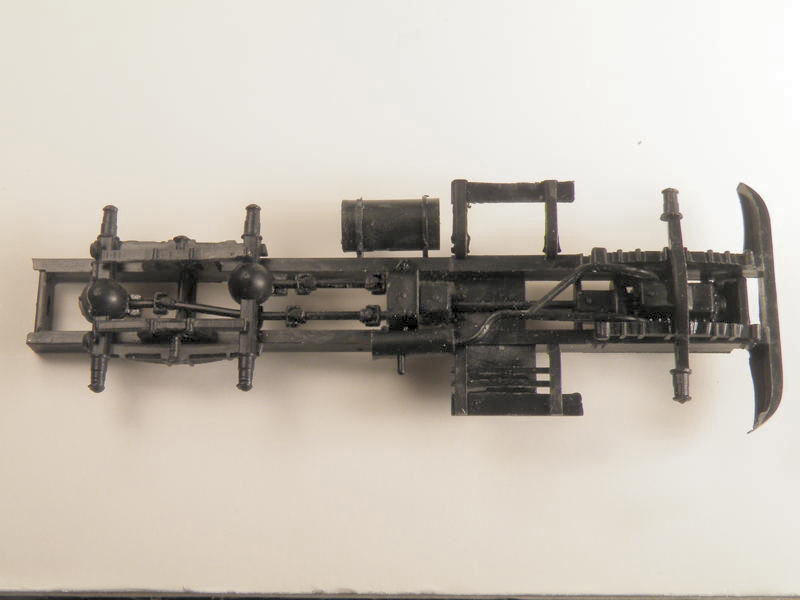

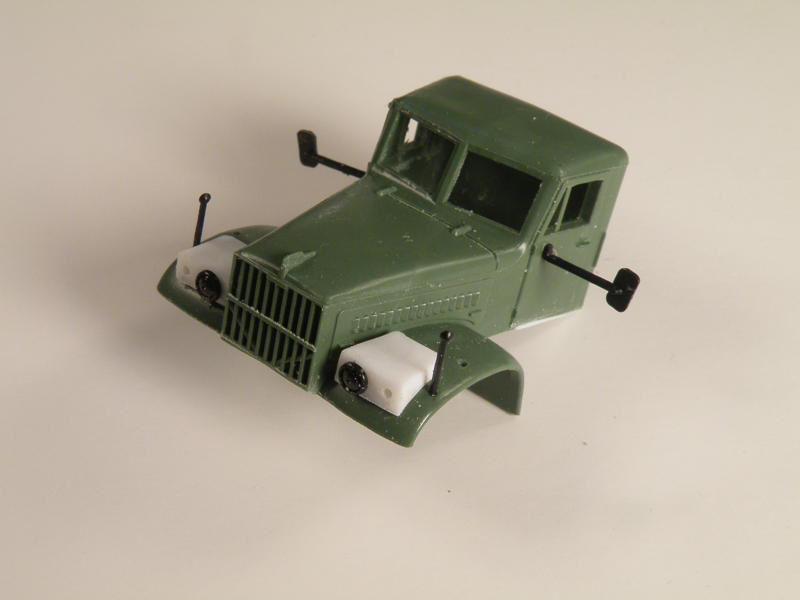
The fuel tank and tool box were added as well and two holes on the left side of the chassis were filled. These are for an extra fuel tank for the KrAZ-255 kit which are not needed on this model. Work on the cab interior was started next. I glued the steering column and seats, but found that the holes for the seat pegs needed to be enlarged so they would fit in the holes. There is no location hole for the steering column so I centered it over the drivers seat. I began work on the cab by attaching the headlight boxes, Part 19, to the fenders. There was some flash on these parts, but a little filing took care of the problem. I then added the headlights as well as the mirrors and width indicators on the cab so that I could paint it all at once.
Since it is easier to build a truck model in sub assemblies I painted the chassis and wheels Model Master Interior Black and the tires Tamiya German Gray. After they had dried, I started the final assembly of the chassis. The wheels have a very snug fit. In fact they were too snug and required sanding along the rims. After this, they set into the tire without any glue. The back wheels simply push onto the axle and click into place. However, the holes for the front axles are too small for this and need to be enlarged. I know because I broke the axle when I was mounting one of the wheels. After enlarging the front wheel holes, I had no more problems.
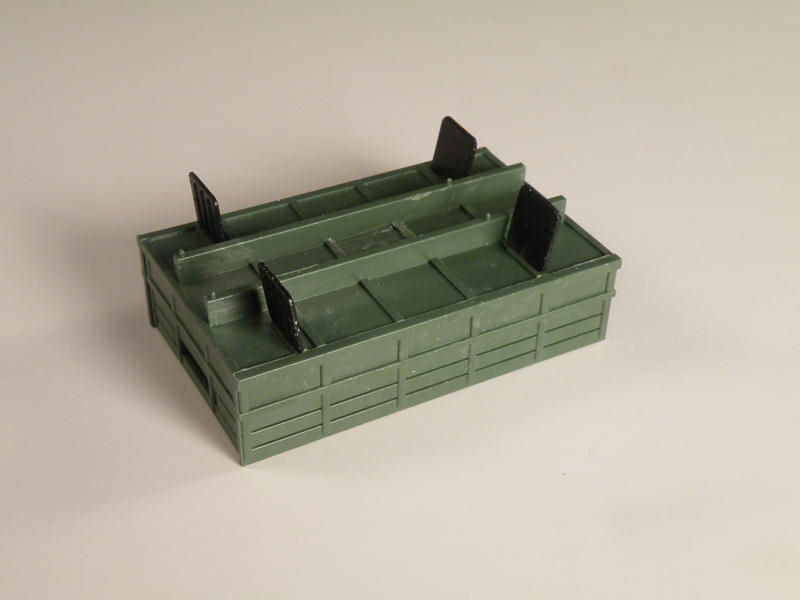
This completed the chassis so I began work on the cargo body. This is simply adding four mud guards to the bottom of the body. Make sure that the front guards clear the front of the rear wheels. The cargo body has a set of location pins which will aid in attaching the guards by allowing the body to be placed in the correct location.
Painting and Finishing
The cab, interior, spare wheel rack and bed body were painted Tamiya Olive Green. They were then given a coat of Pledge with Future then an oil wash of Windsor Newton Lamp Black was applied to the details. The model was then dry brushed with the base coat. I added the decals that came with the kit and chose the Soviet Guards markings.
The decals were very easy to apply. I applied them by putting a drop of Future on the cab and allowing it to dry and then adding the decal. After it had dried, I put another drop of Future on it and then finished it with a coat of Tamiya Flat Coat. There was no silvering of the decals. Out of all the Eastern model decals I have worked with, these were the best. Next came the windshield. It seemed a little thick so I tried an aircraft modelers trick of dipping the windscreen into future. This made it a little more clear.
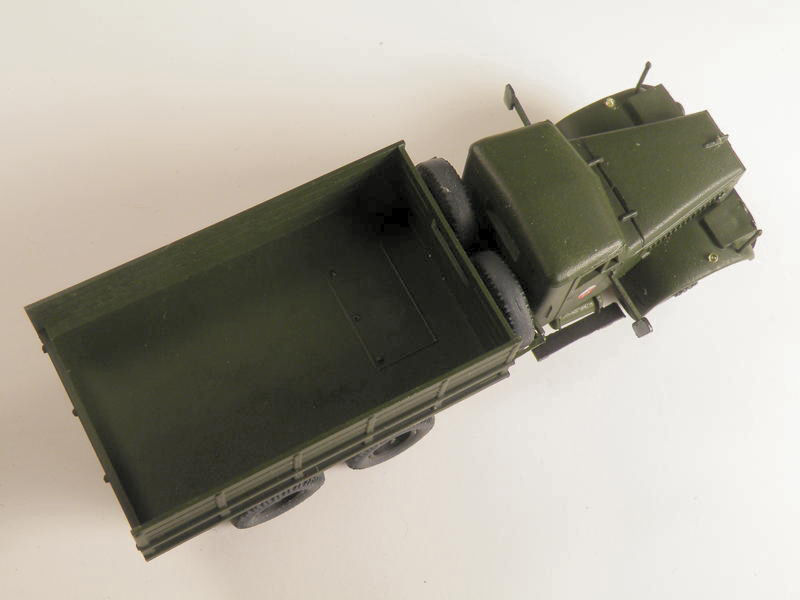
I attached it to the cab with Super Glue to a small tab on the windshield. For the rear window, I added .005 sheet plastic to the back with white glue. The Super Glue should be cured before adding the back glass or the fumes will mar it. The cargo bed was added and the spare tires placed in the tire rack. This was then added to the chassis as well. The mirrors and headlamps and a reflector on the mud guard were painted silver and the reflector coated with Tamiya Clear Red. The headlights, turn signals, mirrors and reflectors were given a drop of Future to give them a glossy finish. The cab was mounted on the chassis and this completed the model.
Conclusions
This was a fun and simple build. The most difficult part of the entire model was adding the turn signals to the fender. That's because they were so small. I highly recommend this kit to anyone interested in Soviet post war trucks. SMK has done an excellent job in rendering an easily built yet well detailed model.
My thanks to HobbyTerra for this review sample.