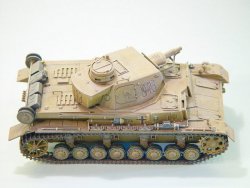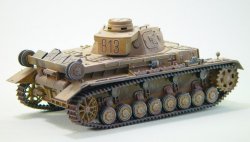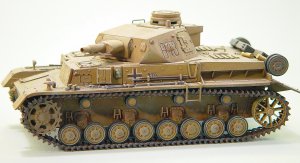
Tamiya 1/35 Panzer IV Ausf.D Build Review
By Michael Benolkin
| Date of Review | July 2002 | Manufacturer | Tamiya |
|---|---|---|---|
| Subject | Panzer IV Ausf.D | Scale | 1/35 |
| Kit Number | 35096 | Primary Media | Styrene |
| Pros | Easy build | Cons | Lower hull holes left over from motorization |
| Skill Level | Basic | MSRP (USD) | $19.00 |
Background
The Panzer IV series was developed in the early 1930s as the next step in the evolution of German armor. Whereas the Panzer I and II were light tanks that spearheaded the high-speed assaults during the early Blitzkrieg, the Panzer III series was envisioned as the tank fighter.
The Panzer IV was developed as a highly armored support tank armed with the 75mm L/24 gun that could fire high explosive, armor piercing or smoke rounds.
It wasn't until the invasion of the Soviet Union in 1941 that the German High Command realized that Russian armor and anti-tank weapons were more than capable against the Panzer I, II and III.
While the Germans were able to up-armor the Panzer III, it became apparent that it was still too small a platform to fit larger weapons and the Panzer IV would become the basis for major upgrades to fill the armor void on the front lines until the Panther and Tiger tanks would later come online.
The Kit
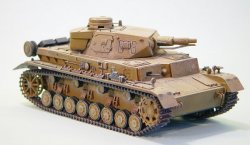
This Tamiya kit represents the early version of the Panzer IV. Molded in medium gray plastic, the kit is quite detailed for its age, though it does suffer from the same problem that many Tamiya armor kits of that era suffered from - remnants of motorization. This kit, like many of Tamiya's other offerings, was designed originally to be motorized so the holes remain in the hull bottom for motor mounting screws, power switches, etc.
Assembly
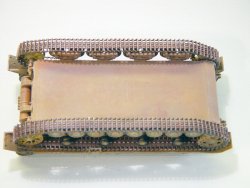
With a few exceptions, I decided to build this kit straight from the box. The first step was to use a variety of Evergreen plastic and cyano filler to plug up the holes in the hull bottom. I didn't worry about what little detail existed on the underside and sanded the whole surface smooth. As you can see in the photo below, Evergreen plastic was used to fill in the gaps between the upper and lower hull, with a brace installed across the lower hull to eliminate any 'flex' in the lower hull that might break the bond between hull halves later on. Access to this area is virtually nil once the halves are joined and the track installed.
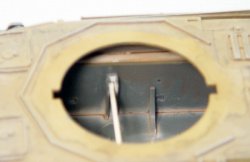
Assembly of the upper hull was straightforward and I decided to pose the hatches and viewports in a closed/buttoned up position. I also used Evergreen plastic to fill in the gaps between the lower and upper hull.
The turret was also assembled in the buttoned up mode and the only deviation from building straight out of the box was replacing the kit barrel with an aftermarket turned aluminum barrel (sorry, I don't recall the manufacturer).
Initial Painting
The hull and turret subassemblies were airbrushed an overall desert sand to represent one of Rommel's Afrika Korps. The rubber tires on the road wheels were painted flat black with a Testor's paint pen. The track was airbrushed a dark metallic gray and set aside to dry.
Final Assembly
I assembled the upper and lower hull according to the instructions and touched up the base color. The exhaust system and pioneering tools were also added to the hull at this time. The track was the next to be installed and we are ready to finish.
Markings
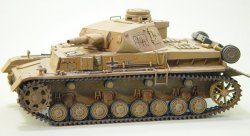
I sprayed the model with a coat of Future to serve as a foundation for the decals. The tank I was modeling didn't have much in the way of markings other that a hull number and the German crosses. These were put into place with the help of some Solvaset and set aside to dry.
Final Finish
The model was airbrushed with a mixture of Future, Tamiya Flat Base and Desert Sand to provide a dead flat finish and to 'wear' the markings into the background color. I use the basic trio of Future (for the acrylic base), Tamiya Flat Base (a flattening agent designed to flatted Tamiya glass acrylics) and Isopropyl Alcohol (to thin the whole mixture to get through the airbrush. A 33%-33%-34% mixture will render a dead flat finish on the model. Of course a 50%-50% mix of Future and Alcohol will render a solid gloss. Therefore, you can experiment with the amount of Tamiya Flat Base to get varying levels of semi-gloss out of your finish.
Once this had dried, I drybrushed the entire model with medium gray to bring out the details. This was then subjected to the complete Rust-All four-part weathering process that really gives the tank the 'well used' look. Of course, special attention was given the exhaust system for corrosion.
I added a few Jerry cans to the rack in the rear along with some spent rounds that rolled back there during the last bit of shooting.
Conclusions
This was a fun project that was designed to test a few new (to me) weathering techniques for lighter color finishes. I am pleased with the effects and will be giving these another go on some more challenging projects in the near future.


