


Tamiya 1/35 Tiger II (Porsche Turret) Build Review
By Jack Bruno
| Date of Review | January 2005 | Manufacturer | Tamiya |
|---|---|---|---|
| Subject | Tiger II (Porsche Turret) | Scale | 1/35 |
| Kit Number | 35169 | Primary Media | Styrene |
| Pros | Great detailing throughout/outstanding | Cons | Vent screen could be better |
| Skill Level | Basic | MSRP (USD) | $41.00 |
Background
In the last few years, modelers throughout the world have been blessed with outstanding kits from Tamiya. This boxing of the King Tiger with Porsche Turret is one of these up to date tooling and Tamiya did a great job.
I won't bore you with the history of the King Tiger, but I will tell you that the Porsche Turret Series was unique. The first 50 King Tiger chassis found them mounting this turret because Dr. Porsche jumped the gun and started churning them out before being awarded the contract - to which he was not. The rounded, curved turret face was a shot trap that deflected right into the thinly armored driving compartment. In addition, the rounded features itself was a manufacturing nightmare. Ultimately, Henschel-designed "production" turrets were used for the duration of the manufacturers run.
Most of these Porsche Tigers were sent to the Normandy Bocage Country and were used to blunt the Allied Invasion. The majority, in fact, were lost to mechanical failure and air attack rather than actual defensive combat to which the tank was designed for. The one word that filled any allied tank crewman with caution and dread was "Tiger". In one of the many wives’ tales of WWII, captured Tigers were used to evaluate the latest 88mm main gun. On the firing range sat a M4 Sherman hull. Several 88mm rounds were fired from the Tiger's main gun with no effect – or so they thought. Up close they found that the shells passed through both sides of the Sherman!.
The Kit
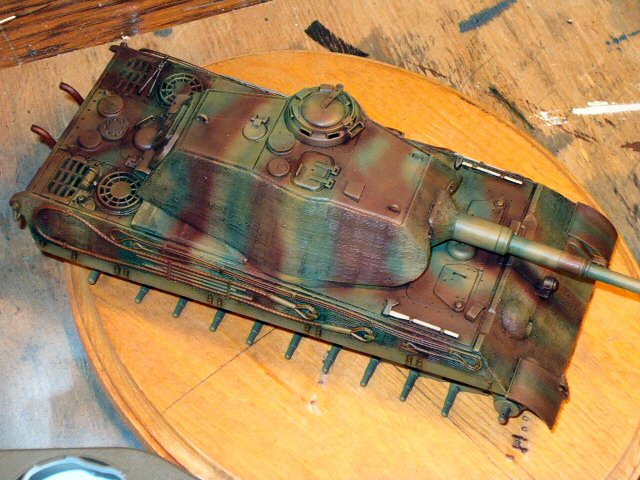
The model is molded in the now famous Tamiya yellow plastic and is very crisp with well defined detail and a joy to work with. As always, besides cutting off the road wheels and removing the mold lines, I build in three subassemblies: Turret, Hull and Chassis. Before adding all of the small parts to the three units, I had to give the beast a zimmerit application. Doing a little pre-building research, I decided to do a standard pattern of horizontal lines using the box art as a guide. There are a few different patterns of zimmerit: Horizontal, Vertical, Waffle and Tile. To my knowledge, Horizontal was the only pattern used on the King Tiger. This was accomplished by using two other Tamiya Products, Tamiya Polyester Putty and Tamiya Photo-Etched Zimmerit Tools.
After spreading it about the designated areas shown in the kit instructions, I used the trowel technique of drag/stop/drag/stop at small intervals. I let it dry for a few days before allowing myself to handle it for painting. I can't recommend these products enough because it took me about an hour to cover the Tank with results to my liking. Mounting the 88 gun to the turret was very easy as I replaced the kit-provided gun with a metal barrel from Jordi Rubio.
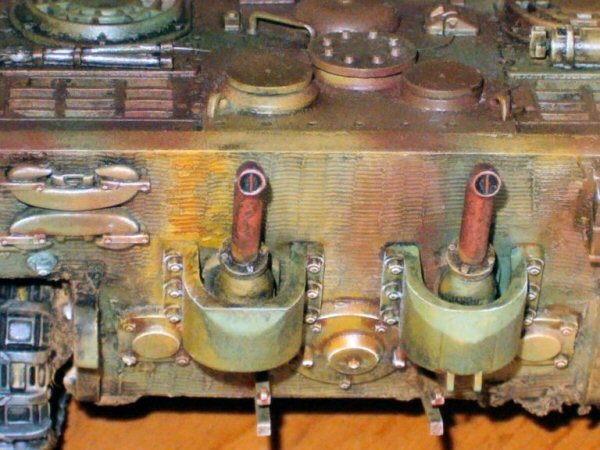
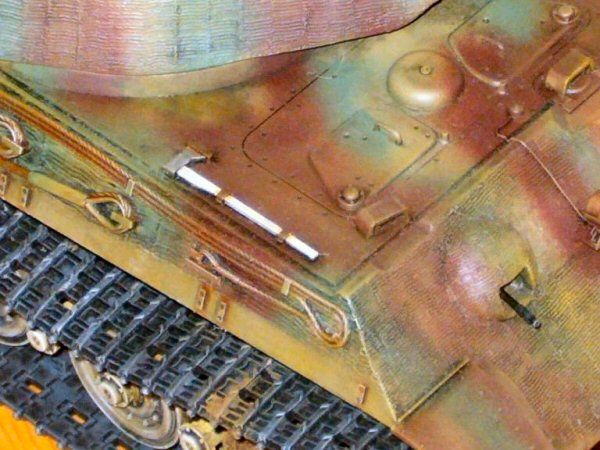
I also decided before the build to have my King Tiger without the kit’s side fenders. Off came the molded-on fender mounts and I scratched new ones from plastic strip. Twenty two were needed and I used a Chopper Two so I could get an exact reproduction every time. The bolt holes were done with the #11 Blade. The only problem I really had was the assembly of the vent screens on the engine deck. I found the netting very finicky and really not wanting to cooperate with the glue. But, with threats of mass murder and mayhem, they conformed. In the future build of the Production King Tiger, I will use PE parts for replacement. With all of the tools cleaned up to remove the mold seams the tank was ready for the paint shop.

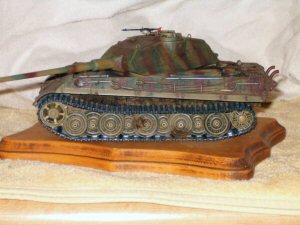
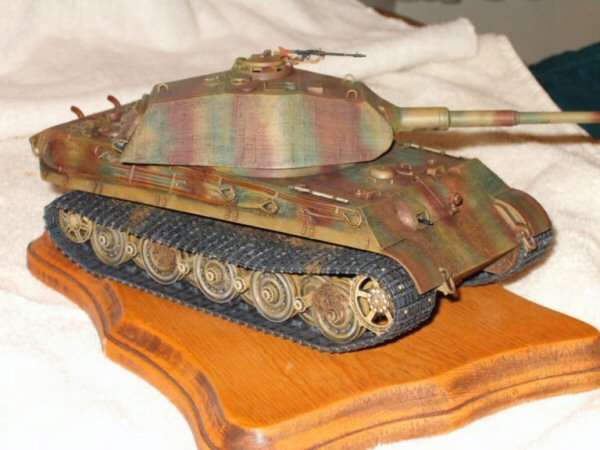
The three sub assemblies were painted entirely flat black. After 24 hours, I gave it a pre-shading of dark yellow and a detailing coat of dark yellow that was lightened up with white. The contrast was to my liking and the "stripe" pattern with armor dark green and, of all things, Japanese Navy red-brown was applied with low pressure from my trusty Paasche. All these colors are in the PollyScale line.
Two light coats of Future were applied with a half hour interval between the two. The next day I gave it a couple of Turpentine and Oil Paint washes. Dry-brushing the wheels and other areas really made things jump out at you, which was my intention. The tracks were then painted black, dark gray, Future, washed with the same oils and dry brushed with light gray and some silver. Don't over do the dry-brushing. It took me years to learn that less is more.
After the tracks were carefully mounted, I glued the machine gun in place (very nice looking too) and applied Celluclay mud. I was careful not to over do it and the results made me very happy! After shooting a Pollyscale British Interior Brown on the mud I gave it a quick wash with a tad bit of dry brushing. A complete coat of PollyScale Flat Finish sealed everything up and the finished product was outstanding. A few selected areas were given just a dash of pastels for a hint of wear and rust - remember, less is more. The only reference I used was the best, the Achtung Panzer book on the Tiger.
Conclusions
There you have it. Tamiya's King Tiger (Porsche) was a pleasure to build and I cannot recommend it enough to modelers that focus on this area of modeling. I would like to thank Shari for letting me have my money to buy the kit. The Tank is now resides with a private collector.