


Tamiya 1/35 Panzer III Ausf.J (Early) Build Review
By Jack Bruno
| Date of Review | February 2007 | Manufacturer | Tamiya |
|---|---|---|---|
| Subject | Panzer III Ausf.L | Scale | 1/35 |
| Kit Number | 35215 | Primary Media | Styrene, PE |
| Pros | Great detailing throughout/outstanding | Cons | Nothing really!!! |
| Skill Level | Experience needed | MSRP (USD) | Altogether about $125 |
The Project
And on the Eighth Day, God created Tamiya armor. Well, that's not what the Good Book says, but suffice it to say that I was in Heaven building this kit/conversion. Nothing thrills me more than building a German vehicle whose base coat was pre-1943 German Gray. There's just something about it that draws my attention. The Panzer III, along with the Panzer IV, was the work horse for the German Armored Divisions for a substantial part of the war, mainly the early to middle years. The chassis of the Panzer III itself was versatile to the point of the production of a series of Assault Guns. (StuG III's) When Dragon released the late J several years ago followed by most of the other early versions, (the G, H and E) the early J stood neglected.
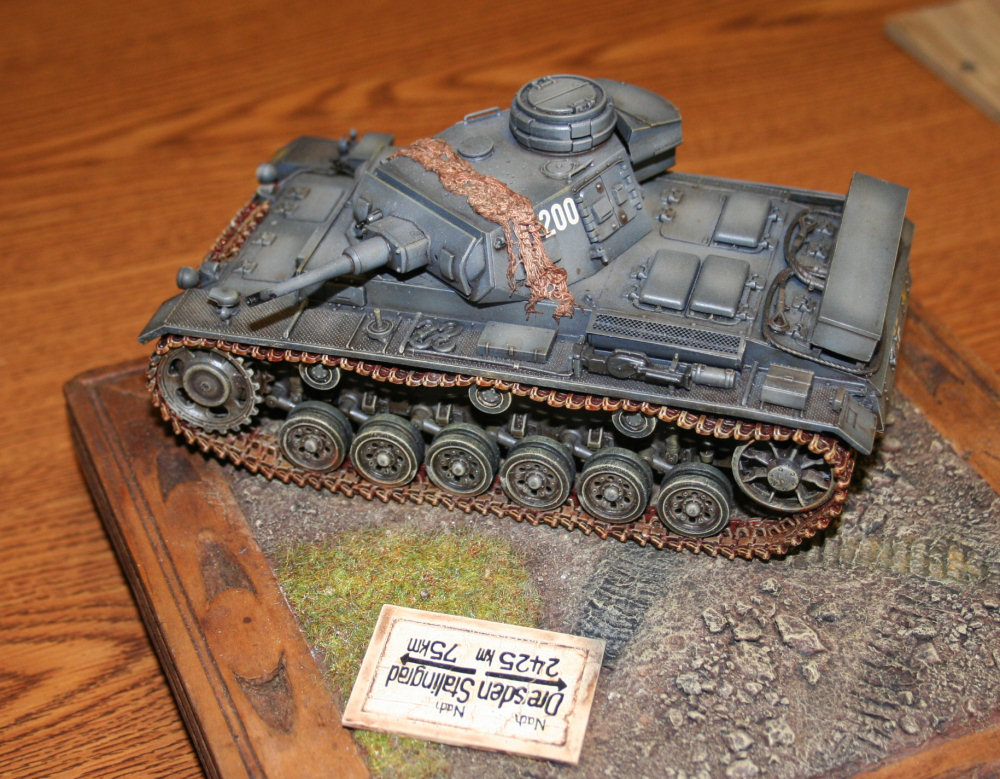
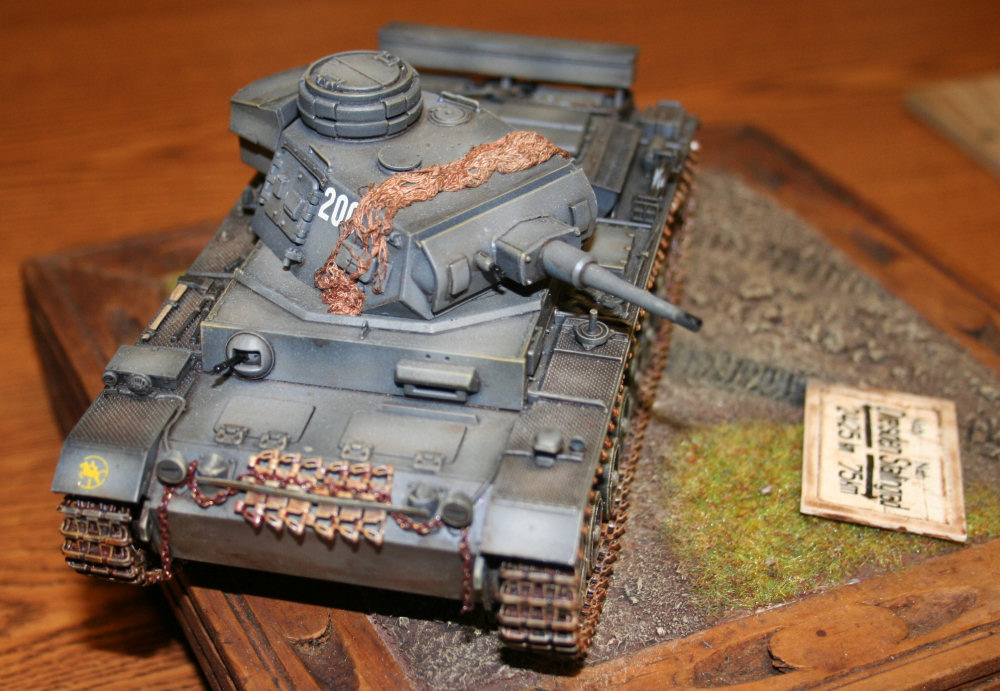
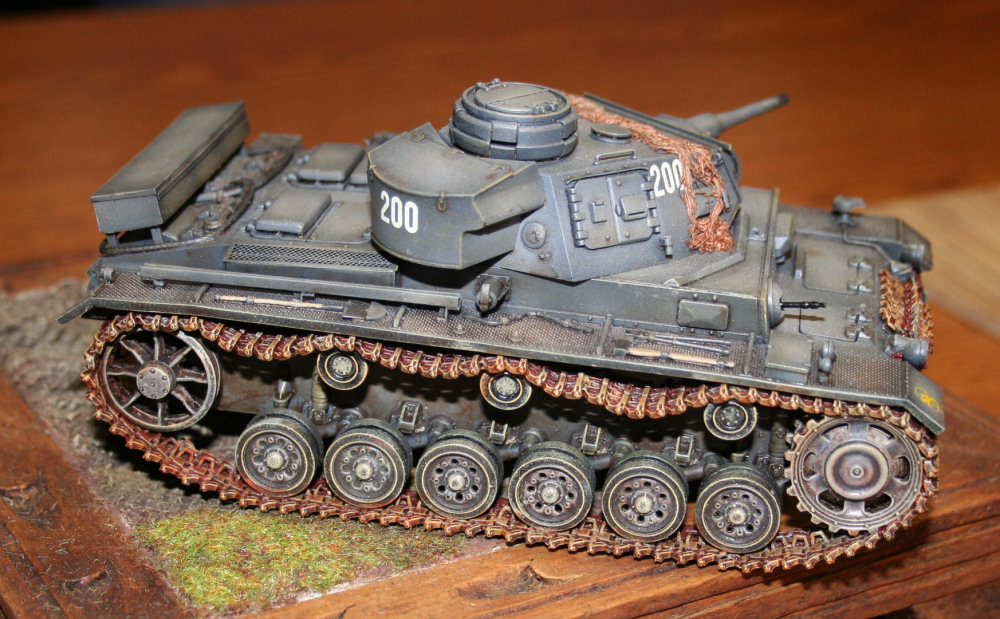
One of my favorite units was the Horse Rider insignia of the 24th Panzer Division. This unit’s early Js were unique because of the tool box that was located at the rear of the engine deck. Every picture that I've seen of the 24th's early J's had this variation. Tank Workshop (TW) came to the rescue with not only the back date conversion for a Tamiya Ausf.L, but also released two resin tool boxes that served my purpose and just told me that this was meant to be. So just kick back and enjoy yourself and imagine watching units of the 24th Panzer embark on the opening stages of Operation Blue and ending with the division’s destruction in the epic Battle of Stalingrad.
Construction
To begin, I started out with the Tamiya Panzer III Ausf.L and used what I needed from this kit, cleaned up the parts from mold seams and flash. I next broke open the TW conversion and carefully separated the resin parts from the holding blocks. Be careful when doing this because there were no extra parts included. The ‘Achtung Panzer’ book on the Panzer III was the only reference that I needed. They include line drawings for the early J as well as the late J. There are significant differences between the two such as the engine deck, turret armament (short barrel) and tool placement on each side. I never knew how much of a difference there actually was until I viewed the plans.
The next step was mounting the hull to the chassis. There was much filing, sanding and a little tweaking to get the right fit. I used the slow drying superglue for this task. The engine deck was very fast after the parts clean up and before you know it I was attaching thin solder wire to the headlight leads as well as the siren and horn. Consult the drawings for the correct placement. These are neglected on most kits I've seen built up and I wanted to do this puppy the way it deserved to be. I did add a metal bar across the headlight mounts to serve as an additional spare track holder. You'll see plenty of German tanks with this feature to serve as additional armor protection too. Next to be added was the fine Tamiya photo-etched screens that are mounted over the vents on the deck and one below the rear deck above the exhaust. These went on without a hitch and really stand out.
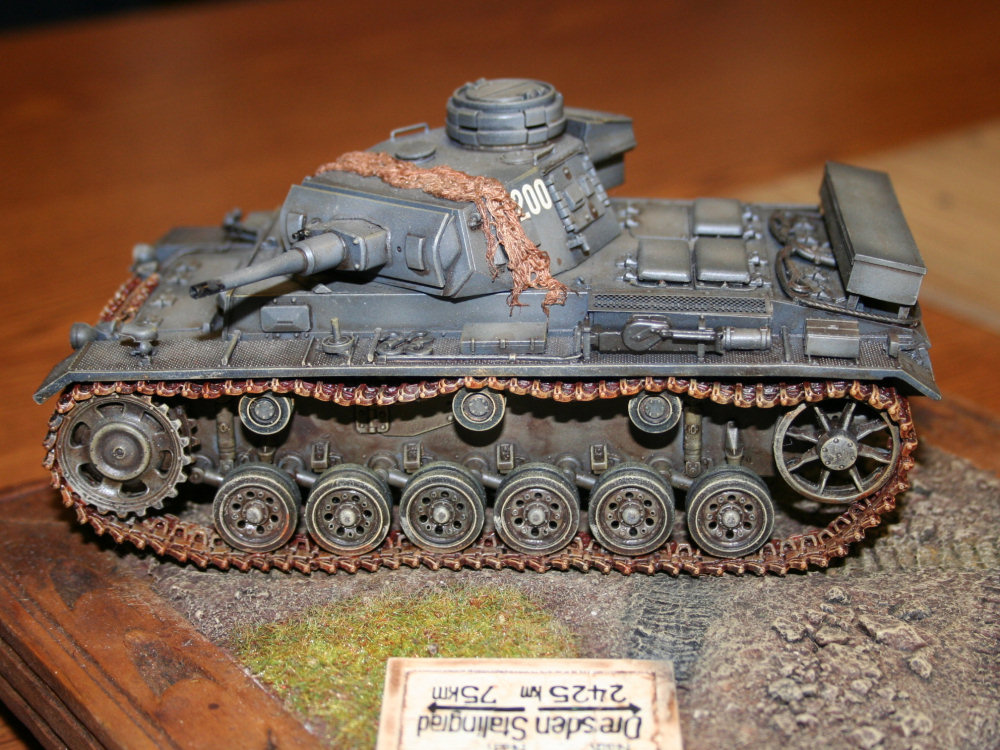
The turret was next and a simple substitution of parts was all that was needed here. The gun housing was conducive to the short barrel gun which was simply inserted courtesy of Jordi Rubio. The turret and bow machine guns were drilled out at this time too. Small conical bolts were added to the rear turret ports on each lower right side as the drawings had them and the kit makers did not. I used resin bolts by Verlinden and just cut out the size I needed. I also added some thin plastic strip to the bottom sides of the storage box. The drawings indicate that electrical shorts and interference were caused on the tank's radio whenever the antenna touched the metal bin. Thus wooden strips did the trick. Ingenuity I say! I left the wheels off and took it across the basement to the paint shop.
Painting and Finishing
If you've followed a few of my articles, you'll note that I always start my painting with a complete flat black covering of the subject. This was no exception and I started using progressive shades of gray starting with the darkest first. This effect really stands out and the pictures just do not do it justice. I then sealed it all with a gloss coat of Future and decaled the tempestuous vehicle. After the decals dried I took a brush and sealed them with Future and let it sit and think about it for a day.
The next day I mixed a fresh batch of Windsor-Newton (WN) Van Dyke Brown cut with turpentine. I gave the model a thorough wash and after it dried, took a new pair of cotton panties.....leave me alone....and wiped it clean. In the hard to reach areas, I used a cotton swab or a brush with some turpentine on it. I'm telling you I love it when a plan comes together.
Next on my agenda was assembling the tracks. This took the better part of a few hours. The set I used was Fruil ATL04 with the hollow horn. I got these from a modeler friend, Greg Metge, owner of Great Hobby Adventures in West Des Moines, IA. When both runs were done, they deserved to be punished too.....so each got a flat black base coat followed by a dark gray. After they apologized, I gave them a Future treatment and WN wash using Burnt Sienna this time. There's nothing like that sweet smell of oils.
Being a loyal shopper at my local Goodwill Store, I picked up a beautiful base for a lousy quarter. I told the guys in the club that it was actually wood from a Stalingrad ruin......they bought it. I mixed a batch of Celluclay with some white glue added. I masked off the area to be covered and applied it sparingly. Following this step, I went out to the curb and gathered some pebbles and residue and pressed it into the still wet clay. While it was still a little moist a day later I pressed the tracks into it. This effect gave the tank some illusion of weight. I’ve dated girls that had that illusion, but that's another story.

At this time I sprayed a few shades of brown over the base and using some diluted white glue, added Verlinden static grass on a small section. Now you’re supposed to blow air across the grass to make it stand up. Well, I felt like an idiot to do that so I just let it be. After a couple a heavy washes using the WN Brown, I let it all dry before dry-brushing both the model and the base. I started out with light browns and ended in white. Anything in the middle was just butter.
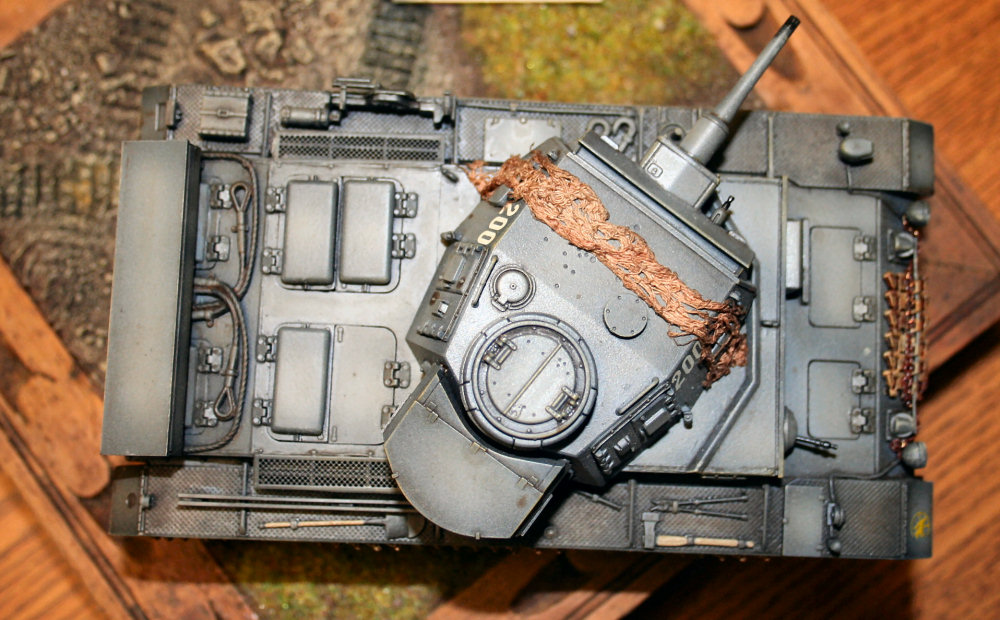
I draped the last of my Verlinden brown netting over a portion of the turret and mounted it gently to the base. Something felt missing so I went over to the locker and decided to utilize a Tamiya sign set that included a large decal and wooden sign that basically said, "Dresden that way....Stalingrad this way." That too was given the Future business and oil washed when dried. I just put it down on the base with a little white glue and my world was now complete. I had thought about adding extra equipment to the tank, but after a while thought less of it because I wanted the conversion to show, not extra packs and boxes.
Conclusions
This was the most fun I've had in years with a project other than the Prom. I would love to do another, the 16th Panzer next time, but I see that the conversion set is no longer on the TW website. Oh well, the Afrika Korps may get the nod. I hope you enjoyed the project, and until next time, go build something!!!