


Testors/Hawk 1/126 C-131 Samaritan Build Review
By Fotios Rouch
| Date of Review | July 2012 | Manufacturer | Testors |
|---|---|---|---|
| Subject | C-131 Samaritan | Scale | 1/126 |
| Kit Number | 905 | Primary Media | Styrene |
| Pros | Only kit of this subject | Cons | See text |
| Skill Level | Basic | MSRP (USD) | Out of Production |
Background
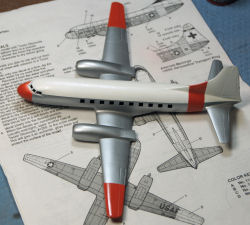
OK, this kit is probably older than a fair chunk of this article's readership but I am not aware of another kit in a small scale. It is obviously larger than 1/144th scale maybe 1/126 or thereabouts. I remember this kit as a boy back in the late seventies in Athens but maybe it is even older and maybe it was originally done by another company (Hawk) and later re-popped by Testors.
Back then modelers were presented with very basic things and this model shows it. Very generic landing gear, no transparencies, no engine fronts at all just a flat surface front with a hole for the propeller shaft and a rough look overall. Shape wise I like the kit and I think it does the job in representing the Samaritan.
Later versions of the kit had better decals and someone had the idea of printing some kind of engine front as a decal in an effort to bring the kit a little more up to date.
So here is the story around this build. I am not sure when it started but it was not started by me. My good buddy Boyd Waechter started this kit and collected all kinds of goodies to improve it but gave up on it since it was way too crude. He was nice enough though to send it to me with evil thoughts in his mind about what I would have to go through to complete it.
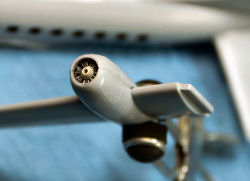
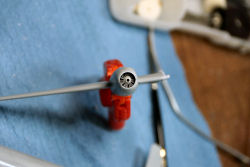
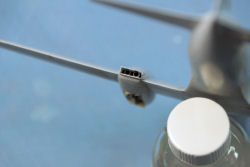
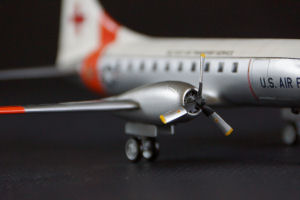
The first thing I did was to drill open the engine nacelle fronts, thin them out, clean them up and install the nice little engines Boyd provided. I think the result is much better than having a decal for an engine front.

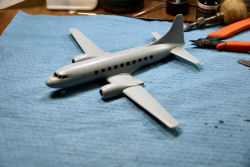
The rest of the basic assembly was completed with no issues other than the gaps left at the wing joints. I inserted Evergreen sprue in the gaps and melted it with a light application of Pro-Weld.
I am still puzzling over what to about the raised panel lines that will inevitably disappear as I sand the joints. I can either scribe them or maybe use heated and stretched sprue and glue it over what is gone and just have only raised panel lines.

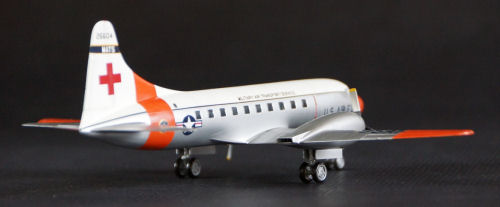
So here we are at the final primer stage. Almost all the blemishes have been fixed and what was not was lightly touched up with red 3M putty. I decided to scribe most of the main and all of the tail wing surface detail. I left the engine panel lines alone. The fuselage top was scribed too all the way down to the raised panel line over the windows.
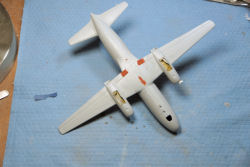
I used two different scribing tools. I always like light scribing but then again this will contrast with the very heavy raised panel lines.
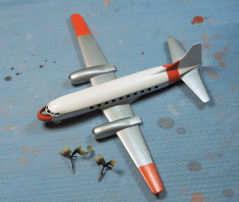
Once I flipped the model over to do the final inspection, I realized that I missed some work I had planned for. One major thing was to scribe the flaps and bring them into the under belly as per the photo references. Then I decided that I could not leave the exhausts like the way they came. I had drilled them out already and installed exhaust pipes but there was one more thing left. I had to box them in to match the photos. They still do not look quite right but at least they are not wide open.
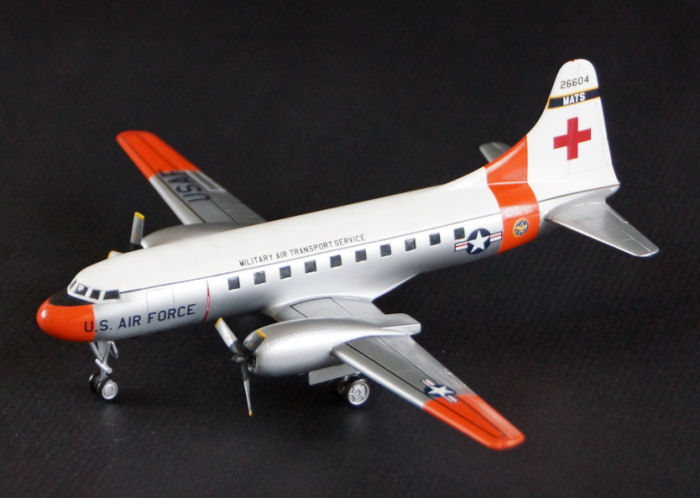
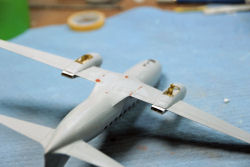
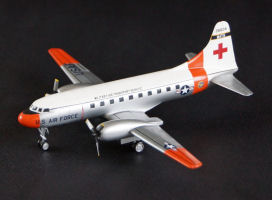
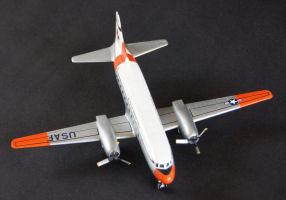
It was now time to lay the Alclad Aluminum and the white. The International Orange went on next. It is always a good idea to have an underlying layer of white or very light gray before applying Orange, Red, Yellow or any of the Dayglo colors. They really come out nice and bright.
The next step will be to add some darker metal shades on the engine nacelles and paint the anti-glare black panel in front of the cockpit.
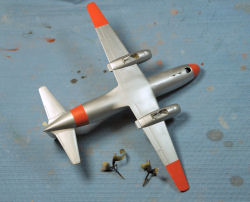
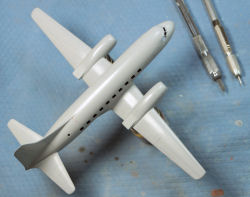
The prehistoric but reasonably accurate kit continues with laying down the black paint and polishing the Alclad II Silver paint.
Next will be touch ups and the first attempt to use Squadron's Crystal Clear on the windows. The difficult part will be to redo the landing gear. What is in the kit is joke at best. Back in the 60's having this gear was probably acceptable but in today's world I have to do something. Maybe scratch-building will be quicker than fixing what is the box.
Well, laziness got the best of me and I decided not to fix the landing gear and just press on to finish this project.
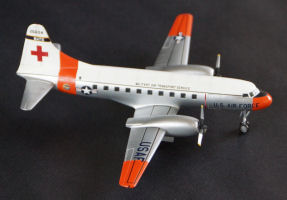
The windows were done with Kristal Klear and they came out pretty good.
The decals went down OK considering how old this kit is. The MATS logo is out of register and it shows but I did not want to sacrifice one from a good model kit.
Conclusion
So this is the ancient Testors Samaritan finally done.
It would be so great if there was a good 144th scale but especially a good 72nd scale Samaritan available in plastic.