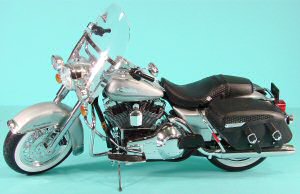
Testors 1/16 Harley-Davidson FLHRCI Road King Classic Build Review
By Michael Benolkin
| Date of Review | January 2007 | Manufacturer | Testors |
|---|---|---|---|
| Subject | Harley-Davidson FLHRCI Road King Classic | Scale | 1/16 |
| Kit Number | 7222 | Primary Media | Styrene, Die-Cast Metal, Rubber, Vinyl |
| Pros | Highly detailed kit, pre-painted, relatively quick build | Cons | |
| Skill Level | Intermediate | MSRP (USD) | Out of Production |
Background
Harley-Davidson motorcycles are an American icon, just like John Wayne, muscle cars and country music. If you were to ask virtually anyone on the street for the name of a motorcycle maker, the majority would respond with Harley-Davidson.
Harleys remain one of the top selling bikes in the world. There is nothing that sounds quite like a Harley. With the advent of the motorcycle television shows on the Discovery Channel like American Chopper, motorcycles are popular forms of transportation, especially with $2+/gallon fuel prices!
The Kit
For a look at the kit straight out of the box, take a look at our in-box review here.
The Build
The first step is to get acquainted with the parts in the kit. The trees are not uniquely labeled though each of the parts are numbered. The instruction book shows you which parts tree has which part number on it.
One of the first things I noticed on opening the box was that the parts bag containing the screws and fasteners needed to build this model had leaked. Needless to say, the next step was to carefully remove all of the parts from the box and retrieve all of the screws, etc., and place them in a small bowl or container where they'll be safe until needed.
To easily build this model, you'll need a good quality phillips screw driver, a small file, X-Acto knife, liquid cement, and thick cyanoacrylate (Crazy Glue). In addition, I used a Xuron cutter to remove parts from the sprue trees, and Zip-Kicker to instantly cure the cyano.
Assembly begins with the engine and for bare styrene on bare styrene assembly, I used Tamiya Thin Cement (though Testors Liquid Cement will work well here as well). The engine halves were cemented together with no problems, but next we come to the educational step that will help you through the rest of the model.
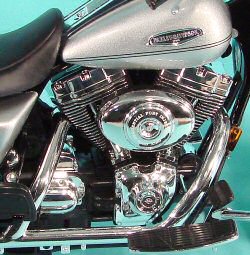
The valve push-rods (parts 4) are chrome-plated and are mounted to plated end-plates (parts 5) at the bottom and plated surface under the top of each cylinder head. When these push rods were designed and fitted to the rest of the kit, they would have been good solid fits with their adjoining parts. Once everything was chrome-plated however, the thickness of the plating changed everything. To get the push rods into place, you'll need to use a file to shorten each push rod ever so slightly. Carefully file a little and test-fit until parts 4 can mount to parts 5 and parts 5 can rest atop part 6 (crank case housing) when it is attached to the engine.
Once you get the feel for how the plating can affect the fit of the parts, you won't have any problems identifying and adjusting the mating surfaces of other similar assemblies.
For glueing chrome-plated styrene parts together or for gluing unplated styrene parts to chrome-plated styrene parts, you'll need to use the cyano. The chrome plating does not easily react to the liquid cement. One thing I discovered in assembling this model, neither the chrome plating nor the painted surfaces react to Zip Kicker either. This means you can use the cyano, then apply a drop of Zip Kicker for an instant solid assembly without having to wait for anything to dry.
NOTE: Don't try using Zip Kicker on other models without experimenting first as I've crazed more than a few surfaces and ruined a few paint jobs as well. Whatever process they've used on this kit to apply the finish, it doesn't react to the Zip-Kicker.
Some of the features on this bike are movable, such as the shifter under the left foot and the rear brake pedal under the right foot. In the case of the shifter, the shift lever is kept in position with a spring on the back side of the transmission. One end of the spring is hooked onto the shifter mechanism, the other onto a stub on the transmission. The problem I had was that there was nothing to keep the end of the spring from gradually sliding off that stub on the transmission. After a moment of engineering (after re-installing the spring for the third time), I used my X-Acto knife to cut a small groove into the stub in which the spring will stay in place.
The spring-loaded brake pedal has no such problems. They did some nice engineering here, though the instructions don't show that you'll need to wind a quarter turn into the spring to mount the pedal and spring onto the frame and that tension keeps the pedal in position.
 |
 |
 |
 |
 |
 |
 |
 |
 |
The biggest challenge I faced in this build was the articulating rear wheel fork. According to the instructions, it is mounted to the right frame half with a 5mm long screw. Shortly thereafter, the rear wheel is mounted to the rear fork and the combined weight of the wheel and die-cast fork quickly stripped the threads inside the fork. The screw dropped out and the fork subassembly with it. Even after getting the other half of the frame in place, I could not use either 5mm screw as they didn't have enough bite into the fork to stay in place. I ended up replacing these two screws with equivalent diameter sheet metal screws that were 8mm long. Now the rear fork articulates nicely and those screws are not coming out. Ever.
Assembly of the rest of the bike is very straightforward. Once you've got the hang of working with plated parts, there are no surprises.
Conclusion
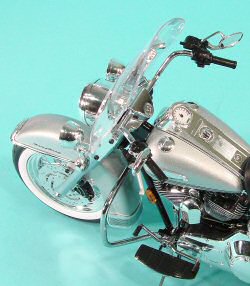
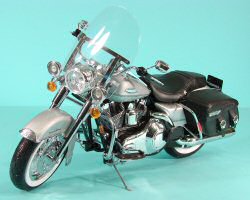
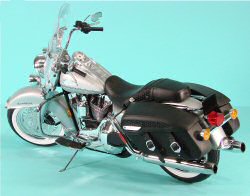
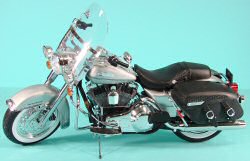
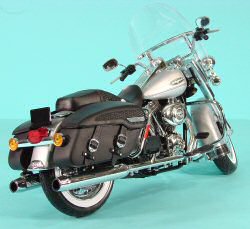
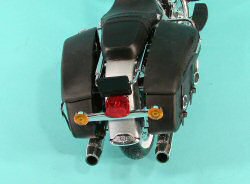
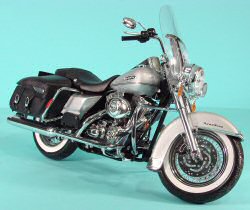
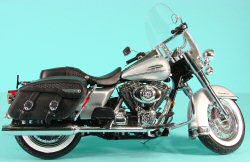
Aside from the nice finish on the completed model, the kit offers some working features to keep it interesting. The wheels move, the front end is steerable, the front and rear suspension works, the saddle bags are hinged, and as mentioned earlier, the foot brake and shift lever are spring-loaded.
I am quite pleased with the finished model and how well the whole kit is engineered. This kit isn't for the beginning modeler, but anyone with the patience to take the extra time to understand what the instructions are telling you will not have any problems getting a spectacular-looking bike.
My sincere thanks to Testors for this review sample!


