


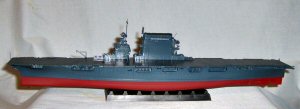
Trumpeter 1/700 USS Lexington CV 2
By Michael Taylor
| Date of Review | January 2006 | Manufacturer | Trumpeter |
|---|---|---|---|
| Subject | USS Lexington CV 2 | Scale | 1/700 |
| Kit Number | 5716 | Primary Media | Styrene |
| Pros | Detailing as nice as the 1/350 kit | Cons | |
| Skill Level | Basic | MSRP (USD) | $22.95 |
Background
When carrier aviation was officially born, it was fitting to name the first aircraft carrier after the man who attempted to be the first with the aeroplane using a shipborne catapult to launch his craft (unsuccessfully). While the USS Langley was converted from a freighter, the second and third aircraft carriers were built upon existing battlecruiser keels. USS Lexington CV 2 and USS Saratoga CV 3 benefited from the rugged design and infrastructure of the battlecruiser hull designs, upon which a huge hangar deck and flight deck were built.
The Lexington had an extensive influence in developing carrier operations experience and improving the concepts. One of its more interesting sidebars happened during the winter of 1929 when the Lexington was used as a floating generator to power the city of Tacoma Washington for over a month after a draught rendered the city's hydroelectric power system inoperative.
After Pearl Harbor, the Lexington was engaged with Japanese forces that included the carriers Shokaku and Zuikaku. Aircraft from those two carriers successfully struck the Lexington with bombs and torpedoes to the point where the ship was abandoned and sunk by a US destroyer.
The Kit
Both Trumpeter and DML have been giving ship modelers in 1/700 many new kits to add to their wish lists. Trumpeter alone has offered up the Lexington. For a look at the parts in the box and some history see the in box review
by Michael Benolkin in the naval reviews section of Cybermodeler.
 |
 |
 |
 |
 |
 |
 |
 |
 |
 |
 |
 |
 |
 |
 |
I'm going to take a step by step look at the assembly of this kit from step 1 through step 22. I don't normally assemble a kit completely before painting but I wanted to incorporate this technique in this review to better show parts fit and give you a look at the kit unpainted as assembly moves forward.
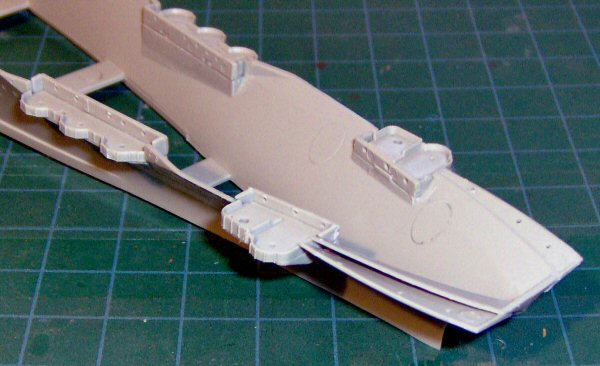
Assembly begins with the forward gun platforms the platforms themselves are nicely detailed with ribbing on the spray shield faces. Sprue attachment points on this surface require careful removal of the part and some subsequent sanding/filing to keep those details in place. The bulkheads that make up the hull of the ship behind these gun platforms are fitted from the inside and some care is needed to make sure you have them positioned correctly. Trumpeter has a problem molding nice square mating surfaces.
I found this on many of the parts. The corners seem to be a bit soft and an excellent join is hard to get. Parts B24 and B26 form the "flair" of the bow just under the forward edge of the flightdeck. Some filling and light sanding was needed to get these to feather well into the contours of the hull. Overall step 1 was rather simple with only trying to get the inner bulkheads behind the gun platforms to fit well causing any concern.
Step 2 consists of placing the boat/20mm wells into the hull and the rear deck in place at the stern. Again I found the fit of the boat wells to be adequate and the 2 rear deck supports (B14, B15) may be confusing and should be test fitted in place before any glue is applied.
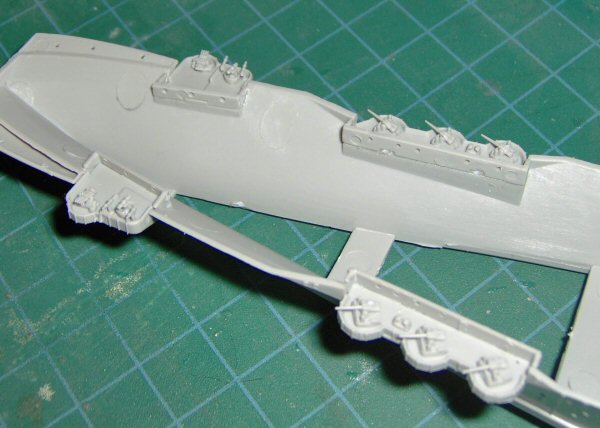
In step 3 and 4 we fill the gun tubs up with the kits guns. The 5" guns are nicely done in my opinion and look to scale. Equally well done are the quad 1.1" guns and their mounts. At this time the ships boats are mounted as well as gun directors and chocks. These latter parts are tiny so care is needed when removing them from the sprue. Also in these steps we place the 20mm galleries in the required wells. While these 20's don't have gun shields molded on I find them to be much finer representations than is supplied in Trumpeters Baltimore class kit.
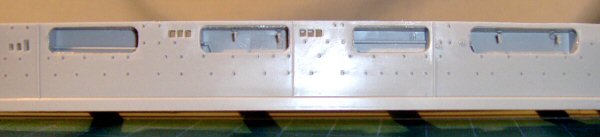
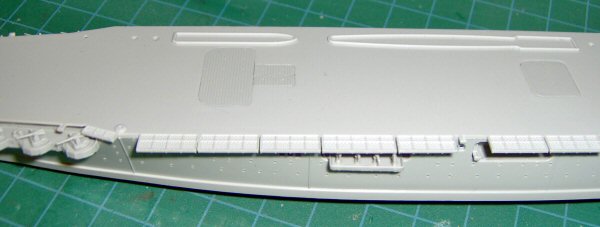
Step 5 deals with the elevator interior bulkheads and as I built my elevators up I omitted these parts. The elevators fit well into the kits deck and no problems were found in getting them to fit flush.
Step 6 is simply placing the deck on the hull. I found no problems with fit but some small amount of fiddling was needed to ensure it was properly locked in place.
Step 7 and 8 mainly concerns placement of deck edge stairways-a nice detail but again-small parts. The forward deck crane is a one piece affair and has some nice detail molded in.
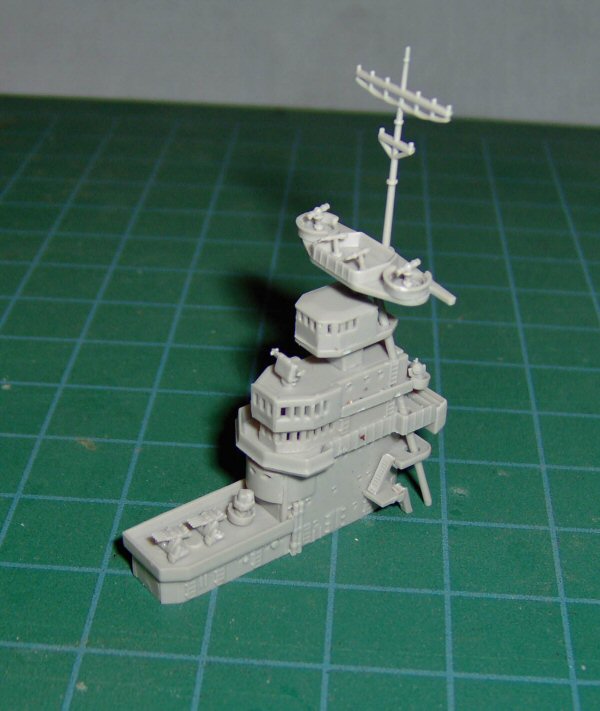
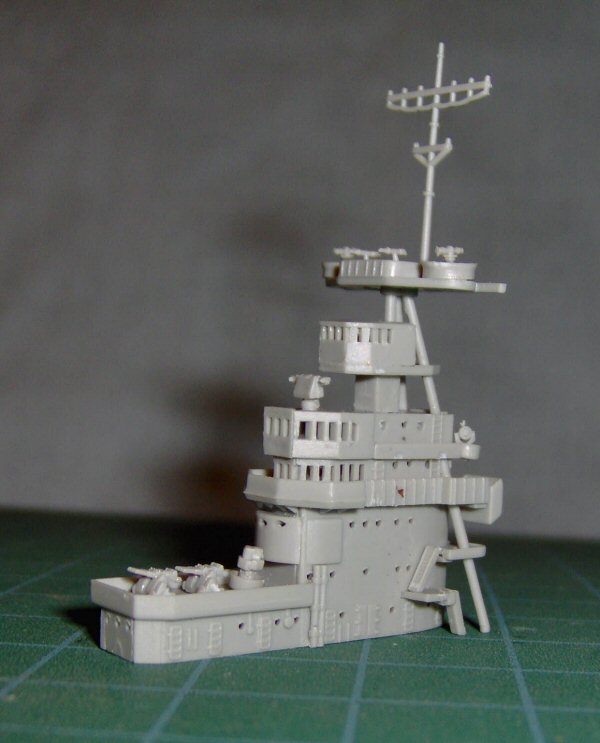
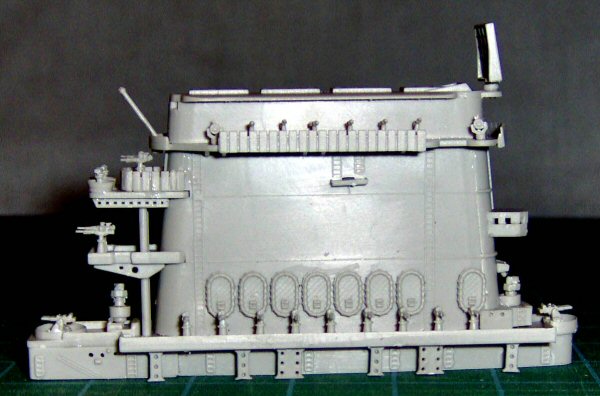
Step 9-14 deal with the assembly of the forward superstructure. A rather complicated assembly given it has six steps but overall the final effect looks quite nice. The various platforms, walkways and ladders are all separate parts and very delicately molded. The Bridge windows are molded opened but care must be taken when assembling these as too much glue will squeeze out from the seams and start to fill the closer windows. One minimal detraction I discovered with this assembly has to do with the tripod mast. When viewed from the side the port and starboard rear tripod supports should each look like one continuous piece from the flight deck, through the superstructure and on to the bottom of the foremast platform. As the photo shows, due to the parts breakdown the upper half of these 2 supports is at a different angle from the lower parts. I chose to add the director tubs, directors and .50 guns as well as the upper mast to the mast platform and let them dry before I placed the platform on the tripod legs.
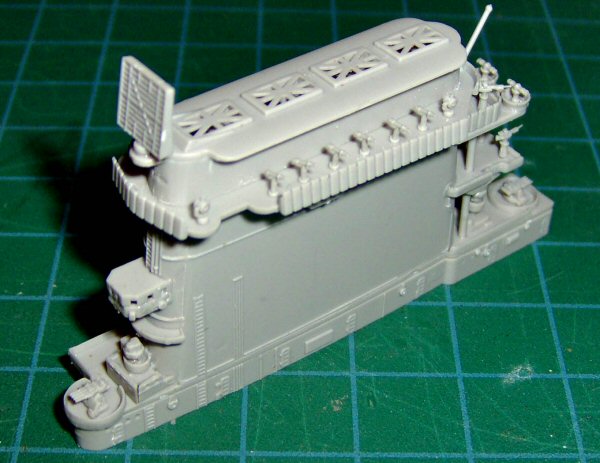
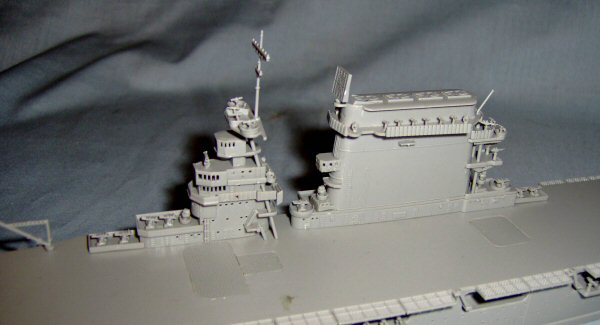
Step 15-20 are for the funnel structure assembly. Once again parts breakdown is rather simple with the main body of the funned structure consisting of only 8 main parts with the rest being all details and these details really do make for an interesting assembly. Various platforms are included with both upper detail and equipment as well as support structures to go underneath. The finely cast 20mm's and gun directors/rangefinders sprinkled throughout the assembly make it quite interesting to look at. I even think the life rafts look good.
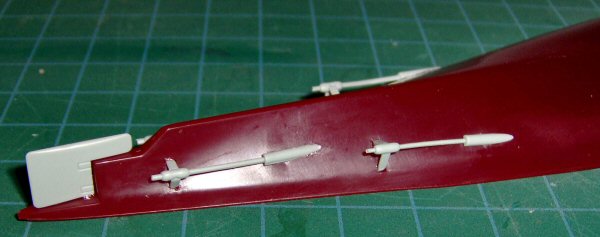
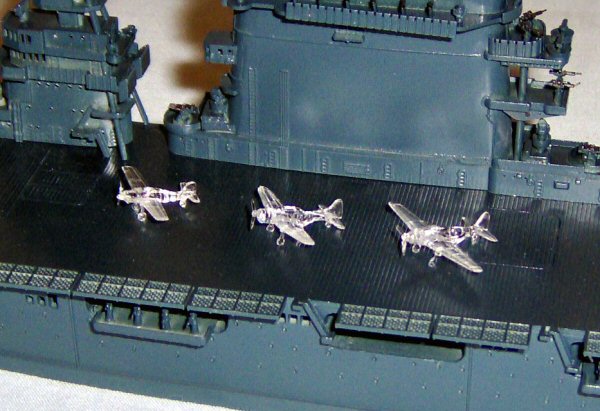
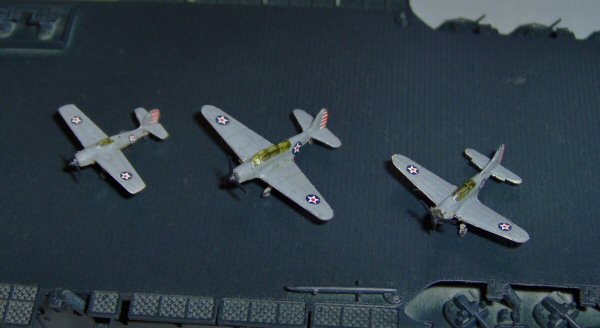
The aircraft are molded in clear styrene with separate landing gear (3) for each as well as propellers. Let me say at this point that I hate to build carriers. I can't stand the repetition of building the planes. Don't get me wrong, I've done it. I've folded the wings on many a 1/700 carrier air wing and I hated every minute of it...sorry but it's true. And now that I'm 40 something and the eyes are finally starting to go decaling an airplane that's 5/8" long with 4 stars isn't as satisfying as it may have once been. I first painted the fuselages under and around the cockpit areas interior green. Once that dried I painted the camo colors, top and bottom taking care to leave the canopies free of paint. In the photos the canopies seem to be acting as prisms and due to the angle of the photos the green interior really stands out. When looking at the planes from the side the canopies are clear.
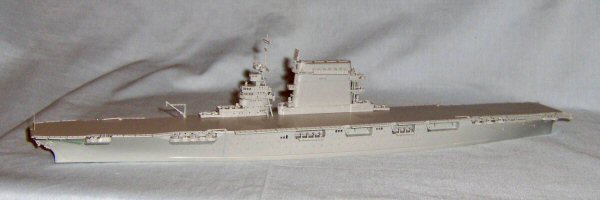
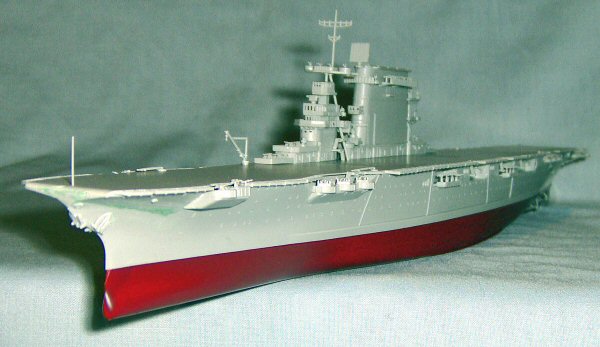
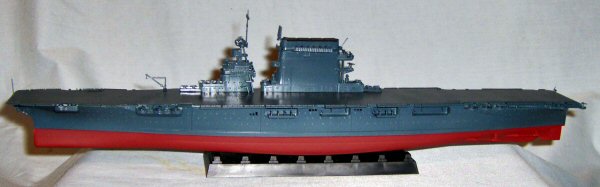
Step 22 shows the placement of the props and their shafts. These fit well and I had no problems in this area. The hull would not just fit together for photos. If you choose to build your Lexington full hull a decent display stand is included. If you like to have your ships waterlined a simulated water base is included but unless you’re totally desperate I'd just toss it...
Conclusions
Overall I think this is a nice kit. Some small fit issues and the tripod mistake are the only things that I could find wrong with it. I’m no expert on any one ship (I even just noticed I need to put the walkway between the forward and funnel superstructures on yet) but this looks like a good Lexington to me and I’d recommend this kit to anyone that’s a fan of early US Carriers.
My sincere thanks to Stevens International for this review sample!