


Unimodel 1/72 Sd.Kfz.140/1 Build Review
By Edward St. Denis
| Date of Review | April 2007 | Manufacturer | Unimodel |
|---|---|---|---|
| Subject | Sd.Kfz.140/1 | Scale | 1/72 |
| Kit Number | 349 | Primary Media | Styrene, Photo-Etch |
| Pros | Nicely detailed kit | Cons | |
| Skill Level | Basic | MSRP (USD) | $11.98 |
Background
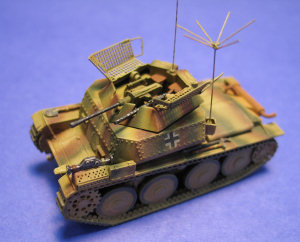
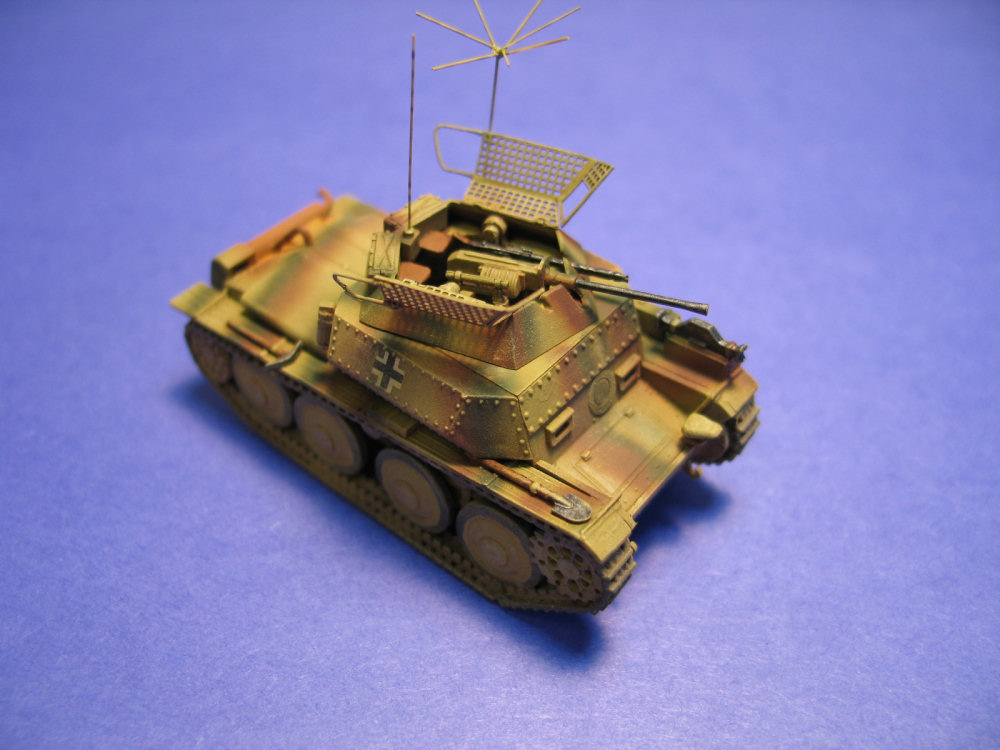
The Sd.Kfz.140/1 was produced in February and March of 1944 to complement the production of the Luchs which had ended after only one hundred had been produced. The Sd.Kfz.140/1 filled the same role as the Luchs, that of reconnaissance. The vehicle had a new superstructure added to an old Pz.Kfw.38(t) chassis. The turret mounted on this new superstructure was the same as that mounted on the Sd.Kfz.250/9, Sd.Kfz.251/23 and Sd.Kfz.234/1. It appears a total of fifty Sd.Kfz.140/1s were produced and the vehicle served on both the Eastern and Western fronts. Currently there are two models of this armored fighting vehicle available in 1/72 scale, one by UM and one by Attack. In my opinion the UM kit is the best kit available.
The Kit
You can see an in-box review of the kit here.
Construction
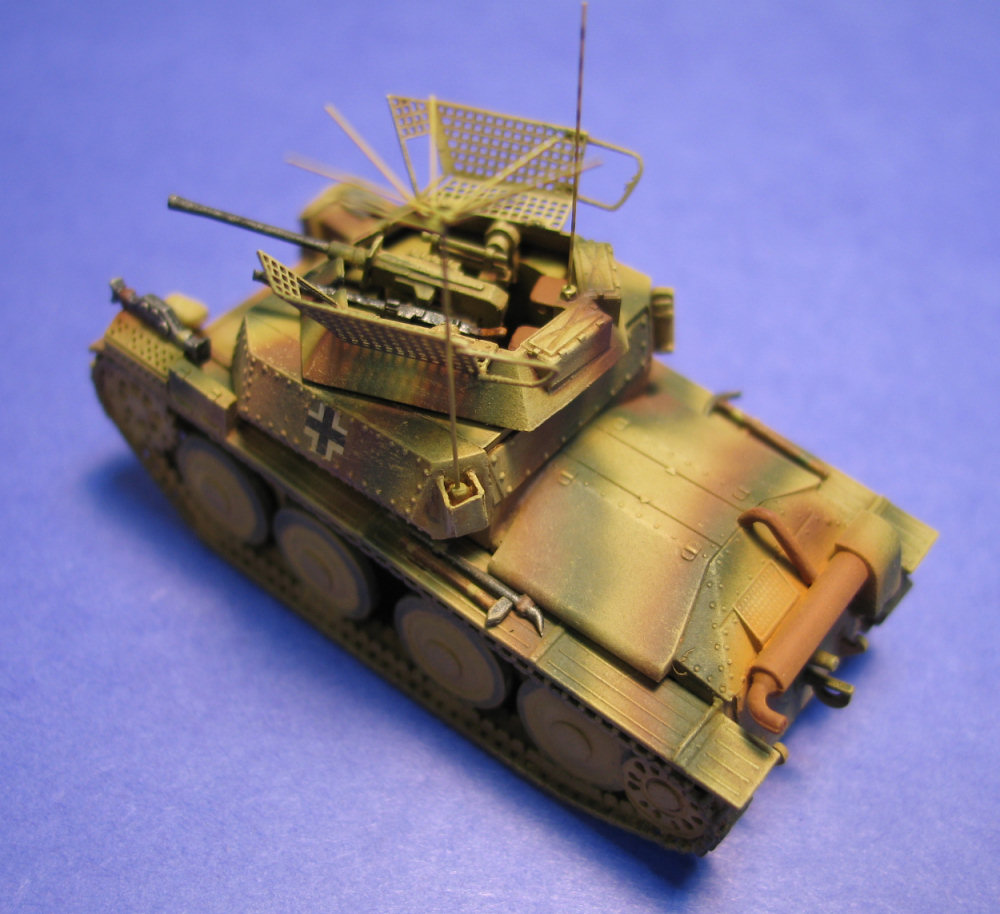
Assembly was straightforward in steps 1 through 6. I chose not to use the extra rivets supplied on part 9B in step 6. Steps 7 through 14 also proceeded without problems but ensure the parts in step 10 are aligned with each other and with the superstructure. I chose to drill out the barrel of the 20 mm cannon in step 11. Proceeding with step 12, I chose to replace parts 56D with more three-dimensional brass wire. Finally in step 14, I built a box around the superstructure antenna mount from sheet styrene. A scratch built crow’s foot antenna and rod antenna were added from stretched sprue.
Painting and Detailing
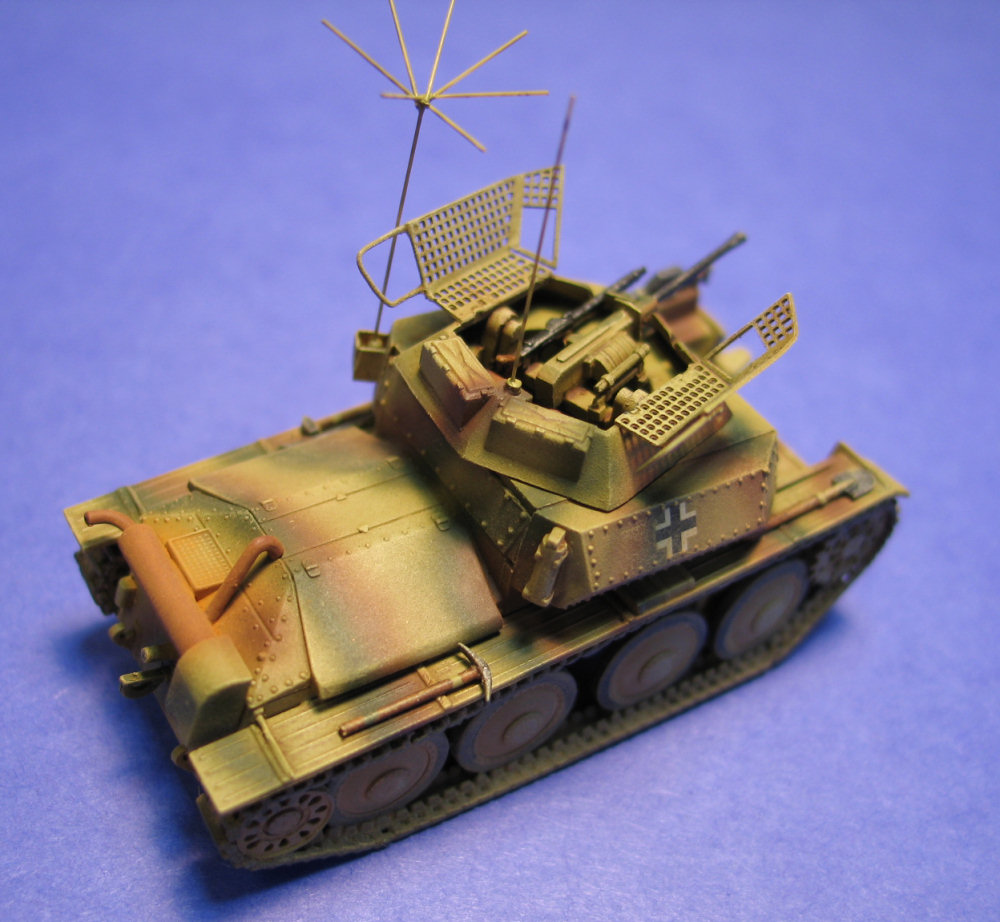
After I had primed the model, the lower hull and suspension was airbrushed with Modelmaster Dunkelgelb. Washes were applied and then the hull and suspension were drybrushed. All the detail painting and weathering of the lower hull and suspension were now done. After adding the painted track guards the painted areas were now masked and the rest of the model was sprayed with Dunkelgelb. Vertical lines of red brown and green were then airbrushed on. Next washes and dry brushing were performed. The kit decals are a bit thick so I replaced them with balkencruz from the parts box. Everything was then sprayed with Dullcote. As a final step, the model was dusted with pastels with an especially heavy application on the lower hull, tracks and suspension.
Conclusions
The UM kit builds up into a great replica of the original. It has a definite edge over the Attack kit in fit and detail. The tracks are especially good on all the UM 38(t) variants available. The photo-etched parts are a great complement to the kit especially for the turret grenade screens.

My sincere thanks to Squadron Mail Order for this review sample!
References:
- Chamberlain, Peter and Hilary Doyle. Encyclopedia of German Tanks of World War Two. New York: Arco Publishing Company, Inc., 1978