


Unimodel 1/72 Sd.Kfz.138/2 Hetzer (Early Version) Build Review
By Llarry Amrose
| Date of Review | November 2007 | Manufacturer | Unimodel |
|---|---|---|---|
| Subject | Sd.Kfz.138/2 Hetzer (Early Version) | Scale | 1/72 |
| Kit Number | 352 | Primary Media | Styrene |
| Pros | Nicely detailed kit | Cons | Thick photo-etch, vague decal placement |
| Skill Level | Basic | MSRP (USD) | $9.98 |
Background
When Nazi Germany annexed Czechoslovakia in the late 1930’s one of the prizes was the Skoda tank works, maker of the fine LT35 and LT38 light tanks. Production was continued, and these designs entered Wehrmacht service as the PzKfw 35(t) and 38(t) (“(t)” standing for Tschechoslowakei, the German spelling). They served well through the beginning of the war, filling a need between the Panzer II and III. Eventually, Allied armor and armament improved, and the tanks were withdrawn from frontline units.
However, the chassis was seen to still have value, so a number of other vehicles were designed based on it. This included self-propelled artillery, and the “Marder” series of tank destroyers. The Marders worked well enough, but eventually showed three areas which could be improved: they had a fairly tall silhouette, an open crew compartment, and a better 75mm gun became available. The JagdPanzer 38(t) was the result, and incorporated a few other advancements, including a machine gun mount that could be operated from inside.
It is known as the “Hetzer” (bushwhacker), though there is a belief in some quarters that the name is a myth, more correctly applied to the experimental E-100, which looks somewhat similar. Either way, with its low, sloped shape and high velocity gun, the JgPz 38(t) proved a formidable foe through the end of the war.
The Kit
Inside the standard blue end-opening UM box are four sprues: two copies of A, which contain the wheels and tracks, and B and C which contain all the rest of the vehicle. UM has kitted other variants of the Hetzer, and the parts seem to all be here. The parts diagram in the instructions shows which engine deck and which gun mantlet parts are to be used, and which are to be discarded. The decal sheet also seems to contain the markings for the other variants, as well as for the four schemes in this kit. Finally there is a small fret of photo-etched brass, providing a selection of brackets, intake and exhaust grills, and side skirts. It is easily the thickest photo-etched sheet I have ever encountered, and provides the most difficult parts of the whole construction.
The Build

Everyone has their own procedure for building armor; this is mine. I prefer to build the upper and lower hulls separately, pretty much in their entirety, including painting, then join them at the end, perform final touchup and move on to decals and weathering. Some of you may prefer to build the entire vehicle, then handle the camouflage, tracks and weathering all at once. Enjoy, I won’t stop you…
The lower hull went together easily, along with the rear idler and the main suspension springs. At this point I needed to paint the road wheels and their rubber tires, as well as the hull that would end up behind the road wheels. The road wheels went on next, but the drive sprockets needed to wait until they could be properly lined up while the tracks were being assembled.
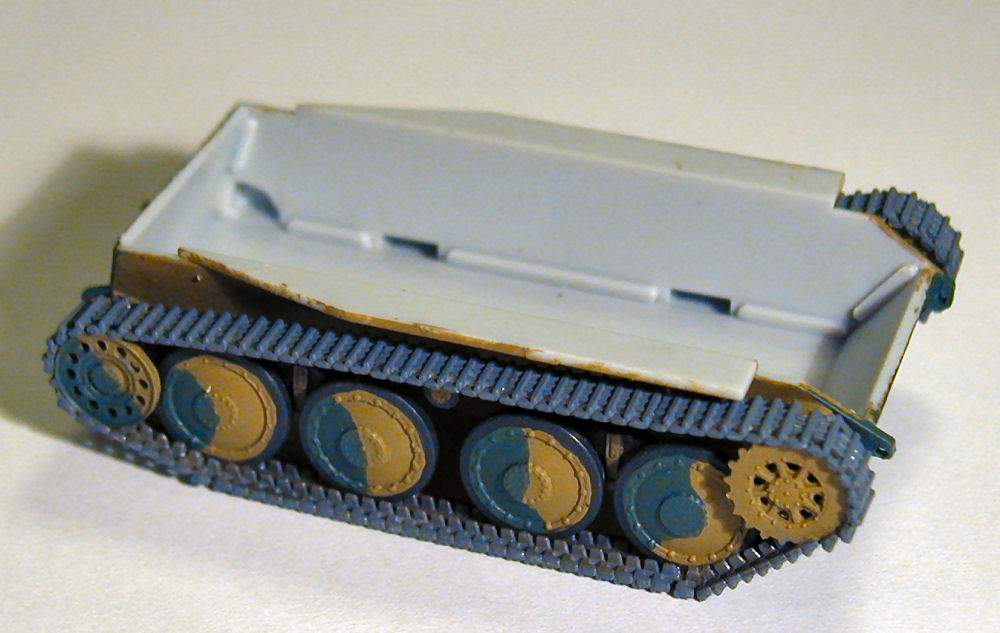
I have to admit, I really like link-and-length track, yes, even in 1/72, so I’ve become a big fan of these UM kits. No matter how many I build, though, it always seems that I learn something while building up the track on the first side that makes the second side come out better. This was no exception, but the side skirting can hide any unevenness along the top…
The upper hull is mostly one piece, except for the rear engine deck. The gun goes into a multi-part mounting that ends up only moving through a few degrees of elevation. If you plan to use this kit in a diorama you may need to take that into account when placing it. This is one of the few kits I have ever seen which has called for drilling out the end of the barrel. A small feature, but one with a very nice payoff in the finished product. While I was at it, I also drilled out the end of the exhaust pipe, but passed on doing the machine gun barrel. The rear fenders are almost impossible to line up properly until the top and bottom hulls are attached, so I painted the underside and waited.
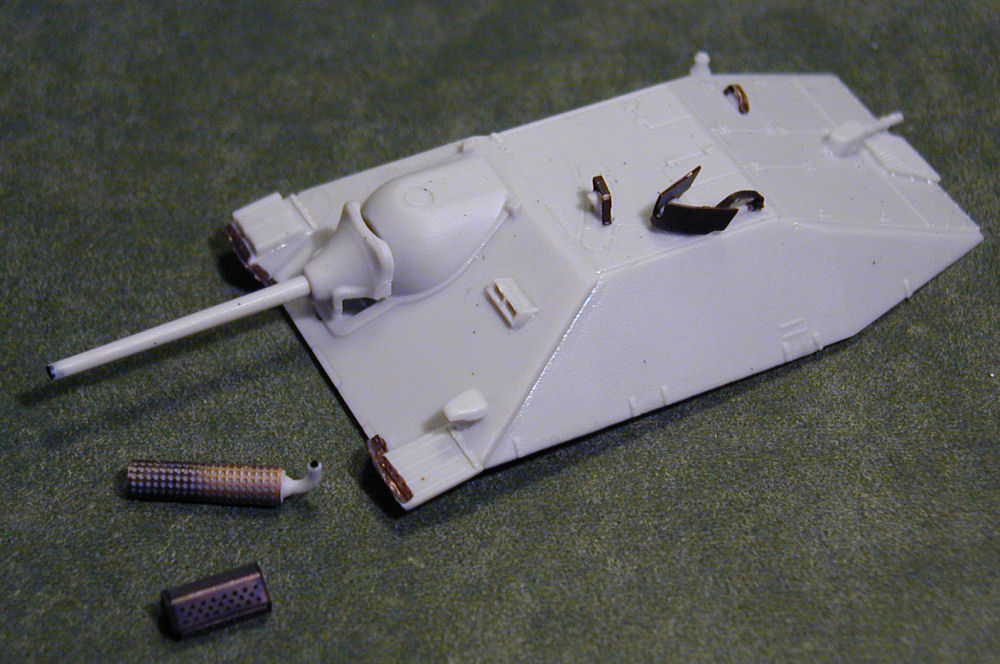
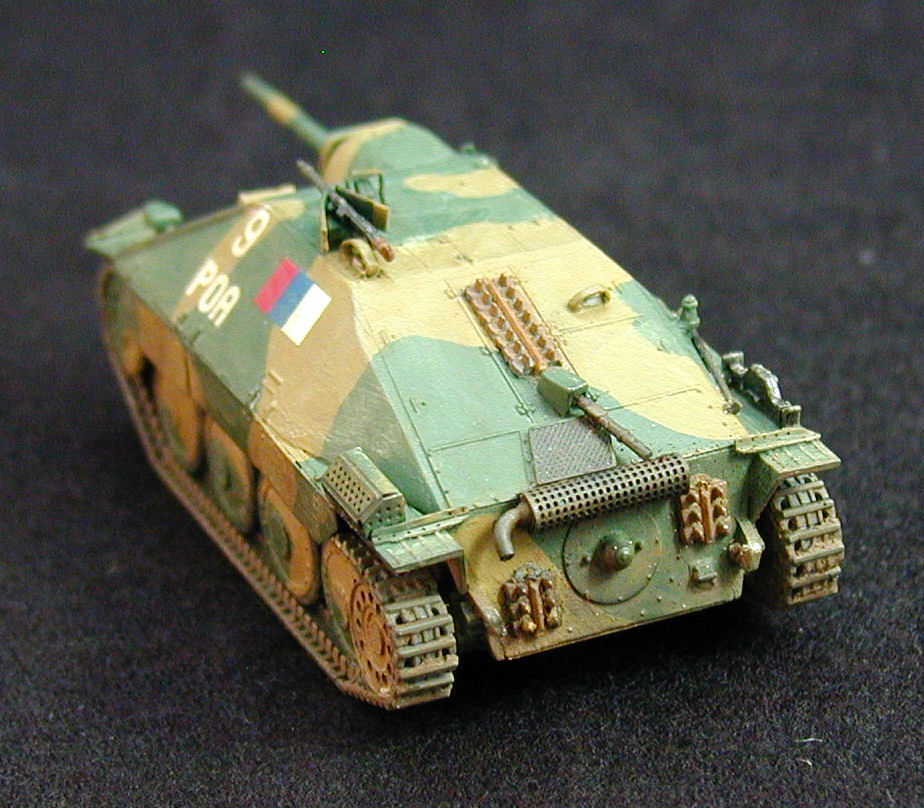
Most of the photo-etched parts attach to the upper hull, so this is the point where you have to start dealing with it. This has got to be the thickest brass I’ve ever dealt with, so annealing is a necessity. Heating the brass sheet in a candle flame until it changes color, then letting it cool makes it more pliable, but even that didn’t make these parts that easy to deal with. I didn’t bother to heat the side skirts, though if you want them to show dents and damage, you will want to.
The front and rear fender brackets are the toughest pieces. They involve the smallest folds and it’s really hard to get crisp right angles. On the plus side, these are also parts of the real vehicle very likely to suffer wear and tear, so being dinged and bent is not really a problem. The rear fender brackets have a very clear spot on the fender to attach to, but I recommend waiting until after the fenders are attached to the hull before mounting the brackets, so that they line up properly with the rear panel.
After painting the base color, it was time to join the upper and lower hulls, add the rear fenders, tools and side skirts. The front join is nice and tight, the back not quite as perfect, but with a little care it will be fine with minimal filling. More paint, including the camouflage pattern, and it was time for the muffler and the spare track links. A little more touch up, and building was complete and ready for decals and weathering.
Markings
There a four schemes to choose from. The back of the box has a three-tone scheme of sand, panzer green and red-brown, but with no identification and no decal indications. The instruction pamphlet has three more, which do have unit information and decal data, although it only consists of the decal number and an arrow to a spot on the hull. Orientation and alignment are left to the builder, which I do not like. One of these schemes is sand and green with a border of red-brown between them, and is identified as being from the Western front, autumn 1944. The other two schemes are just sand and green. One is from a Hungarian tank division near Lake Balaton in March, 1945.
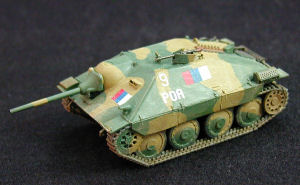
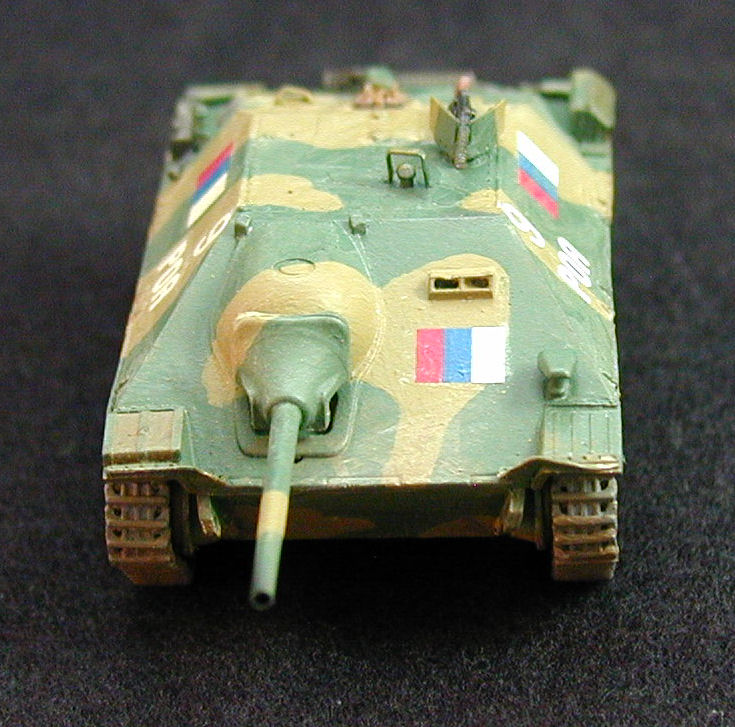
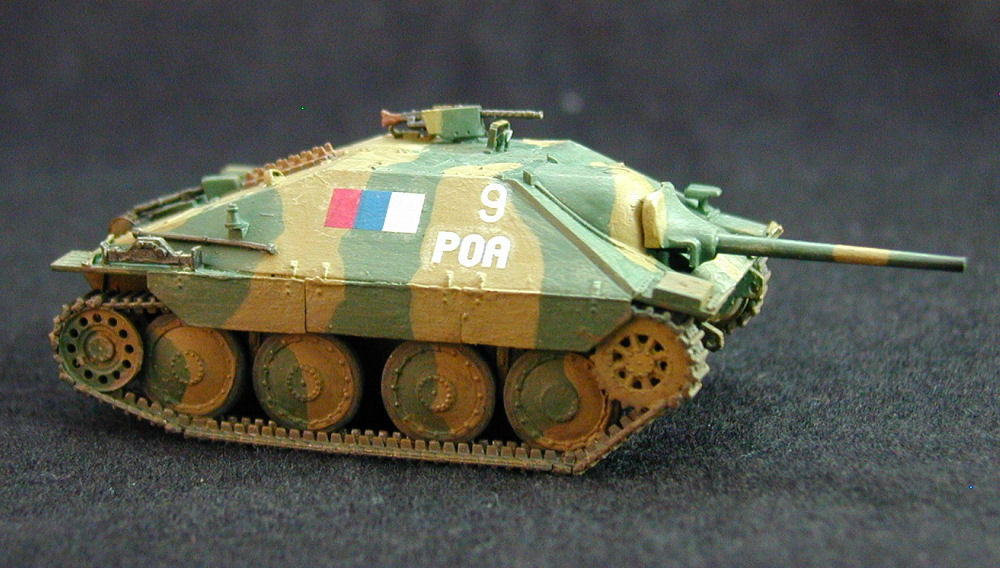
The scheme I chose is from the Russian Liberation Army from 1945 near Prague. The ROA (from the Russian name) was formed from Soviet prisoners and émigrés and was mainly used for anti-Stalin propaganda. Eventually they were actually equipped and deployed, but due to concerns over their loyalty, the first units were sent to the Western front. Having no real quarrel with the Western Allies, mass surrenders resulted. Some units fought bitterly, having been misinformed that if captured, they would be turned over to the Soviets. When finally deployed on the Eastern front, they performed reasonably well until the Prague uprising, when they decided to support the Czechs who were finally able to rebel against the Nazis. At war’s end, troops captured by the Soviets were considered traitors and imprisoned or executed. Some western forces did allow ROA members to escape to safety overseas.
I used PollyScale paints, and Tamiya weathering materials. The “Mud” Weathering stick is a soft-crayon-like stick of water-soluble paint, which can be smeared on, and then spread around with a wet brush, or left to dry as clumps. The Weathering Masters are a series of pastels in makeup-like cases with an applicator sponge/brush which excel for more subtle affects, and hold up better than regular dry pastels.
The decals are exceptionally matte, and handle well. The exact positioning of the markings was something of a guess, based on the directions. In retrospect, I believe that the Russian tri-color markings should actually be oriented vertically, with the white section on top, though I still haven’t been able to find any photos to prove it.
Conclusion
This is another winner from UM, better detailed than the older (but not bad) ESCI/Italeri kit, particularly when you take into account the versions in the different boxings. If you’re not comfortable with handling photo-etched brass parts, I would recommend building a couple of UM’s Soviet armor kits first, as the parts in the ones I’ve built tend to be simpler. Likewise, if you’re not used to link-and-length tracks, I would suggest one of UM’s T-34 versions, as the track parts are a little larger and easier to handle. Either way, if you want a Hetzer, I don’t think you can go wrong here.
I would like to thank Squadron Mail Order for the sample kit.