


Wolfpack 1/48 T-38A Talon 'USAF' Quick Build Review
by Michael Benolkin
| Date of Review | September 2013 | Manufacturer | Wolfpack |
|---|---|---|---|
| Subject | T-38A Talon 'USAF' | Scale | 1/48 |
| Kit Number | 10001 | Primary Media | Styrene |
| Pros | Easy build | Cons | A few minor glitches |
| Skill Level | Experienced | MSRP (USD) | TBA |
Quick Build
For a look at this kit out of the box, look here.
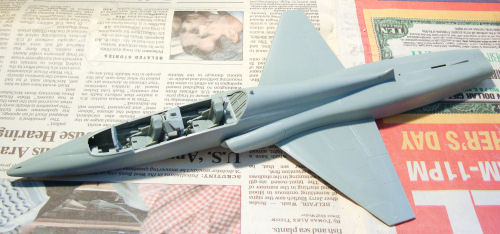
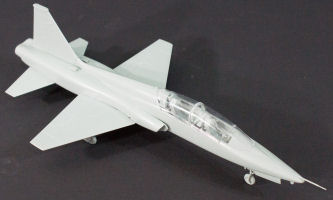
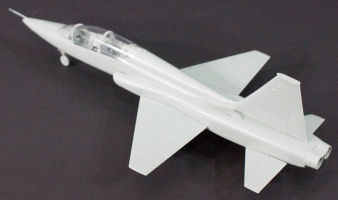
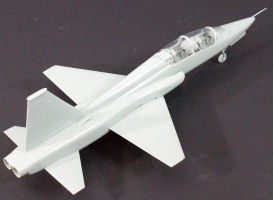
The build naturally starts in the cockpit. Step 1 assembles the ejection seats and out of the box, they look nice though they really need seat belts, shoulder harnesses, and that launching strap that flings your butt out of the seat several seconds after ejection. Step 2 works with the instrument panels and adding rudder pedals to the panels. The decals provide instrument face overlays for the panels though we didn't use them in this quick build. Step 3 installs the ejection rails, control sticks, instrument panels, and ejection seats into the cockpit tubs. The tubs have throttles molded in place (nice).
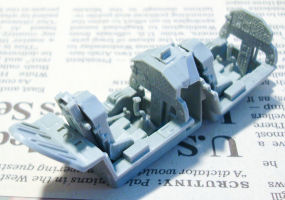
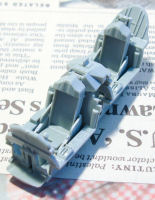
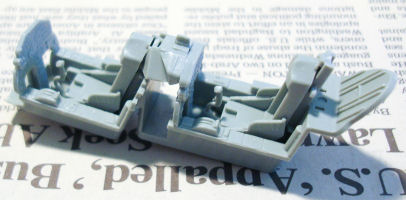
Step 4 installs the cockpit assembly inside the fuselage halves along with the nosewheel well.

Step 5 added an antenna and anti-collision light to the underside of the forward fuselage plate which is then mounted to the fuselage assembly in Step 6. The lower wing halves and rear fuselage ventral plate mounts behind the forward plate. There isn't much for aligning the rear ventral plate and the fuselage assembly, so take a little extra time and glue only one side at a time. Even so, you'll still have a little bodywork to fix back there. The upper wing halves, intakes and vertical stabilizer go on next, though I opted to wait on the tail until a little later in the process. Note that the instructions have you mount part B21 to the top of the vertical stabilizer, and if you do that, you'll have one of the main gear doors up there. Use the ILS antenna part B12 instead. Step 8 adds the afterburner chambers and nozzles to the aft end of the fuselage.
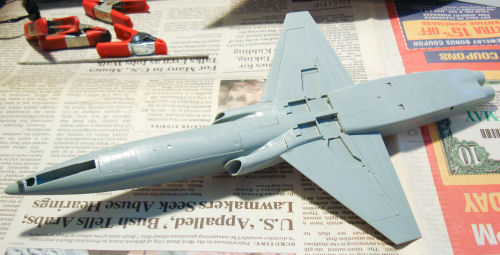
The landing gear is next in Step 9 for the nose gear and Step 10 for the mains.
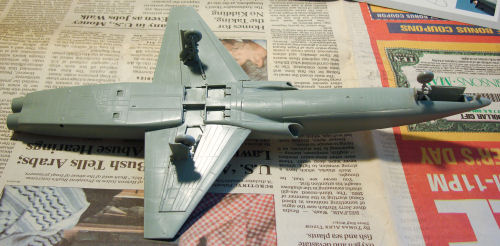
Step 11 adds the speed brakes; Step 12 adds the horizontal stabs and the afterburner cool air scoops (and I added the vertical stabilizer at this point). Steps 13-15 add the front instrument panel cover (part A4), windscreen, and the forward and rear canopies. Here is the only real bug in the project. Part A4 will not sit properly over the front instrument panel (part B8) because B8 is too tall. I don't know how they did this but the panel sits high enough to obstruct the panel cover and the windscreen. Since I heard from a friend who also ran into this problem, I laid part A4 behind B8 and traced the outline of A4 on the rear of the instrument panel. With A4 set aside, I carefully applied sprue cutters to the lines I traced on B8 and lowered the top of the panel. The result isn't pretty, but it fits perfectly now.


With an abbreviated forward instrument panel, it seemed prudent to finish the quick build with the canopies closed.
Conclusion
Overall, this kit goes together very quickly and uneventfully. When next I build this kit again, I will:
- resize the forward instrument panel from the bottom before gluing everything together; or,
- scratchbuild front and matching rear instrument panels using AirScale instrument decals and photo-etched bezels; or,
- wait for an aftermarket photo-etched cockpit detail set (with seatbelts and harnesses too); or,
- rob the resin cockpit out of my Sword T-38 kit; or,
- some combination of all of the above.
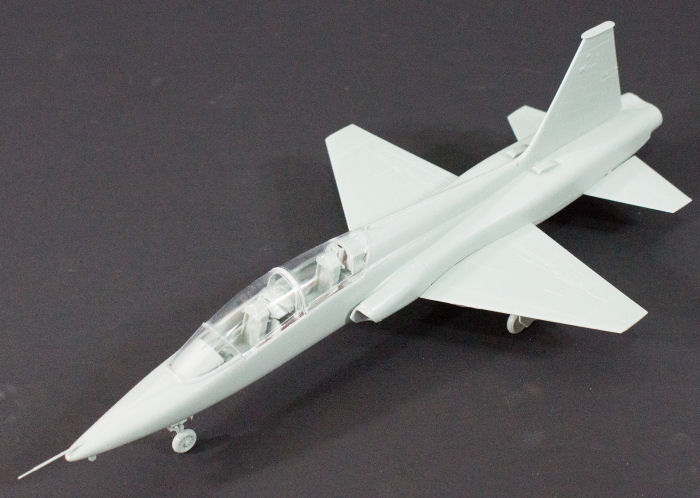
You can see a few minor spots on the airframe that will benefit from some filler, but overall this model is very nice and is a big improvement over the Sword kit.
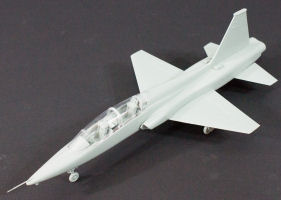

As I mentioned in the first-look at this kit, MRC is importing the kit into the North American market so you'll have these on store shelves soon. With the wide variety of color schemes that this aircraft has carried in flight training, flight test, astronaut training, aggressor and adversary duties, etc., you could build several dozen of these kits without duplicating subjects. This was a fun build that took only a few hours to complete (without painting or filling).
My sincere thanks to MRC for this review sample!