CMK 1/72 U-Boot VIIc Officer's Wardroom and Galley First Look
By Michael Benolkin
| Date of Review | December 2005 | Manufacturer | CMK |
|---|---|---|---|
| Subject | U-Boot VIIc Officer's Wardroom and Galley | Scale | 1/72 |
| Kit Number | N72005 | Media | Resin, Photo-Etch |
| Pros | Incredible interior detail! | Cons | Costs as much as the kit! |
| Skill Level | Intermediate | MSRP (USD) | $55.98 |
First Look
 |
 |
Revell/Germany produced a highly sought after kit in a huge scale - 1/72. Huge? When the subject is a Type VIIc U-Boat, that's respectable. For those who want larger, Andrea still has their 1/35 Type VIIc kit, but you're on your own getting a larger house to display it!
The kit features nice detailing out of the box (and a big box it is!), and quite a few aftermarket companies have naturally jumped on the bandwagon and have released sets to help detail out the exterior of the kit. These include White Ensign Models and Eduard, who've released some nice details in photo-etch, and interestingly enough, there is very little duplication of details in the two sets - get both! (I did...)
Of course there are but a few ship kits out there that provide any interior details, and for Revell/Germany to attempt an interior in this kit would have likely driven the retail price of the kit out of sight. Nevertheless, the designers at CMK have taken on the challenge and have released number five in their interior series (numbers one through three have been previously reviewed here, number four hasn't been released yet).
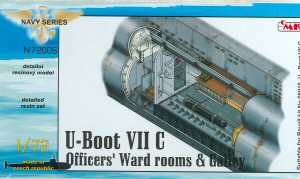
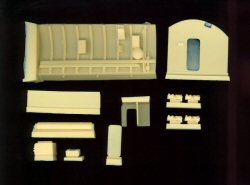
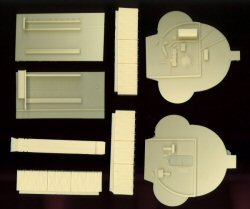
This set replicates the slice of the boat containing the officer's ward room, galley, and the batteries below the main deck. Unlike the diesel engine room that only provided one engine so that you could see inside, this set provides several banks of batteries to provide detail depth below decks, and only one half of the officers' bunks to facilitate the 'cut away' effect.
Face it, if you have one of the U-Boat kits (or are considering one) and you are at least partially afflicted with AMS (Advanced Modelers' Syndrome (you can NEVER build anything straight from the box!)), you're going to want to install at least one of these interiors to your submarine. I plan on using all three as these details will turn this kit into a museum-quality display model.
The main effort will be to cut away the corresponding section out of the right (starboard) side of the hull. As with the previous two sets reviewed here, the conversion includes a nice razor saw. This is a double-sided, very fine razor saw that should make the job of cutting away major areas of the kit's starboard side easier. This is a first class touch from CMK. Bravo Zulu!
See for yourself and you'll know why I have to rate this 'highly recommended!'


