


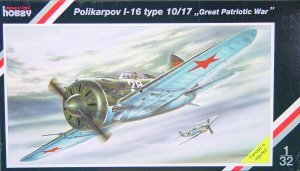
Special Hobby 1/32 I-16 Type 10/17 Kit First Look
By Michael Benolkin
| Date of Review | July 2005 | Manufacturer | Special Hobby |
|---|---|---|---|
| Subject | Polikarpov I-16 Type 10/17 | Scale | 1/32 |
| Kit Number | 32001 | Primary Media | Styrene, Resin, PE |
| Pros | The kit is 95% styrene | Cons | See text |
| Skill Level | Experienced | MSRP (USD) | OOP |
First Look
 |
 |
 |
 |
 |
 |
Polikarpov's design signature during the mid and late 1930s was stubby, barrel-shaped fighters. The primary machine during that era was the I-15 biplane. Like their barrel-shaped brothers on the other side of the world, the Grumman F3Fs, the I-15 was going to be transformed almost directly into a monoplane fighter, the I-16. In the transformation, the I-15's upper wing was deleted and the lower wing strengthened to carry the full load. With a wingspan one meter shorter than the I-15, the early I-16 was powered by the same 700hp M-25 radial engine as the late-model I-15. The I-16 also incorporated retractable landing gear which could be exchanged for retractable skis.
Armament for the I-16 Type 10 was a pair of 7.62mm machine guns in the top of the nose and another pair in the wings just outside the propeller arc. The Type 17 retained the nose-mounted machine guns, while the wing-mounted guns were replaced with 20mm cannons.
The I-16 saw combat on two fronts in the late 1930s, first in the Spanish Civil War and later with the Chinese against Japan. In Spain, the early Bf 109s flown by the Nationalists were surprised by the agile I-16 and suffered losses to the 'Rata' (Rat) as they nicknamed it. The Japanese forces were also surprised by the agile I-16 until they finally discovered and exploited the I-16's weaknesses.
By the time the Nazi violated the peace treaty between the Soviet Union and Germany, the I-16 was obsolete. Nonetheless, the I-16 soldiered on into 1943 before being completely phased out of service. One of the most famous tactics flown by Soviet pilots in 1941 was ramming their I-16s into the tails of German aircraft, then either limping back to base or parachuting to safety.
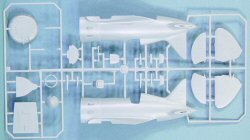
The Special Hobby I-16 represents their first foray into 1/32 scale, and from what I can tell, they've done an excellent job. This project represents one of the first I've seen where the vast majority of the parts are styrene. The only resin parts in the kit are the engine exhaust stacks, which a small fret of Eduard photo-etch is included with seat belt, shoulder harness, and gunsight reticle.
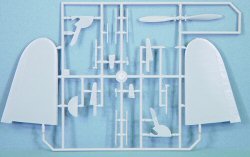
The parts are molded in light gray styrene and feature very nicely executed surface detailing. All of the panel lines, etc., are scribed. The kit is presented on four parts trees, plus a single small clear tree with the windscreen.
Assembly begins with the cockpit. The instrument panel would have benefited from a photo-etched face with acetate instrument faces in this scale, but after installation, it would take a high-power IPMS Judge's flashlight to see the instruments. The left entry door is molded separately, though the instructions show where to cut should you wish to have both doors open (the right side door was not added until the Type 24). The instructions have you trap the cockpit into the fuselage halves, but it appears that the cockpit will fit though the bottom of the assembled fuselage. This would allow you to assemble the fuselage and remove any seam lines before adding the cockpit.
The rudder is molded separately, but the elevators are molded onto the horizontal stabilizers. You'll probably want to remove the elevators so you can pose them with a more natural droop. The top and bottom wing halves go together next.
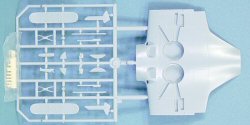
Here is where it is time to decide on your particular version. In step 5, you apply the fuselage bottom. According to the instructions, part B1 is for the Type 10, D1 is the Type 17. The instructions show how to equip your Type 10 with either wheels or skis, but for some reason only portrays the Type 17 with wheels only. The Type 17 can use skis as well, just follow the Type 10 steps here. You can even see the recesses in the bottom of the fuselage for the retractable skis on the Type 17's part D1, though some of the photos I've seen shows these recesses on some of the ski-equipped Type 10, so you have a little lattitude here.
The instructions show that the Type 17 needs to have wire running from the wheel well to the landing gear axle as part of the manual retraction system. This important detail applies to (I believe) all version of the I-16 except for those with the fixed ski installation. The skis on in this kit are retractable and will also need the retraction cable.
The shutters on the engine cowling face are molded closed, and there is no engine provided (or needed). If you're wanting to do a little superdetailing, you can use one of the Williams Brothers' 1/32 engine kits (or something equivalent from Engines & Things) to add an engine and open up the cooling shutters.
The gunsight on this kit is quite interesting. It has a reflector sight, a spotting scope, and a ring and bead sight, all in one unit. That will look outstanding under the windscreen.
Markings are provided for three examples:
- I-16 Type 17, White 28, 4th Guards Fighter Regt, Leningrad 1942
- I-16 Type 17, Red 8, 7th Fighter Regt, Leningrad 1941
- I-16 Type 10, Winter Scheme, Winter 1941
If this builds as nice as it looks, it should be a winner.