


Mission Models Paint Review
By Michael Benolkin
| Date of Review | February 2020 | Manufacturer | Mr.Paint |
|---|---|---|---|
| Subject | Mission Models Paint | Product Number | Various |
| Pros | Custom paint solutions for specific subjects | Cons | Price (see text) |
| Skill Level | Basic | MSRP (USD) | $5.75 |
Review
Mission Models started producing acrylic paints several years ago initially focusing on armor colors. I heard from many folks saying that these were the best acrylics they'd ever used while others had mixed results. At that point in time, I was overwhelmed by acrylic paints as we had Vallejo, AK Interactive, Ammo by Mig, Hataka, and others over and above my go-to-acrylics from Tamiya and Gunze Sangyo. The last thing I was interested in seeing at that point was yet another acrylic line. Fast forward to 2019, and I had divested myself of the Vallejo, AK Interactive, and Ammo by Mig paints for various reasons that are beyond the scope of this article, but Mission Models had expanded their color offerings to include aviation subjects and as I was about to revise our online paint tables, it was time for a closer look.
I ordered a few dozen colors that cover a variety of upcoming projects, and there's nothing like the convenience of Amazon to get them delivered quickly. After watching numerous videos produced by Mission Models and some independent reviewers, I came to the conclusion that there are at least three ways to use these paints:
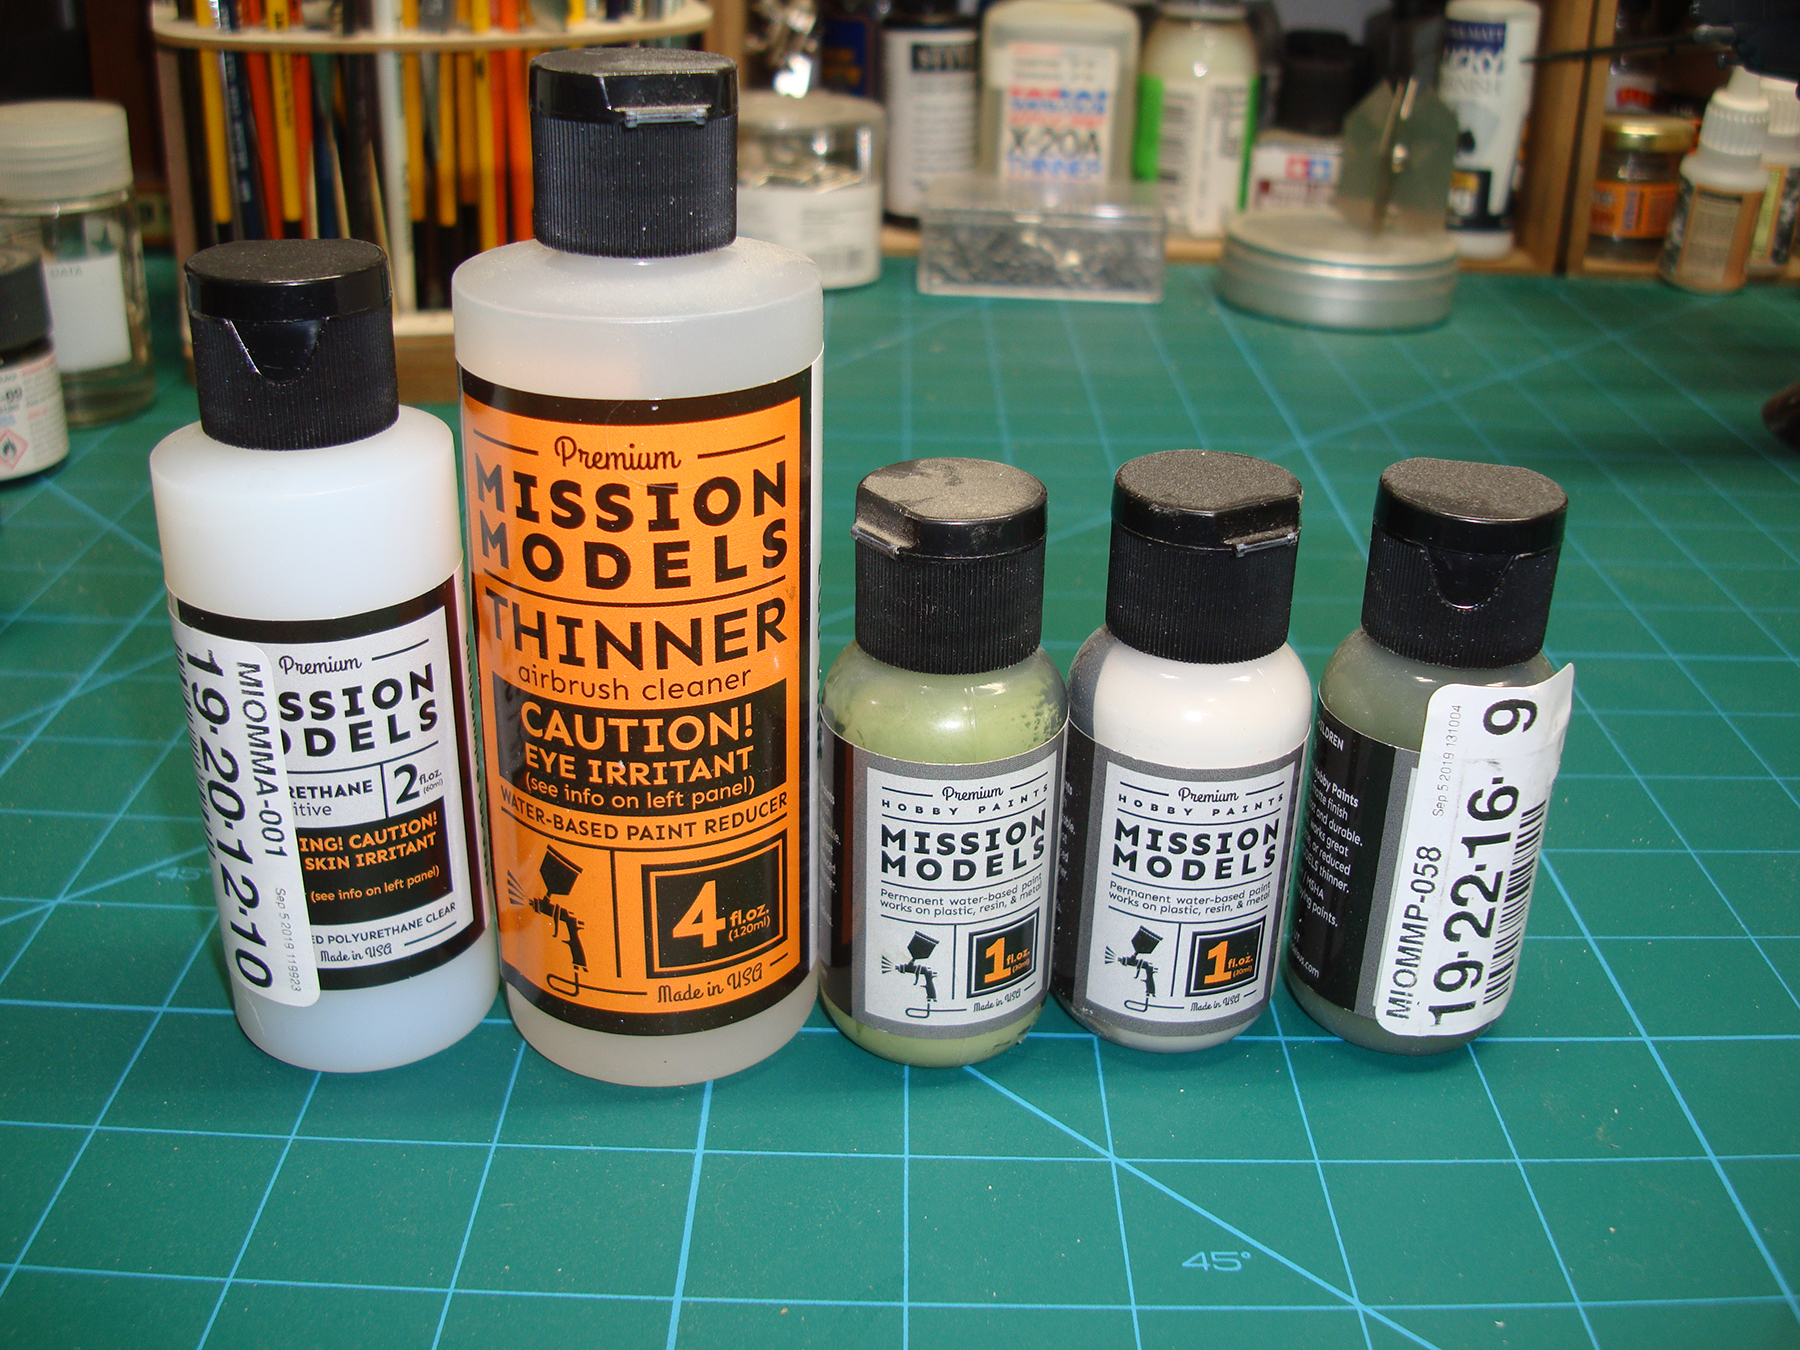

- Use them straight from the bottle (as indicated by the instructions on the bottles)
- Use them with the Mission Models Polyurethane additive and thinner (as demonstrated by Mission Models' videos)
- Use them mixed 50:50 with Future instead of the Mission Models additives/thinner (as demonstrated in at least one independent video)
Despite the bottle's instructions, these paints won't adhere to the models without their additives, and this was confirmed by several frustrated users, so I skipped the first option for now.
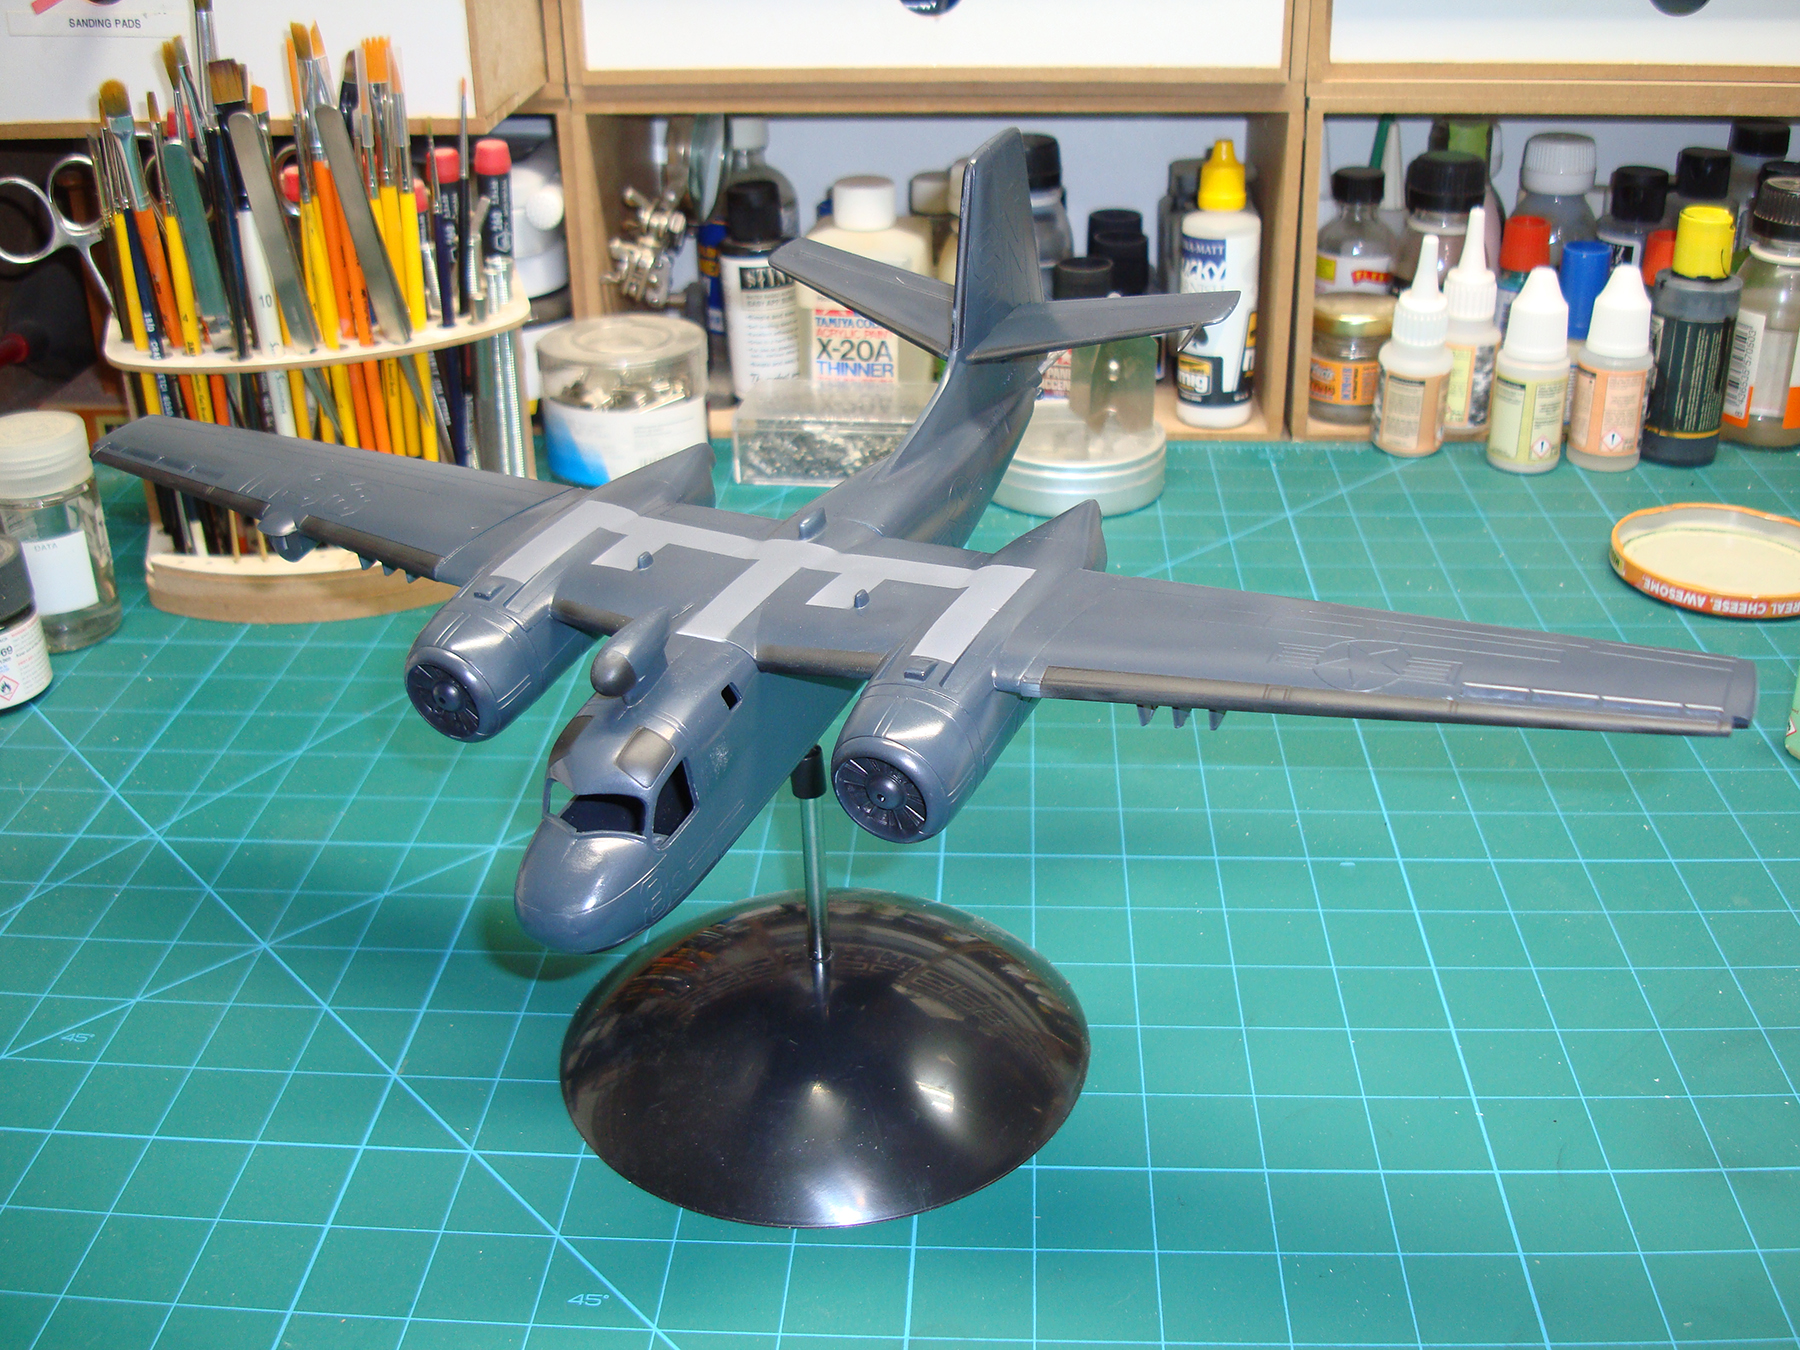
For my first test, I was painting an old Aurora 1/54 S2F Tracker (recently reissued by Atlantis Models), and I selected Mission Models' glossy Sea Blue. The wings were painted together with the Mission Models additives while the fuselage was painted with the 50:50 mix with Future. In the video demonstrations, the Mission Models paints will work well with other paint brands and the plastic does not need to be washed/cleaned of mold release agents or the oil of your hands, so we tested those claims as well.
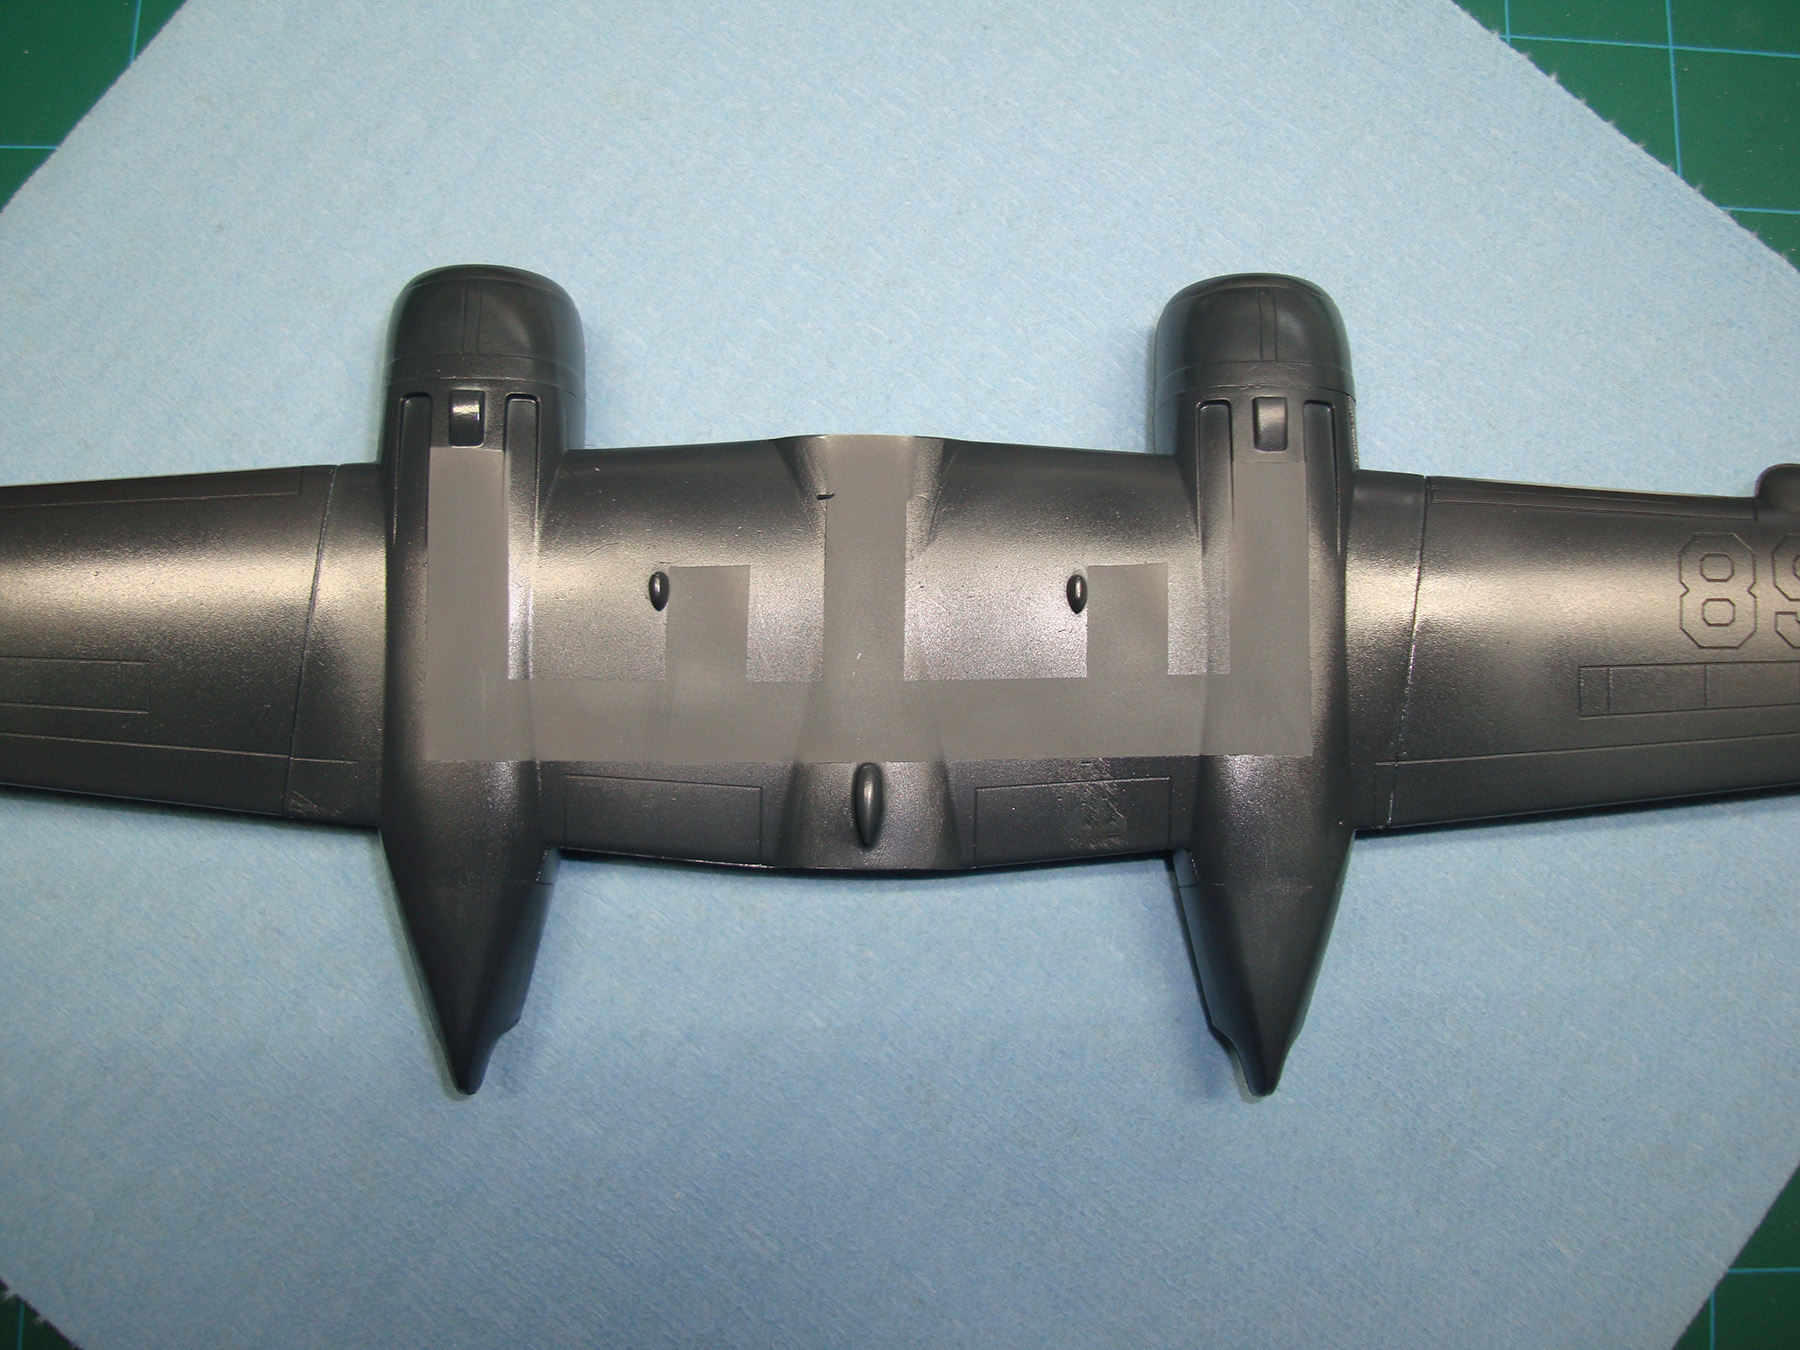
Here's a photo of the wing that had been painted with Stynylrez black primer around the wing's leading edges and Tamiya acrylic gray in the areas where there will be a walkway. Once the paint had dried/cured, I masked the areas around the leading edges to apply black Stynylrez again for the de-icing boots. Pulling up the yellow masking tape covering the walkways was fine, I rarely have paint pull-up with Tamiya. Pulling up the tape around the deicing boots had small bits of paint pull-up of the Mission Models' Sea Blue, and a large (quarter-sized area) under the wing. When I applied a touch-up of the pull-up spots, the paint didn't blend into the surrounding areas as well as I'd like as the touch-ups appeared glossier than the base coat.
Turning to the fuselage, the mixture with Future went down nicely and the results were identical to the wing, including little bits of pull-up from the painting of the deicer boot on the vertical fin. When the wing and fuselage are glued together, you can't tell that the model was painted using two different mixtures.
I was happy with the final results of that S2F build and I wanted to really understand what these Mission Models paints could do. I grabbed a main rotor from a recent quick-build review and wiped down the blades with Plastic Prep to ensure I had clean surface to work with. I marked the blades to show the four test conditions I would be creating:
- N - Mission Models paints applied to bare plastic with no thinner or additives. I applied a green and a gray here to see if there was any difference in adhesion between colors.
- A - Mission Models paint (green) thinned with Mission Models thinner and used the Polyurethane additive applied to bare plastic.
- F - Mission Models paint (green) thinned with Future and applied to bare plastic.
- L - Since I was testing Tamiya paints thinned with lacquer thinner, I thinned Mission Models green with GSI lacquer thinner and applied to bare plastic.
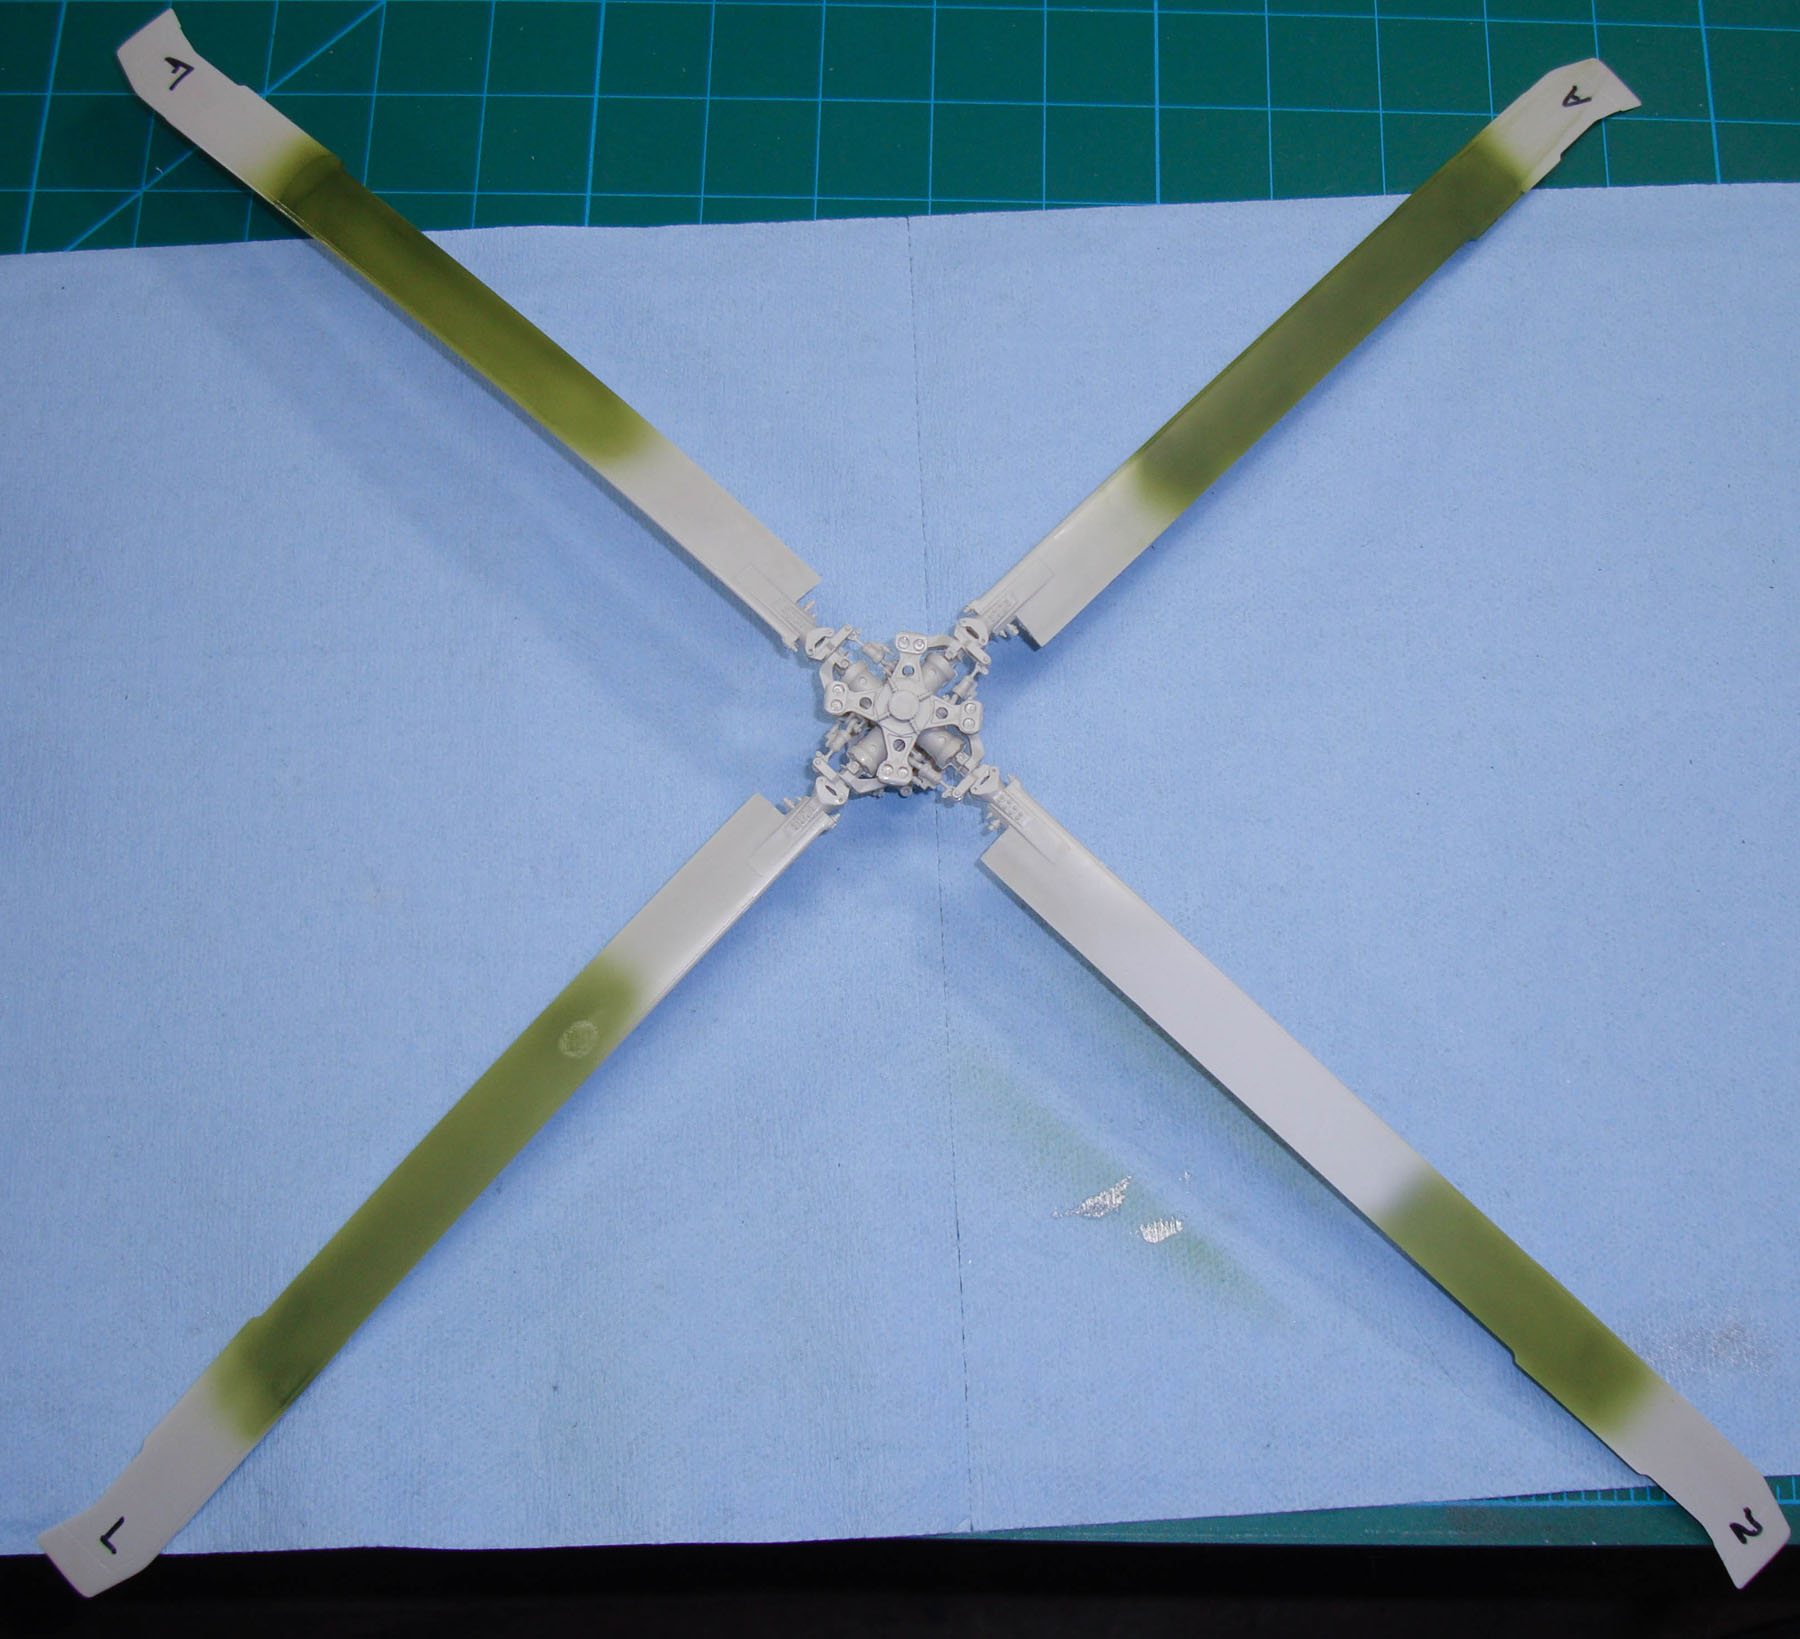
If you're wondering it that is a fingerprint on the L blade, I was curious to see if the Mission Models paint dried as quickly as Tamiya using lacquer thinner and the answer was obviously NO. I set the blades to dry/cure for a few hours. I applied masking tape along the length of each blade and burnished the surface to ensure a snug application.
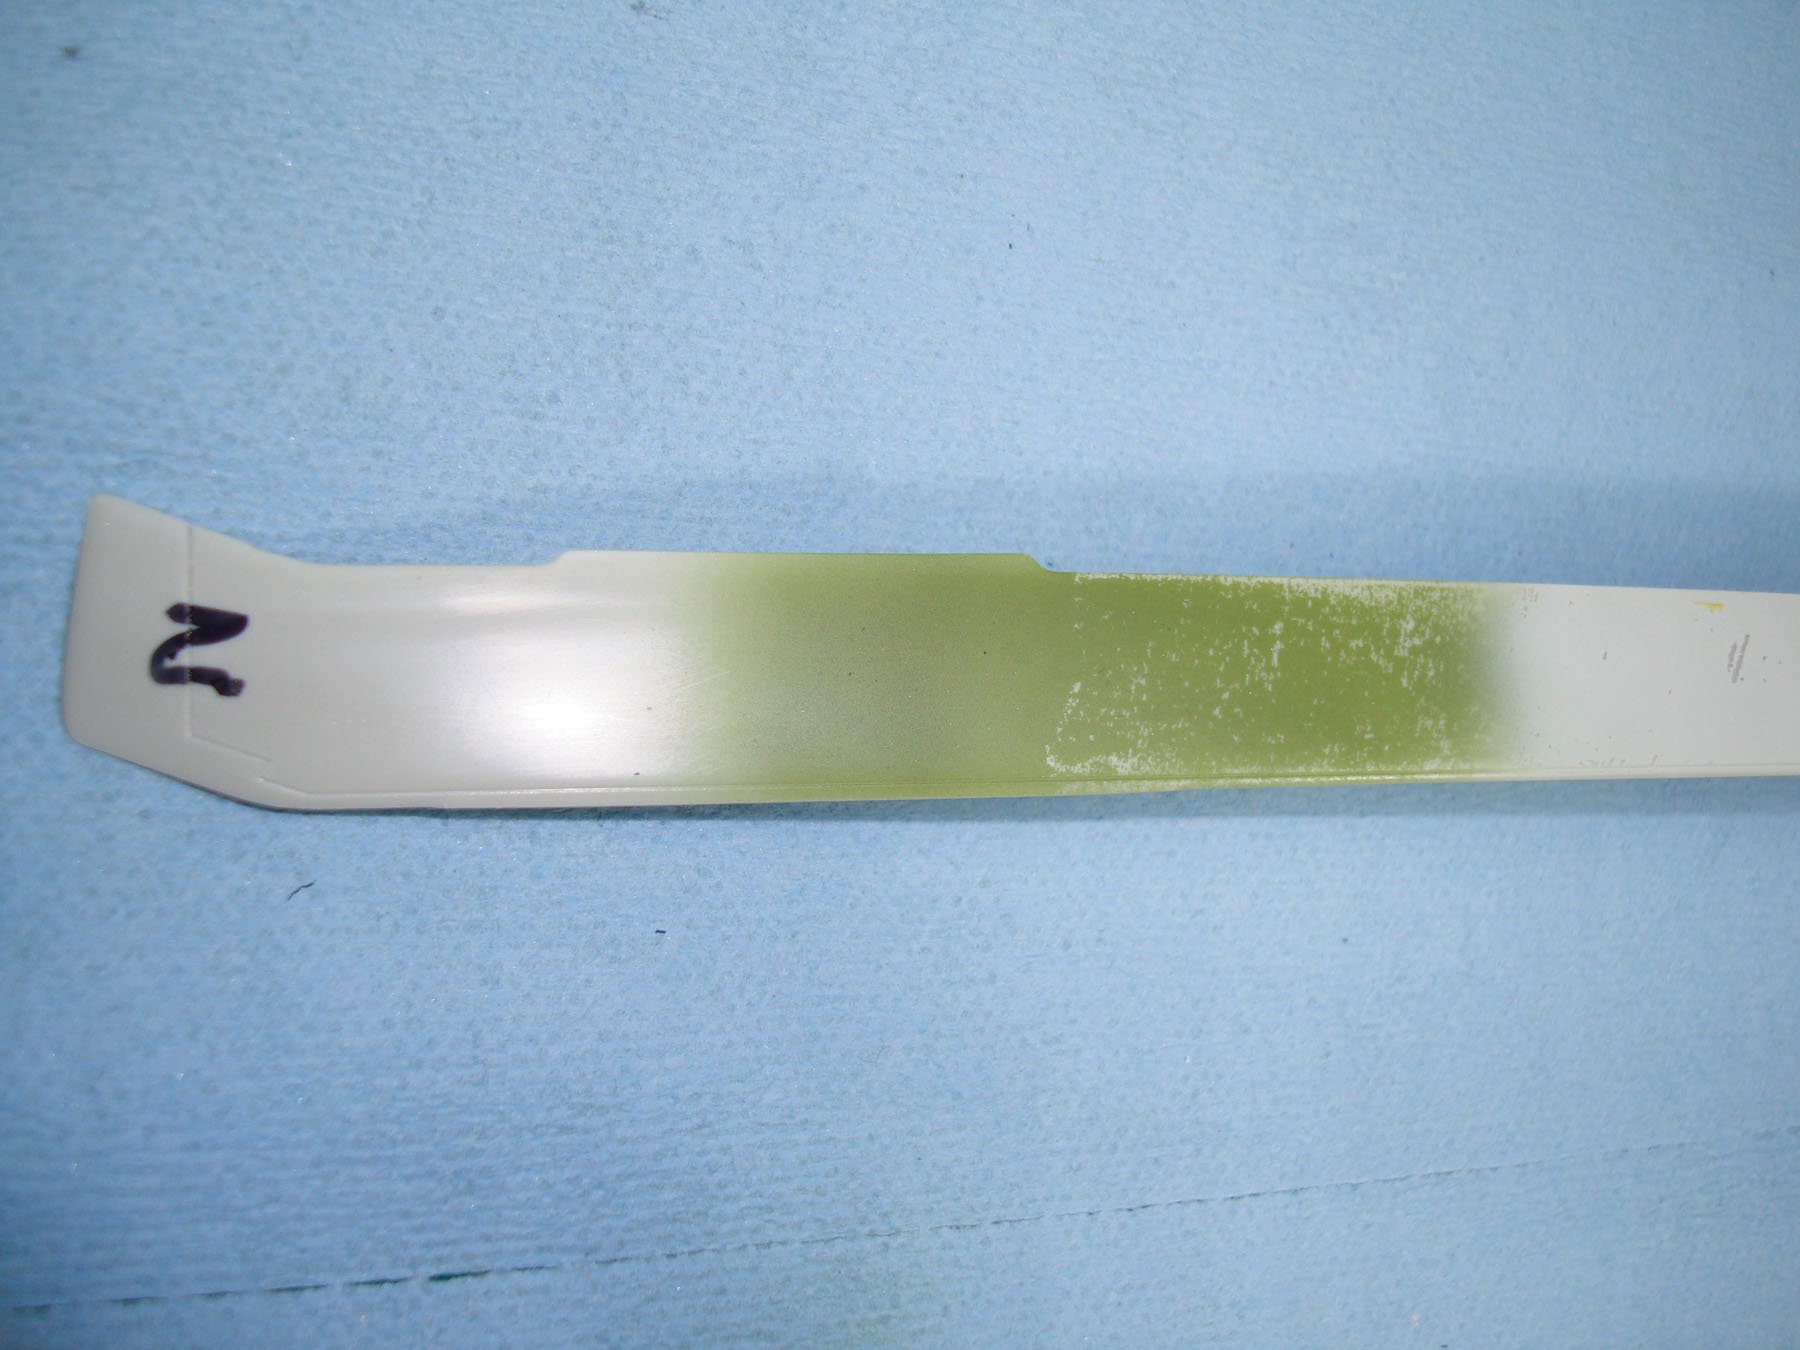
The paint pulled up on the green and gray, so identical performance. If you don't use Mission Models' thinner and polyurethane additive, you can expect a similar outcome on your models. The paint is also easy to scratch, so it is as delicate as some of the Spanish-made paints.
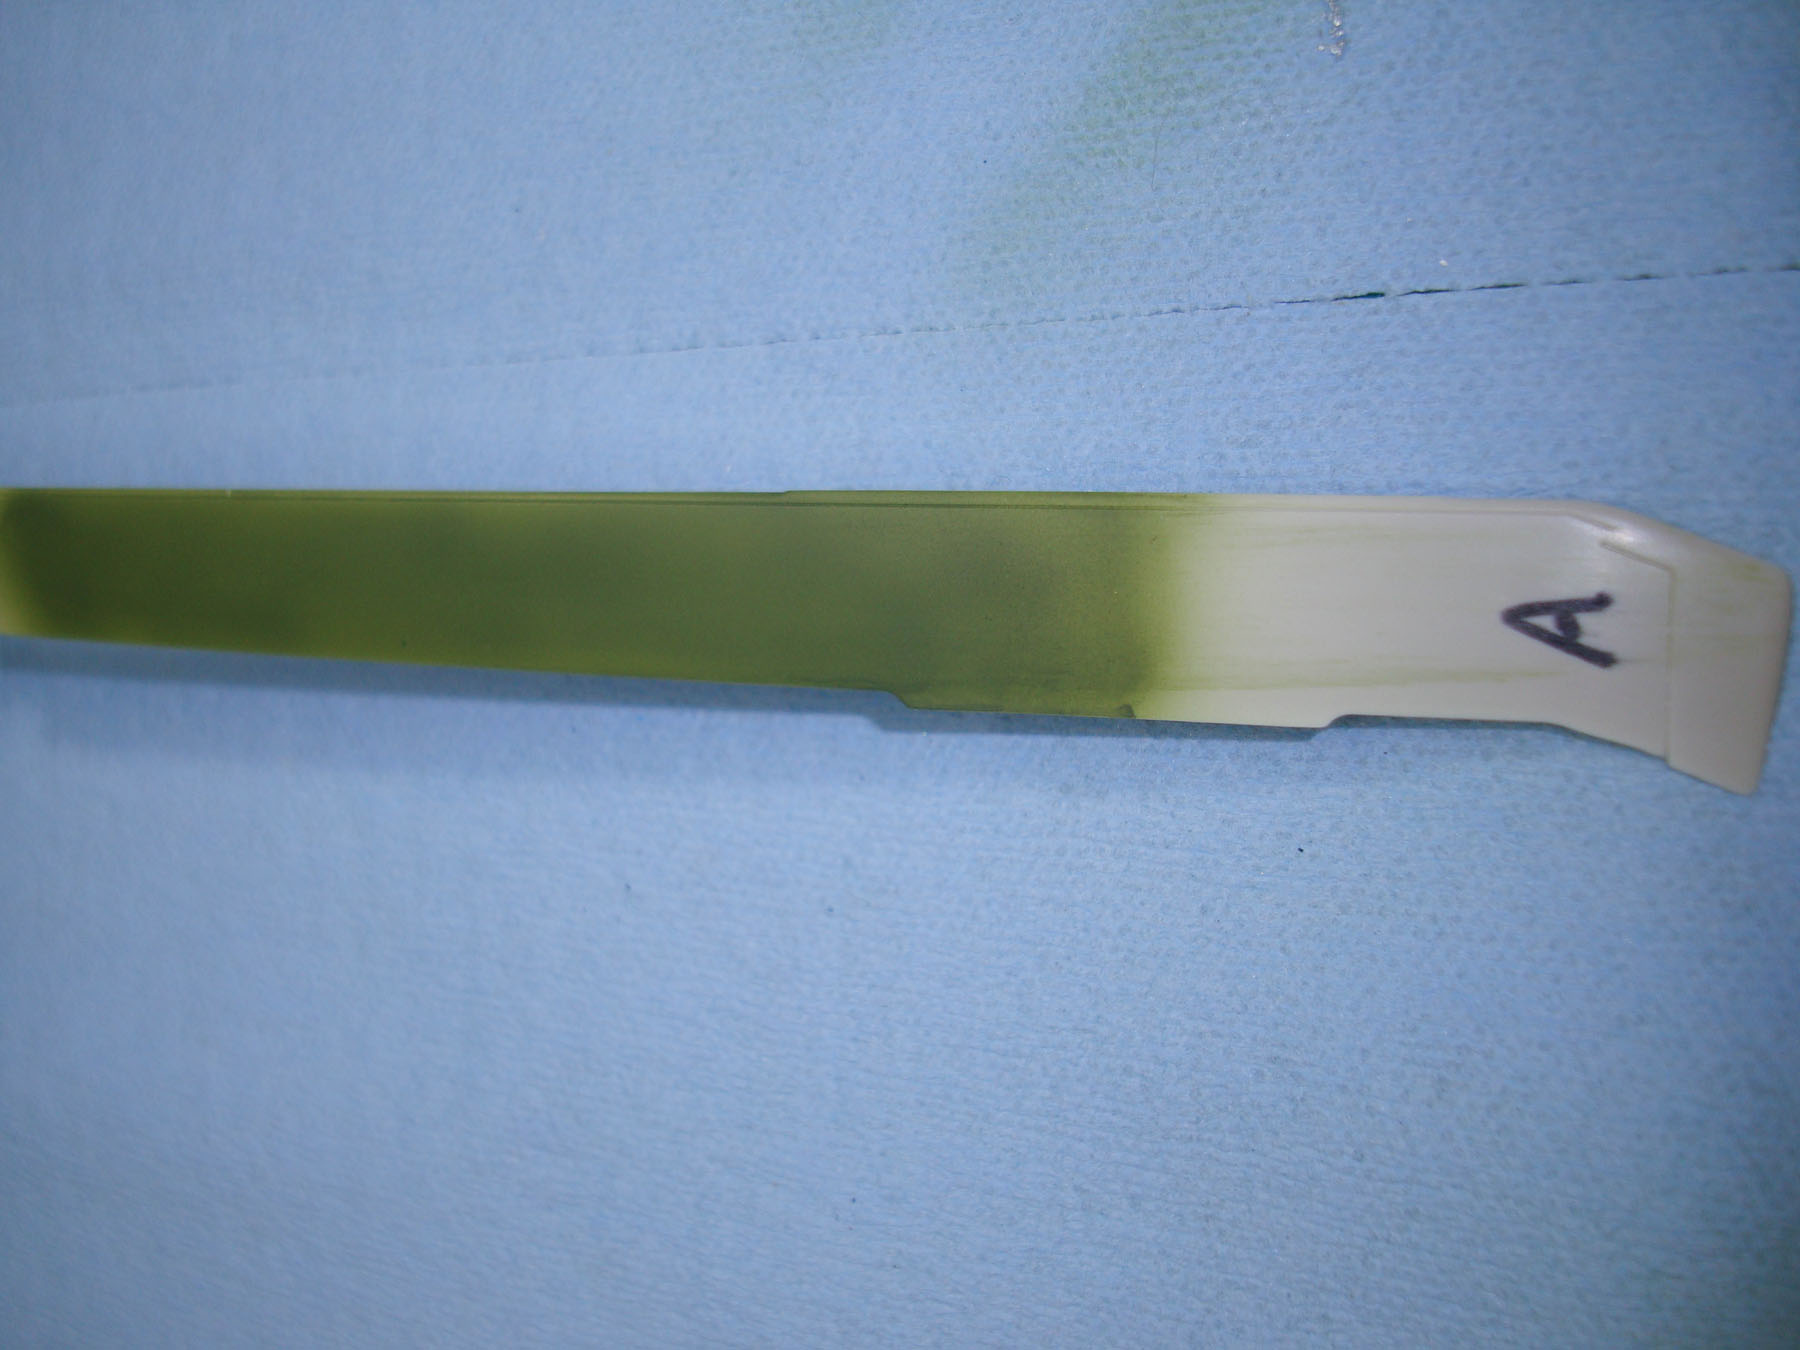
This paint was applied with Mission Models thinner and polyurethane additive, and there was no pull-up of paint. When I tried to scratch the paint, I got nothing. This is a really solid paint system.
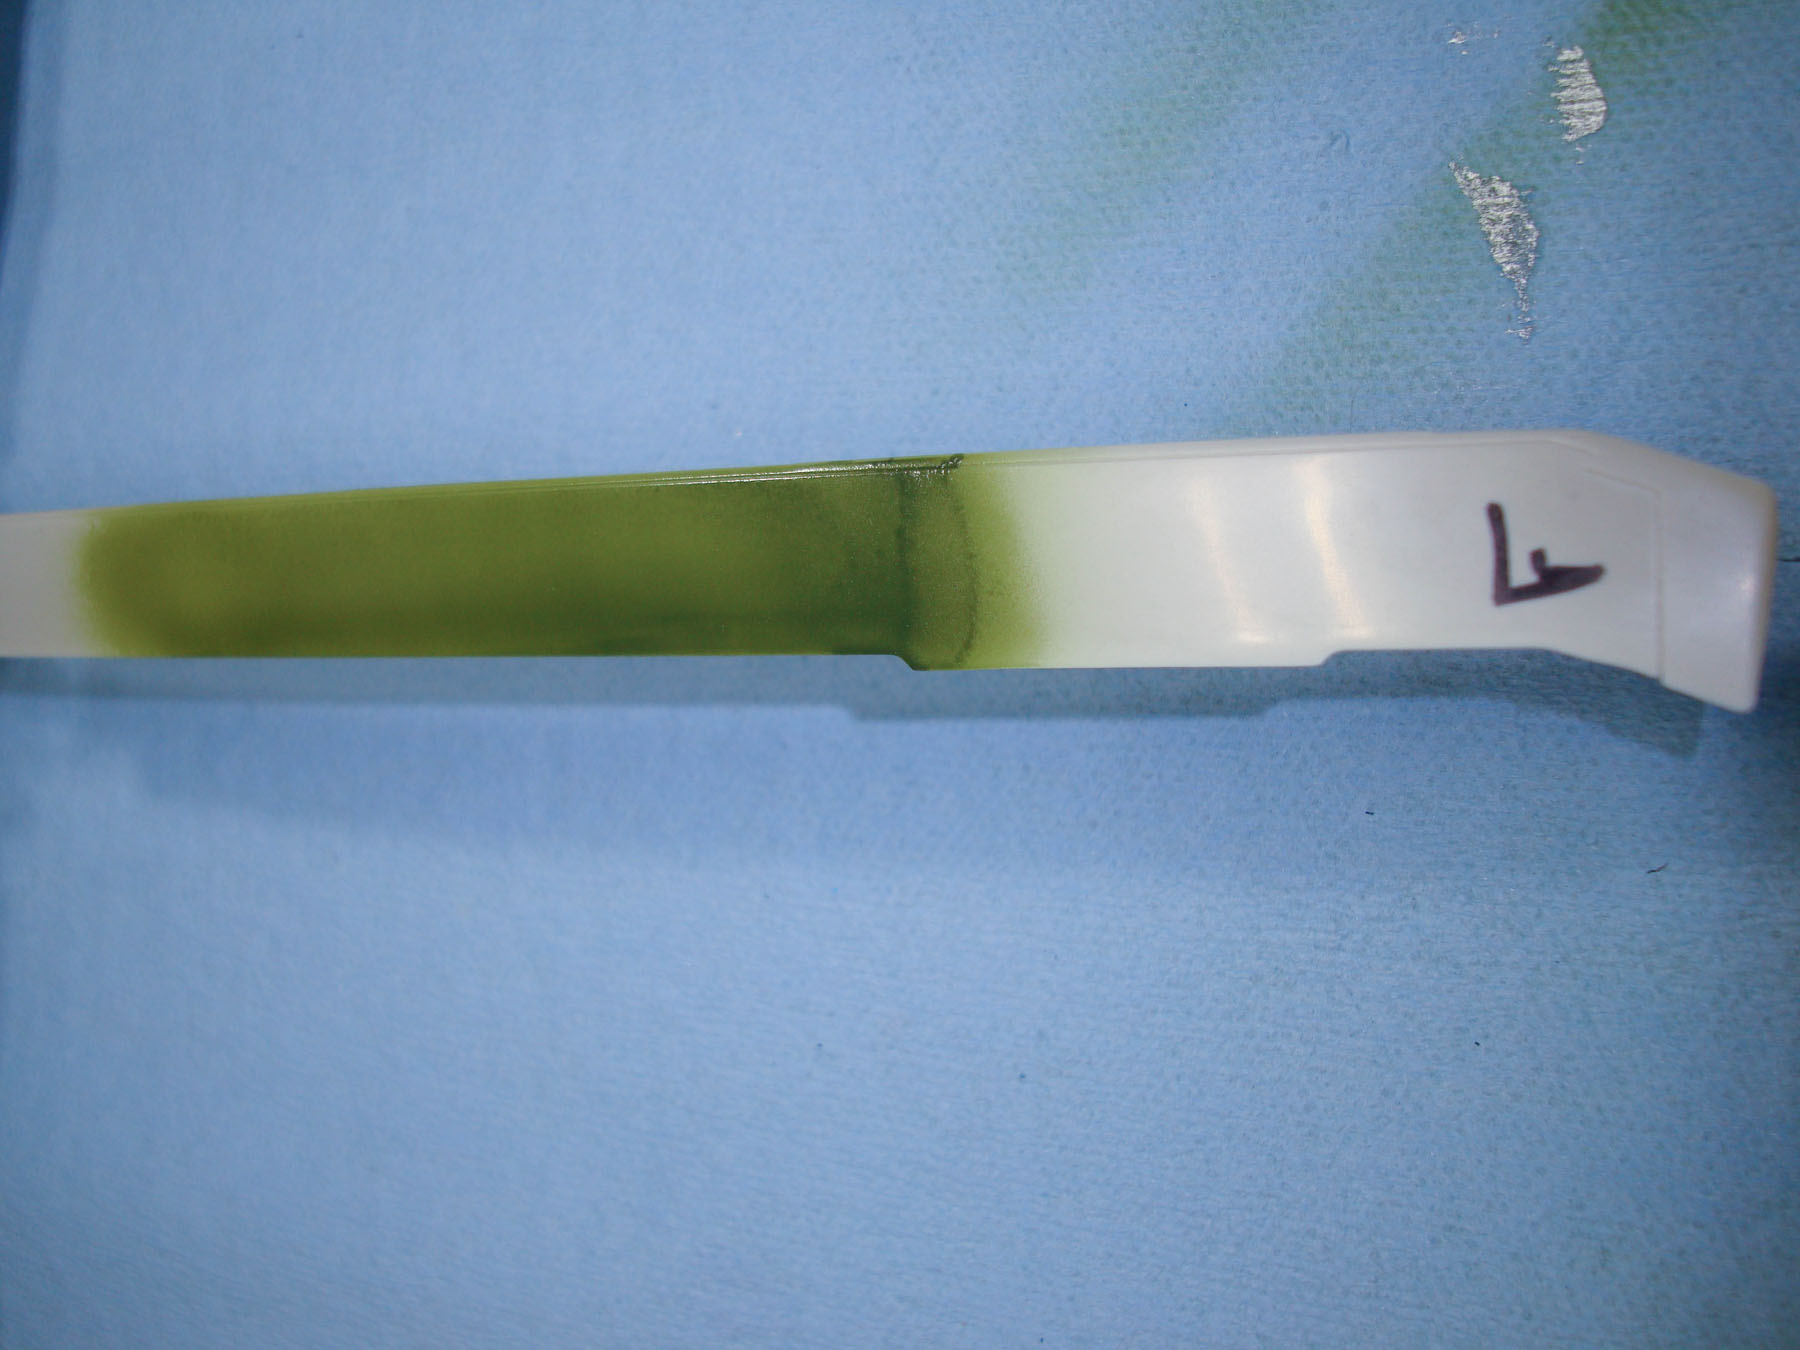
This is the blade with Mission Models paint thinned with Future, but looking at that finish, I think I had too much Future in the mixture. Nevertheless, when I pulled the tape, there was no paint pull-up, nor did the paint take any scratches from my fingernail. The only downside is that the paint is glossy (no big surprise here).
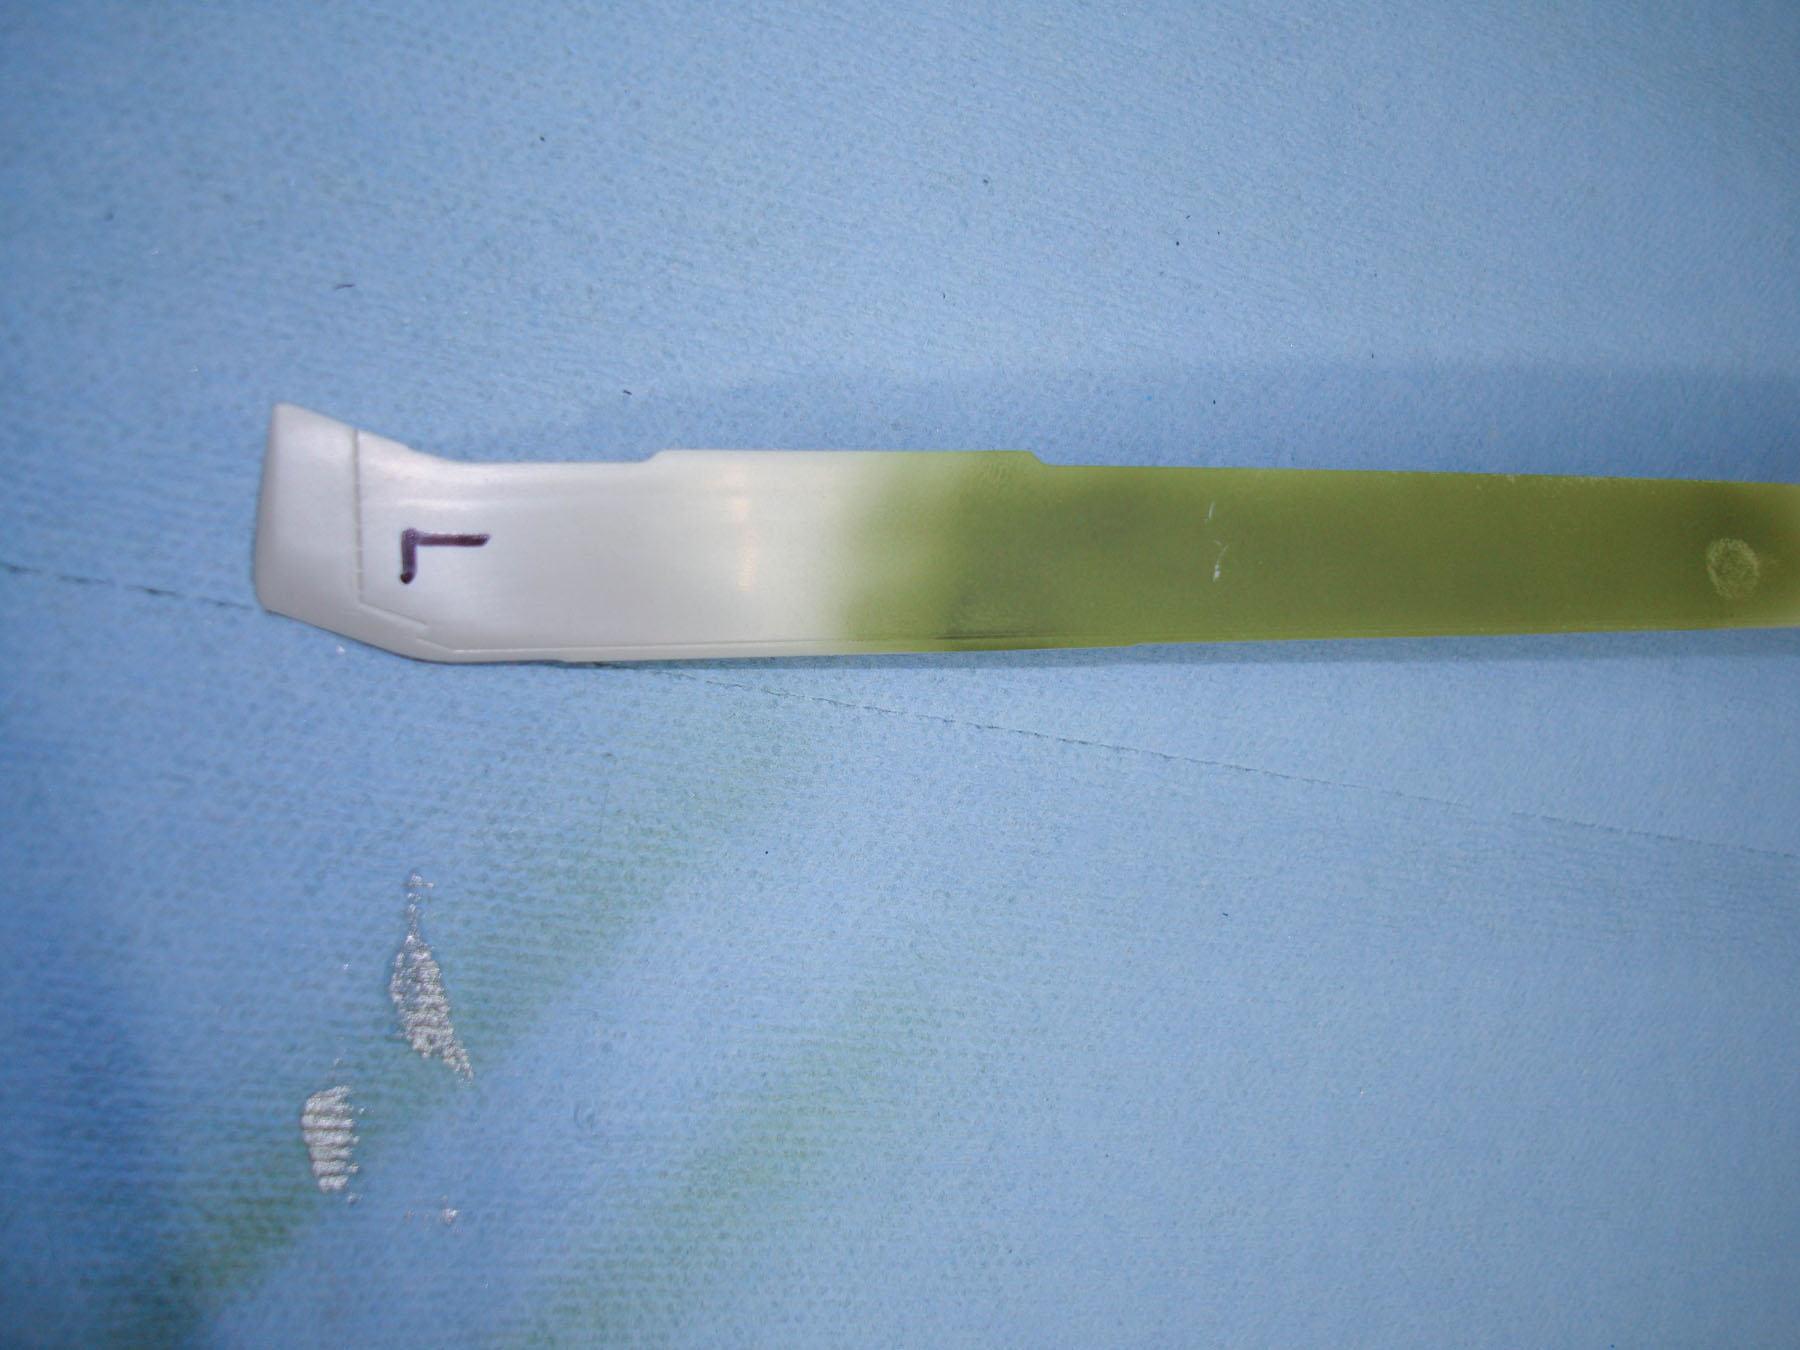
So here is the big surprise, while the paint did go down with lacquer thinner, there is little difference in performance compared to applying the paint from the bottle as in the first example above. The paint pulled up (not as bad as the first example) but it scratches much easier.
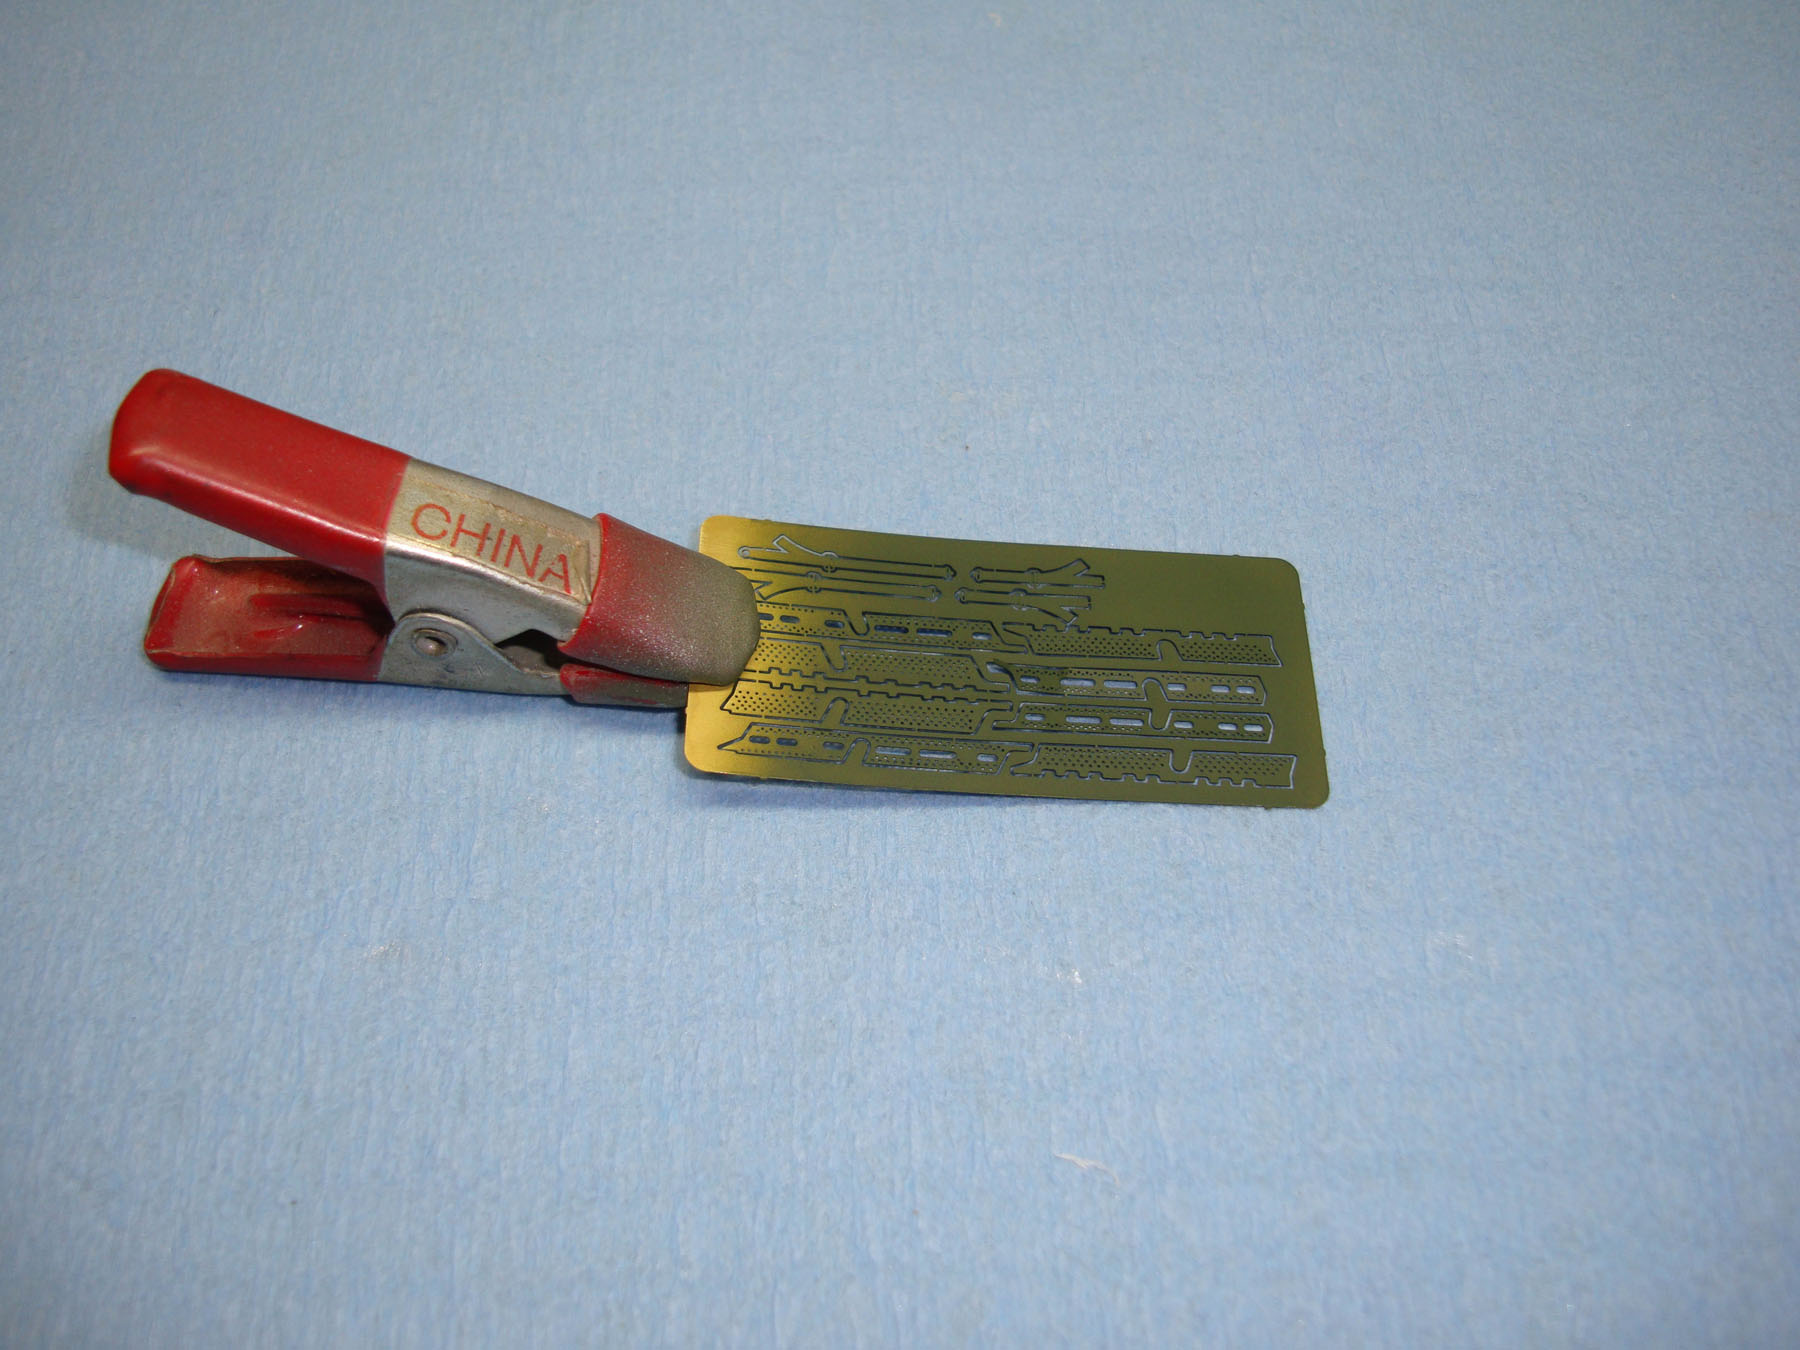
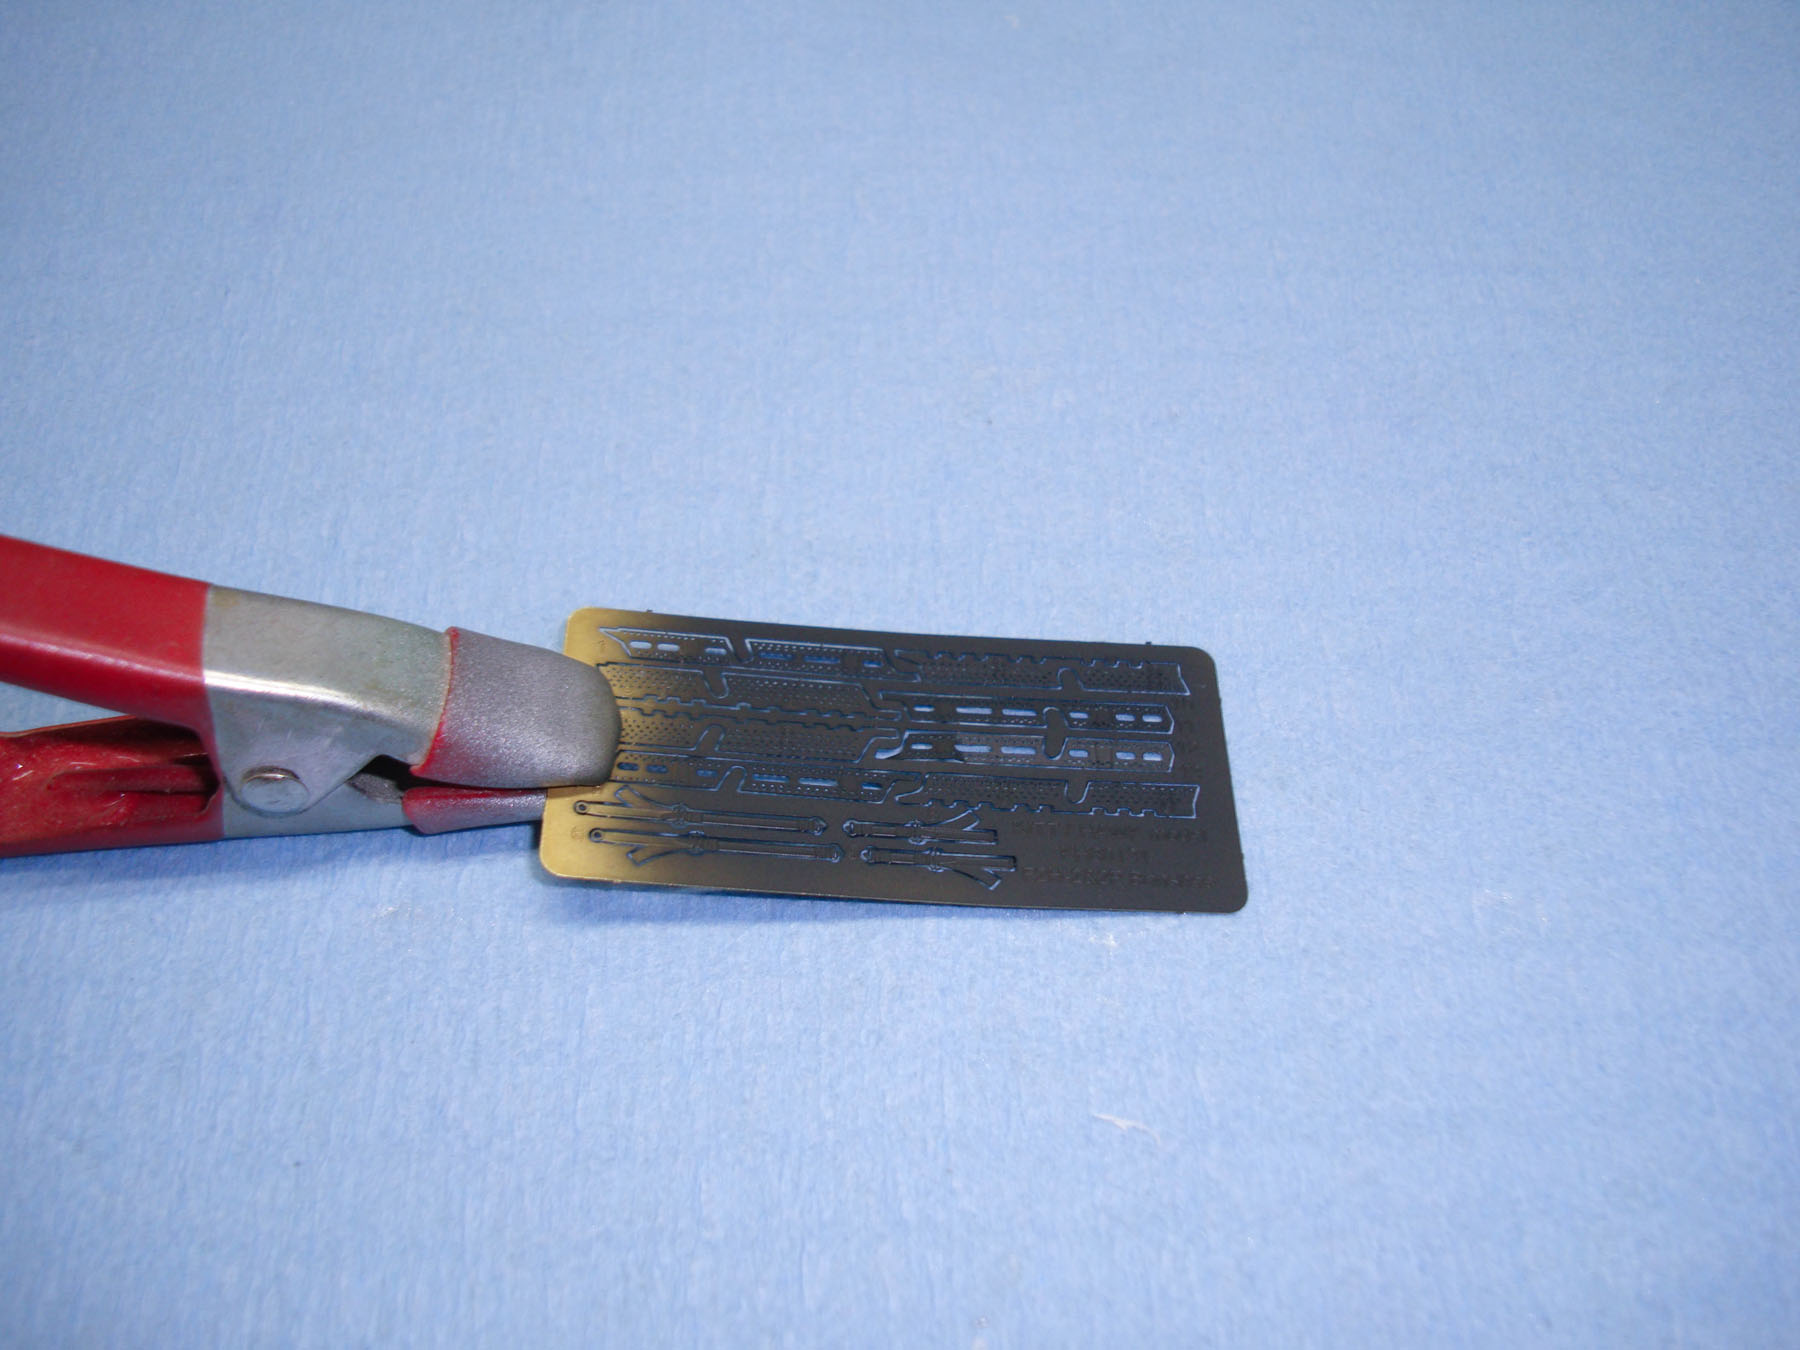
Now there is one area that deeply disappointed me with the Spanish-made paints - adhesion to photo-etch. I've been reluctant to use photo-etched parts on my armor and aircraft projects because the paint easily pulls up using the Spanish-made paints, so how does Mission Models paint stack up? I grabbed an unused fret of photo-etched parts, buffed the surfaces with a 3000 grit sanding pad, wiped down both sides with lacquer thinner, and then applied two test cases. The green is the same Mission Models green in the tests above thinned with Mission Models thinner and their polyurethane additive. The other side is Tamiya NATO Black thinned with lacquer thinner. The fret was set aside for an hour, then masking tape was applied to both sides.
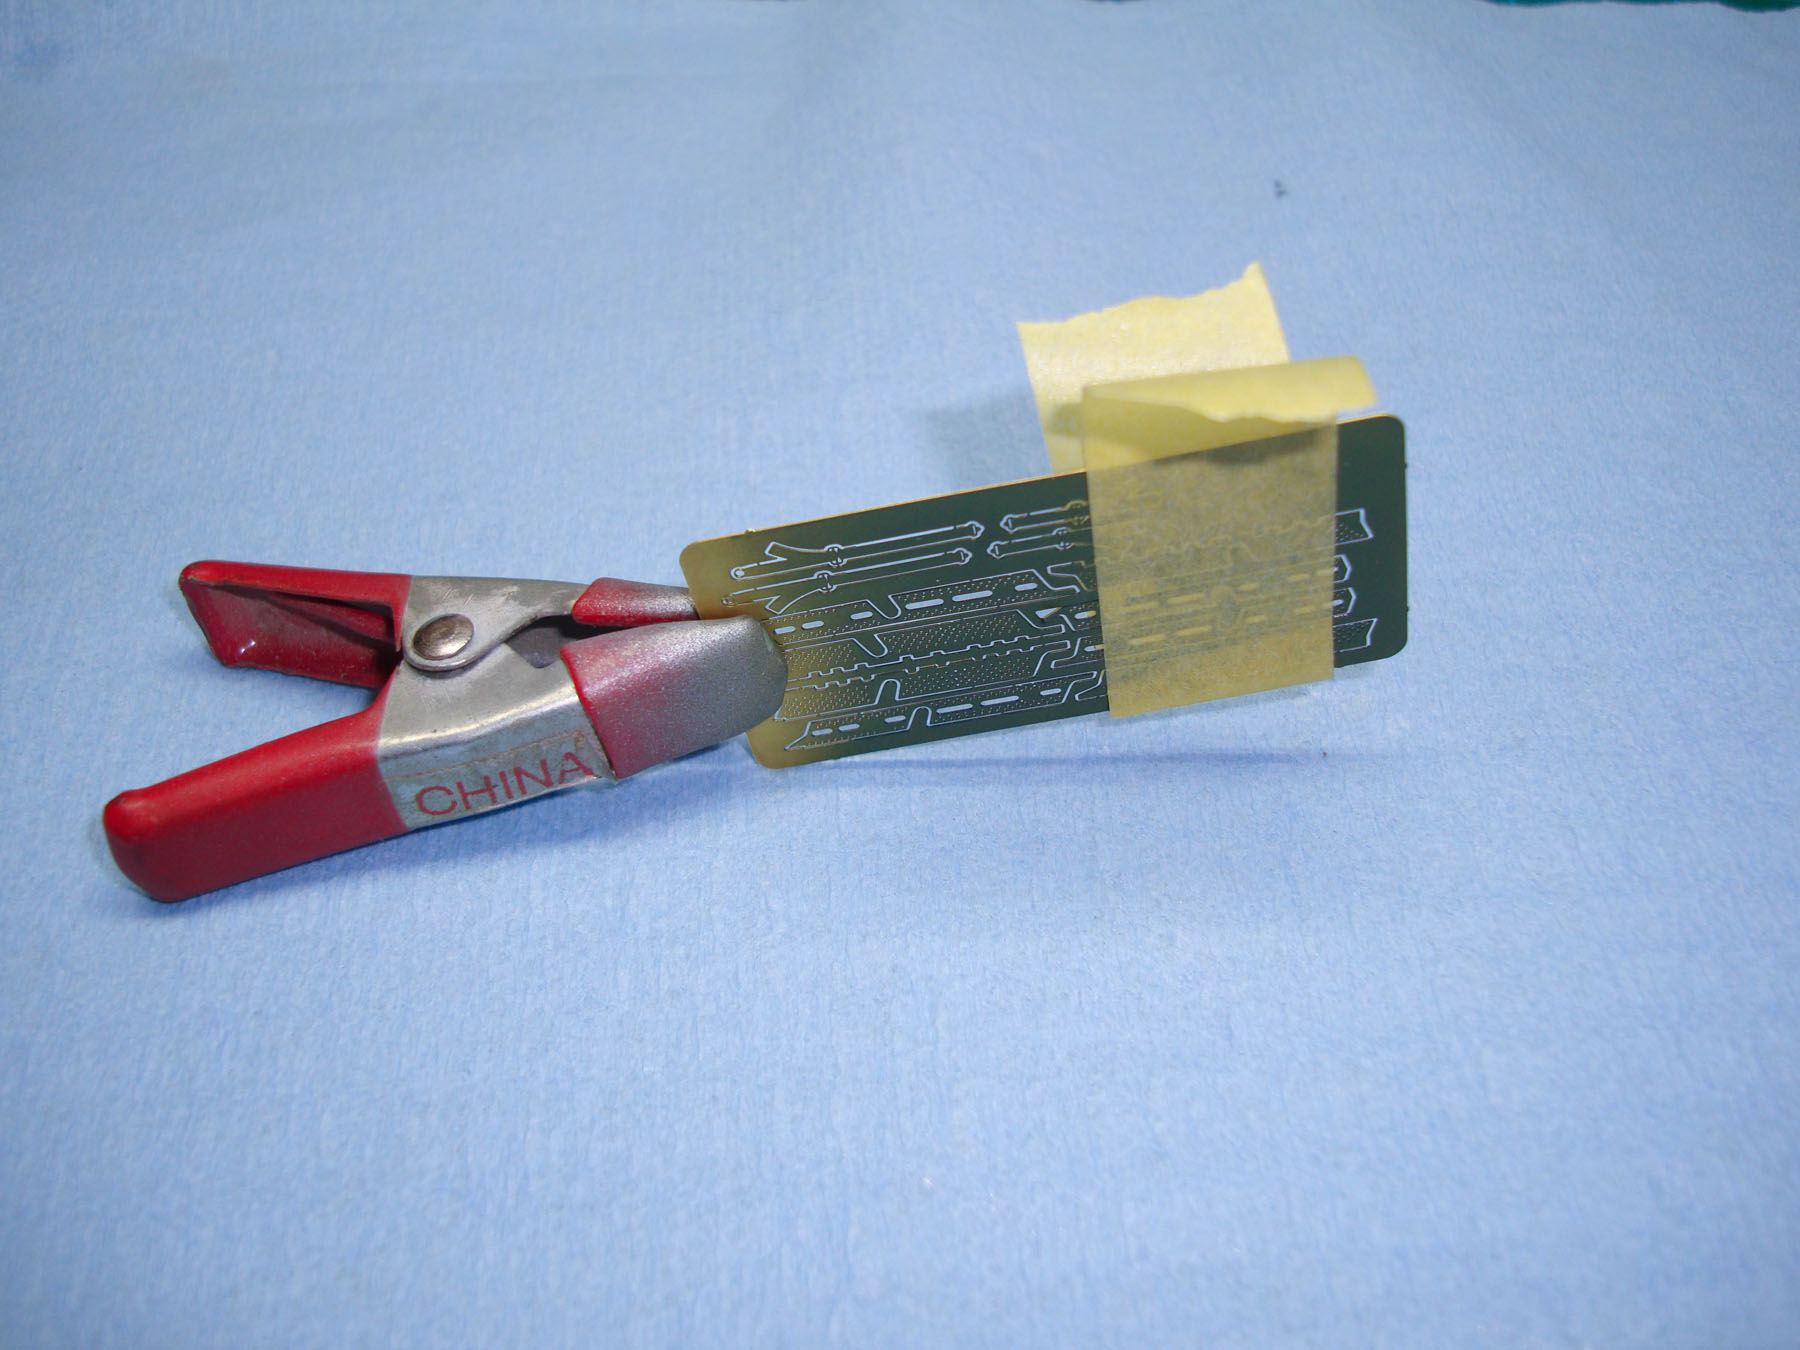
There was no paint pull-up with either side. I applied the tape a few times and even tried to scratch the surfaces with my finger nail. The finish is rock-solid on both sides. I now have two reliable options for painting models with photo-etched parts, and I was skeptical because I could get paint pull-up using Tamiya lacquer-based rattle can primer on photo-etch.
My assessment of the Mission Models paints:
- Ignore the instructions on the paint bottle and use the mixtures to get the paints to adhere
- I don't blame the paint for the pull-up issue as it happens with other brands when painting surfaces that aren't properly cleaned. I do fault the videos for giving the impression that they will work on uncleaned plastic, but they perform well on clean plastic
- They have a good range of colors in their catalog
- The airbrush cleans easily with water
- These paints work well over and under other brands of paints
- While your results may very, I am keeping Mission Models paints in my workshop
Watch the Mission Models videos on YouTube for instructions on which paints, metallics, primers, etc., need what proportions of additives, but if you follow those instructions, you'll love the results.