


HobbyZone AJ01 Aircraft Building Jig Review
By Michael Benolkin
| Date of Review | November 2017 | Manufacturer | HobbyZone |
|---|---|---|---|
| Subject | Aircraft Building Jig | Part Number | AJ01 |
| Pros | Completely adjustable | Cons | Nothing noted |
| MSRP (USD) | $49.95 |
Review
HobbyZone has released the AJ01 Plane Stand (Aircraft Building Jig) and it looks just as nice as the production prototypes that we had the opportunity to preview. Based on some experience assembling the jigs, I thought I'd share some tips on building the jig without any surprises.

When you open the 'pizza' box, you can see the jig is well-packaged, just like the other HobbyZone products we've seen.
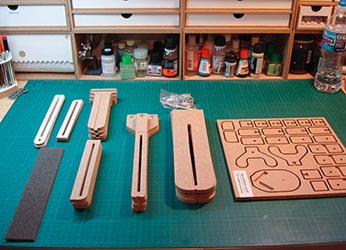
Unpacking the box, I sorted out the different parts and made sure I had the bag of hardware and the foam sheet we'll be using later. Note: The instructions have an illustration that shows two bolts/washers/wingnuts per riser. This is an error - while the prototype had two bolts on the base of each riser, the production units only have one and there are only 10 bolts/washers/wingnuts provided/needed. The parts list is correct with 10 of each in the kit.

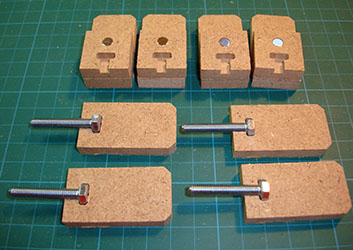
The only real problem I have ever had assembling the jig is with the larger parts in the base 'floating' out of position while the glue dried. The solution is simple enough. I took the two (wide) sections used for the wing jigs and placed bolts into the machined slots.
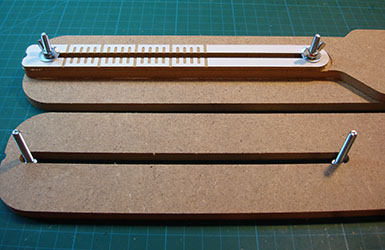
When this is all glued together, the bolts won't turn in those slots so you can easily adjust the position of the risers. I placed a bolt on either end of the slot, glued the upper frame into place with the bolts holding alignment, followed by the white laminate scale. When I was happy with the positions, I added washers and wingnuts to hold the upper parts in place. Where I ran into problems before was when one or both ends of the upper part floated slightly out of position preventing me from inserting or moving the riser bolt along the slot. Problem solved.
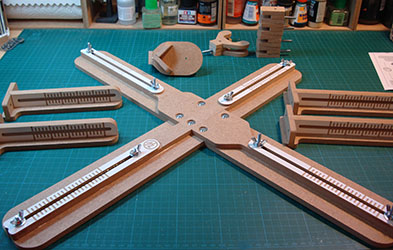
All four wings of the jig are screwed together while the glue is drying to ensure that everything is tight and aligned. Now is the time to make any adjustments before the glue cures.
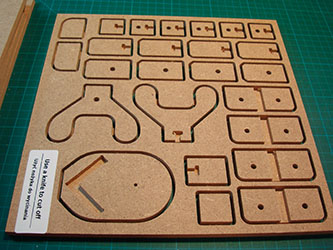
The small parts come on a pre-machined sheet of MDF and all that needs to be done is to use an X-Acto knife to cut the two tabs that hold each part to the sheet and then trim any remnants of the tabs off each part. This took just a few minutes.

Here are the small parts all sorted out.

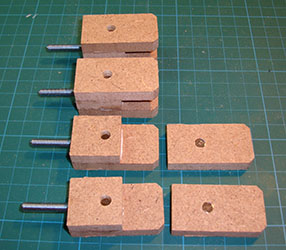
First up are the wingtip holders, there are four of them. The first step is to take the longer parts with the hole along with the shorter parts with the hole and half of the bolt holder aside. Using a small mallet or hammer, tap the magnets that are in the parts bag into the holes and orient all of the magnets in the same direction/polarity. That way any of the holders are interchangeable with one another.
Next, grab the four longer parts with the bolt holder machined into the surface and place four of the bolts into position.
Glue the short parts with the bolt holders over the bolts (I use Gorilla non-foaming wood glue), snap the longer parts with the magnets onto the subassemblies and set them aside to dry.
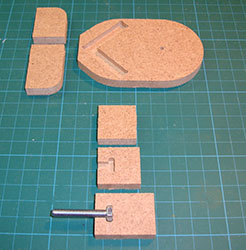

The next assembly is the nose cradle, tap the shorter and longer parts into the machined 'V' on the oval part using the wood glue. You see the three smaller parts in the foreground, these are all laminated together. First place the bolt into the longer part, glue the corresponding shorter half over the bolt, then take the plain square and glue it over the shorter bolt holder. The bottom part of this assembly will stick out like a shelf and it is on this shelf that the flat portion of that oval is glued into place.
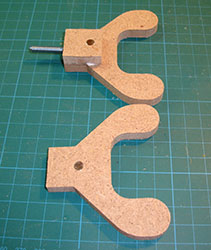

Finally, we have the tail holder and we first insert the magnets, then place the bolt into the recess machined into the 'C' part. Glue the small part with its bolt holder over the end of the 'C', and you're all set.

Here are the tail holder, wingtip holders, and nose cradle all set aside to dry.

The four-piece risers are next. Dry fit one together and you'll see how all four go together. The machining is very impressive here and I added glue and carefully tapped the parts together.

Here are all four risers assembled with the white scale parts laminated into place.

I cut out squares from the foam pad and laminated the self-adhesive foam padding onto each half the wing clamps and tail clamp as well as added a rectangular pad to the nose cradle.

Here is the jig holding a 1/48 F2H Banshee. The wingtip tanks are too thick to use the upper clamp surface so these are magnetically set up on the unused clamps above. Each clamp or cradle is adjustable so you can set the wing dihedral, tailplane angles, etc. The tail clamp can be reinstalled vertically, when needed, to hold the vertical stabilizer instead.
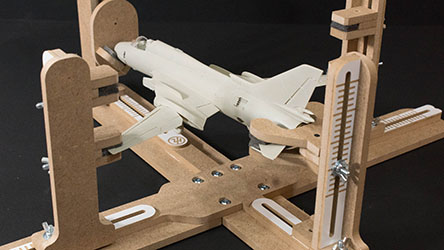
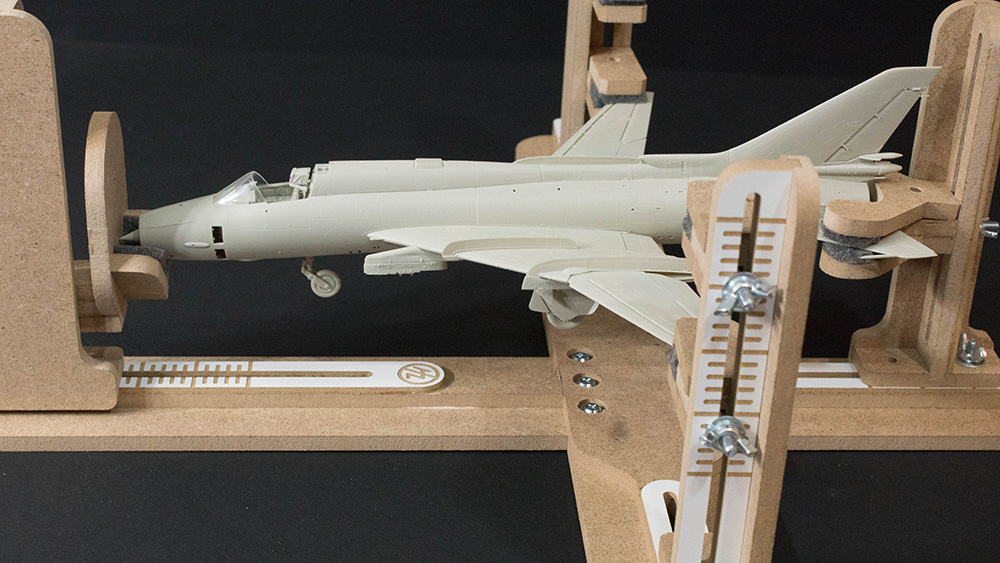
Here is the jig holding a 1/48 Su-17 Fitter. If you'll note the hole in the nose cradle above the Su-17, you can insert a brass rod (or other rod) through the hole and into the cowling of a propeller fighter, or conversely insert the crank shaft into the hole.
One other use for this jig is for working around the fuselage before or after the wings are mounted. I simply unscrew one or both of the wing bases and set them aside so I can work closer to the jig, all while keeping the fuselage and any tiny probes, antennas, gun barrels, static discharge probes, etc., from being damages from sitting on the bench surface. You'll obviously need to install the nose-mounted pitot booms after the model has been removed from the jig.
The AJ01 is 21.5" (54.6cm) long x 24.5" (62.2cm) wide x 7.75" (19.7cm) high. The clamps/mounts can hold a fuselage 4.25" (10.8cm) - 15" (38.1cm) in length and a wingspan between 6.25" (15.9cm) -19" (48.3cm). The AJ01 is optimized for a variety of 1/32 scale World War I biplane subjects on the market and is equally useful for other subjects in a variety of scales.
Overall, the AJ01 is easy to assemble and even easier to set up for each task that comes to your bench. Whether you want to set your wing dihedral or as sturdy model holder while you work on the upper or lower surfaces of your project, this jig provides a variety of uses while keeping all of the tiny parts on the surface of your model safe from being rubbed or rolled off while working on the bench.
You can find AJ01 at here!
My thanks to HobbyZone USA (hobbyzone.biz) for this review sample.