


Hasegawa 1/32 P-40E Warhawk Build Review
By Michael Benolkin
| Date of Review | September 2012 | Manufacturer | Hasegawa |
|---|---|---|---|
| Subject | P-40E Warhawk | Scale | 1/32 |
| Kit Number | 08226 | Primary Media | Styrene |
| Pros | Easy build, nice details | Cons | Nothing noted |
| Skill Level | Basic | MSRP (USD) | $79.95 |
Background
For a look at this kit out of the box and a brief description of the subject, look here.
The Kit
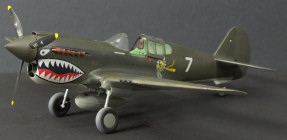
For whatever reason, I really like the P-40. Whether it is the sharkmouth that brings this aircraft to life or the old John Wayne movie that put the American Volunteer Group and their Warhawks onto the silver screen, I was hooked at an early age. For years, the only option for this subject in 1/32 scale was the venerable Revell kit which does build into a nice model, but like many kits of its generation, it lacked the detailing found in contemporary kits. When Hasegawa released their first P-40s in this scale, I was a bit skeptical given the level of modularity used to assemble the kit. Don't get me wrong, their modular Bf 109s in 1/32 scale are great kits, but I am still disappointed with their modular 1/48 scale Harriers. After reviewing a few of these kits, most recently this kit which can be built as an E-model or K-model, it was time to put this tooling to the test.
Assembly
I decided from the outset that I wouldn't photograph the in-progress steps of this build as I was looking for a fun project. The kit was build completely out of the box, no aftermarket parts were used though the model would look better with seat belts and shoulder harness if you opt not to use the optional pilot figure. There may be some other opportunities for aftermarket details elsewhere in this build, but I wanted to see how well the basic kit would go together.
I followed the instructions (though I did jump around a bit to combine several painting steps) and I didn't really have any problems with the kit. Everything fit together almost perfectly - the only place I needed filler was the rear edges of the rear windows and the bullet fairing for the main landing gear where it meets the leading edge of the wing. These were very fine gaps that were easily dealt with using Mr. Surfacer 500. In fact, most of my time was spent painting...
Painting & Finishing
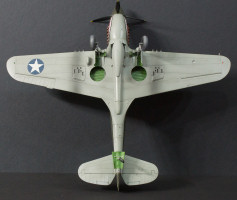
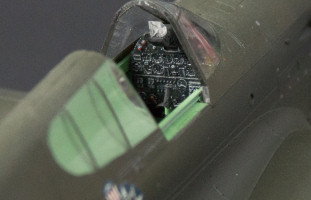
Before I started the assembly process, I had painted the wheel wells and radiator ducts with Testors Model Master Zinc Chromate Green and most of the cockpit parts with Testors Model Master Interior Green. The Instrument panel and subpanels were painted Testors Model Master NATO Black. With the basic colors laid down, I started dry-brushing and detail painting in different areas of the wheel wells and cockpit interior with various colors. I didn't get carried away as this project was intended to focus on the basics.
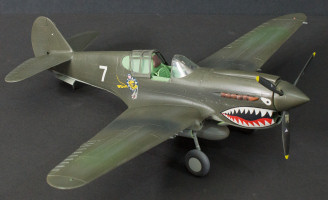
With the aircraft built up but not yet on its landing gear, I masked the windscreen and rear windows with strips of yellow tape filled in with liquid mask. There are two sliding canopy sections included in this kit - one is designed for canopy closed and the other for canopy open (the width is slightly wider to properly sit over the dorsal spine). I masked off the open canopy part and simply used white glue to attach the closed canopy section to protect the cockpit interior while painting.
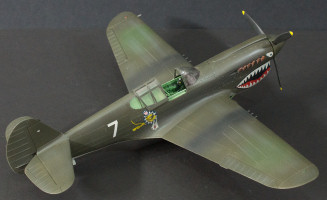
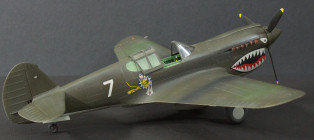
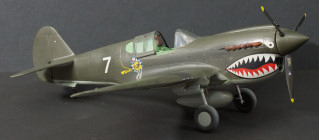
The first step was to paint the window frames Testors Model Master NATO Black including the separate 'open canopy' part. Next, I applied the underside gray, masked the hard color demarcation line, then painted the upper green. The whole aircraft was given a coat of Model Master Gloss Clear Lacquer. Much to my surprise, the green darkened a little too much for my taste, but I decided to press on.
The decals were applied per the instructions and they laid down nicely over the glossy surface. When these had dried, I applied another coat of gloss clear to seal the decals into place. The rest of the model was finished per the instructions and I'm pleased with the results.
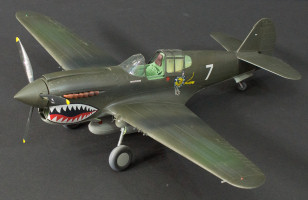

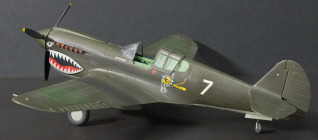
Conclusion
Well the mission was to see how well this model build straight out of the box and as you can see, it did so nicely. I'm quite impressed just how well this model goes together and even the decals turned out well on this model. If you're looking for your own P-40 project in 1/32 scale, the Hasegawa kit is great straight out of the box and is even better with a little AMS modeling.
My sincere thanks to Hasegawa USAfor this review sample!