


Kitty Hawk Models 1/35 AH-6J/MH-6J Little Bird Quick Build Review
By Michael Benolkin
| Date of Review | November 2017 | Manufacturer | Kitty Hawk |
|---|---|---|---|
| Subject | AH-6J/MH-6J Little Bird | Scale | 1/35 |
| Kit Number | 50003 | Primary Media | Styrene, Photo-Etch |
| Pros | Nice details and options | Cons | See text |
| Skill Level | Experienced | MSRP (USD) | $54.95 |
The Build
For a brief discussion of this subject and a look at this kit out of the box, look here.
Here is a favorite subject of mine - the H-6 Cayuse family. It was a pleasant surprise when Kitty Hawk announced this kit in 1/35 scale, and when this kit arrived, I couldn't wait to get started. The kit layout is more sensible/less modular than earlier Kitty Hawk kits, so let's jump into the project. This will be a classic quick-build - I will only use liquid cement (Tamiya Extra Thin) along with basic tools. No paint, filler, or other materials will be used to build this model so you can see for yourself how the fit and finish of the basic model appears after each step. I will also not be using the kit photo-etched parts. I will (more or less) follow the assembly instructions as printed and note any issues as required.
Before we even start, just a reminder that the Kitty Hawk kits have the odd ejector pin stubs that pop out of the strangest places. Take your time, examine each part for mold stubs, ejector pin stubs, and mold flash, then test-fit the parts before gluing just to make sure there are no surprises. The more time you spend here, the less frustration you will have later.

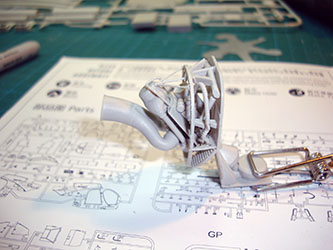
Step 1 - the first step is to assemble the Allison (now Rolls Royce) power pack. The engine core and exhaust stacks come in halves, and this was a great opportunity to try out some new tools that scrape away mold lines and seams without flattening the surfaces. Step 1 does highlight the need to study the assemblies before attempting them. For example, you need to mount part C7 onto the accessory pack before B25 or else it isn't going to fit. The instructions also show a four-part assembly that mounts to the engine consisting of parts B1, B15, B16, and B17. These are really small parts and the two lines (B15/B16) are supposed to plug into part B1. Since B1 has no mounting holes, you're going to have a challenge getting these together unless you mount B1 into the rear of the engine pack and B17 against the accessory shield as shown in the instructions. Once these are solidly mounted, the two lines (B15/B16) can be glued into place without the use of colorful metaphors.

Step 2 - this step builds up the firewall and engine mounts. The instructions have parts B70 and B71 swapped, and the hole that is supposed to go through the frame of the starboard mount (B70) is really a C-shaped opening where hose B72 passes through. I'm not sure if B70 is supposed to be C-shaped or was a short-shot (incomplete molded part), but it worked. Speaking of short-shots, the mounting tab for frame C35 to mount to the firewall isn't there on my part, so I waited to mount B70/B71 as they have rods that plug into the underside of C35 and that, in turn, allowed for C35 to be glued into place on the firewall.

Step 3 - Here are the instrument panel console and cyclics. For whatever reason, Kitty Hawk opted to mold the cyclic shafts and grips as separate parts, and these mount to the pitch control tubes that extend out of either side of the console bottom. Once again, the parts for the pitch control tubes are reversed in the instructions (B19/B20). The bottom of one of the cyclic shafts was short shot, so it didn't have the mating surface for the control tube. I tacked both cyclics to their control tubes with liquid cement, then added a drop of cyano to reinforce the short shot mating surface. To complicate things further, the control grips are provided for left hand and right hand operation. There are one of each and the real aircraft uses right hand oriented control grips.

Step 4 - Here is the rear cockpit bulkhead and crew seats. Kitty Hawk replicated the lightweight seats nicely though the parts A38/A39 that mount behind the crews' heads appear to be inertial reels. For whatever reason, the instructions have you drop the rear of each shoulder harness behind the seat rather than into the inertial reel. While the port side collective is one piece, the starboard side is smaller yet two pieces (one of which got away). There is a part 32 that is supposed to mount between the pilots but the indicated mounting hole doesn't exist on the bulkhead.

Step 5 - This should be a simple enough step - mounting the anti-torque (yaw) pedals to the floor. The pedals have mold-tree attachments inside the backside of the C-shaped pedals and you'll have to take care removing those stubs to avoid damaging these delicate parts. One of the pedals turned out to be short-shot, but if this had been a full-build, it would have been simple enough to scratch-build a replacement.
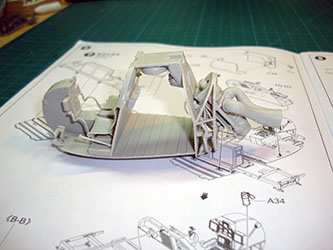
Step 8 - steps 6 and 7 have you assemble either the weapons mount frames and ammo cannisters of the AH-6 or the planks of the MH-6. I'm not going to worry about the AH or MH-specific details in this exercise and stick with the basic airframe. In step 8, the floor, console, front and rear bulkheads all come together. The extra time spent cleaning up all of the parts made this step flawless. You may have noticed that the cyclics are installed backwards, but since I noticed this too late, I left them as-is. Since this is a test build, no worries.

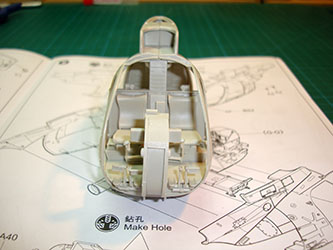
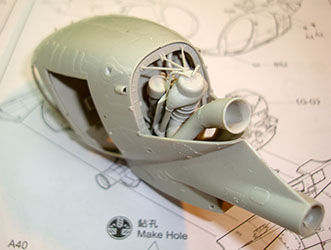
Step 9 - Here's the big moment, the assembled interior mounts inside the fuselage halves. Flawless. Note that the engine frame is a little recessed into the fuselage. Due to the shape of the fuselage versus the floor, the floor tends to move forward until the glue sets. You need to ensure that the floor/interior assembly is pushed back against the rear stops molded into the fuselage halves until the glue sets. If you don't, you'll have problems in the next step.
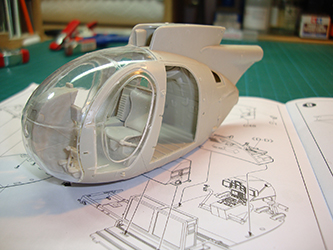
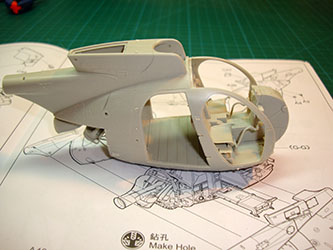
Step 10 - If you're interior is properly mounted, the bubble windshield will drop into place. Since my interior had shifted a little forward unknown to me, the windshield is obstructed by the front of the instrument pedestal. I filed down the front of my pedestal to get the windscreen into place, but heed the advice in step 9 and you shouldn't have to make any modifications. The front cockpit doors fit quite nicely, and the tabs mounted to the doors will allow them to be positioned open should you wish.
The engine doors also mount in this step, but if you don't get C11 mounted to B70/B71 properly in step 2, the engine exhaust duct may be slightly out of position. This isn't a problem if you're positioning the access doors open, but you can see the duct isn't centered in the opening of my bird. To complicate matters, there are no alignment tabs to square the doors against the edges of the fuselage, so I will be adding styrene tabs for door alignment in my full-builds.


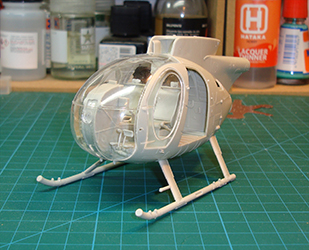
Step 13 - I skipped steps 11 and 12 as I'm not arming this quick build. In this step, we mount the skids to the bottom of the fuselage. I'm disappointed that there are no solid pins on the skids and reinforced holes in the fuselage to positively mount and align the skids. I glued my skids onto the fuselage one at a time, using the HobbyZone AJ01 aircraft jig to hold the fuselage alignment while each skid dried. The result is fairly strong, but I'm not doing any autorotations to test for a breaking point.
Steps 14 and 15 - I mounted the ventral radar altimeter antennas and the ventral cooling duct (parts B38/B39). Take your time here and ensure that the mold flash is cleared from the mounting tabs and fuselage slots or you will have a challenge getting this subassembly into place. Skipping the various antennas for this quick build, I added the dorsal doghouse cap (A52 in my case) and the rear side doors.
Step 16 - The tail cone (parts C5/C6) goes together easily, but dry-fitting this to the fuselage reveals a step as the cone diameter is slightly smaller than the rear opening of the fuselage. You might wish to mount the cone to the fuselage and address the step with putty or persuasion before adding the 'T' tail and tail rotor. Pay close attention to the double pins on the rear of C6 as those should be perpendicular to the ground on the starboard side of the airframe.
The tail rotor assembly looks easy enough, but the control linkage (part B47) is one of those tiny delicate parts with a big sprue stub that will need to be removed VERY carefully. Pay attention to the groove on part A45 where the end of the linkage should mount as this isn't keyed very well for orientation.
The tail rotor blades (part A22) mount to the yaw actuators (part A32) but there is no drive shaft to really mount the part into place. While the parts are go together as they should, the instructions have you mount the tail rotor blades backwards. When you look at the left side of the helicopter, the tail rotor should rotate clockwise, but the instructions show the tail rotor oriented counter-clockwise. As I said, the parts are molded so that A22 and A32 go together in the proper orientation so you'd have to do extra work to mess this one up (like follow the instructions).
Step 17 - This is a seven-part assembly of the top of the transmission, control linkages, swash plate, and rotor mast. It is here that it becomes clear that these instructions were not based upon the CAD drawings that were used to tool this kit. The instructions show holes in the base of part B78 where the linkages mount, but there are no holes here. There are pins on the linkages, but no corresponding holes. I've seen this from Step 1, but clearly whoever did these instructions did not build the kit. Yes, the tail rotor was another clue. I made the best of it.
Step 18 - Here's one of the better engineered assemblies - the main rotor head and blades. The mounting pins on the rotor head are keyed so the blades will mount only one way. The ends of the rotor blades are slide-molded so the ends have a corresponding keyed hole and this goes together very easily.
On the other hand, you need to make a decision here. If you are happy with gluing the rotor mast and rotor head permanently in place, you'll be fine following the instructions. I want the option to remove the main rotor assembly to safely move/transport the model. If I simply left the rotor mast on the top of the transmission without glue, the first jostle of the main rotor will scramble all of the linkages connected to the lower swash plate. I opted to enlarge the holes at the top of the transmission and through the lower swash plate to insert a thin brass tube. This is firmly seated with cyano and the linkages and lower swash plate are secure. The main rotor mast sits in the tube for display with the upper swash plate sitting on the lower plate, but when I want to move the model, the main rotor comes right off.
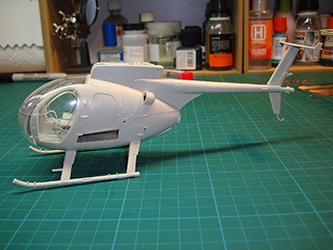
Step 19 - The main rotor and tail section mount to the fuselage. As mentioned above, you might want to mount the tail cone early and deal with any step you might find in your build.
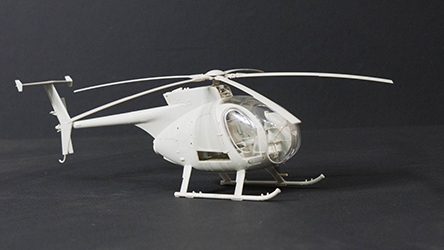
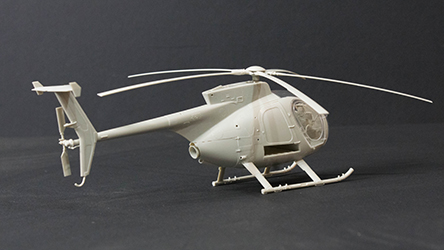
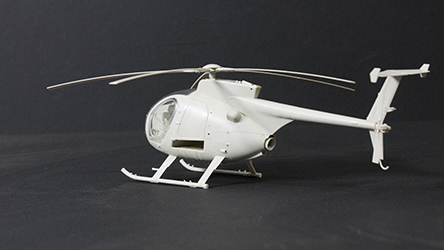
Step 20 - Since there are no assembly steps illustrated here, I guess it's time to sit back and admire your (and their) work.
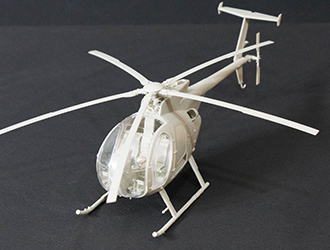


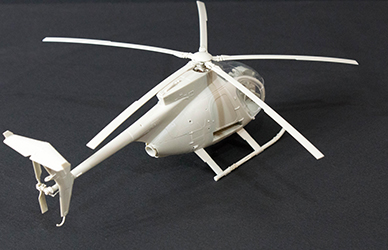
Aside from the minor issues mentioned above, this kit goes together rather nicely and painting it will be even easier. The Little Bird comes in the same variety of colors as Ford's Model T - black.
I've acquired some of the AH/MH-6M modifications for the DML kit from Black Ops, so I'm taking my lessons learned from this quick-build and rendering the AH-6J, MH-6J, and AH-6M from the three kits that just arrived in the mail. You might want to consider the aftermarket decals from Werner's Wings (look here and look here) to provide some alternatives to kit subjects.
My sincere thanks to Kitty Hawk Models for this review sample!