


MiniArt 1/35 Middle East Diorama Build Review
By Michael Benolkin
| Date of Review | March 2014 | Manufacturer | MiniArt |
|---|---|---|---|
| Subject | Middle East Diorama | Scale | 1/35 |
| Kit Number | 36056 | Primary Media | Styrene |
| Pros | New subject area, lots of possibilities | Cons | Modeling skills required |
| Skill Level | Intermediate | MSRP (USD) | $89.00 |
Build Review
For a look at the kit out of the box, check our first-look here.
I've tinkered with a few of the MiniArt diorama sets and to be honest, the vacuformed parts in the 1/35 scale sets were a bit intimidating. I have also built their 1/72 diorama kits which are injection-molded styerene and enjoyed those. There was a recent 1/35 diorama release that really interested me but a number of factors kept that project tabled. When this Middle East diorama was released, all of those other factors were tabled and it was time to give one of these sets a go.
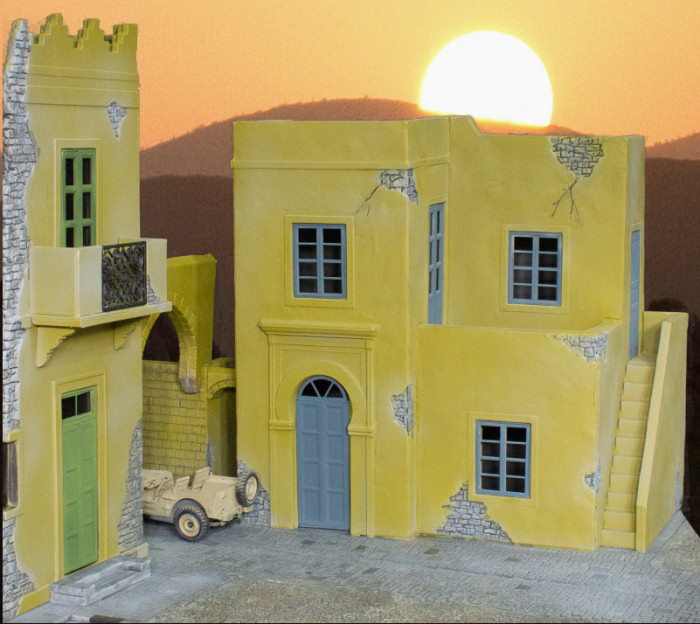
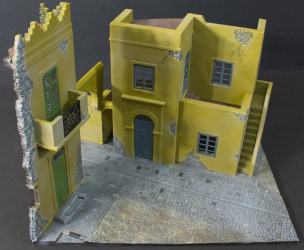
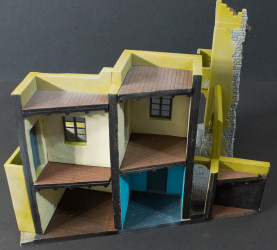
Looking at the box art, there is a building on the left and a larger structure on the right, both connected with an arch. The structures sit on a very nice display base (also vacuformed) measuring 13.75" by 9.9". The interior in the structure on the left is rubble, but the structures on the right have beautiful floor and ceiling details for both stories. The base has a road with a drainage gutter down the center which will make for a nice setting for any number of US or NATO combat vehicles, figures, or whatever you want to depict. The dried grass shown in the box art is not included but easily remedied.
I started this build following the kit instructions and the results were less than satisfactory. You can see that attempt here. The kit instructions show the wall halves assembled before assembing the other walls together to form the structure. Getting a solid glue joint with the walls preassembled was not working for me. Thanks to MRC for sending a second kit, I could try a different approach to building this kit (which should work well with many of the other more complex MiniArt kits).
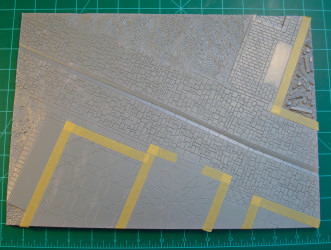
For the display base, I masked off the areas where the walls will be cemented to the base to keep a clean glue joint. The base was primed with Vallejo Black Primer and set aside to dry.
This image shows the results of painting the base using a variety of colors. The stone road was painted a neutral gray and then a variety of other grays were used to pick out random stones. The effect is a bit stark but this will be toned down during weathering.
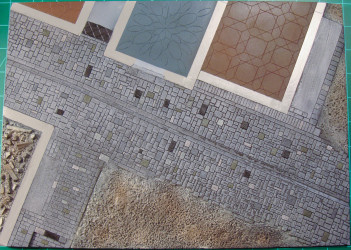
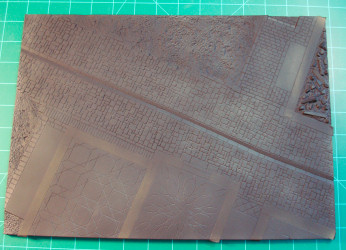
Here is the display base after a few coats of Future for an acrylic clear protective coating followed by a heavy wash of Lamp Black oil paint and odorless mineral spirits. The multi-colored stones are starting to blend back together and we'll continue this weathering once the structures are in place. Note that I didn't wash the tile floors that will be inside the main structures. These will get a different wash later.
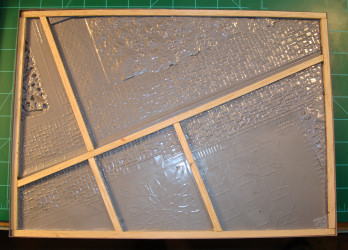
I decided to reinforce the display base. While the vacuform sheet will hold up most models, it will flex quite a bit during handling and that isn't good for its longevity. I used strips of balsa cut to lenth and then the mating edge contoured to mach the molded-in detail so it will sit flush against the underside of the base. The perimeter was done first, then the main cross section runs along the molded-in gutter/ditch, and then cross sections where buildings or other items may be placed. The wood was glued into place using thick cyano and Zip Kicker accelerator.
Once again, I removed the parts from the vacuform sheet with a new X-Acto blade in my knife. Be careful not to get distracted while making your cuts or you might get a piece of your thumb (like I did).
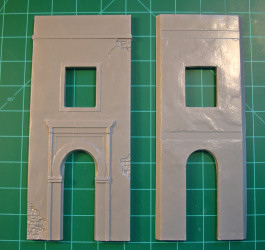
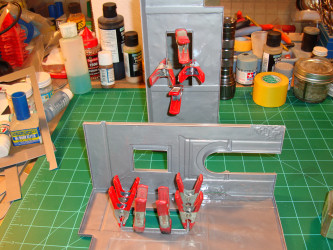
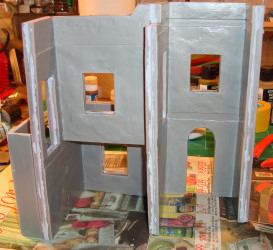
This time I assembled the inner wall sections with the 45 degree bevel using Tamiya Extra Thin Cement and a few clamps. Look how much tighter the corners are in the new building section (left) versus the previous attempt (right).
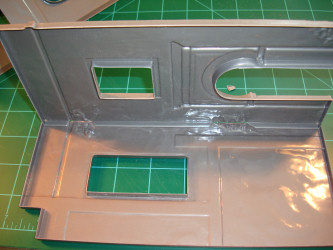
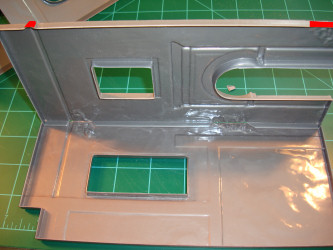
For the outer walls, I selected one wall section to retain its edges molded at 90 degrees and removed the corresponding edges on the other two outer walls of this assembly. In the image above left, you can see the retained edge acting as the glue joint to the wall facing down. In the same image to the right, I've highlighted in red where I've removed the molded details as well as any edges that are going to overlap molded-in wall damage. You can see the edges already cut away in the lower joint.
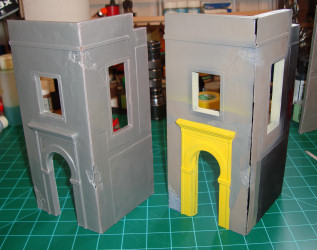
Once again, you can see how tight the resulting corner joint is with the new section (left) compared to the first attempt (right).
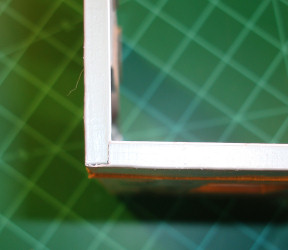
This is one of the corner joints in the outer wall again showing the nice butt joint resulting in a much more precise fit.
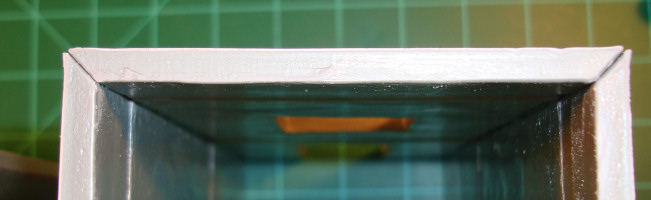
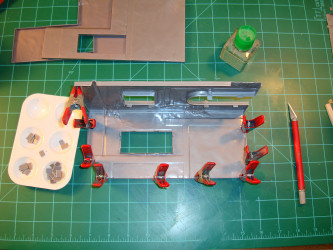
The inner walls have the 45 degree beveled edges already molded in place, so all you need to do is clean the edges after removing them from the vacuform sheet and clamp them together when ready to cement.
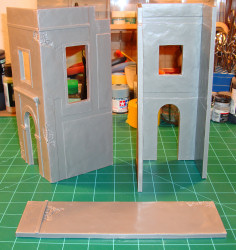
The inner and outer wall sections are almost ready to be put together. The third wall is in place on the inner section while the third outer wall will go into place last. This is to allow some flexibility to maneuver the assembled outer and inner walls together with all of the alignment tabs in place.
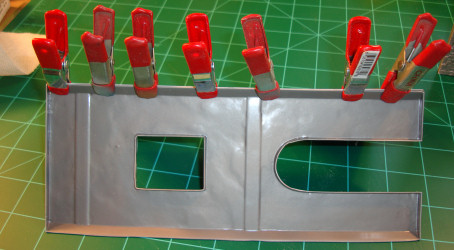
Here are two shots of the alignment tabs being installed. The tabs are simply the scrap strips of sheet plastic from the removed wall sections that are cut into small squares or rectangles and then glued and clamped into place. Check your work frequently so you don't accidentally put two tabs opposite one another and block the join.
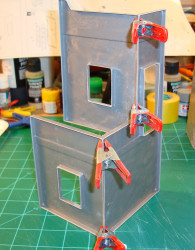
Alignment of the next set of rooms is key since the upper floor has an exterior balcony so the front walls are displaced. The kit parts line up nicely and are clamped. In the image on the right, the assembly is dry-fitted to the first section and the alignments look good so far.
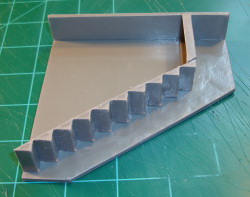
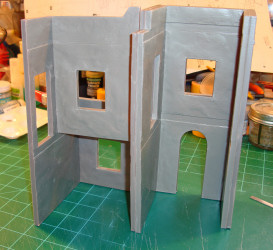
Here is the exterior staircase after assembly on the left, and on the right we have the exterior walls dry-fit to the new section and the staircase set in place. There is a little tweaking required to get everything aligned, but this is the time to discover the bugs through frequent dry-fitting.
The next step was to examine all facets of each subassembly and use gap-filling cyano to plug any holes or gaps left over from assembly. When that was cured and wet-sanded smooth, a liberal application of Mr. Surfacer 500 was applied to all seams.
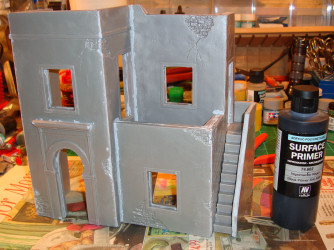
Now we have all three subassemblies glued into one module and Mr. Surfacer was used to fill any gaps. Don't worry about cleaning up the excess to much as it blends in with the rest of the stucco/clay fascia.
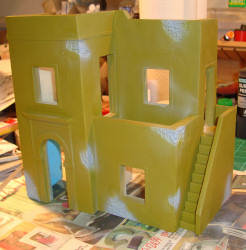
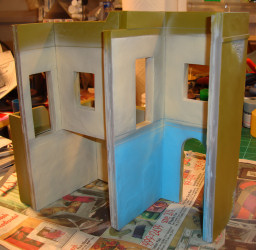
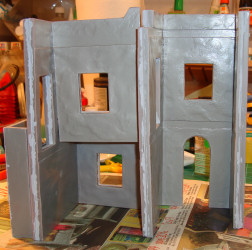
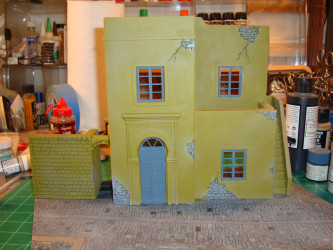
The module has now been primed and the base colors for the exterior, interior rooms, and exposed stone walls are applied. There will be further weathering and adjustments once the floors, windows and doors are in place.
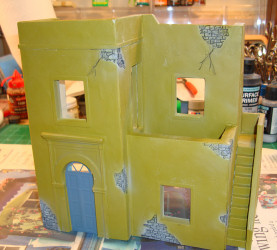
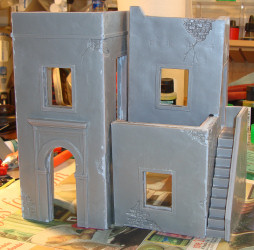
The front door and skylight are installed, the damaged outer walls have been given a wash of lamp black oil which really makes the details pop.
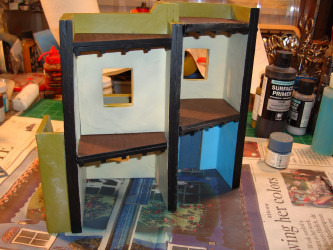
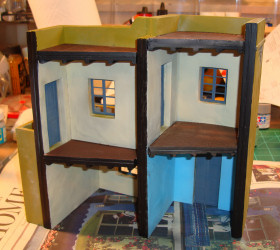
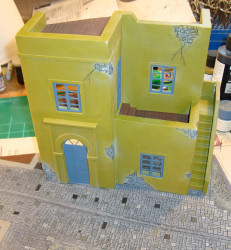
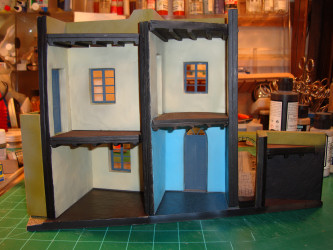
Inside the floors are all installed and the rear edges painted black. As with the other assemblies, this is done with lots of dry-fitting and trimming to get it all together.
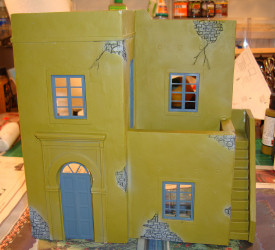
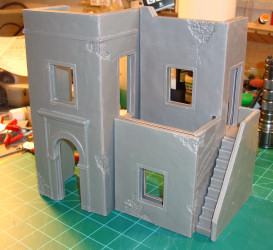
The doors and windows are now all in place. Door handles will be added later.
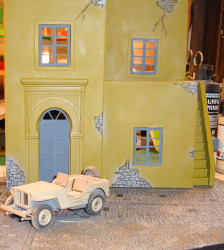
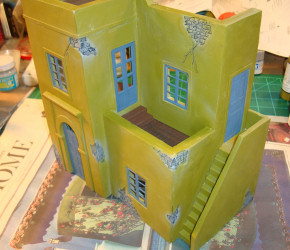
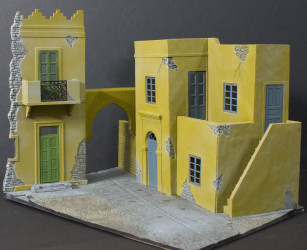
The main structure is now glued into place on the stone base. You can see how nice it looks as a backdrop for any number of subjects including what's left of this old SAS Jeep.
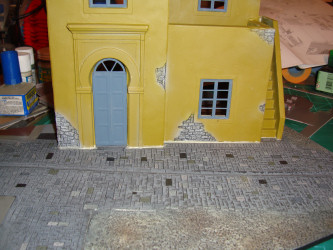
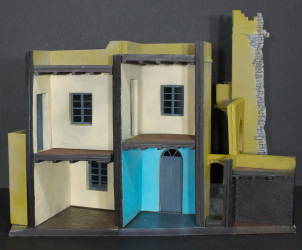
I wasn't happy with the gap between the bottom edge of the building and the stone base, so I used a brush to apply a bead of white glue around the perimeter of the building and closed the gap. While while glue dries clear, it will also take the background color in appearance. In those places where the background color wasn't appropriate, I simply applied the base color over the dried white glue to blend it in. The image above shows the white glue around the bottom of the building still wet.
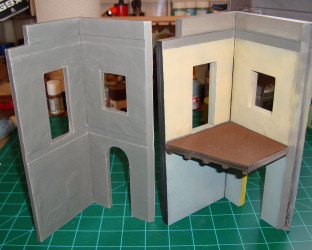
The small enclosure and arch to the left of the building is assembled, painted and installed according to the instructions. Because the interior of that structure has little interior volume, there was no point of using it in any diorama so I painted the interior black. The taller third structure and its connecting arch were last and it had the least agreeable fit. With this, I aligned and glued the halves together at the door frames and along the bottom. The top and jagged edges didn't line up very well, so when the cement had dried, I used gap-filling cyano and zip accelerator to close those gaps and provide some structural rigidity along those edges. After cleaning this step up, I used white glue to close any remaining gaps, assembled and installed the balcony, doors and large arch.


This kit was a fun build. It was the first major vacuform I've undertaken in some time and I now have some experience and techniques that will work toward future MiniArt diorama bases. Even after the do-over opportunity I had earlier, there are still things I'd do a little differently in the future, and so it goes with other different modeling projects. This base is now just lacking some additional weathering, dry grass/weeds, figures, and some central subject vehicle to bring this set to life.
This diorama kit has lots of possibilities. I originally had some ideas about placing a Humvee or other modern vehicle in this scene, but I can see SAS Jeeps or similar applications for a World War 2 North Africa scene as well. You're only limited by your imagination!
Definitely recommended to modelers with experience!
My sincere thanks to MRC for this review sample!