


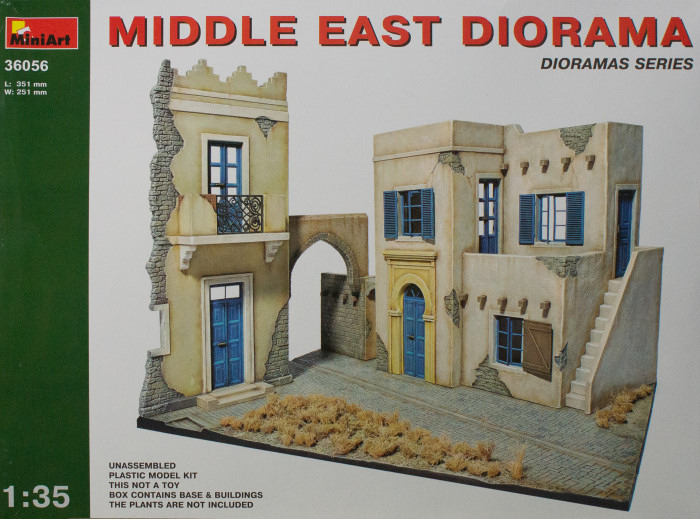
MiniArt 1/35 Middle East Diorama Build Review
By Michael Benolkin
| Date of Review | March 2014 | Manufacturer | MiniArt |
|---|---|---|---|
| Subject | Middle East Diorama | Scale | 1/35 |
| Kit Number | 36056 | Primary Media | Styrene |
| Pros | New subject area, lots of possibilities | Cons | None |
| Skill Level | Intermediate | MSRP (USD) | $89.00 |
Build Review
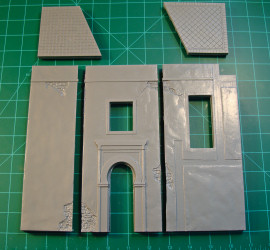
Getting started, I put a new blade in my X-Acto knife and carefully scribed the perimeter of the upper and lower floor halves from structure on the left. Since this was a damaged building, the rear edge of the floor is jagged depicting some of the damage. The floor halves aligned nicely and I used Tamiya Extra Thin Cement to glue the halves together. So far, so good. I used a file to clean up the edges, Mr. Surfacer 500 to address any imperfections, wet-sanded the edges, and there was the first part completed.
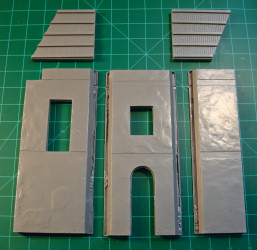
The instructions show that the inner and outer wall halves should be assembled before adding additional wall sections. I cut out the three inner and outer wall halves of the center building (the one with the interesting arch entry) as well as the associated second floor and roof halves. Getting the window and door openings to align with the outer edges of the walls was a challenge at first, but then I used some scrap sheet cut away from the walls and used an old vacuform aircraft trick - glue tabs on both sides of each wall to help the edges align and this worked perfectly. A little more Tamiya cement and each wall came together along with the two sets of floor/ceiling halves.
The three wall sections come together at 90 degree angles and each have 45 degree joints molded into the inner walls. The outer walls need to be trimmed and this was accomplished with a hobby disk sander that has an angle-adjustable work surface. I set it to 45 degrees and roughed out the walls. You can see the results before cleanup below.
I repeated the process of Mr.Surfacer 500 on the edges and in a couple of cases, gap-filling cyano to repair some spots where the disk sander took too much material. Wet-sanding the edges and these parts were all ready for primer. Almost. Looking at the diorama base, I remember something else that needed attention with all of the parts. MiniArt uses some sort of pin-based ejectors to remove the vacuform sheets out of the machine. On warm plastic these pins leave lots of 'nipples' that need to be cleaned up. I grabbed a file and removed all of these 'nipples' on the base, walls and floors. NOW we're ready for primer.
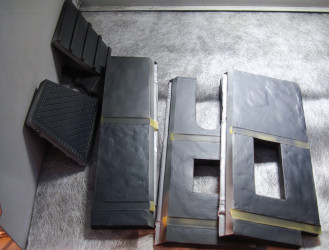
Since the walls have recesses molded into them for the floors and the display base has the wall outlines clearly molded as well, I grabbed some Tamiya masking tape and masked all of the joints. This will help provide a good plastic-on-plastic glue joint rather than trying to cement through layers of paint. I used Vallejo Black Primer straight out of the bottle and painted all of the parts assembed so far. This image shows the walls and floors in primer with the masking tape protecting the floor joints.
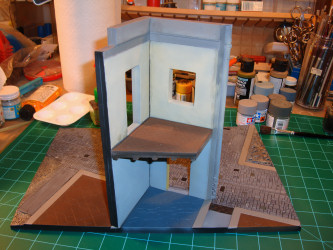
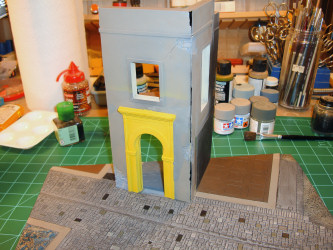
So here is part of the first structure sitting in place. The exterior and interior have their base colors and I had started assembling the walls with liquid cement and then cyano. I am not at all pleased with the results as you can see the gaps in the interior and exterior corners. The good news is that based on this failure, I now have a better way to assemble these walls which I will demonstrate in the next update. Thanks to MRC, I have a spare set of walls so I can complete a do-over and you'll be able to skip my first approach!
Return to the primary build review.
My sincere thanks to MRC for this review sample!