Moebius Models 1/25 1965 Plymouth Satellite Build Review
By Greg Morgan, Front Range Auto Modelers (FRAM)
| Date of Review | December 2015 | Manufacturer | Moebius Models |
|---|---|---|---|
| Subject | 1965 Plymouth Satellite | Scale | 1/25 |
| Kit Number | 1215 | Primary Media | Styrene |
| Pros | Nice details and options | Cons | Nothing Noted |
| Skill Level | Moderate Experience | MSRP (USD) | $32.49 |
The Build
For a look at this kit as it appears in the box, look here.
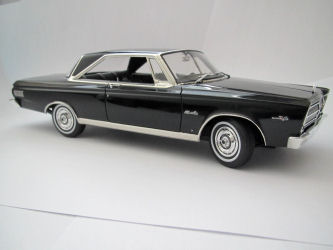
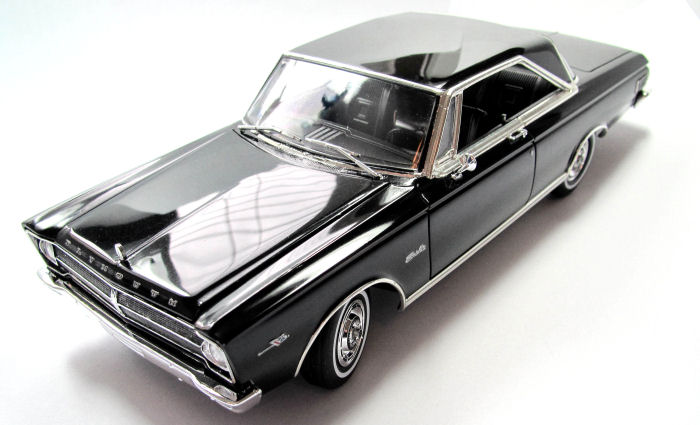
In the initial kit review, the overall impression of the Moebius 1965 Plymouth Satellite was great! As building commenced, it was quite apparent that this kit was going to live up to all those expectations and even more! From start to finish, it went together well and provided everything necessary to create a stunning model. This kit was painted black-on-black and out-of-the-box, so no custom work or scratch building was a part of this build. Simply paint and bare metal foil were the only things used that were not included with the basic model kit.
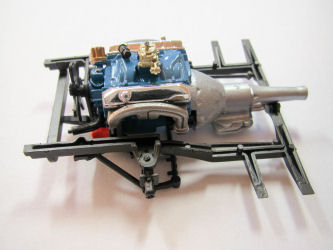
The engine was a dream to build. Acrylic Plymouth Engine Blue was unable to be procured at local hobby shops, so it was “mixed to color” based on internet photos and box art reference photos (if the shade is not quite perfect, my apologies to the Plymouth purists). The instructions and even the design of the engine pieces allowed for an easy assembly with great end results.
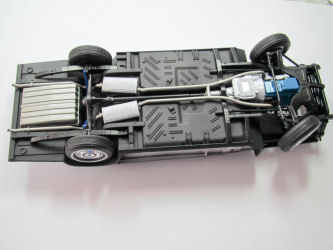
The wheels and tires went together quite well and did not require unusual amounts of “heavy handedness” to get them together and attach them to the chassis. The most challenging part of the wheels was the “blacking out” of recessed areas of the wheels. A little patience, time, flat black acrylic paint and a tooth pick will enable the average modeler to create very realistic and nicely detailed wheels.
All chassis and engine compartment pieces are cast well and the instructions are clear, so it made assembly a breeze and the results were “clean” and very “realistic” upon completion. One may get the impression things are more complicated then they appear, but Moebius did a splendid job with making assembly instructions quite easy to understand and the pieces themselves go together quite easily. Kit design allow one to use various shades of black and metal paints to create an amazing looking under carriage and engine compartment. Only observation, per the instructions too, the inner fender wells, fire wall and core support will take a little extra time to ensure everything is square. This modeler used 5-minute epoxy to patiently ensure everything had proper and accurate long-term placement.
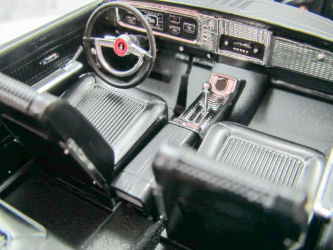
The interior could have almost been for a snap together kit, but with end results of an intricately detailed glue type model kit. In fact, very little glue was needed to actually put it together and less glue results in a cleaner look and better end results. An argent metallic Prismacolor artist pencil (part number PC949), was used to highlight the pipping for the front and rear seats. All the detail of the interior pieces lent well to using silver paint and various shades of black paint to create a very realistic appearing finished interior. With accompanying decals, it is almost a shame to hide the interior with the kit body.
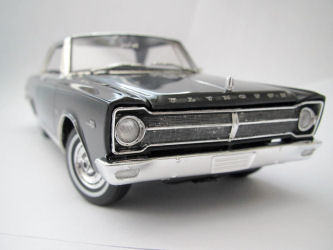
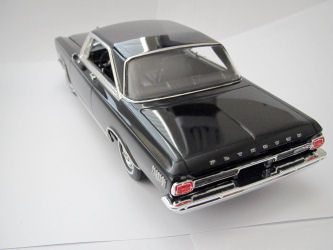
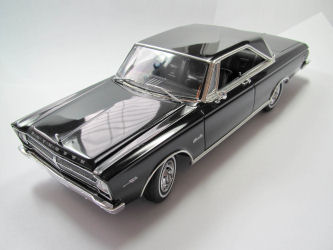
The kit body is the one area of this kit that provided the most ample opportunities for a realistic end result, but also the most challenge. Even with a high end primer sealer, the plastic reacted not only to the primer, but also the black lacquer paint and clear coat. Much effort was taken to get the glass mirror-like deep black finish. Maybe it was just this batch of styrene, but this modeler’s recommendation is to use enamel or water based paint, to avoid issues with lacquer, or to test spray primer, lacquer and clear coat before committing to the whole body, to decide if it will be a problem for them. Overall though, great detail and all the body accouterments went on well without too much trouble.
Final aspect of this kit would be the remainder of the body and all its accouterments. Clear glass goes in from the outside, so care should be taken in how much bare metal foil is used for the exterior trim of the front and body window trim, as there should not be a chrome appearance beneath the clear glass, but a black effect resembling inner black rubber seals. This modeler used flat black trim foil from the Bare Metal Foil Company and placed it on a the thin exterior edge of the glass to “cover up” any bare metal foil chrome from the body of the kit. The rear end of the kit trim panel was quite challenging to detail, but with patience, time, semi-gloss black acrylic paint and a tooth pick it turned out okay. For the front end grill piece, this modeler used flat black acrylic paint and then the silver pencil to create a realistic grill, as opposed to just leaving it chrome. All kit pieces, especially how they go together and with their level of detail, help to create a very realistic overall finished product from every angle.
In conclusion, Moebius did an outstanding job! Instructions, reference photos, extremely well detailed parts and many other aspects create the basis for a modeler to simply apply shiny paint and attention-to-detail in the assembly process and create a very realistic looking 1:25 scale model car kit. Many thanks to Moebius for the donation of this kit for this build and to the Front Range Auto Modelers (FRAM) for all their support!
With some Bare Metal Foil and decals this build was finished and ready for the shelf.
My sincere thanks to Moebius Models for this review sample!


